
1. Introduction
Thank you for choosing the Benass 10x20 Heavy Duty Carport. This manual provides essential information for the safe assembly, operation, and maintenance of your carport. Please read these instructions carefully before beginning assembly and retain them for future reference.
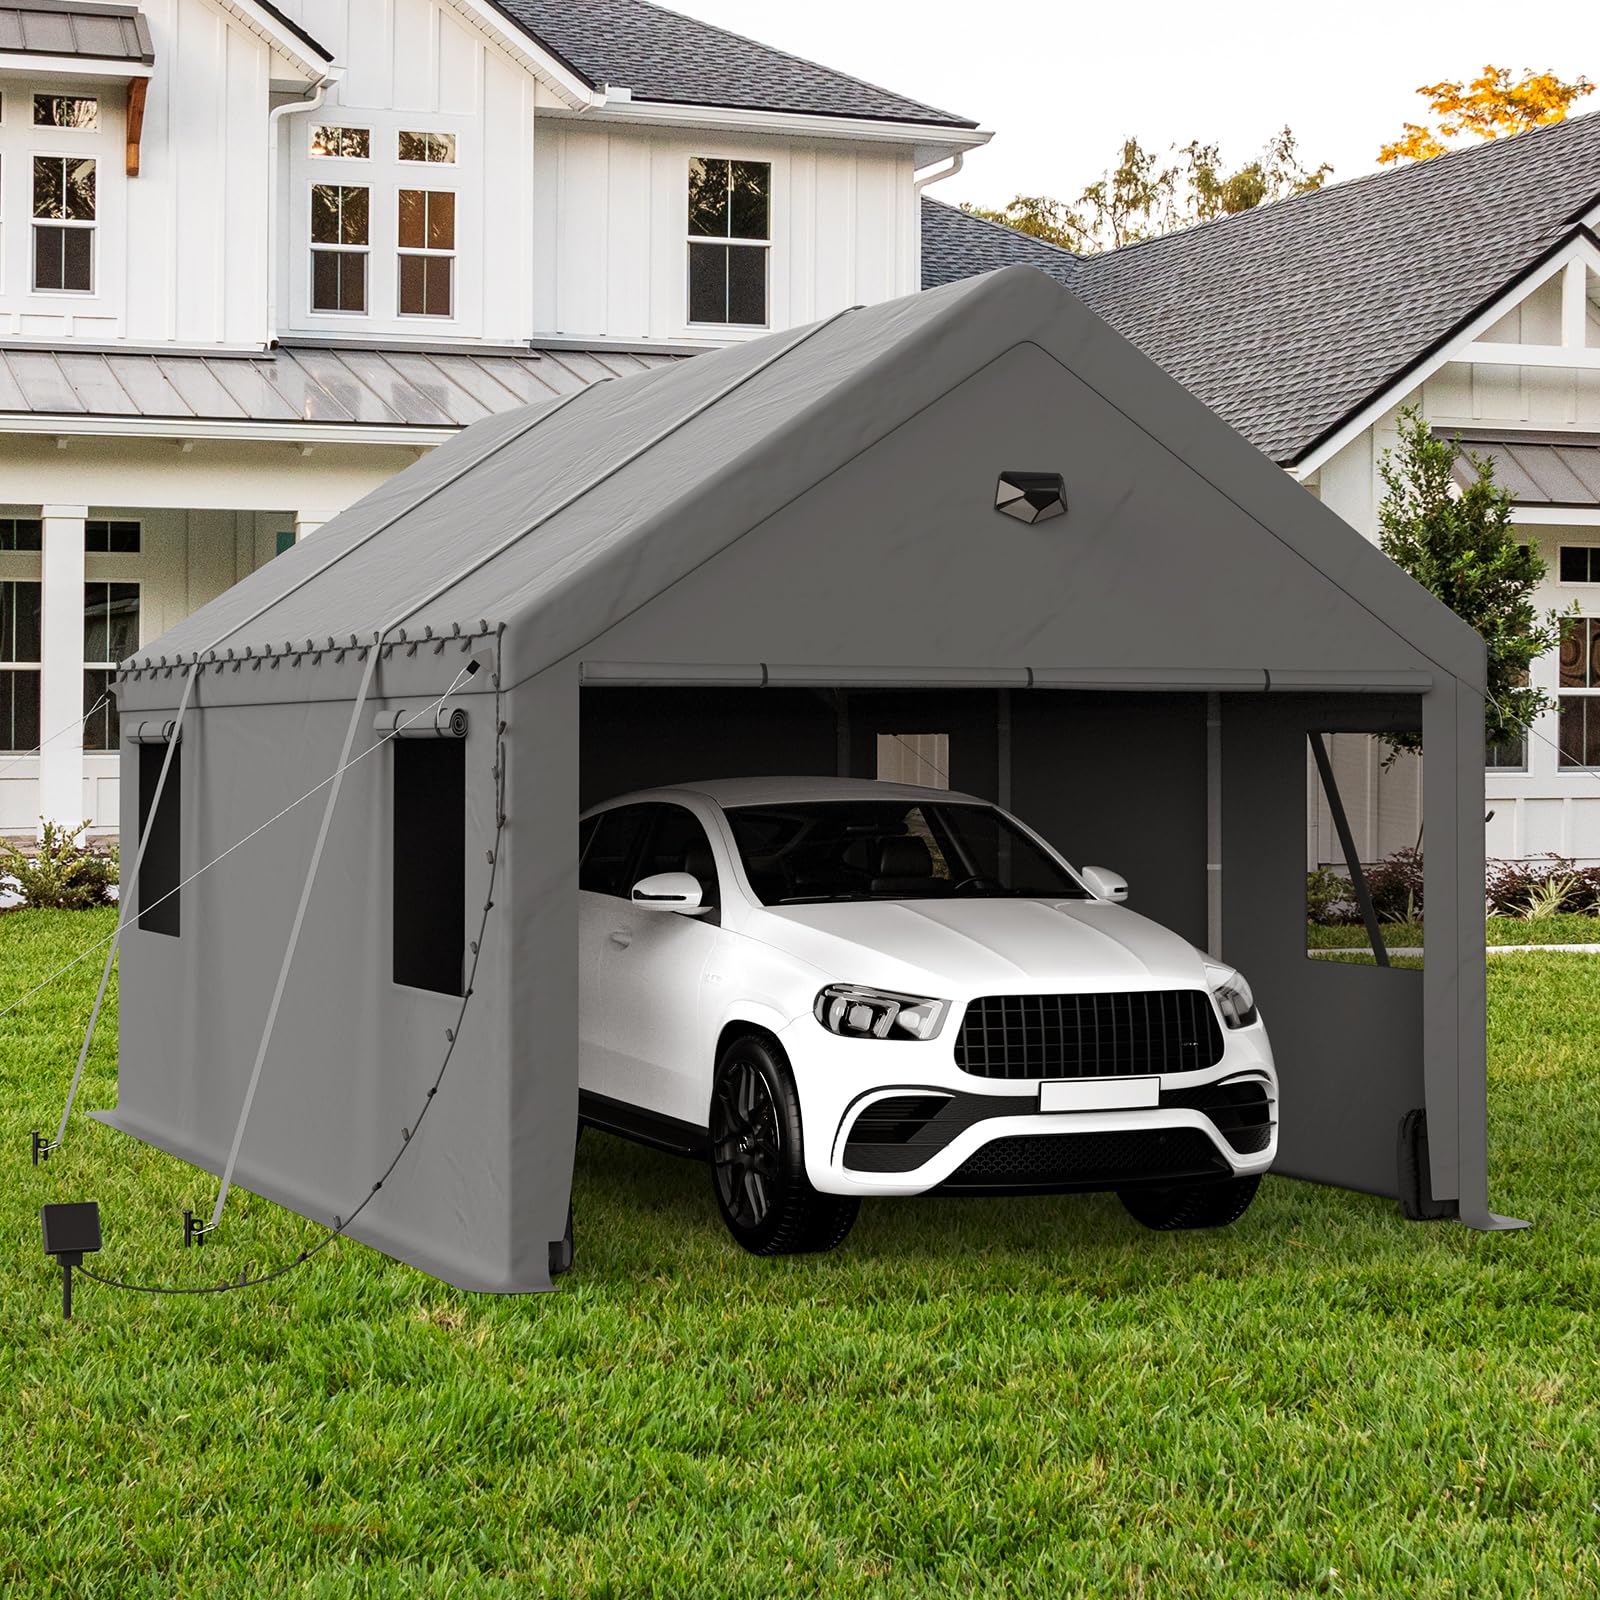
Image 1.1: The Benass 10x20 Heavy Duty Carport providing shelter for a vehicle.
This 10x20 foot carport is designed to provide ample space for parking vehicles or for use as a temporary storage solution. It features a robust galvanized steel frame and a durable PE canopy top, engineered for enhanced stability and weather resistance. The design includes roll-up zipper doors and mesh windows for improved air circulation.
2. Safety Guidelines
- Site Selection: Choose a level, stable surface for assembly. Avoid areas prone to strong winds or water accumulation.
- Weather Conditions: Do not attempt to assemble the carport during strong winds, heavy rain, or lightning. In severe weather conditions, it is recommended to remove the canopy cover to prevent damage.
- Anchoring: Always secure the carport firmly to the ground using all provided anchoring hardware (wind ropes, binding straps, sandbags, ground nails). Proper anchoring is crucial for stability.
- Assembly Team: Due to its large size, assembly requires at least 2-3 people.
- Clearance: Ensure adequate clearance around the carport for safe entry, exit, and air circulation.
- Fire Safety: Keep all heat sources and open flames away from the canopy material.
- Inspection: Regularly inspect the frame, canopy, and anchoring for any signs of wear or damage. Address any issues promptly.
3. Package Contents
Verify that all components listed below are present before beginning assembly. If any parts are missing or damaged, please contact Benass customer support.

Image 3.1: Key components and anchoring accessories for enhanced stability.
- Galvanized Steel Frame Pipes (various lengths and connectors)
- 170gms PE Canopy Top
- 2 Wind Ropes
- 2 Binding Straps
- 4 Sandbags
- 2 Removable Sidewalls
- Roll-Up Zipper Door (integrated into sidewall)
- 4 Side Mesh Roll-Up Windows (integrated into sidewalls)
- 1 Solar Light
- 1 Light Strip
- Ground Nails and Screwed Base Nails
- Highly Extensible Buckles
- Assembly Manual
4. Assembly Instructions
Assembly requires 2-3 people. Follow these steps carefully for proper installation.

Image 4.1: Visual guide for the carport assembly process.
- Step 1: Assemble the Top Frame. Connect the horizontal and vertical pipes to form the rectangular top frame structure.
- Step 2: Install the Top Reinforced Steel Pipes. Attach the reinforced steel pipes to the top frame for added structural integrity.
- Step 3: Assemble Small Support Beams. Connect the smaller support beams to complete the roof framework.
- Step 4: Install the Cover and Secure It. Carefully drape the PE canopy top over the assembled roof frame. Ensure it is centered and secure it temporarily.
- Step 5: Install Steel Pipes at Four Corners. Attach the vertical steel pipes to the four corners of the top frame, lifting the structure.
- Step 6: Install Supporting Legs and Side Fabric. Connect the remaining supporting legs and attach the sidewalls, including the roll-up door and window panels.
- Step 7: Install Base and Fix with Nails. Secure the base of the carport to the ground using the provided ground nails and screwed base nails.
- Step 8: Secure the Perimeter and Fix the Carport. Use the wind ropes, binding straps, and sandbags to further anchor the carport, ensuring maximum stability against wind.
5. Operation
The Benass carport is designed for ease of use and adaptability.
5.1 Roll-Up Zipper Door
The carport features a large roll-up zipper door for convenient vehicle access and enhanced air circulation. To open, unzip the door completely and roll it upwards, securing it with the attached ties. To close, unroll the door and zip it down fully to protect the interior.

Image 5.1: Detail of the roll-up zipper door for vehicle access and ventilation.
5.2 Side Mesh Roll-Up Windows
Four side mesh roll-up windows are included to ensure optimal air circulation and prevent stuffiness inside the carport. To open, unfasten the window covers and roll them up, securing them with the ties. This allows airflow while keeping insects out. To close, unroll the covers and secure them to protect the interior from elements.

Image 5.2: Side mesh roll-up windows providing ventilation.
5.3 Solar Light and Light Strip
The included solar light and light strip provide illumination for night indication and convenience. Position the solar light to receive maximum sunlight during the day for optimal charging. The light strip can be placed as desired for additional ambient lighting.

Image 5.3: Carport illuminated by the included solar light and light strip.
6. Maintenance
- Cleaning: Clean the canopy cover periodically with mild soap and water. Avoid harsh chemicals or abrasive brushes that could damage the material. Rinse thoroughly and allow to air dry completely before storage.
- Frame Inspection: Regularly check all frame connections and bolts to ensure they are tight and secure. Tighten any loose connections.
- Anchoring Check: Verify that all ground nails, wind ropes, and sandbags are securely in place, especially after strong winds or heavy rain. Re-tension ropes if necessary.
- Snow Removal: In areas with heavy snowfall, regularly remove accumulated snow from the canopy to prevent structural damage due to excessive weight.
- Storage: If disassembling for storage, ensure all components are clean and dry. Store the canopy in a cool, dry place away from direct sunlight to prolong its lifespan.
7. Troubleshooting
- Carport Instability: Ensure all frame connections are tight and all anchoring points (ground nails, wind ropes, sandbags) are properly secured. Re-check the levelness of the ground.
- Water Pooling on Canopy: Verify that the frame is assembled correctly and the canopy is taut. Ensure proper tensioning of the cover to allow water runoff.
- Zipper Malfunction: Check for any obstructions in the zipper teeth. Apply a silicone-based lubricant if the zipper is stiff. Avoid forcing the zipper.
- Damage from Wind: If the carport experiences strong winds, inspect the frame and canopy for any bends, tears, or loose connections. Replace damaged parts immediately.
8. Specifications
| Feature | Detail |
|---|---|
| Brand | Benass |
| Model Number | 1020pe-1 |
| Product Dimensions | 240"L x 120"W x 113.4"H (20'L x 10'W x 9.45'H) |
| Floor Area | 200 Square Feet |
| Frame Material | 1.5" Galvanized Alloy Steel |
| Canopy Material | 170gms PE (Polyethylene) |
| Water Resistance Level | Waterproof |
| Ultraviolet Light Protection | Yes (UV protection level 80+) |
| Item Weight | 129 Pounds |
| Color | Grey |
| Assembly Required | Yes |

Image 8.1: Product dimensions of the Benass 10x20 Carport.

Image 8.2: Illustration of the carport's waterproof and UV protection features.
9. Warranty and Support
Benass offers a one-year warranty for this product, ensuring satisfactory after-sales service. If you encounter any problems upon receiving the carport or during its use, please do not hesitate to contact Benass customer support.
For assistance, please refer to the contact information provided with your purchase or visit the official Benass store on Amazon: Benass Store.
