
ChunHee CB07
ChunHee Wireless Dog Doorbell Potty Training System
Model: CB07 - Instruction Manual
1. Introduction
The ChunHee Wireless Dog Doorbell is designed to assist in potty training and communication between pets and owners. This system allows your dog to signal when they need to go outside, reducing instances of scratching, barking, or indoor accidents. It features a touch-sensitive button, a wide operating range, and customizable settings for an effective training experience.

This image illustrates how the ChunHee Dog Doorbell helps dogs communicate their needs, preventing common issues like scratching doors or indoor accidents.
2. Package Contents
Please verify that all components are present in your package:
- 3 x Wireless Transmitter Buttons
- 1 x Plug-in Receiver
- 1 x CR2450 Battery (pre-installed in each transmitter)
- Mounting Accessories (adhesive pads)
- User Manual
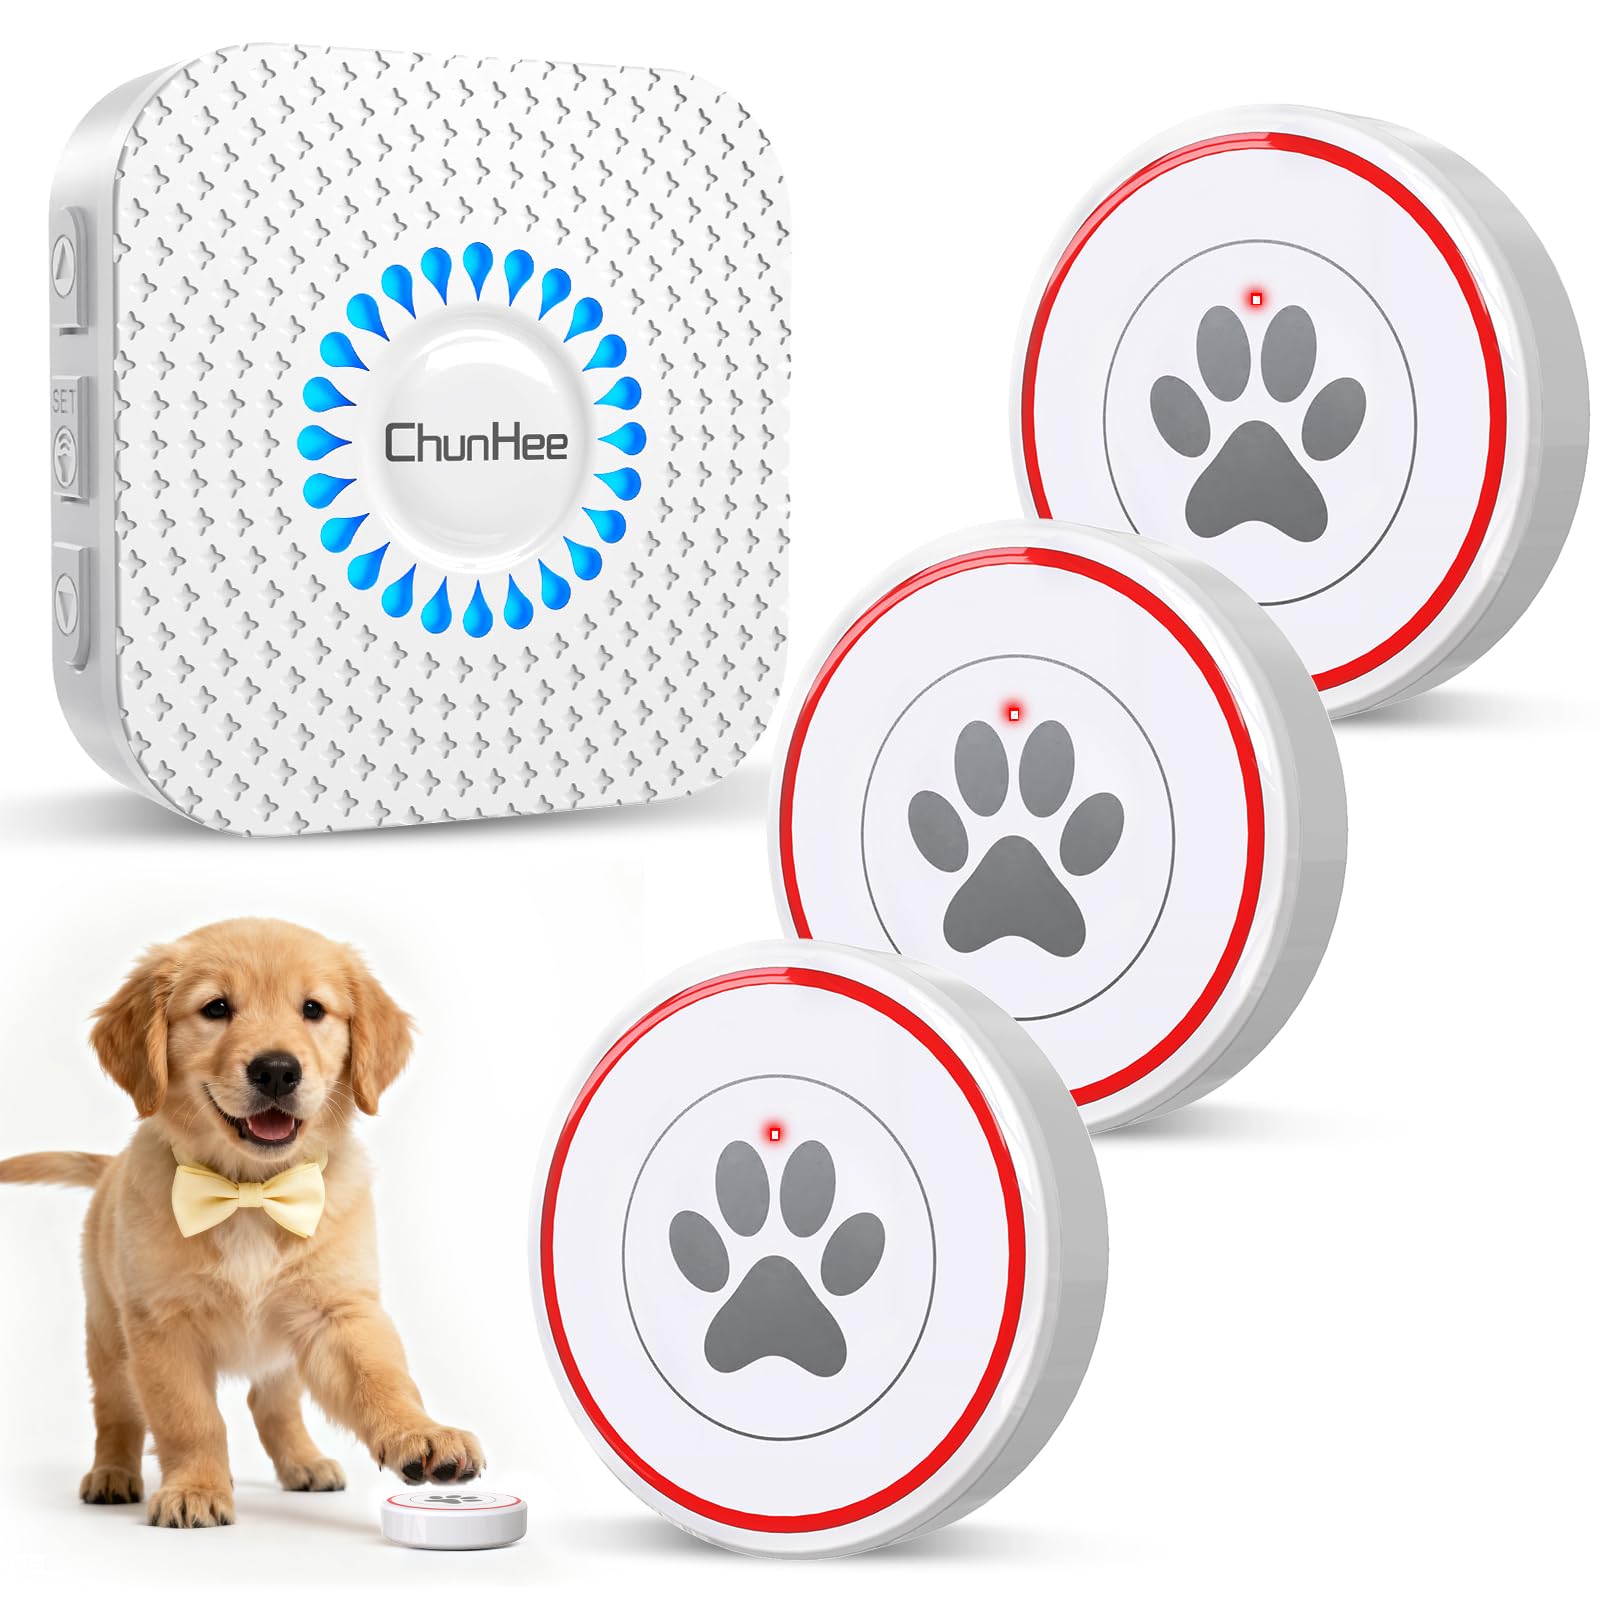
The main product image displays the included components: three doorbell buttons and one receiver.
3. Specifications
| Feature | Detail |
|---|---|
| Model Number | CB07 |
| Brand | ChunHee |
| Touch Surface Diameter | 1.6 inches |
| Wireless Range | Up to 500 feet (150 meters) in open areas |
| Ringtones | 55 selectable melodies |
| Volume Levels | 5 adjustable levels (0-110 dB) |
| Waterproof Rating | IP55 (transmitter) |
| Transmitter Battery | 1 x CR2450 (included) |
| Receiver Power | AC 110-240V (plug-in) |
| Material | Plastic |
| Certifications | CE, FCC, RoHS |

The doorbell button features a 1.6-inch touch surface, making it easy for dogs of all sizes to activate.
4. Setup
4.1 Receiver Installation
- Plug the receiver into a standard electrical outlet in a location where you can easily hear the chime, such as your living room or kitchen.
4.2 Transmitter Button Installation
The transmitter buttons can be installed in various locations depending on your preference and your dog's size. Ensure the button is placed at a height easily accessible by your dog's paw or nose.
- On a Door: Use the provided adhesive pad to attach the button to the lower part of your door.
- On Glass: The adhesive also works on glass surfaces, such as sliding patio doors.
- On the Floor: For smaller dogs or specific training methods, the button can be placed directly on the floor near the exit.
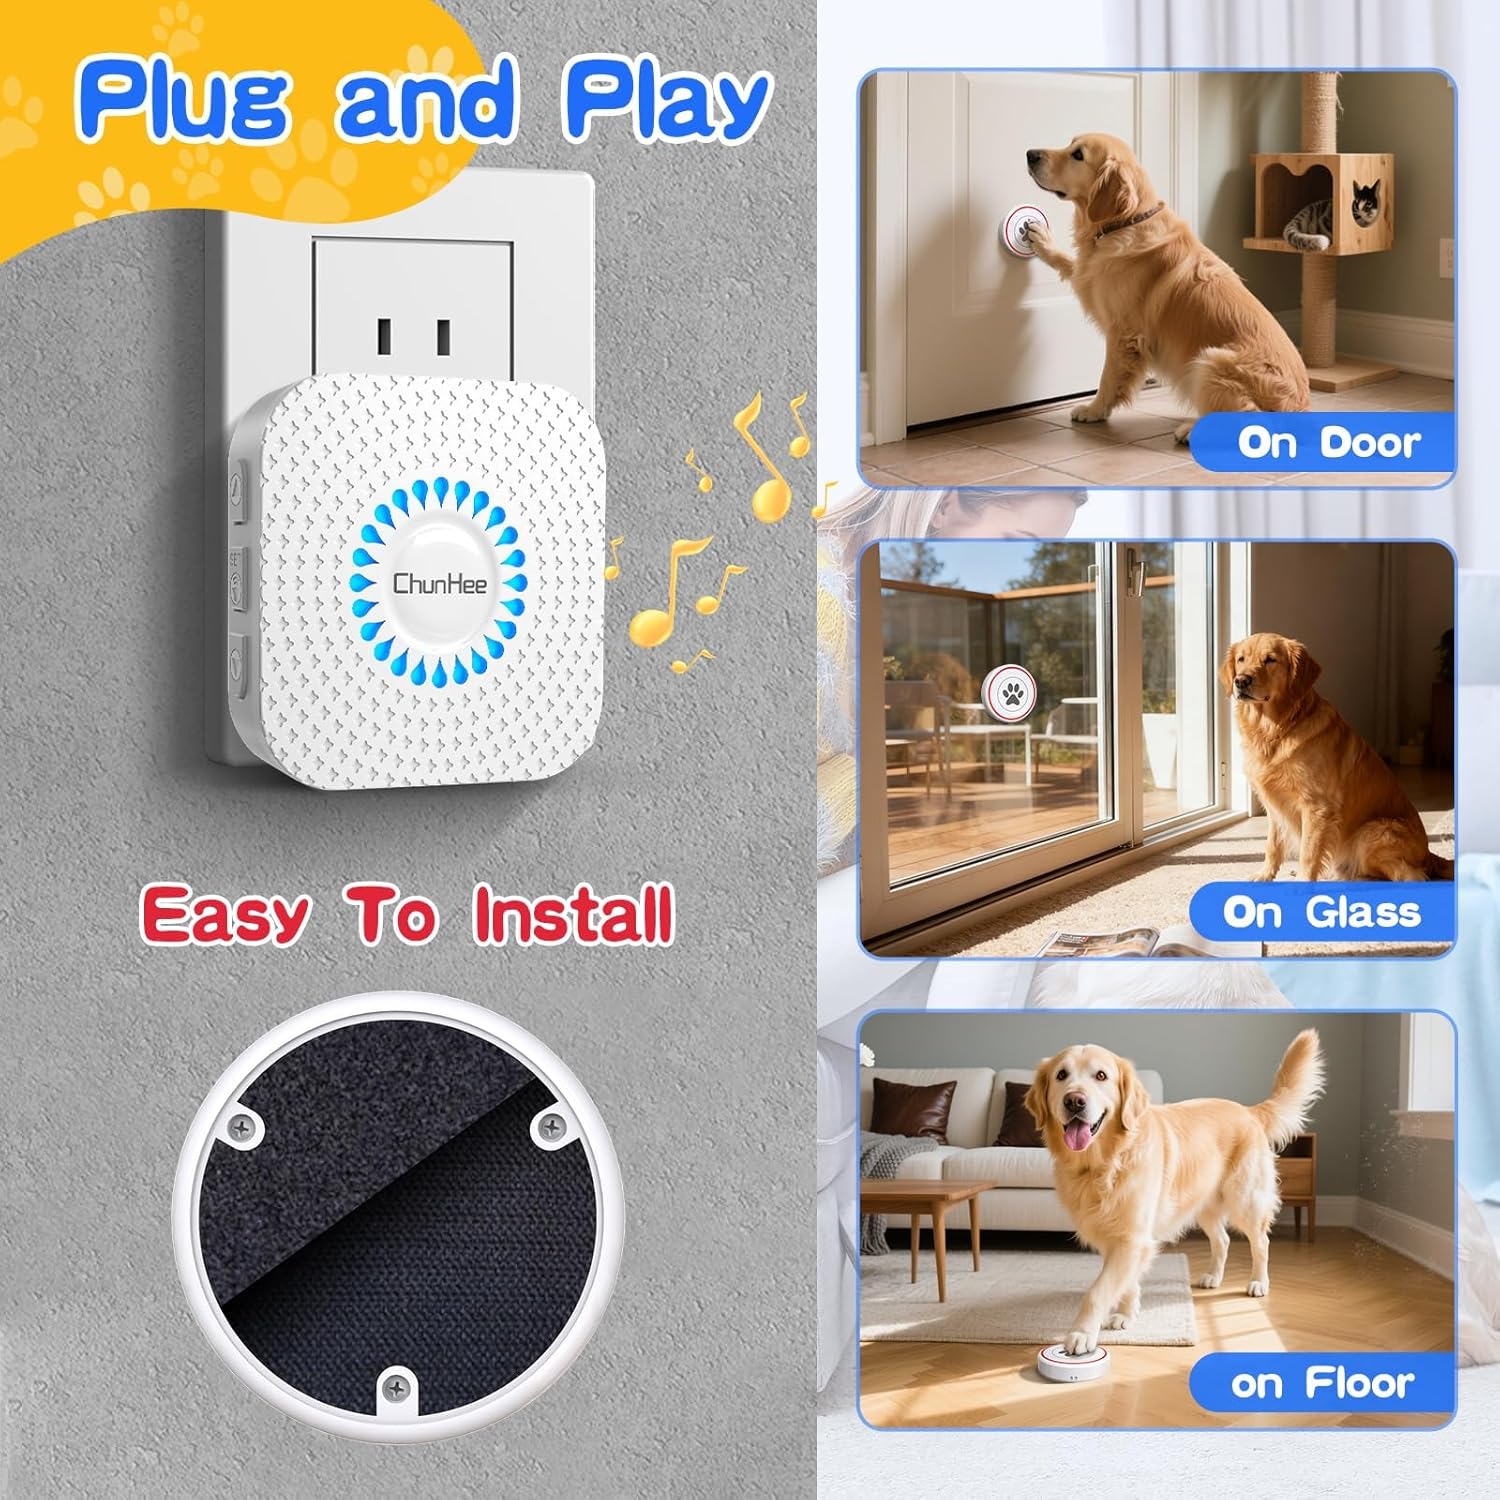
The doorbell button can be easily installed on various surfaces like doors, glass, or placed on the floor using the included adhesive.
4.3 Pairing Transmitter Buttons with Receiver
Each transmitter button needs to be paired with the receiver to function correctly. Follow these steps:
- Plug the receiver into a power socket.
- Press the "Forward" or "Backward" button on the receiver to select your desired melody.
- Press and hold the "Volume" button on the receiver for approximately 5 seconds until it makes a "Ding" sound and the receiver indicator flashes. This indicates pairing mode.
- Quickly touch the transmitter button within 8 seconds. The receiver will make a "Ding-Ding" sound, and the indicator will flash, confirming successful pairing.
- Repeat steps 2-4 for any additional transmitter buttons you wish to pair.
5. Operation
5.1 Changing Ringtones
To change the ringtone for a specific transmitter button:
- Follow steps 1-3 of the pairing process (Section 4.3) to put the receiver into pairing mode.
- While the receiver is in pairing mode, press the "Forward" or "Backward" button to cycle through the 55 available melodies.
- Once you hear the desired melody, quickly touch the specific transmitter button you want to assign that ringtone to. The receiver will confirm with a "Ding-Ding" sound.

You can set different ringtones for each doorbell button, allowing for distinct alerts if you have multiple buttons or pets.
5.2 Adjusting Volume
Press the "Volume" button on the receiver repeatedly to cycle through the 5 available volume levels (0-110 dB). Select a volume that is audible but not disruptive.
5.3 Memory Function
The receiver features a power-failure memory function. Your selected ringtone and volume settings will be saved even if the receiver is unplugged or loses power.
6. Potty Training Guide
Consistent training is key to successfully teaching your dog to use the doorbell. Here's a step-by-step guide:
- Step 1: Introduce the Doorbell. Place the doorbell button near the door your dog uses to go outside. Let your dog explore it. Treat and reward any interest shown towards the bell. Ensure your dog is comfortable with the sound of the bell when activated.
- Step 2: Teach to Touch. When your dog needs to go outside, gently guide their paw or nose to touch the bell. As soon as they touch it and it rings, say "Touch!" or "Yes!" enthusiastically, and immediately reward them with a high-value treat. Repeat this several times.
- Step 3: Teach When to Ring. Before opening the door to let your dog out for potty breaks, ask your dog to touch the bell. As soon as they ring it, say "Yes!" and open the door immediately. Take them outside. If they successfully potty, praise and treat them again. Repeat this every time you go out.
- Step 4: Be Patient and Consistent. If your dog rings the bell, always take them out, even if you think they just want to play. If they potty, praise and treat. If not, go back inside and try again shortly. They will learn that ringing the bell means going outside for potty. Avoid scolding if they have an accident; instead, reinforce positive behavior with the bell.

Proper training with the doorbell can help eliminate unwanted behaviors like indoor accidents, scratching, or excessive barking at the door.
7. Maintenance
7.1 Cleaning
Wipe the doorbell buttons and receiver with a soft, damp cloth. Do not use harsh chemicals or abrasive cleaners. Ensure the transmitter buttons are dry after cleaning, especially if used outdoors.
7.2 Battery Replacement
The transmitter buttons use a CR2450 battery. When the button's indicator light no longer flashes or the range decreases significantly, it's time to replace the battery. To replace:
- Carefully open the back cover of the transmitter button.
- Remove the old CR2450 battery.
- Insert a new CR2450 battery with the positive (+) side facing up.
- Close the back cover securely.

The transmitter buttons are powered by a CR2450 battery, designed for long-lasting use.
7.3 Waterproof Rating
The transmitter buttons are IP55 waterproof, meaning they are protected against dust ingress and low-pressure water jets from any direction. They are suitable for outdoor use but should not be submerged in water.
8. Troubleshooting
- Doorbell not ringing:
- Ensure the receiver is plugged in and powered on.
- Check if the transmitter button's battery needs replacement.
- Re-pair the transmitter button with the receiver (refer to Section 4.3).
- Ensure the transmitter and receiver are within the effective wireless range and there are no significant obstructions.
- False alarms (doorbell rings without being touched):
- This can sometimes occur due to environmental interference or a faulty unit. Try moving the receiver to a different outlet.
- If the issue persists, try re-pairing the button. If the problem continues, contact customer support.
- Short wireless range:
- Thick walls, metal objects, or other electronic devices can interfere with the signal. Try repositioning the receiver or transmitter.
- Ensure the transmitter battery is not low.
- Volume too low/high:
- Adjust the volume using the "Volume" button on the receiver (refer to Section 5.2).
9. Warranty and Support
9.1 Warranty Information
This ChunHee product is covered by a 1-Year Manufacturer's Warranty from the date of purchase. This warranty covers defects in materials and workmanship under normal use. It does not cover damage caused by misuse, accidents, unauthorized modifications, or normal wear and tear.
9.2 Customer Support
If you encounter any issues or have questions regarding your ChunHee Wireless Dog Doorbell, please contact our customer support team. For the fastest service, please have your model number (CB07) and purchase details ready.
Contact Information: Please refer to the contact details provided on the product packaging or the retailer's website where you purchased the item.
Related documentsCB07

Ask a question about this manual
Ask about setup, troubleshooting, compatibility, parts, safety, or missing instructions. Manuals+ will review the question and use this page’s manual context to help answer it.