
1. Introduction
This manual provides detailed instructions for the cudinham X6 Print Pod Mini Thermal Printer. This compact, inkless printer is designed for various uses, including creating stickers, notes, and labels directly from your smartphone or tablet. Please read this manual thoroughly before use to ensure proper operation and longevity of your device.
2. What's in the Box
Verify that all items are present in the package:
- cudinham X6 Mini Thermal Printer
- 10 Rolls Printing Paper (Thermal Paper & Sticker Paper)
- Type-C Power Cord
- User Manual

Figure 2.1: Package Contents
3. Product Overview
The cudinham X6 Mini Thermal Printer features a simple and intuitive design. Key components include:
- Paper Outlet: Where printed paper exits.
- Power Button: Used to turn the printer on/off and initiate feeding.
- Power Indicator: Shows the device's power status.
- USB Port: For charging the device.
- Cover Opening Button: Releases the top cover for paper loading.
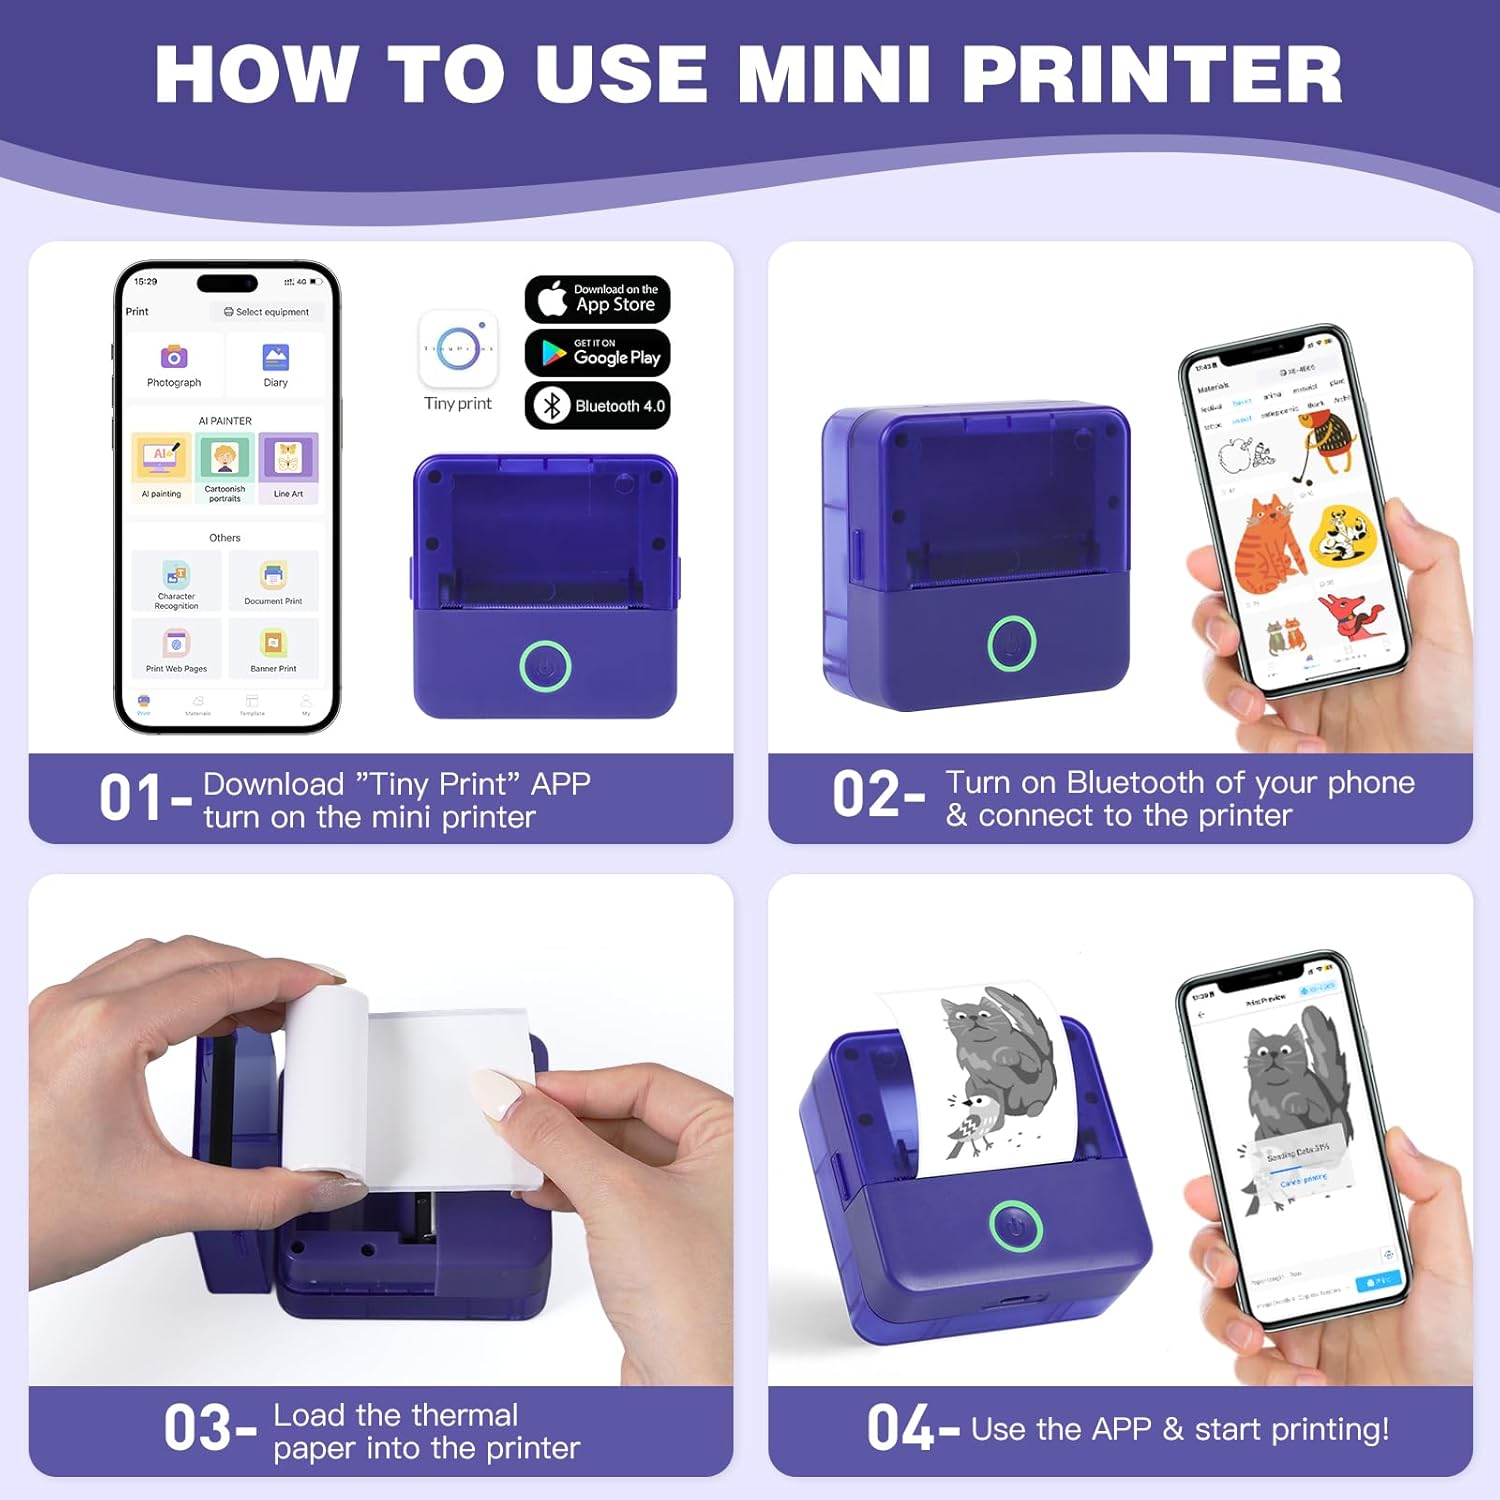
Figure 3.1: Printer Components and How to Use
4. Setup
4.1 Charging the Printer
Before first use, ensure the printer is fully charged. Connect the provided Type-C power cord to the printer's USB port and a suitable power adapter (not included). The power indicator light will show charging status.
4.2 Installing Thermal Paper
- Press the cover opening button to open the top cover of the printer.
- Remove any existing paper roll or the adjuster from the right side if present.
- Load a new thermal paper roll into the paper compartment. Ensure the printing side (smooth side) is facing up and aligned with the print head.
Tip: To distinguish the printing side, gently scratch the paper surface with your nail; the side that leaves a mark is the printing side. - If removed, install the adjuster on the right side to secure the paper roll.
- Pull out a small portion of the paper (approximately 1cm) beyond the paper outlet.
- Close the top cover firmly until it clicks into place.

Figure 4.1: Opening the Paper Compartment

Figure 4.2: Loading the Paper Roll

Figure 4.3: Closing the Cover after Paper Loading
4.3 App Download and Bluetooth Connection
- Download the "Tiny Print" app from the App Store (iOS) or Google Play Store (Android).
- Turn on the mini printer by pressing and holding the power button until the indicator light illuminates.
- Enable Bluetooth on your smartphone or tablet.
- Open the "Tiny Print" app and follow the in-app instructions to connect to your printer via Bluetooth. Look for a device named "X6H-XXXX" or similar.
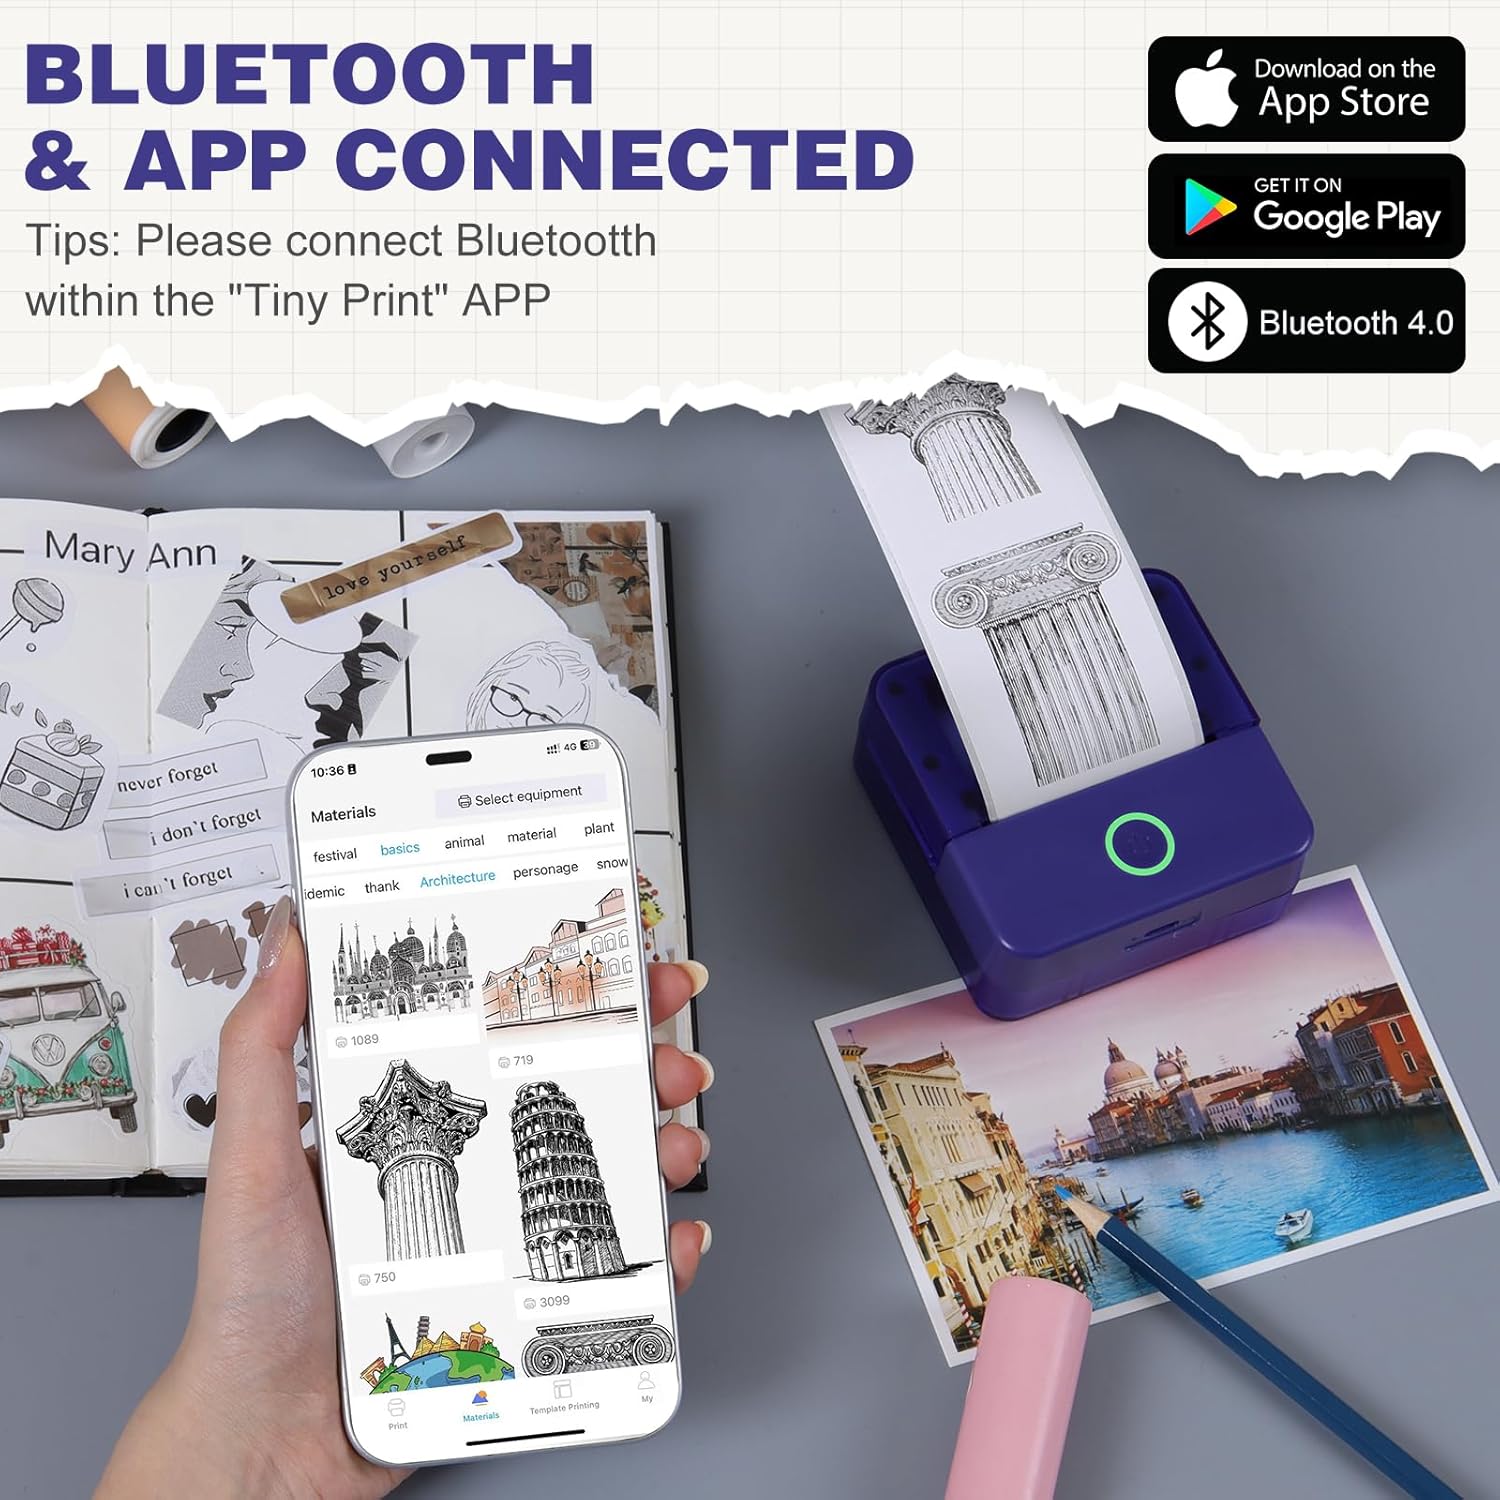
Figure 4.4: App Interface and Bluetooth Connection
Video 4.1: Demonstrating the setup and connection process for the cudinham X6 Mini Thermal Printer.
5. Operating Instructions
The "Tiny Print" app offers various functions for printing. Ensure your printer is connected via Bluetooth before proceeding.
5.1 Basic Printing
- Photo Printing: Select "Photo Printing" in the app, choose an image from your gallery, adjust as needed, and tap "Print."
- Text Printing: Select "Text Printing" or a template, input your text, customize fonts and sizes, and tap "Print."
- Templates: The app provides multiple free templates for notes, to-do lists, labels, and more. Select a template, customize it, and print.

Figure 5.1: Multi-functionality of the Tiny Print App

Figure 5.2: Image Printing Settings

Figure 5.3: Text Printing Settings
5.2 Adjusting Print Settings
Within the app, you can adjust the print depth for both images and text. For optimal results, especially with images, it is recommended to use the high-definition printing mode and set the print depth between 4 and 7. Experiment with settings to achieve your desired print quality.
Video 5.1: Overview of the cudinham X6 Print Pod Mini Printer's features and printing capabilities.
6. Maintenance
6.1 Cleaning the Print Head
To maintain print quality, regularly clean the print head. Use a soft, lint-free cloth lightly dampened with alcohol. Gently wipe the print head to remove any dust or paper residue. Ensure the printer is turned off and disconnected from power before cleaning.
6.2 Paper Storage
Store thermal paper in a cool, dry place away from direct sunlight and heat to prevent premature fading or damage. Avoid touching the printing surface of the paper with bare hands as oils can affect print quality.

Figure 6.1: Different Types of Thermal Paper
7. Troubleshooting
| Problem | Possible Cause | Solution |
|---|---|---|
| Printer not turning on | Low battery; Power button not pressed correctly. | Charge the printer; Press and hold the power button for 3 seconds. |
| Poor print quality (faint/blurry) | Print head dirty; Incorrect print depth setting; Low battery. | Clean the print head; Adjust print depth in the app (recommended 4-7); Charge the printer. |
| Printer not connecting via Bluetooth | Bluetooth off on phone/printer; App not recognizing printer. | Ensure Bluetooth is enabled on both devices; Restart the app and printer; Re-pair the device in the app. |
| Paper jam | Paper loaded incorrectly; Foreign object in paper path. | Open the cover, remove jammed paper, re-load correctly; Check for obstructions. |
8. Specifications
| Feature | Detail |
|---|---|
| Model Name | X6 |
| Brand | cudinham |
| Printing Technology | Thermal |
| Connectivity Technology | Bluetooth |
| Printer Output | Thermal (Monochrome) |
| Max Print Speed (Monochrome) | 20 ppm |
| Print Media | Thermal Paper |
| Sheet Size | 57x22 Millimeters |
| Maximum Media Size | 52x350mm |
| Product Dimensions | 3.35 x 1.77 x 3.35 inches |
| Item Weight | 13.2 ounces |
| Batteries | 1 Nonstandard Battery (included) |
| Hardware Interface | USB |
9. Warranty and Support
For warranty information and customer support, please refer to the warranty card included in your package or contact cudinham customer service directly. Keep your purchase receipt for warranty claims.
Contact Information:
- Manufacturer: Cudinham
- Seller: Cudinham Home
- Please refer to the product packaging or official website for the most current support contact details.