1. Introduction
Thank you for choosing the kavey 4-6 Fingerprint Gun Safe (Model GKM-140W). This manual provides essential information for the safe and effective use of your new gun safe. Please read it thoroughly before installation and operation, and keep it for future reference.
The kavey 4-6 Fingerprint Gun Safe is designed to provide secure storage for your firearms and valuables, featuring advanced biometric and electronic locking mechanisms, robust construction, and flexible interior organization.
2. Important Safety Information
- Always store firearms unloaded and locked away from ammunition.
- Keep emergency keys in a secure location, separate from the safe and out of reach of unauthorized individuals.
- Ensure the safe is securely mounted to a wall or floor to prevent unauthorized removal.
- Do not store the emergency battery pack or USB Type-C cable inside the safe.
- Regularly check battery levels to ensure continuous operation of the electronic lock.
- Familiarize yourself with all locking mechanisms and alarm features.
3. Setup and Installation
3.1 Unpacking and Initial Access
Upon receiving your kavey gun safe, carefully unpack all components. The safe needs to be assembled. All required accessories and clearly marked parts are included in the package. For initial access, use the emergency keys provided.
Video: Gun Safe Installation Overview. This video provides a general overview of the gun safe and its features, including initial access methods and internal components.
Video: Initial Password Open. This short video demonstrates how to open the safe using the initial password.
3.2 Battery Installation
Locate the battery compartment inside the safe door. Install 4 AA batteries (not included) following the correct polarity. Close the battery cover securely.
Video: Installing 4 AA Batteries. This video shows the process of installing the required 4 AA batteries into the safe's internal battery compartment.
3.3 Secure Mounting
For enhanced security, it is highly recommended to bolt the safe to the ground, a wall, or both. The package includes 5 expansion screws for this purpose. Detailed instructions for mounting are provided in the user manual.

Image: 5 Expansion Bolts Installation. This image illustrates the three-step process for securely mounting the gun safe using the provided expansion bolts to either a wall or the floor.
4. Operating Instructions
4.1 Access Methods
Your kavey gun safe offers multiple ways to access your firearms:
- Fingerprint Recognition: Quick access in just 1 second. Stores up to 30 unique fingerprints.
- Digital Password: Utilizes a backlit keypad. Stores 2 sets of digital passwords.
- Emergency Key: For manual access in case of battery failure or forgotten password.
- External Power Jack (USB Type-C): Provides temporary power to the keypad if internal batteries are discharged.

Image: 4 Ways to Open. This image visually explains the four different methods available for opening the kavey gun safe, including biometric, electronic, key, and external power options.
4.2 Setting Passwords
After initial access, you can set your personal digital password. The initial password is typically "1234#" or "123456".
- Open the safe using the emergency key.
- Press the red setup button located behind the door. The touch panel lights up with a short beep.
- Enter your desired 3-8 digit password and press "#" to confirm.
Video: How to Use the Gun Safe with Electronic Lock. This video demonstrates the basic operation of the electronic lock, including setting and using a password.
Video: Set a Password. This short video guides you through the steps to set a new password for your gun safe.
4.3 Setting Fingerprints
The safe can store up to 30 unique fingerprints for quick biometric access.
- Open the safe.
- Press the red setup button located behind the door.
- Place your finger on the fingerprint sensor 3 times until the green "OK" light appears, indicating successful registration.
Video: Set Up a Fingerprint. This video demonstrates the process of registering a fingerprint for biometric access.
4.4 Mute Function
To enable or disable sound feedback from the keypad:
- To mute: Enter "33#" on the keypad.
- To unmute: Enter "66#" on the keypad.

Image: Alarm System & Mute Function. This image details the alarm system features and provides instructions for activating the mute function.
Video: Mute Mode. This short video demonstrates how to enable and disable the mute function on the safe.
4.5 Emergency Power
If the internal batteries are discharged and you cannot access the safe, use the external battery pack (USB Type-C cable) to temporarily power the keypad.
- Connect the USB Type-C cable from the external battery pack to the port on the keypad.
- Enter your digital password or use your registered fingerprint to open the safe.
- Replace the internal batteries immediately after gaining access.
5. Flexible Storage and Interior Features
The kavey gun safe is designed for versatile storage of various firearms and accessories.
- Capacity: Holds 4-6 rifles up to 55.12 inches.
- Removable Shelf: Allows for increased length storage for longer firearms.
- Magnetic Adjustable Gun Racks: Stabilizes firearms and prevents tipping.
- Separate Drawer with Lock: Ideal for storing ammunition, pistols, or other valuables.
- Storage Bags & Pistol Bags: Two storage bags and two pistol bags are included for organized storage of smaller items.
- Interior LED Light & Magnetic Light: Provides illumination for easy access in the dark.

Image: Product Details. This image highlights key features of the safe's interior, including the removable shelf, locking bolts, gun racks, LED light, and drawer.
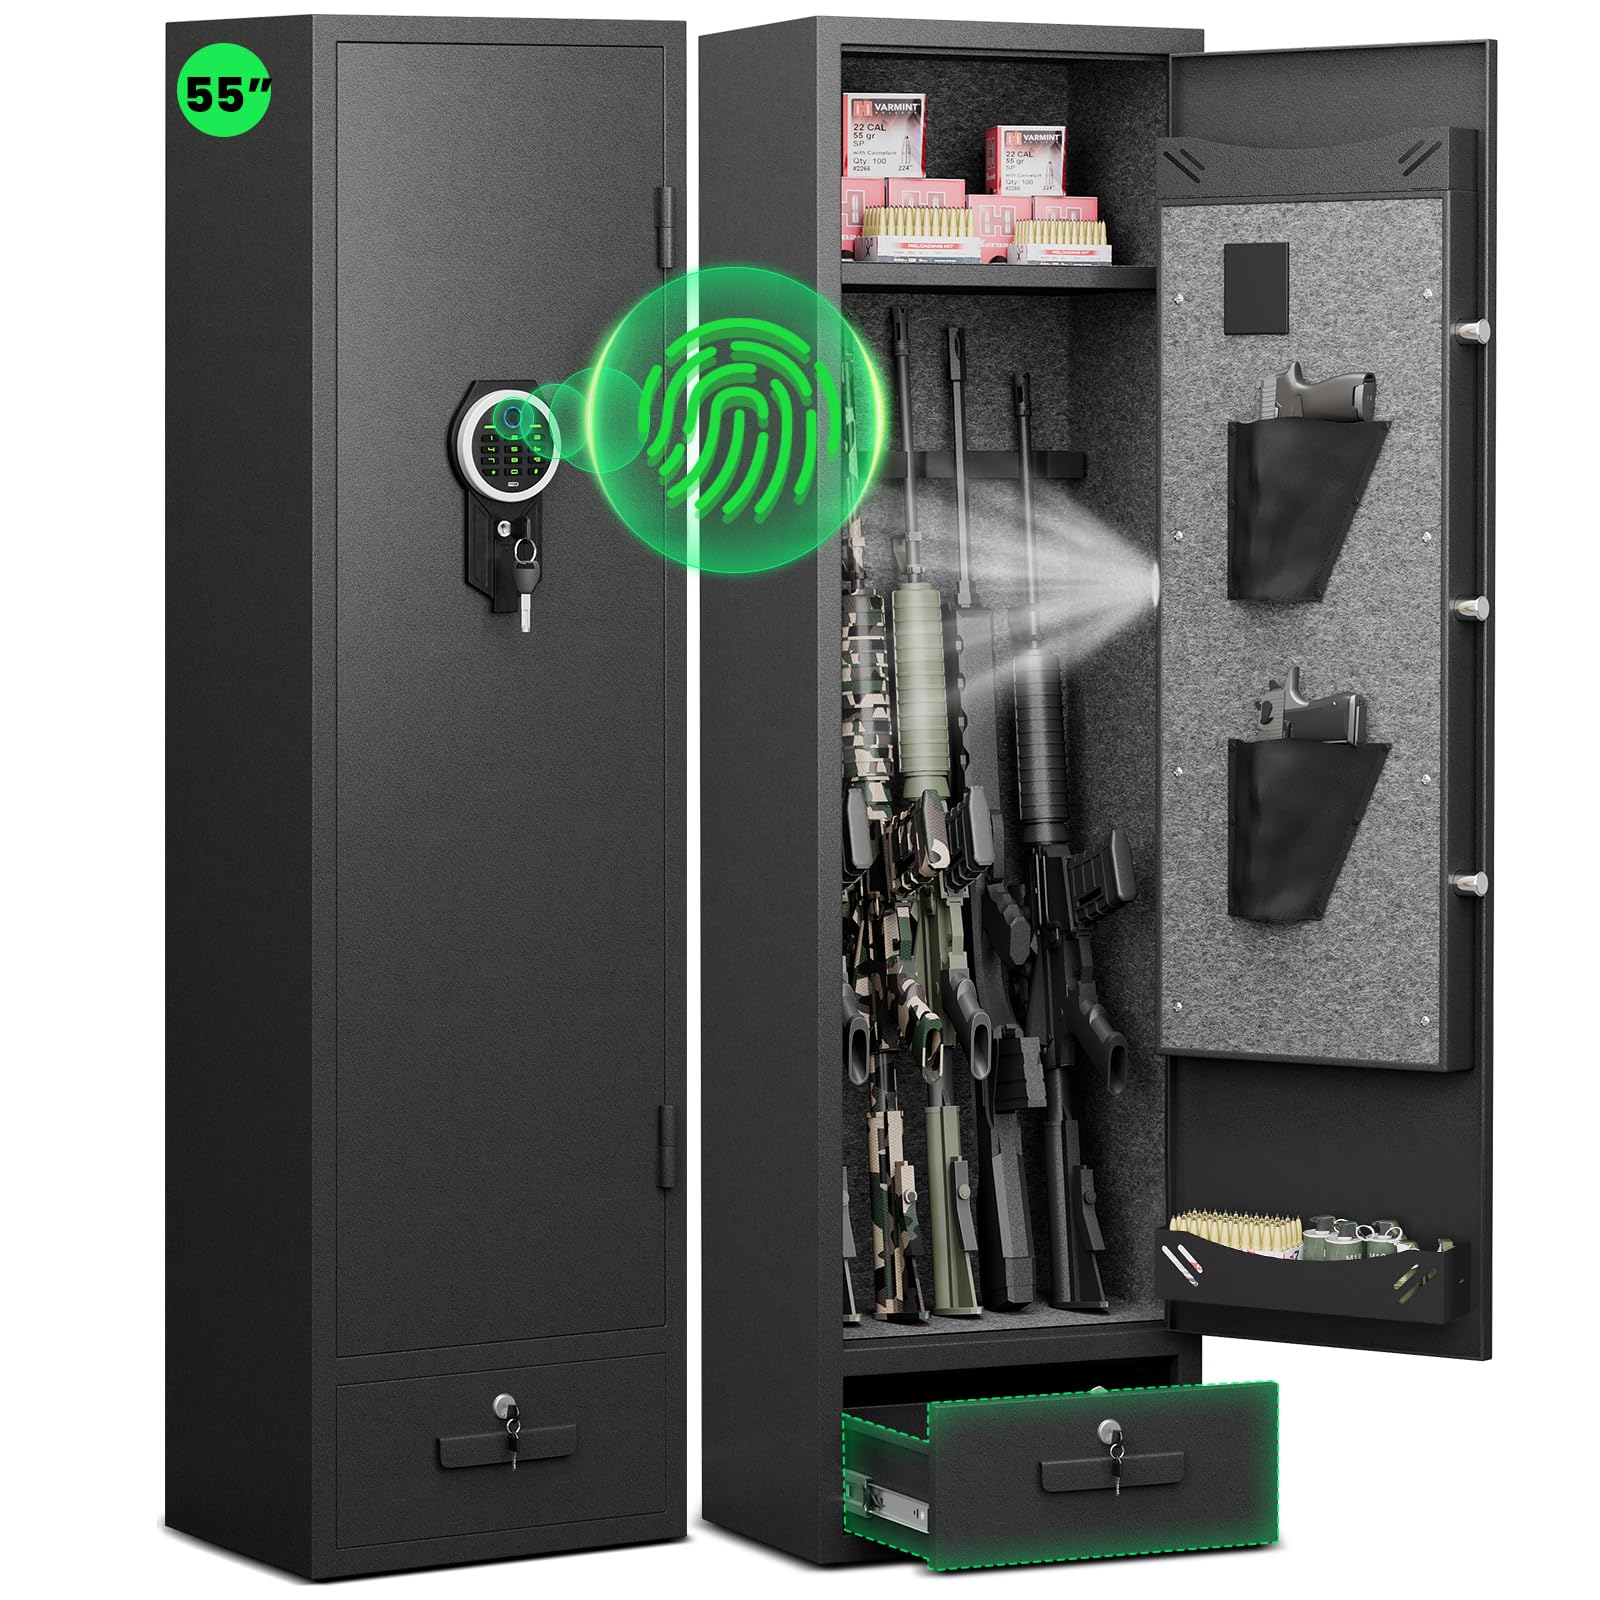
Image: Free Allocation Space. This image illustrates how the removable shelf allows for flexible interior space, accommodating different firearm lengths.
Video: How to Remove the Drawer. This video demonstrates the process of removing the internal drawer for customized storage.
Video: Removable Gun Rack and Shelf. This short video highlights the removable gun rack and shelf features, allowing for flexible interior configuration.
6. Maintenance
- Cleaning: Wipe the exterior with a soft, damp cloth. Avoid abrasive cleaners.
- Battery Replacement: Replace batteries when the low voltage warning is activated (keypad plays a prompt sound when voltage is lower than 4.8V).
- Anti-Corrosion Design: The safe features a unique anti-corrosion design for long-term use. No special maintenance is typically required for this feature.
7. Troubleshooting
7.1 Alarm System
The safe is equipped with a dual alarm system:
- Wrong Access Alarm: If an incorrect password is entered 3 consecutive times, an alarm will sound for 60 seconds (up to 70 decibels).
- Vibration Alarm: If the safe vibrates violently, a vibration alarm will be triggered.
To cancel the alarm, enter the correct password.
Video: Alarm System Demonstration. This short video demonstrates the alarm system activation when incorrect passwords are entered multiple times.
Video: Input Wrong Password Alarm. This short video shows the safe's response to incorrect password inputs, triggering an audible alarm.
7.2 Resetting Passwords and Fingerprints
If you need to reset all passwords and fingerprints to factory settings:
- Open the safe.
- Press and hold the red button behind the door for 3 seconds. All passwords and fingerprints will be reset.
Video: Reset System. This short video demonstrates how to reset the safe's system by pressing and holding the green button inside the door.
8. Specifications
| Feature | Detail |
|---|---|
| Brand | kavey |
| Model Number | GKM-140W |
| Product Dimensions | 11.02"D x 12.59"W x 55.12"H |
| Lock Type | Biometric, Electronic, Key |
| Color | Black |
| Material | Carbon Steel |
| Special Features | Adjustable Shelf, Alarm System, Anti-Theft, Combination Lock |
| Mounting Type | Floor Mount, Wall Mount |
| Item Weight | 65.8 Pounds |
| Alarm | Audible, Vibration |
9. Warranty & Customer Support
Your kavey gun safe comes with comprehensive customer support. If you encounter any problems with your gun cabinet, please contact our experienced customer service team directly. We are committed to responding within 24 hours and resolving any issues to your satisfaction.
For support, please refer to the contact information provided in your product packaging or visit the official kavey website.


