1. Important Safeguards
When using electrical appliances, basic safety precautions should always be followed to reduce the risk of fire, electric shock, and injury to persons, including the following:
- Read all instructions before operating the appliance.
- Do not touch hot surfaces. Use handles or knobs.
- To protect against electrical shock, do not immerse cord, plugs, or the appliance in water or other liquid.
- Close supervision is necessary when any appliance is used by or near children.
- Unplug from outlet when not in use and before cleaning. Allow to cool before putting on or taking off parts.
- Do not operate any appliance with a damaged cord or plug or after the appliance malfunctions or has been damaged in any manner.
- The use of accessory attachments not recommended by the appliance manufacturer may cause injuries.
- Do not use outdoors.
- Do not let cord hang over edge of table or counter, or touch hot surfaces.
- Do not place on or near a hot gas or electric burner, or in a heated oven.
- Extreme caution must be used when moving an appliance containing hot oil or other hot liquids.
- Always attach plug to appliance first, then plug cord into the wall outlet. To disconnect, turn any control to "off", then remove plug from wall outlet.
- Do not use appliance for other than intended use.
- Oversized foods or metal utensils must not be inserted in a toaster oven as they may create a fire or risk of electric shock.
- A fire may occur if the oven is covered or touching flammable material, including curtains, draperies, walls, and the like, when in operation.
- Do not place any of the following materials in the oven: paper, cardboard, plastic, and the like.
- Do not store any materials, other than manufacturer's recommended accessories, in this oven when not in use.
- Do not place cooking utensils or baking dishes on the glass door.
2. Product Overview
The Magic Mill MTO-870 is an Ultra-Premium Dual-Zone Stainless Steel Air Fryer Toaster Oven Combo designed for versatile cooking. It features a 32QT capacity, French doors, and Sync Finish technology for simultaneous cooking of different dishes.
Key Features:
- SyncCore Dual-Zone Cooking with Sync Finish: Cook two different dishes at once with separate temperatures and timers, or remove the divider for full 32QT capacity. Sync Finish ensures both sides complete cooking simultaneously.
- 10-in-1 Smart Presets: Includes Air Fry, Bake, Toast, Rotisserie, Pizza, Roast, Broil, Dehydrate, Reheat, and Ferment functions.
- LED Display & Touch Controls: Dual LED displays for easy programming and responsive touch controls.
- Interior Lighting: Allows monitoring of cooking progress without opening the doors.
- Family-Size Capacity: 32-quart cavity fits a full rotisserie chicken, 12-inch pizza, or multiple trays.
Included Accessories:
The appliance comes with a 13-piece premium accessory kit.

Image: The 13-piece accessory kit includes a rotisserie set, cavity divider panel, grill racks, dual air fry baskets, XL baking trays, and a dishwasher-safe crumb tray.
- Roasting Pan
- Baking Pans (XL)
- Grill Racks
- Air Fry Baskets (Dual)
- Rotisserie Tools (Spit, Forks, Removal Tool)
- Crumb Tray
- Cavity Divider Panel
3. Setup and First Use
Unpacking:
- Carefully remove all packaging materials from the appliance and accessories.
- Check for any damage during transit. Do not operate if damaged.
- Retain packaging for future storage or shipping.
Placement:
- Place the oven on a stable, level, heat-resistant surface.
- Ensure adequate clearance (at least 4 inches) on all sides and above the oven for proper ventilation.
- Do not place near flammable materials or heat sources.
Initial Cleaning:
- Wash all accessories (baking pans, grill racks, air fry baskets, rotisserie tools, crumb tray, cavity divider) in warm, soapy water or in the dishwasher (top-rack safe). Rinse and dry thoroughly.
- Wipe the interior and exterior of the oven with a damp cloth. Do not use abrasive cleaners.
- Before first use, it is recommended to run the oven empty for about 15 minutes at 400°F (200°C) to burn off any manufacturing residues. Ensure the area is well-ventilated during this process.
4. Operating Instructions
Control Panel Overview:
The oven features a dual LED display and touch controls for intuitive operation.

Image: The LED touchscreen control panel displays temperature, time, and offers 10 smart presets for various cooking functions.
- Left/Right Displays: Show settings for each cooking zone.
- Function Icons: Select desired cooking mode (Air Fry, Bake, Toast, etc.).
- Temperature/Time Controls: Adjust cooking temperature and time.
- Sync Button: Activates Sync Finish technology.
- Start/Pause Button: Initiates or pauses cooking.
- Light Button: Turns interior oven light on/off.
Dual-Zone Cooking with Sync Finish:
This feature allows you to cook two different foods simultaneously at different temperatures and times, ensuring both finish at the same moment.

Image: The oven features a removable divider panel, allowing for dual-zone cooking of different dishes at varying temperatures or a single large 32QT cooking space.
- Insert the cavity divider panel into the central slot to create two separate cooking zones.
- Place food and appropriate accessories into each zone.
- Select the desired cooking function for the left zone using the touch controls. Adjust temperature and time.
- Repeat for the right zone.
- Press the Sync button. The oven will intelligently align the cooking times so both zones finish together.
- Press Start to begin cooking.
Single-Zone Cooking (32QT Capacity):
For larger items, remove the cavity divider panel to utilize the full 32QT capacity.

Image: The 32QT capacity of the oven can accommodate a full rotisserie chicken, a 12-inch pizza, or a 4 lb roast beef, eliminating the need for batch cooking.
- Ensure the cavity divider panel is removed.
- Place food and accessories into the oven.
- Select a cooking function and adjust temperature/time using either the left or right zone controls (the oven will recognize full capacity).
- Press Start.
Preset Functions:
The oven includes 10 optimized presets for common cooking tasks:
- Air Fry: For crispy results with little to no oil.
- Bake: Ideal for cakes, cookies, and casseroles.
- Toast: For bread, bagels, and pastries.
- Rotisserie: For roasting whole chickens or roasts.
- Pizza: Optimized for cooking pizzas.
- Roast: For meats and vegetables.
- Broil: For grilling and browning.
- Dehydrate: For drying fruits, vegetables, and jerky.
- Reheat: For warming up leftovers.
- Ferment: For proofing dough or making yogurt.
To use a preset, simply touch the corresponding icon on the control panel. The oven will suggest a default temperature and time, which can be adjusted manually.
Rotisserie Use:
The rotisserie function is ideal for evenly cooking whole poultry or roasts.
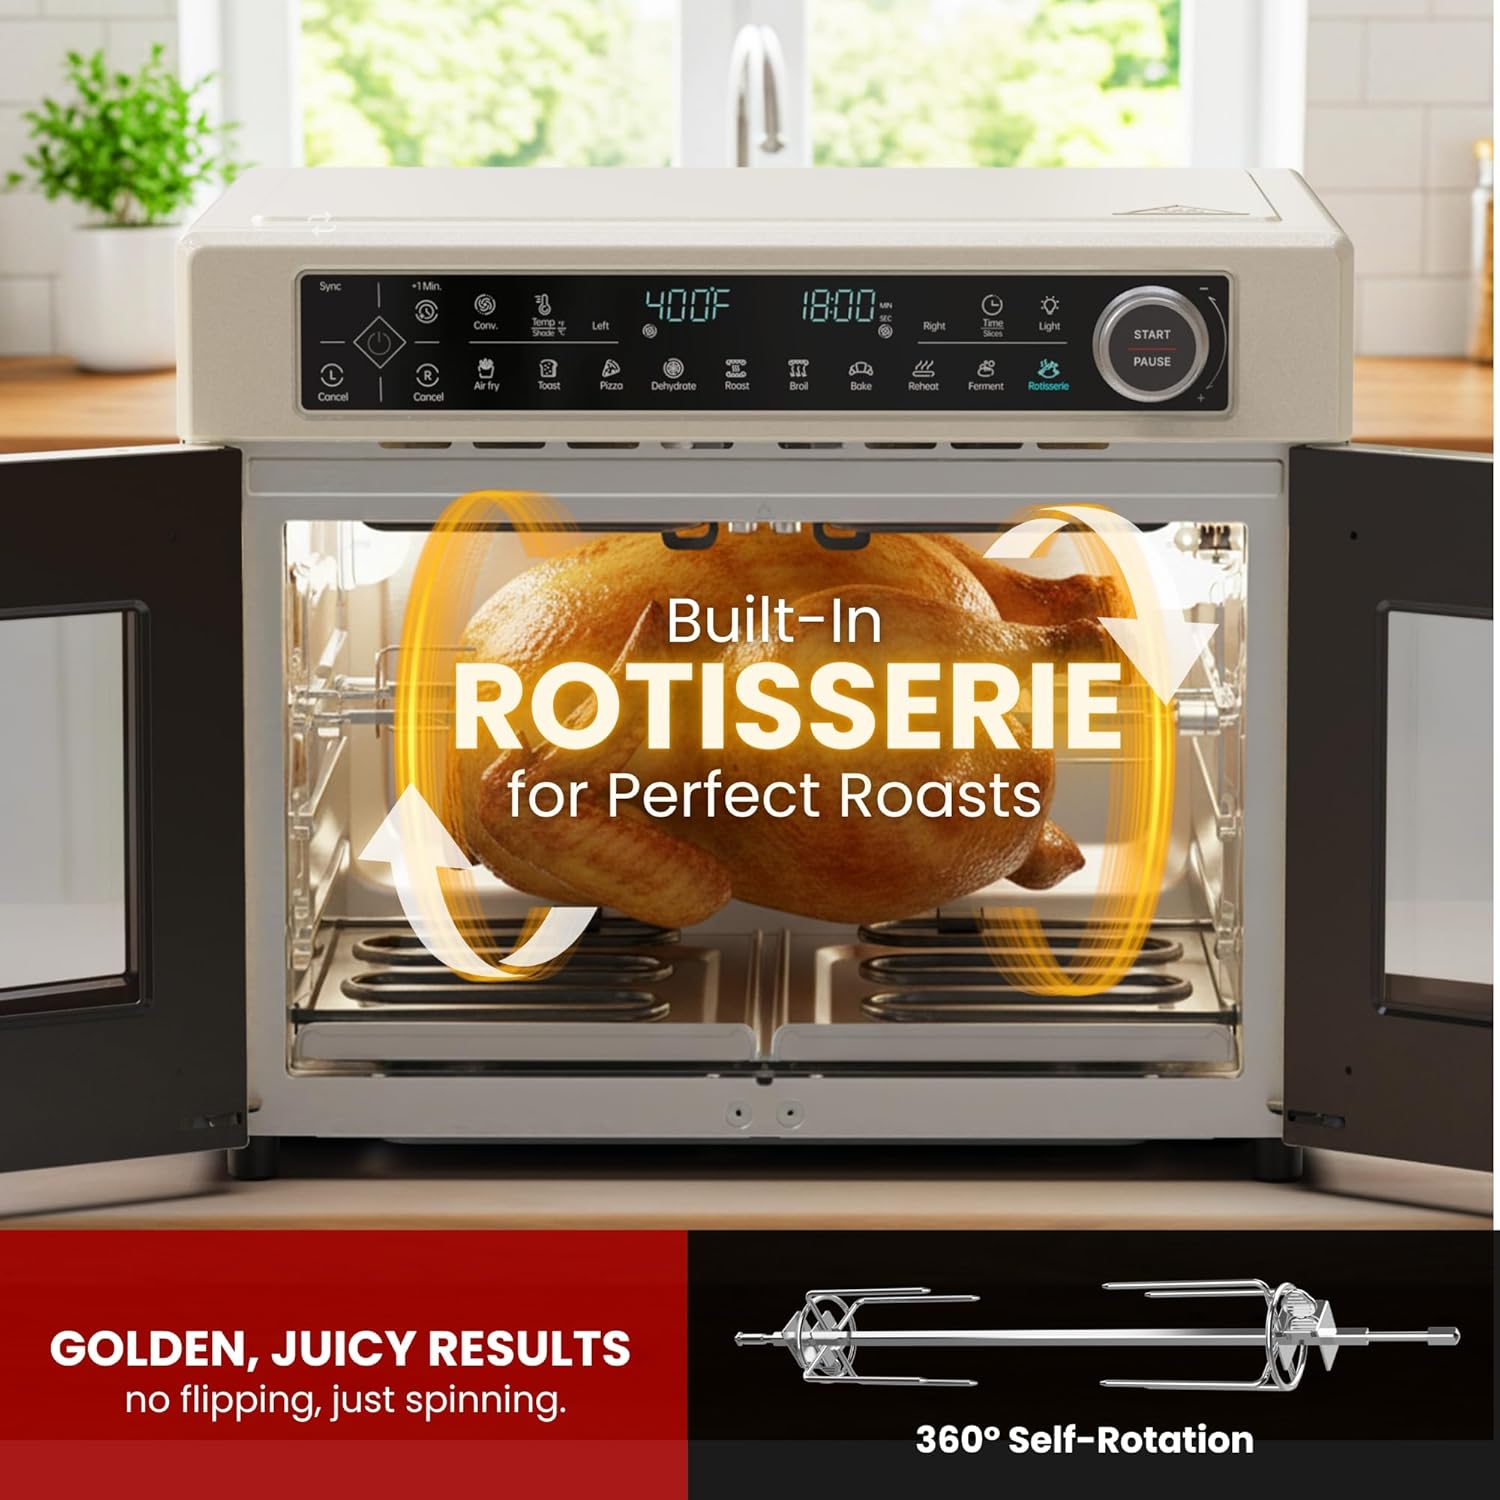
Image: A whole chicken is shown rotating on the built-in rotisserie spit inside the oven, illustrating the 360-degree self-rotation feature for even cooking.
- Assemble the rotisserie spit and forks, securing the food item firmly.
- Insert the assembled rotisserie into the designated slots inside the oven.
- Select the Rotisserie preset or manually set the temperature and time for roasting.
- Press Start. The rotisserie will automatically rotate during cooking.
- Use the rotisserie removal tool to safely extract the hot rotisserie after cooking.
5. Care and Maintenance
Regular cleaning and maintenance will ensure the longevity and optimal performance of your Magic Mill oven.
Cleaning:

Image: One image shows a baking tray being rinsed under a faucet, while another shows a tray being loaded into a dishwasher, highlighting that all removable parts are top-rack dishwasher-safe.
- Always unplug the oven and allow it to cool completely before cleaning.
- Removable Accessories: All included accessories (roasting pan, baking pans, grill racks, air fry baskets, rotisserie tools, crumb tray, cavity divider) are top-rack dishwasher-safe. Alternatively, wash them in warm, soapy water, rinse, and dry thoroughly.
- Crumb Tray: The crumb tray should be emptied and cleaned regularly to prevent grease buildup and potential fire hazards. Slide it out from the bottom of the oven.
- Interior: Wipe the interior surfaces with a damp cloth and mild detergent. For stubborn stains, use a non-abrasive cleaner. Avoid using metal scouring pads or harsh chemicals.
- Exterior: Wipe the exterior with a damp cloth. The stainless steel housing is smudge-resistant. Do not use abrasive cleaners or polishes.
- Glass Doors: Clean with a soft cloth and glass cleaner or mild soapy water.
Storage:
Store the oven in a cool, dry place when not in use. Ensure it is clean and dry before storing. Do not place heavy objects on top of the oven.
6. Troubleshooting
If you encounter issues with your Magic Mill oven, refer to the following common problems and solutions:
| Problem | Possible Cause | Solution |
|---|---|---|
| Oven does not turn on. | Not plugged in; power outlet malfunction; circuit breaker tripped. | Ensure the power cord is securely plugged into a working outlet. Check your household circuit breaker. |
| Food not cooking evenly. | Overcrowding; incorrect temperature/time settings; food placed too close to heating elements. | Avoid overcrowding the oven. Adjust temperature and time as needed. Ensure proper rack placement. For dual-zone, ensure divider is correctly installed. |
| Smoke coming from the oven. | Food residue or grease buildup; crumb tray full; fatty foods. | Unplug and allow to cool. Clean the interior and crumb tray thoroughly. Use a drip tray for fatty foods. |
| Sync Finish not working. | Sync button not pressed; significant difference in cooking times. | Ensure the Sync button is pressed after setting both zones. The Sync Finish works best with reasonable time differences. |
| Rotisserie not rotating. | Rotisserie spit not properly seated; food too heavy or unbalanced. | Ensure the rotisserie spit is correctly inserted into the drive socket. Balance the food item on the spit. |
If the problem persists after trying these solutions, please contact customer support.
7. Specifications
| Attribute | Detail |
|---|---|
| Brand | Magic Mill |
| Model Number | MTO-870 |
| Material | Stainless Steel |
| Color | Ivory |
| Wattage | 1800 watts |
| Product Dimensions (D x W x H) | 14.64"D x 16.65"W x 17.87"H |
| Voltage | 120 Volts |
| Item Weight | 14.35 Pounds |
| Number of Trays | 2 |
| Dishwasher Safe Parts | Yes (removable accessories, top-rack) |
| UPC | 810183040492 |
8. Customer Support
For any questions, assistance, or troubleshooting not covered in this manual, please contact Magic Mill customer support.
Website: www.magicmill.com (Example, please refer to actual product packaging or official website for correct contact information)
Email: support@magicmill.com (Example)
Phone: 1-800-XXX-XXXX (Example)
Please have your model number (MTO-870) and purchase information ready when contacting support.


