
1. Introduction
This manual provides essential information for the safe and efficient operation, assembly, and maintenance of your MAXLANDER 15-Amp Electric Wood Chipper Shredder, model ML-WR3003. Please read all instructions carefully before use to ensure proper function and to prevent injury.
2. Safety Information
WARNING: Read and understand all safety warnings and instructions before operating this machine. Failure to follow the warnings and instructions may result in electric shock, fire, and/or serious injury.
2.1 General Safety Rules
- Always wear appropriate personal protective equipment (PPE), including safety glasses, hearing protection, gloves, and sturdy footwear.
- Keep children and bystanders at a safe distance (at least 50 feet/15 meters) from the operating area.
- Do not operate the chipper in wet conditions or on slippery surfaces.
- Ensure the work area is clear of debris and obstacles.
- Never reach into the feed hopper or discharge chute while the machine is running.
- Always disconnect the power supply before performing any maintenance, cleaning, or clearing jams.
2.2 Electrical Safety
- Use only an extension cord suitable for outdoor use and rated for the chipper's power requirements (15-Amp).
- Ensure the extension cord is in good condition and free from damage.
- Do not abuse the cord. Never carry the chipper by the cord or yank it to disconnect from the receptacle.
- Connect the chipper to a properly grounded outlet.
3. Package Contents
Verify that all components are present and undamaged upon opening the package:
- MAXLANDER Electric Wood Chipper Shredder Unit
- Collection Bag (45L)
- Wheels (2)
- Support Legs/Frame
- Feeding Paddle
- Assembly Hardware (screws, nuts, washers)
- Wrench/Tools for Assembly
- Instruction Manual
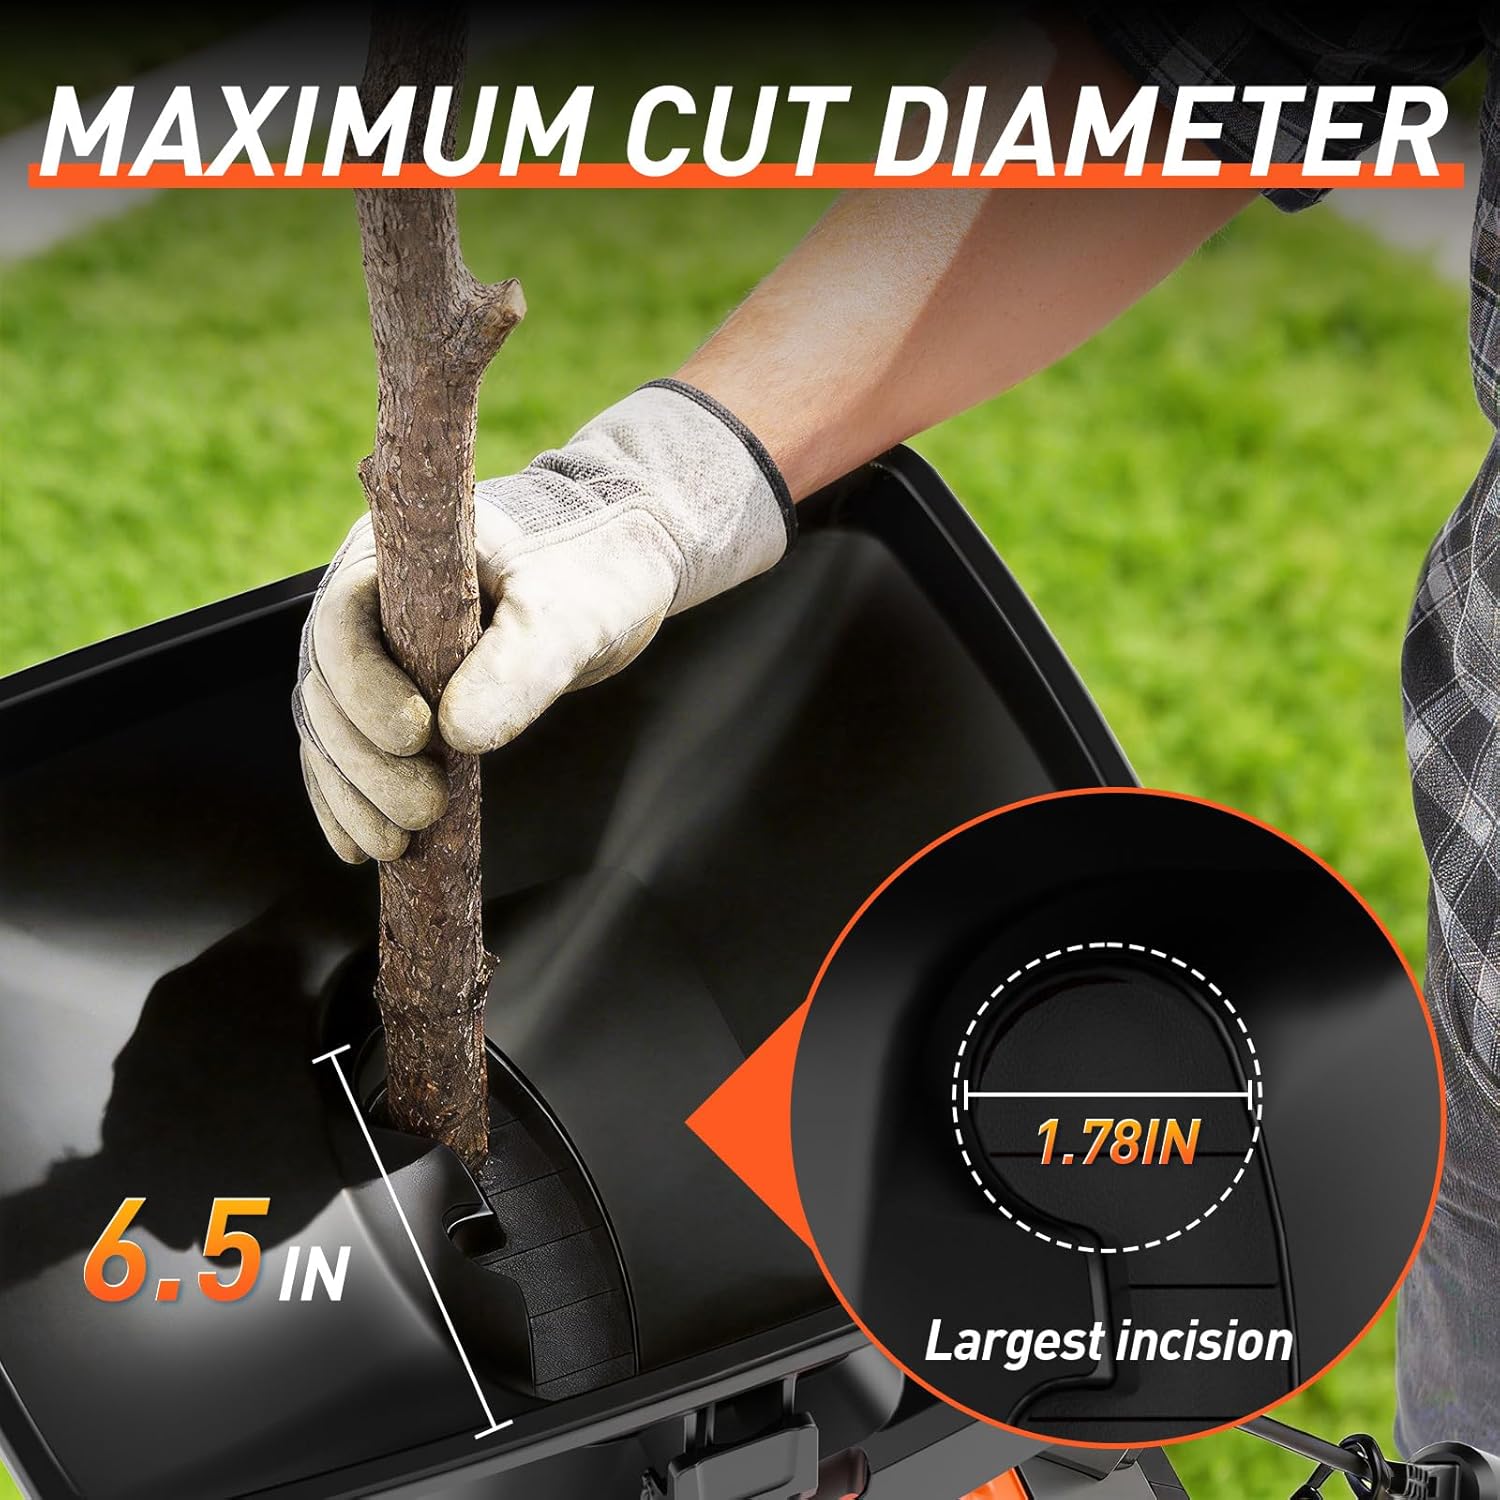
Image: All components of the MAXLANDER Electric Wood Chipper Shredder laid out on a surface, including the main unit, wheels, frame, collection bag, and tools.
4. Assembly Instructions
Follow these steps to assemble your MAXLANDER Wood Chipper Shredder:
- Attach the Support Frame: Connect the two curved support legs to form the base. Secure them using the provided hardware.
- Install the Wheels: Slide the wheels onto the axle of the support frame. Secure them with the included pins or caps.
- Mount the Main Unit: Carefully lift the main chipper unit and align its mounting points with the assembled support frame. Secure it firmly with the provided screws and a screwdriver or drill.
- Attach the Collection Bin/Bag: Hook the 45L collection bag onto the designated hooks beneath the discharge chute. Ensure it is securely attached to prevent wood chips from flying out.
- Verify Blade Installation: Before first use, ensure the SK5 dual-edge blades are securely installed and tightened. Refer to the detailed diagram in the printed manual for precise positioning.
Video: A detailed step-by-step guide demonstrating the assembly process of the MAXLANDER Electric Wood Chipper Shredder, including attaching the frame, wheels, and main unit.

Image: Close-up view of the wide funnel design, highlighting the 1.78-inch largest incision for feeding branches.
5. Operating Instructions
Before operating, ensure the chipper is fully assembled, the collection bag is attached, and all safety precautions are observed.
- Prepare Material: Feed only dry wood, plant roots, and branches. The chipper can handle sticks and branches from 0.9 inch up to 1.8 inches in diameter. Avoid feeding wet, green, or excessively leafy material as it may cause clogging.
- Start the Chipper: Connect the power cord to a suitable outdoor outlet. Press the ON switch to start the motor. Allow the motor to reach full speed before feeding material.
- Feed Material: Slowly feed branches and twigs into the hopper. Use the feeding paddle to push material into the cutting area, keeping hands away from the blades.
- Monitor Output: The chipper features a 21:1 reduction ratio, turning bulky waste into fine mulch suitable for composting or disposal. Regularly check the collection bag and empty it when full to prevent backup.
- Stop the Chipper: When finished or if a jam occurs, press the OFF switch and disconnect the power supply.
Video: Demonstration of the MAXLANDER Electric Wood Chipper in operation, showing how to feed branches into the hopper and the resulting wood chips.

Image: The MAXLANDER wood chipper processing different types of yard waste, including dry wood, plant roots, and branches, illustrating its multi-purpose capability.

Image: A visual representation of the wood chipper's reduction rate, showing a large pile of branches being reduced to a small amount of mulch, highlighting the 15:1 ratio.
6. Maintenance
Regular maintenance ensures the longevity and optimal performance of your chipper.
- Cleaning: After each use, disconnect power and clean the feed hopper and discharge chute. Remove any accumulated debris or wood chips.
- Blade Inspection: Periodically inspect the SK5 dual-edge blades for sharpness and damage. Dull or damaged blades should be replaced or sharpened by a qualified technician.
- Storage: Store the chipper in a dry, secure location away from children and adverse weather conditions.

Image: An internal view highlighting the powerful 15-Amp motor of the MAXLANDER wood chipper, indicating its robust design for consistent performance.
7. Troubleshooting
If you encounter issues, refer to the following common problems and solutions:
| Problem | Possible Cause | Solution |
|---|---|---|
| Chipper does not start | No power, safety interlock not engaged, overload protection tripped. | Check power connection, ensure collection bin is correctly seated, reset overload protector. |
| Material not chipping effectively | Dull blades, incorrect material type, material too large. | Inspect/replace blades, ensure material is dry and within diameter limits. |
| Chipper jams frequently | Overfeeding, wet material, foreign objects. | Feed material slowly, avoid wet material, clear any obstructions after disconnecting power. |
8. Specifications
| Feature | Detail |
|---|---|
| Model Number | ML-WR3003 |
| Motor | 15-Amp Electric |
| Max RPM | 4000 RPM |
| Cutting Capacity | 1.75-Inch (4.45 cm) |
| Reduction Ratio | 21:1 |
| Collection Bin Capacity | 45L |
| Blades | SK5 Dual-Edge Steel |
| Safety Features | Auto Shut-Off (when bin removed), Overload Protection, Safety Interlock System, Feeding Paddle |
| Product Dimensions | 16.9 x 13.78 x 41.9 inches |
| Item Weight | 24 pounds |
9. Warranty and Customer Support
MAXLANDER products are designed for reliability and performance. For warranty information, technical support, or replacement parts, please contact MAXLANDER customer service through the retailer where the product was purchased or visit the official MAXLANDER website. Keep your purchase receipt as proof of purchase.