
1. Introduction
This manual provides essential instructions for the safe and efficient installation, operation, and maintenance of the Anchilly Carel RITCUSRG02 RITTAL Operation Panel. This device functions as a thermostat control unit, designed for integration into various systems requiring precise temperature management. Please read this manual thoroughly before using the product.
2. Safety Information
Always observe the following safety precautions to prevent personal injury or damage to the device:
- Installation and maintenance should only be performed by qualified personnel.
- Disconnect power before performing any wiring or maintenance.
- Ensure the power supply voltage matches the specifications of the device.
- Do not expose the device to moisture, extreme temperatures, or corrosive environments.
- Verify all connections are secure and correct before applying power.
3. Product Overview
The Anchilly Carel RITCUSRG02 RITTAL Operation Panel is a compact control unit featuring a digital display and intuitive buttons for temperature setting and mode selection. It is designed for panel mounting and includes necessary connections for integration into a control system.
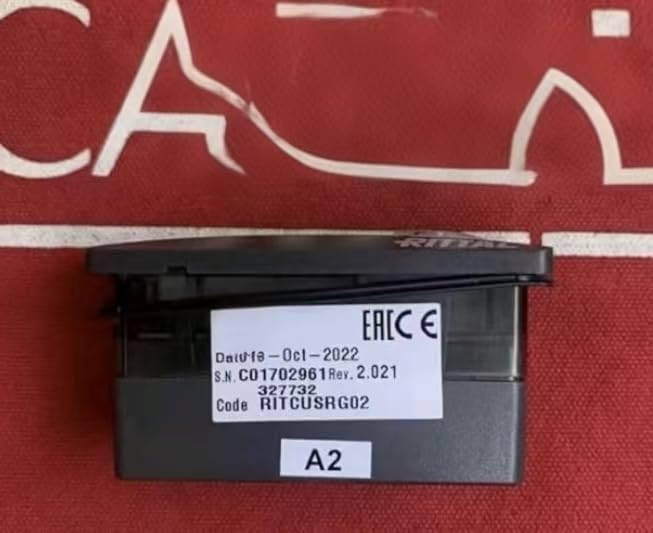
This image displays the Anchilly Carel RITCUSRG02 RITTAL operation panel from multiple angles. The front view shows the digital display and control buttons for temperature adjustment (Fahrenheit/Celsius) and settings. The bottom view reveals a label with the serial number, date (12-Aug-2017), and product code RITCUSRG02. The side view exposes the internal circuitry and connection points.
3.1 Components
- Digital Display: Shows current temperature and settings.
- Control Buttons: Includes buttons for adjusting temperature (up/down), switching between Fahrenheit (°F) and Celsius (°C), and accessing settings (set).
- Mounting Housing: Designed for secure panel installation.
- Connection Terminals: Located on the rear for power and sensor connections.
4. Setup
4.1 Mounting
- Prepare an appropriate opening in the control panel according to the device's dimensions.
- Insert the RITCUSRG02 unit into the opening from the front.
- Secure the unit using the provided mounting clips or screws from the rear of the panel.
4.2 Wiring
Refer to the wiring diagram provided with your specific system or consult a qualified electrician. General steps include:
- Ensure all power is disconnected before wiring.
- Connect the power supply wires to the designated terminals.
- Connect the temperature sensor to the appropriate sensor input terminals.
- Connect any output control wires (e.g., to a heater or cooler) to the relay output terminals.
- Double-check all connections for correctness and security.
5. Operating Instructions
5.1 Power On/Off
Once correctly wired, apply power to the system. The display on the RITCUSRG02 will illuminate, showing the current temperature.
5.2 Setting Temperature
- Press the SET button once. The display will show the current setpoint temperature.
- Use the Up or Down arrow buttons to adjust the setpoint to the desired temperature.
- Press the SET button again to confirm the new setpoint and exit the setting mode.
5.3 Changing Temperature Units (°F/°C)
To switch between Fahrenheit and Celsius, locate the dedicated °F/°C button (if present) or refer to advanced settings in the full product documentation for specific instructions.
6. Maintenance
6.1 Cleaning
To clean the device, wipe the display and housing with a soft, dry cloth. Do not use abrasive cleaners, solvents, or excessive moisture, as these can damage the unit.
6.2 Inspection
Periodically inspect the wiring connections for any signs of wear, corrosion, or looseness. Ensure the device is securely mounted in its panel. If any issues are found, disconnect power and address them promptly.
7. Troubleshooting
- No Display/No Power: Check the power supply and all wiring connections. Ensure the circuit breaker or fuse is not tripped.
- Incorrect Temperature Reading: Verify the temperature sensor is correctly connected and not damaged. Ensure the sensor is placed in an appropriate location for accurate readings.
- Control Output Not Activating: Check the setpoint temperature and ensure it is outside the deadband. Verify wiring to the controlled device (e.g., heater/cooler).
- Device Not Responding: Try cycling the power to the unit. If the issue persists, consult the manufacturer's support.
8. Specifications
| Feature | Detail |
|---|---|
| Brand | Anchilly |
| Model Number | RITCUSRG02 |
| Manufacturer | Anchilly |
| Manufacturer Part Number | RITCUSRG02 |
| UPC / GTIN | 751591288642 |
9. Warranty and Support
For warranty information, please refer to the documentation provided with your purchase or contact the seller directly. Extended warranty options may be available through third-party providers. For technical support, please contact Anchilly customer service or your authorized distributor.