Introduction
Thank you for choosing the Willsenton R200 Tube Integrated Amplifier. This manual provides essential information for the safe and optimal operation of your amplifier. Please read it thoroughly before use to ensure proper setup and to maximize your listening experience.
Important Safety Instructions
- Ventilation: Ensure adequate ventilation around the amplifier. Do not block any ventilation openings. Maintain a minimum clearance of 10 cm (4 inches) around the unit.
- Power Source: Connect the amplifier only to the specified power supply voltage (~115V±5% (50Hz)).
- Moisture: Do not expose the amplifier to rain, moisture, or excessive humidity. Keep liquids away from the unit.
- Heat: Avoid placing the amplifier near heat sources such as radiators, heat registers, stoves, or other heat-producing apparatus.
- Vacuum Tubes: Vacuum tubes operate at high temperatures. Avoid touching them during operation or immediately after powering off. Allow sufficient time for cooling.
- Servicing: Do not attempt to service this product yourself. Refer all servicing to qualified service personnel.
- Grounding: Ensure the power cord is properly grounded.
Product Overview
The Willsenton R200 is a tube integrated amplifier designed for high-fidelity audio reproduction, featuring both speaker outputs and a dedicated headphone amplifier. It utilizes a pure gallbladder and hand-made tent welding construction for optimal sound quality.
Front Panel Controls
The front panel provides access to essential controls for volume adjustment, input selection, and headphone output.

Front view of the Willsenton R200 amplifier with vacuum tubes illuminated, showing volume, input selector, and headphone jack.
Rear Panel Connections
The rear panel houses all input and output connections for your audio sources and speakers.

Rear panel of the Willsenton R200 amplifier, showing input terminals (CD, AUX1, AUX2), speaker output terminals (4Ω, 8Ω), AC power input, and Bluetooth antenna.
Vacuum Tubes
The R200 utilizes a specific configuration of vacuum tubes for its preamp and power amplification stages:
- Preamp Stage: One 12AX7 and two 6N1 vacuum tubes.
- Power Amplification Stage: Four 5881 vacuum tubes for AB1 class push-pull amplification.
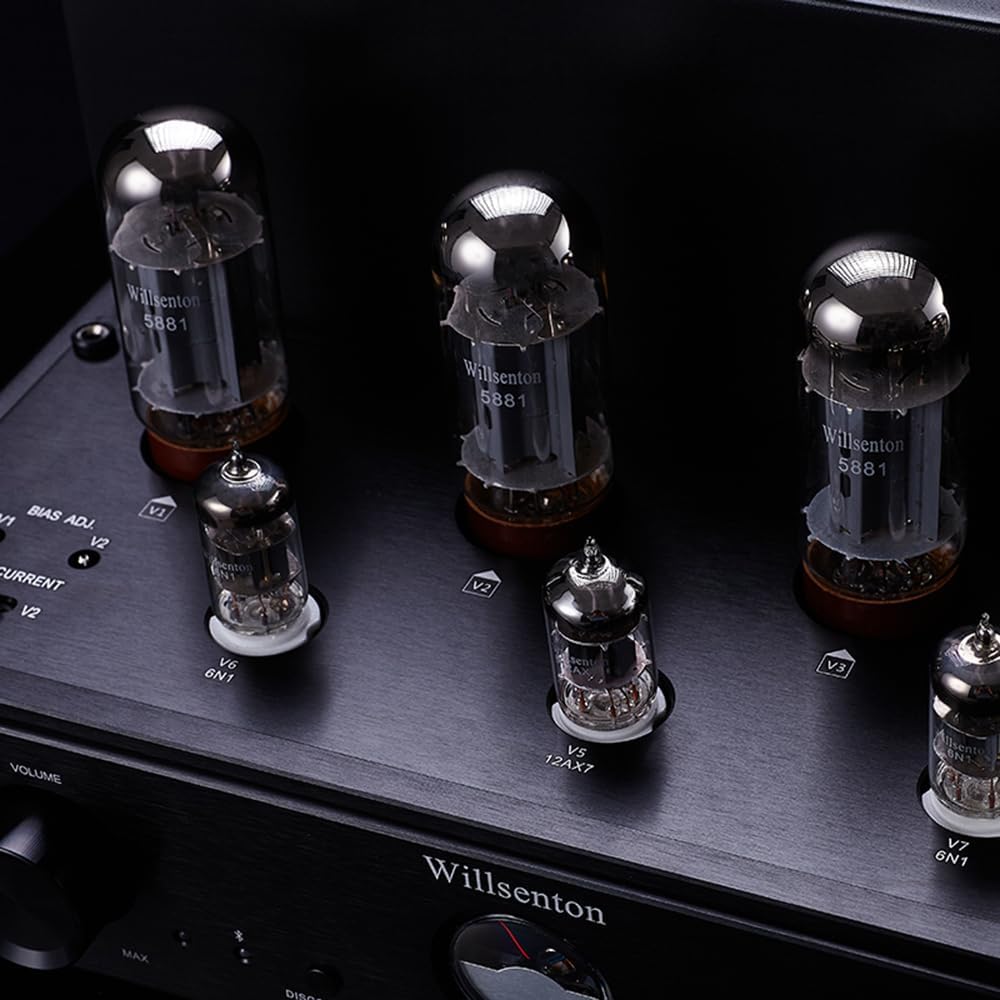
Close-up view of the vacuum tubes and the BIAS ADJ current display meter on the Willsenton R200 amplifier.
Setup Guide
1. Unpacking
- Carefully remove the amplifier and all accessories from the packaging.
- Inspect the unit for any signs of damage during transit.
- Retain the original packaging for future transport or storage.
2. Tube Installation
The vacuum tubes may be shipped separately or require careful installation. Handle tubes by their bases, avoiding contact with the glass. Align the pins with the sockets and gently push down until seated firmly.
3. Connecting Audio Sources
Connect your audio sources (CD player, DAC, etc.) to the appropriate RCA input terminals on the rear panel (CD, AUX1, AUX2).
4. Connecting Speakers
Connect your speakers to the corresponding 4Ω or 8Ω output terminals on the rear panel. Ensure correct polarity (+ to + and - to -) for each speaker.
5. Connecting Headphones
Plug your headphones into the 6.35mm (1/4 inch) headphone jack on the front panel.
6. Power Connection
Connect the provided power cord to the AC input on the rear panel and then to a suitable wall outlet.
Operating Instructions
1. Powering On/Off
Press the power switch on the front panel to turn the amplifier on or off. Allow a brief warm-up period for the tubes to stabilize after powering on.
2. Input Selection
Use the 'Selector' knob on the front panel to choose your desired audio input (CD, AUX1, AUX2, BT).
3. Volume Control
Adjust the 'Volume' knob on the front panel to control the output level. Start with a low volume and gradually increase to a comfortable listening level.
4. Bluetooth Pairing
- Select 'BT' as the input source using the selector knob.
- On your Bluetooth device, search for available devices and select 'Willsenton R200'.
- Once paired, audio from your device will stream wirelessly to the amplifier.
5. BIAS Adjustment and Monitoring
The R200 features an external independent BIAS ADJ current display meter. This allows you to monitor and adjust the bias of the power tubes, ensuring they operate at optimal conditions. Refer to the specific instructions provided with the BIAS adjustment tool for precise calibration. Regular monitoring helps reduce tube damage and extends their lifespan.
Maintenance
Cleaning
Wipe the amplifier's exterior with a soft, dry cloth. Do not use liquid cleaners or abrasive materials. Ensure the unit is powered off and unplugged before cleaning.
Tube Care and Replacement
Vacuum tubes have a finite lifespan. If you notice a degradation in sound quality or a tube fails, replacement may be necessary. Always replace tubes with compatible types. Consult a qualified technician if you are unsure about tube replacement procedures.
Troubleshooting
- No Power: Check the power cord connection and the wall outlet. Ensure the power switch is in the 'On' position.
- No Sound: Verify that the correct input source is selected. Check all audio cable connections. Ensure speakers or headphones are properly connected. Confirm volume is not set to minimum.
- Distorted Sound: Check speaker connections for correct polarity. Ensure input source signal is not overdriven. Inspect vacuum tubes for proper seating or signs of failure. Adjust BIAS if necessary.
- Bluetooth Connection Issues: Ensure the amplifier is in Bluetooth pairing mode. Check that your device's Bluetooth is enabled and within range. Try unpairing and re-pairing the device.
If problems persist, consult a qualified service technician.
Technical Specifications
| Feature | Specification |
|---|---|
| FTC Rated Output Power | 20W+20W (8Ω, 20Hz-20KHz, THD 1%) |
| Output Power Rating (Non-FTC) | 30W+30W |
| Frequency Response | 10Hz-42KHz (±1.5dB) |
| Harmonic Distortion | 0.2% (1W/1kHz, rated output power less than 5%) |
| Signal-to-Noise Ratio | 90dB (A weight) |
| Input Sensitivity | 260mV |
| Input Impedance | 100kΩ |
| Input Terminals | CD, AUX1, AUX2, BTH |
| Speaker Output Impedance | 4Ω, 8Ω |
| Headphone Output Impedance | 30Ω-300Ω |
| Power Supply Voltage | ~115V±5% (50Hz) |
| Dimensions (WxDxH) | 390 x 260 x 215mm (15.35 x 10.24 x 8.46 inches) |
| Vacuum Tubes Used | 12AX7x1, 6N1x2, 5881x4 |
| Net Weight | 16.5 kg (36.38 lbs) |
| Power Consumption | 260W |
| Bluetooth Chip | Qualcomm QCC3034 |
| Bluetooth Audio Formats | aptX, aptX HD, aptX Low Latency, SBC, AAC |
| Bluetooth Transmission Distance | Effective range of 10 meters |
| Bluetooth Specifications | V5.0 |
What's Included
The Willsenton R200 package typically includes:
- Willsenton R200 Tube Integrated Amplifier
- Full set of Vacuum Tubes (pre-installed or for user installation)
- Tube Cage
- Power Cord
- Remote Control


