Introduction
This manual provides detailed instructions for the installation, operation, and maintenance of your Marhynchus Kitchen Sink Drain Kit. Designed for double bowl sinks, this kit offers an odor-proof and leak-proof solution for your kitchen drainage needs. Please read these instructions carefully before beginning installation to ensure proper function and longevity of the product.
Product Components
The Marhynchus Kitchen Sink Drain Kit includes the following components:
- 2 x Drain Strainer
- 1 x Open Lid Trash Can (for debris collection)
- 1 x Drain Interface
- 1 x Overflow Pipe
- 2 x Drain Pipe
- 1 x Overflow Joint
- 1 x Tee Connector
- 1 x Silicone Gasket

Image: Labeled diagram of the drain kit components and their typical installation points under a double sink.
Setup and Installation
Follow these steps for proper installation of your sink drain kit. Ensure all components are present before starting.
- Prepare the Sink: Ensure your double bowl sink is clean and free of debris around the drain openings. Remove any existing drain components.
- Install Drain Strainers: Place a silicone gasket under each drain strainer and insert them into the sink drain openings. Secure them from underneath the sink using the provided fasteners.
- Connect Overflow Pipe: Attach the overflow pipe to the overflow outlet on one of the sink bowls. Connect the other end to the overflow joint.
- Assemble Main Drain Body: Connect the two drain strainers to the main drain body using the drain interfaces. Ensure all connections are tight and sealed with silicone gaskets.
- Attach Tee Connector and Drain Pipes: Connect the Tee Connector to the main drain body. Attach the two flexible drain pipes to the Tee Connector. One pipe will lead to the wall drain, and the other will connect to the open lid trash can (if applicable).
- Install Open Lid Trash Can: Integrate the open lid trash can component into the drain pipe assembly. This component is designed to collect larger debris and prevent clogs.
- Connect to Wall Drain: Extend the main drain pipe to connect to your household's main drainage system. Ensure a secure and leak-free connection.
- Test for Leaks: Once all connections are made, run water into both sink bowls and check thoroughly for any leaks at all connection points. Tighten any loose connections as needed.
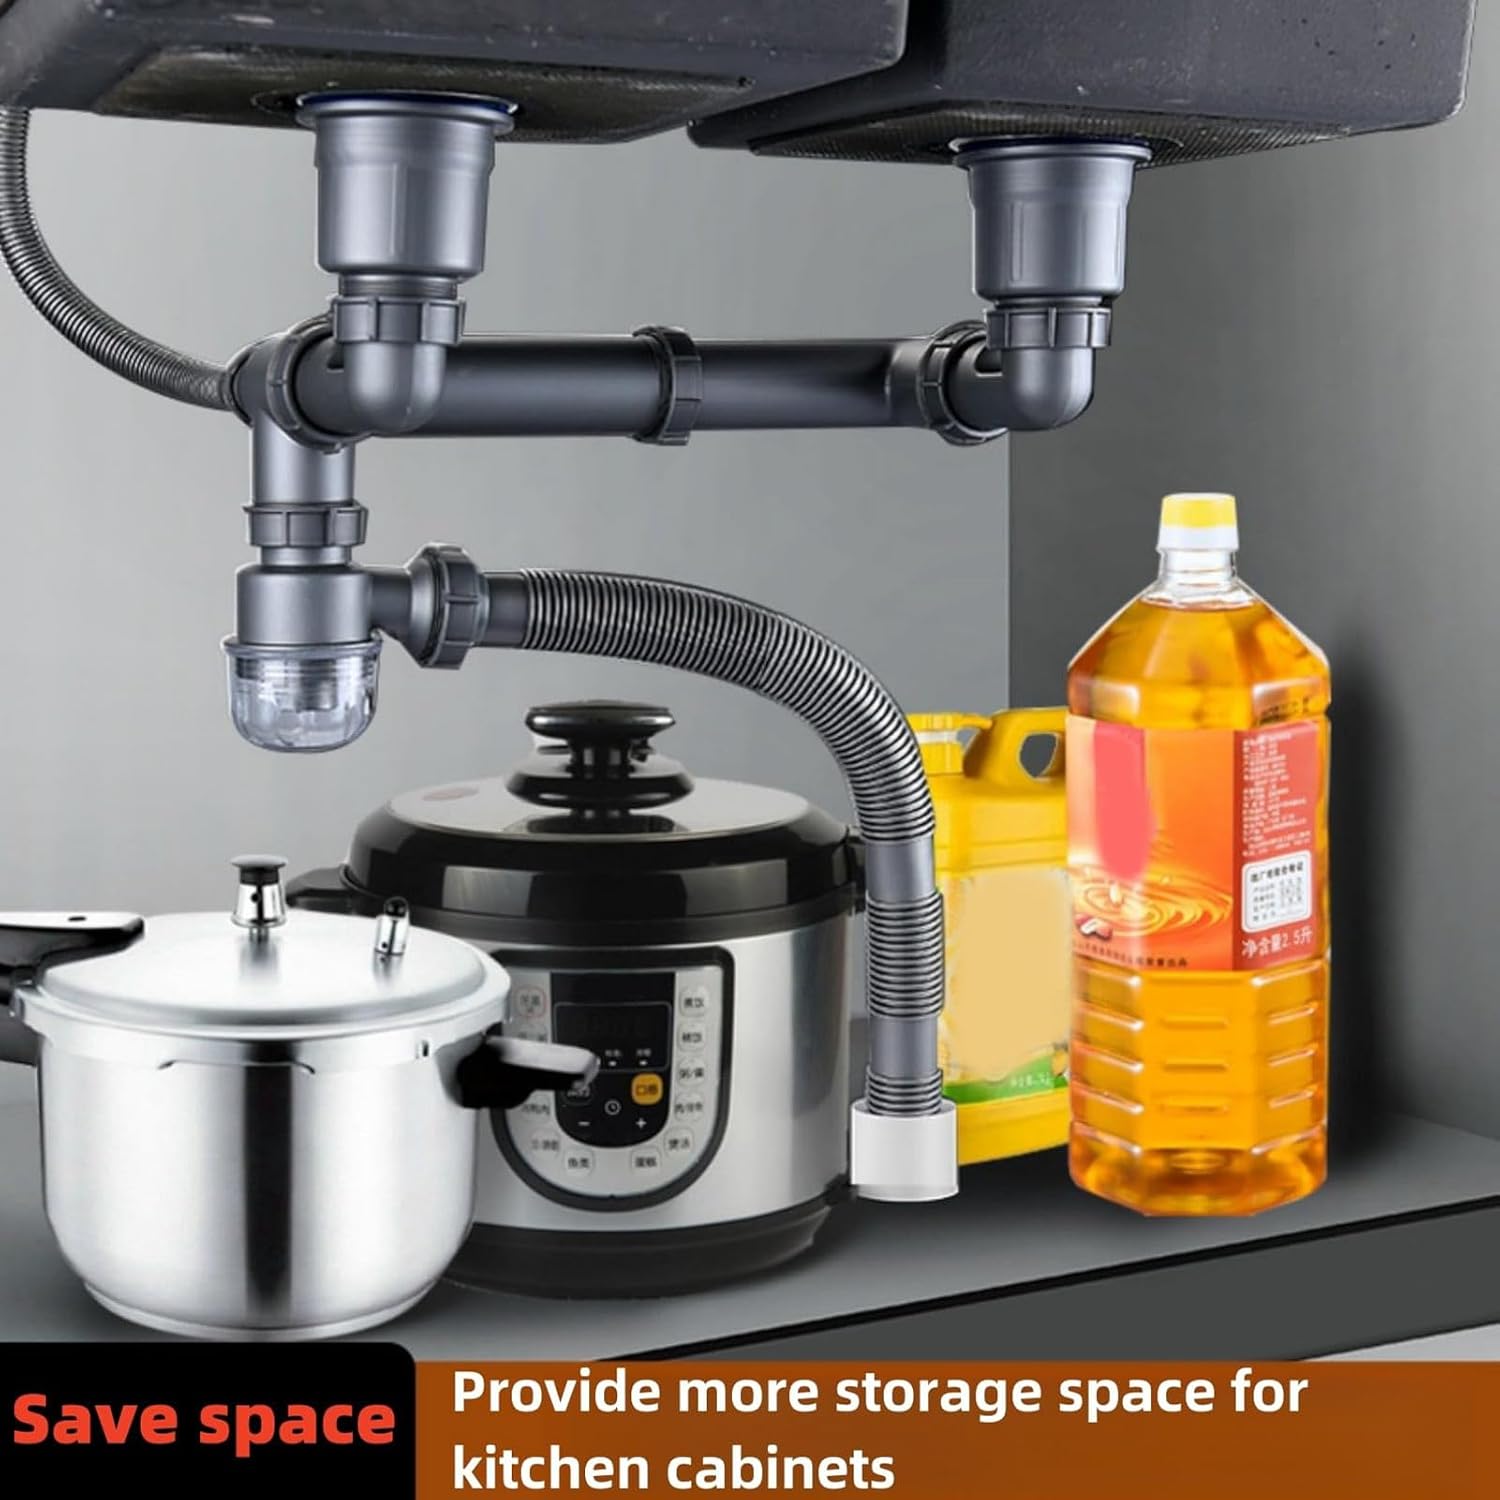
Image: The installed drain kit demonstrating its compact design under a kitchen cabinet, allowing for more storage space.

Image: Illustration of the left and right telescopic range (11.8-20 inches) and front and rear extension range (7.8-9.5 inches) for flexible installation.
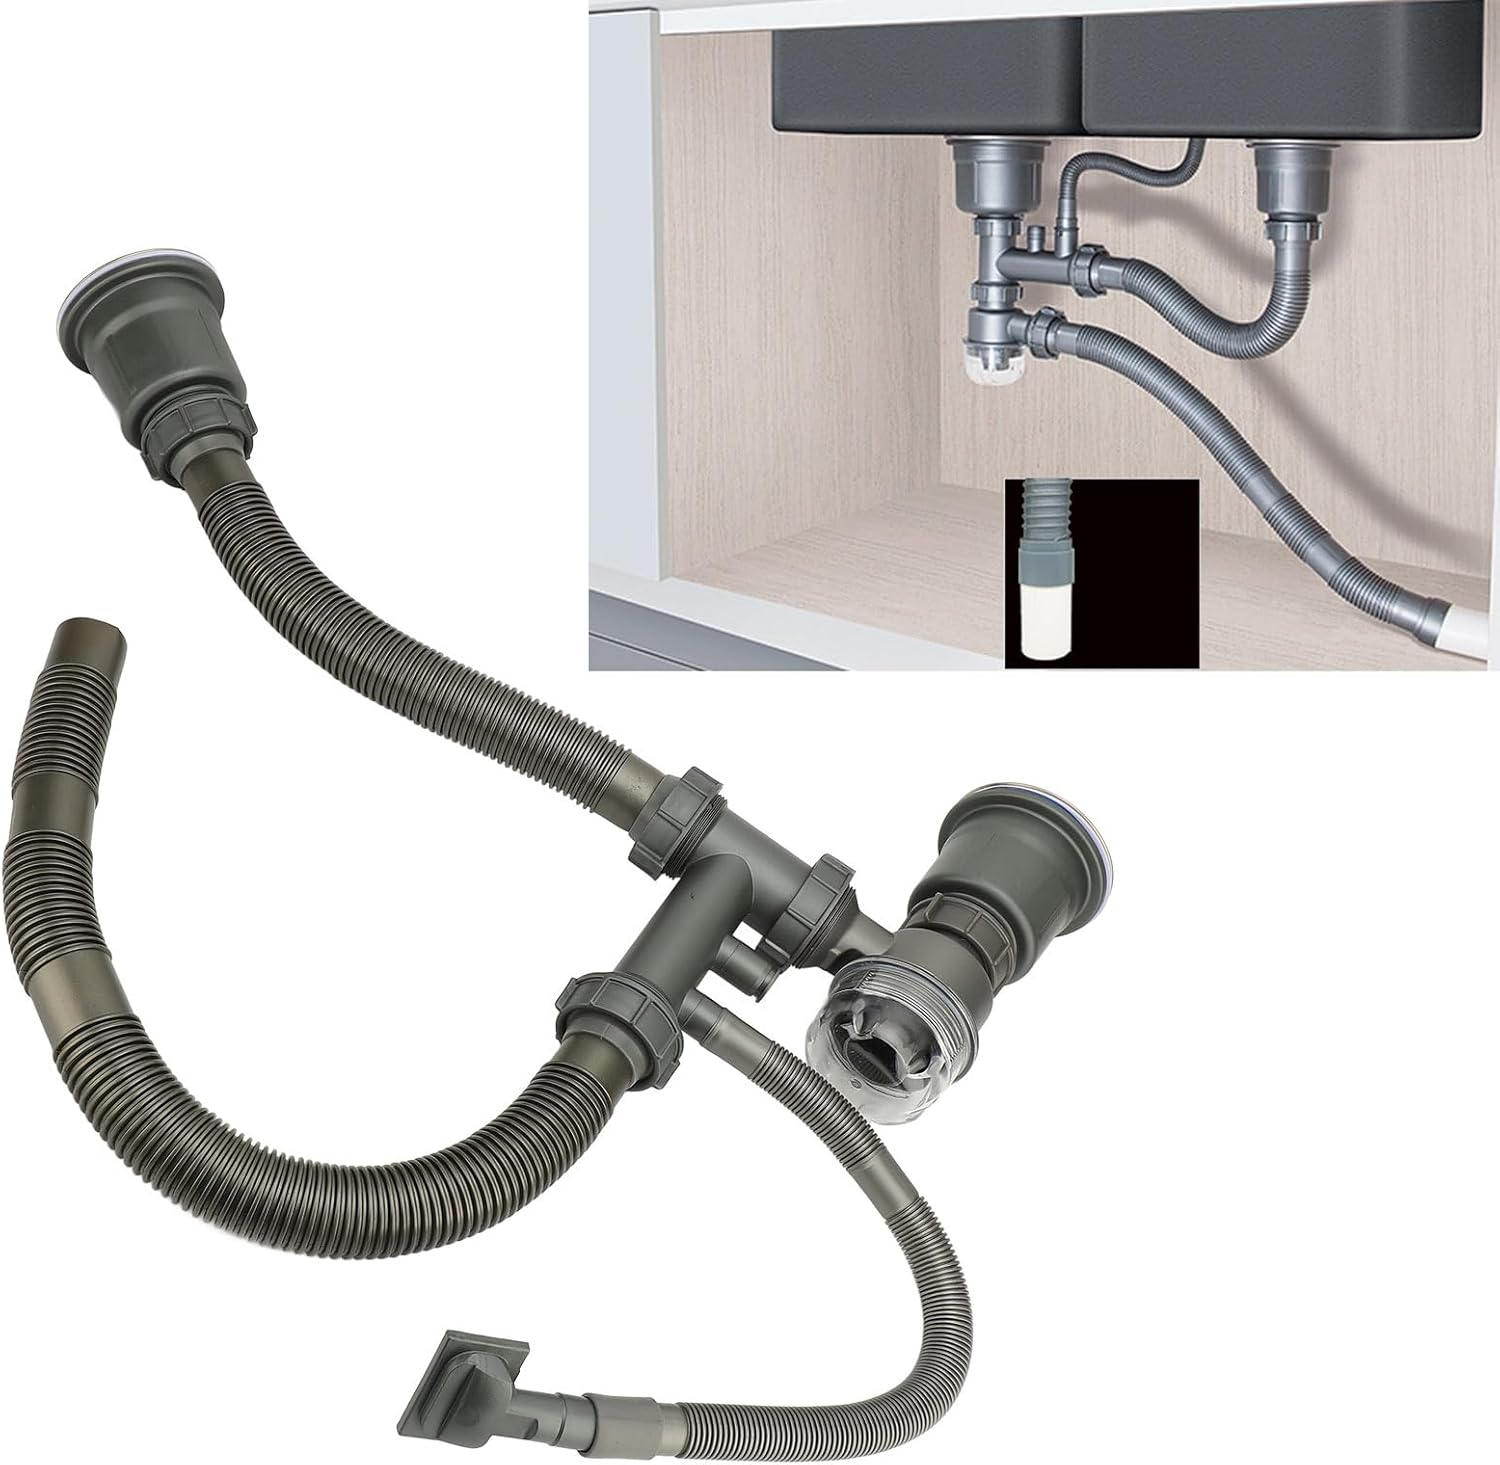
Image: Close-up showing the adjustable features of the drain kit, including forward and backward expansion, left and right expansion, and 360-degree rotation for versatile fitting.
Operation
Once installed, the Marhynchus Kitchen Sink Drain Kit operates automatically to manage wastewater from your double bowl sink. The integrated open lid trash can collects food particles and debris, preventing them from entering the main drainage system and causing clogs. The odor-proof design helps maintain a fresh kitchen environment.

Image: Detailed view of the drain kit's anti-clog and anti-odor mechanism, featuring a visible water cup for easy inspection and cleaning of collected debris.
Maintenance
Regular maintenance ensures the optimal performance and longevity of your drain kit.
- Clean the Trash Can: Periodically empty and clean the open lid trash can to remove collected food particles and debris. This prevents blockages and odors.
- Inspect for Leaks: Regularly check all connections for any signs of leaks. Tighten fittings if necessary.
- Clear Blockages: If water drains slowly, check the drain strainers and the open lid trash can for blockages. Clear any obstructions carefully.
- Avoid Harsh Chemicals: Do not use harsh chemical drain cleaners, as they can damage the PP and metal components. Use natural solutions like baking soda and vinegar for minor clogs.
Troubleshooting
| Problem | Possible Cause | Solution |
|---|---|---|
| Water leaking from connections | Loose connections or improperly seated gaskets. | Tighten all connections. Ensure silicone gaskets are correctly positioned. Re-seat components if necessary. |
| Slow drainage | Clog in the drain strainer, open lid trash can, or drain pipes. | Remove and clean the drain strainers and the open lid trash can. If the clog persists, inspect the flexible drain pipes for obstructions. |
| Unpleasant odors | Accumulation of food waste in the trash can or a dry P-trap (less likely with this design). | Clean the open lid trash can thoroughly. Ensure there is water in the trap section of the drain to block odors. |
| Difficulty fitting the kit | Incorrect adjustment of telescopic or rotational components. | Utilize the kit's adjustable features (telescopic range, 360° rotation) to achieve the correct fit for your sink configuration. Refer to installation images for guidance. |
| Damage to components | Excessive force during installation or exposure to extreme conditions. | Ensure careful handling during installation. The kit is designed for temperatures up to 212°F (100°C). Replace any damaged components. |
Specifications
- Item Type: Sink Drain Kit
- Material: Premium PP (Polypropylene), Metal
- Weight: Approximately 920g / 32.5oz (2.23 pounds)
- Product Dimensions: 14.56 x 12.59 x 5.11 inches
- Model Number: Marhynchus3tnik7a5y8
- Temperature Resistance: Up to 212°F (100°C)
- Compatibility: Universal fit for most kitchen sinks, especially double bowl configurations.

Image: Technical drawing showing key dimensions of the drain kit components in both millimeters and inches for precise planning.
Warranty and Support
For warranty information or technical support regarding your Marhynchus Kitchen Sink Drain Kit, please refer to the product packaging or contact Marhynchus customer service directly. Keep your purchase receipt for warranty claims.