
1. Introduction
Welcome to the user manual for your LOKLNEYK H610 S4 Motherboard. This guide provides detailed instructions for installation, operation, maintenance, and troubleshooting to ensure optimal performance and longevity of your system. Please read this manual thoroughly before beginning installation.
2. Setup
2.1. Package Contents
Verify that all components are present in your motherboard package:
- LOKLNEYK H610 S4 Motherboard
- I/O Shield
- SATA Data Cables (quantity may vary)
- User Manual (this document)
- Driver CD/USB (or download instructions)
2.2. Motherboard Layout
Familiarize yourself with the various components and connectors on the motherboard. Refer to the diagram below for a detailed overview of the H610 S4 motherboard's key areas.

Figure 1: Labeled diagram of the LOKLNEYK H610 S4 Motherboard, highlighting CPU socket, RAM slots, PCIe slots, M.2 slots, SATA ports, and various headers.
2.3. Installation Steps
Follow these steps for proper installation of your motherboard and components:
- Prepare the Chassis: Install the I/O shield into the rear opening of your computer case.
- Install the Motherboard: Carefully place the motherboard into the chassis, aligning it with the standoffs. Secure it with screws.
- CPU Installation (LGA 1700):
- Open the CPU socket lever and protective cover.
- Align the CPU's triangular mark with the mark on the socket.
- Gently place the CPU into the socket. Do not force it.
- Close the lever to secure the CPU.
- CPU Cooler Installation: Install your CPU cooler according to its manufacturer's instructions, ensuring proper thermal paste application.
- RAM Installation (DDR4):
- Open the clips on both ends of the DDR4 memory slots.
- Align the memory module's notch with the slot's key.
- Press down firmly on both ends of the module until the clips snap into place.
- Storage Installation (NVMe M.2 / SATA):
- For M.2 SSDs, insert the drive into the M.2 slot and secure it with the provided screw.
- For SATA drives, connect SATA data cables to the motherboard's SATA ports and to your drives. Connect power cables from your power supply to the drives.
- PCIe Card Installation: Insert your graphics card or other PCIe expansion cards into the appropriate PCIe slots and secure them.
- Power Supply Connections: Connect the 24-pin ATX power connector and the 8-pin CPU power connector from your power supply to the motherboard.
- Front Panel Connections: Connect the front panel headers (power button, reset button, USB ports, audio jacks, LED indicators) to the corresponding pins on the motherboard. Refer to the motherboard layout diagram (Figure 1) for pin locations.
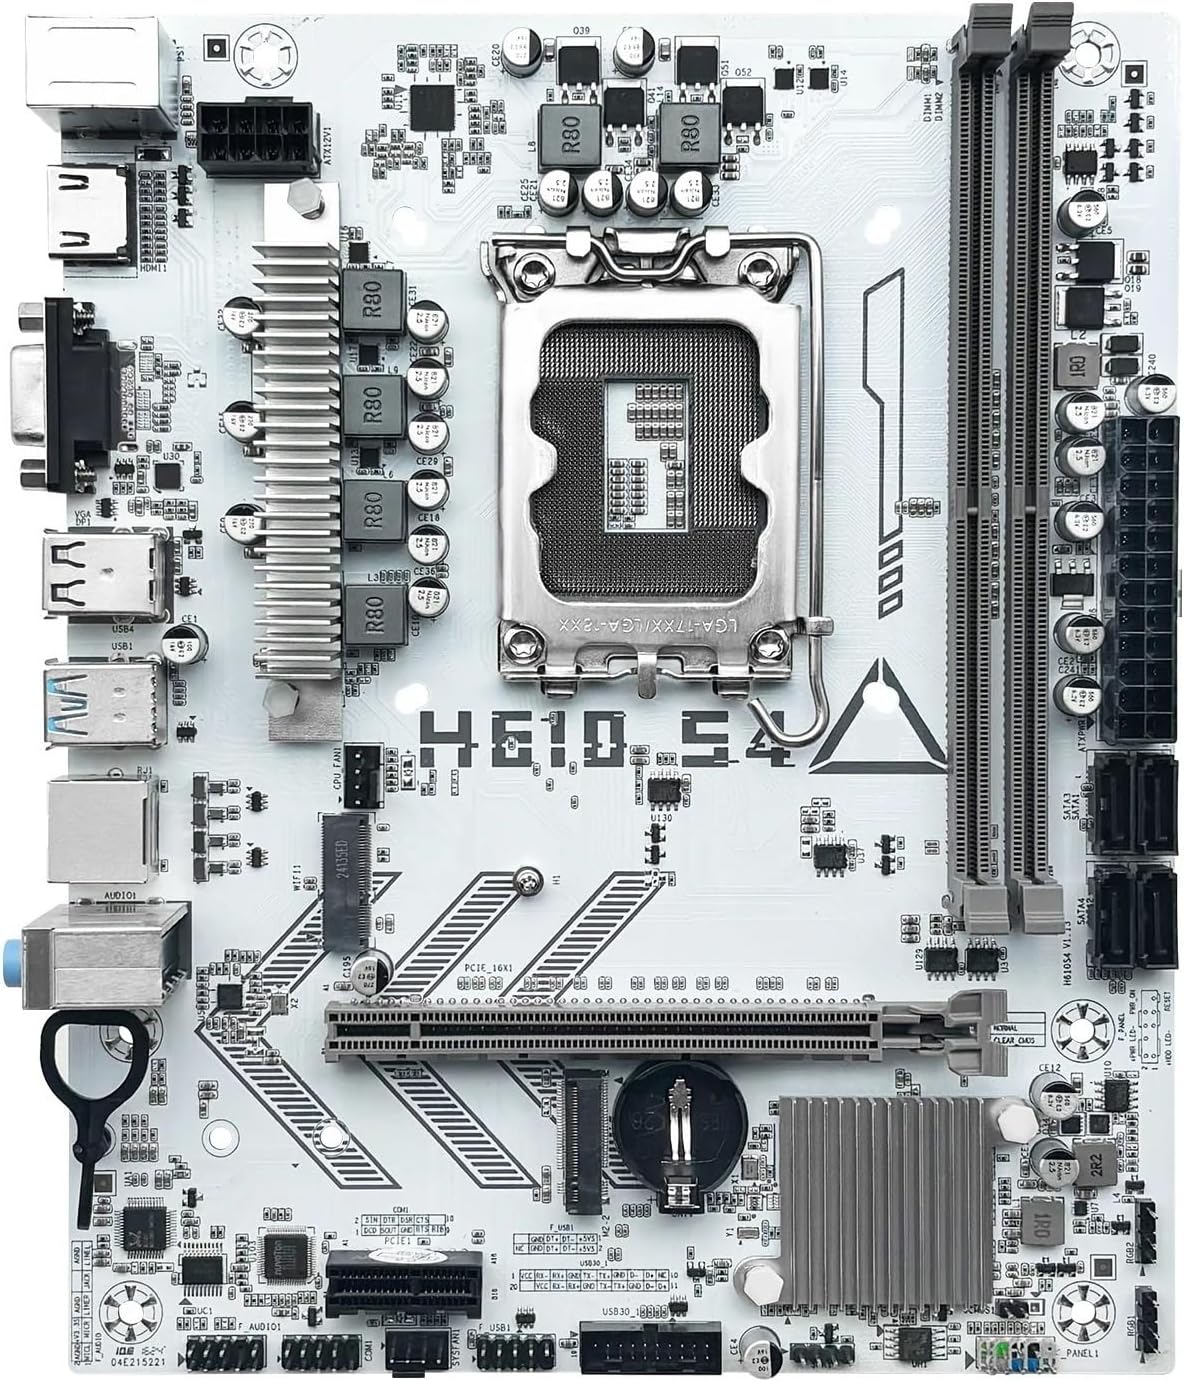
Figure 2: Overview of the LOKLNEYK H610 S4 Motherboard, showing the general layout of components.
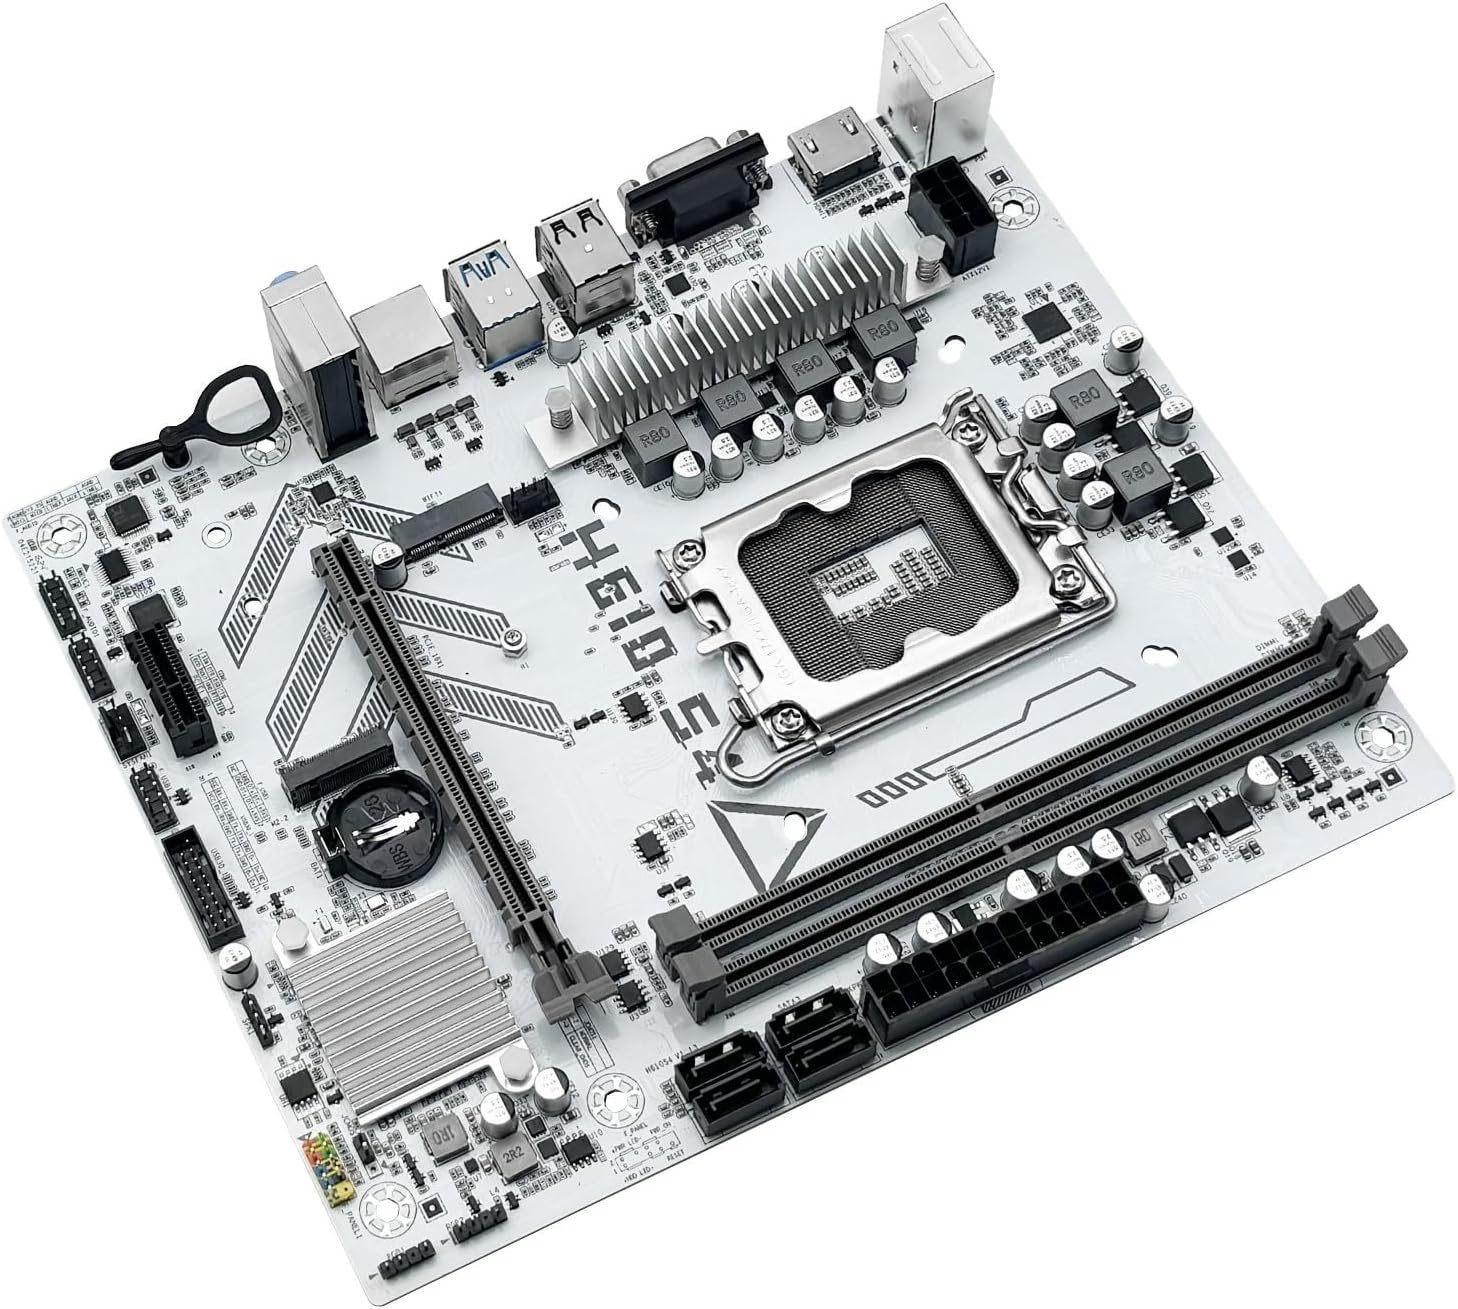
Figure 3: Rear I/O panel connectors and typical accessories like the I/O shield and SATA cables.
3. Operating Instructions
3.1. First Boot
After completing all hardware installations, connect your monitor, keyboard, and mouse. Power on your system. The system should display the BIOS/UEFI splash screen. If not, check all power connections and component seating.
3.2. BIOS/UEFI Configuration
To enter the BIOS/UEFI setup utility, press the DEL or F2 key during the initial boot sequence. Here you can configure:
- Boot order for your operating system drive.
- Date and time settings.
- Memory profiles (e.g., XMP for DDR4).
- Fan speed controls.
- SATA mode (AHCI/RAID).
3.3. Driver Installation
After installing your operating system, it is crucial to install the latest drivers for your motherboard components. These include:
- Chipset drivers
- LAN (Ethernet) drivers
- Audio drivers
- Graphics drivers (for integrated graphics or discrete GPU)
Drivers can typically be found on the LOKLNEYK official website or on the provided driver media.
4. Maintenance
4.1. Cleaning
Regular cleaning helps maintain optimal performance and extends the lifespan of your motherboard. Use compressed air to remove dust from heatsinks, fans, and other components. Ensure the system is powered off and unplugged before cleaning.
4.2. BIOS/UEFI Updates
Periodically check the LOKLNEYK website for updated BIOS/UEFI versions. Updates can provide improved compatibility, stability, and new features. Follow the specific instructions provided by LOKLNEYK for updating the BIOS/UEFI to avoid system damage.
5. Troubleshooting
This section provides solutions to common issues you might encounter.
5.1. Common Issues and Solutions
- No Power:
- Check if the power supply is connected correctly to the motherboard (24-pin ATX and 8-pin CPU).
- Ensure the power supply switch is in the 'ON' position.
- Verify front panel power button connection.
- No Display:
- Ensure the monitor cable is securely connected to the graphics card or motherboard (if using integrated graphics).
- Reseat the graphics card and RAM modules.
- Try booting with only one RAM stick.
- System Instability/Crashes:
- Check CPU and GPU temperatures.
- Ensure all drivers are up to date.
- Test RAM modules for errors.
- Boot Device Not Found:
- Verify that your storage drive (SSD/HDD) is properly connected.
- Check BIOS/UEFI settings for correct boot order and SATA mode.
- Ensure the operating system is correctly installed on the drive.
For more complex issues, consult the LOKLNEYK support website or a qualified technician.
6. Specifications
Below are the technical specifications for the LOKLNEYK H610 S4 Motherboard:
| Feature | Specification |
|---|---|
| CPU Socket | LGA 1700 |
| Compatible CPUs | Intel Core 12th, 13th, 14th Generation i3, i5 Processors |
| Chipset | Intel H610 |
| Memory Slots | 2 x DDR4 DIMM |
| Max Memory Capacity | 64 GB |
| Storage Interfaces | 2 x M.2 (NVMe 2280), 4 x SATA 3.0 |
| PCIe Slots | 1 x PCIe 4.0 x16, 1 x PCIe x1 |
| LAN | 1 x RJ45 Gigabit Ethernet |
| USB Ports | USB 3.0, USB 3.1 Gen1, USB 2.0 (Front & Rear) |
| Video Outputs | HDMI, VGA |
| Audio | Onboard Audio |
| Form Factor | Compact (180mm x 220mm) |

Figure 4: LOKLNEYK H610 S4 Motherboard showing its physical dimensions.
7. Warranty and Support
7.1. Warranty Information
Please refer to the warranty card included with your product or visit the official LOKLNEYK website for detailed warranty terms and conditions. Keep your proof of purchase for warranty claims.
7.2. Technical Support
If you encounter any issues that cannot be resolved using this manual, please visit the LOKLNEYK support website for FAQs, driver downloads, and contact information for technical assistance.