
1. Introduction
Thank you for choosing the Omnitronic DRS-95 Internet Radio. This device offers a comprehensive audio experience, combining Internet radio, DAB+, FM radio, Bluetooth connectivity, and UPnP/DLNA media streaming. This manual provides essential information for safe operation, setup, and use of your DRS-95.
2. Safety Instructions
Please read these instructions carefully before operating the device. Keep this manual for future reference.
- Power Supply: Connect the device only to a grounded mains socket with the specified voltage (AC 230V, 50Hz). Ensure the power cord is not damaged.
- Moisture and Heat: Do not expose the device to rain, moisture, or excessive heat. Avoid placing it near heat sources or in direct sunlight.
- Ventilation: Ensure adequate ventilation. Do not block ventilation openings.
- Cleaning: Disconnect from power before cleaning. Use a dry, soft cloth. Do not use liquid cleaners.
- Servicing: Do not attempt to repair the device yourself. Refer all servicing to qualified personnel.
- Placement: Place the device on a stable, level surface. If rack-mounting, ensure proper support.
3. Product Overview
3.1 Front Panel
The front panel provides access to the main controls and display.
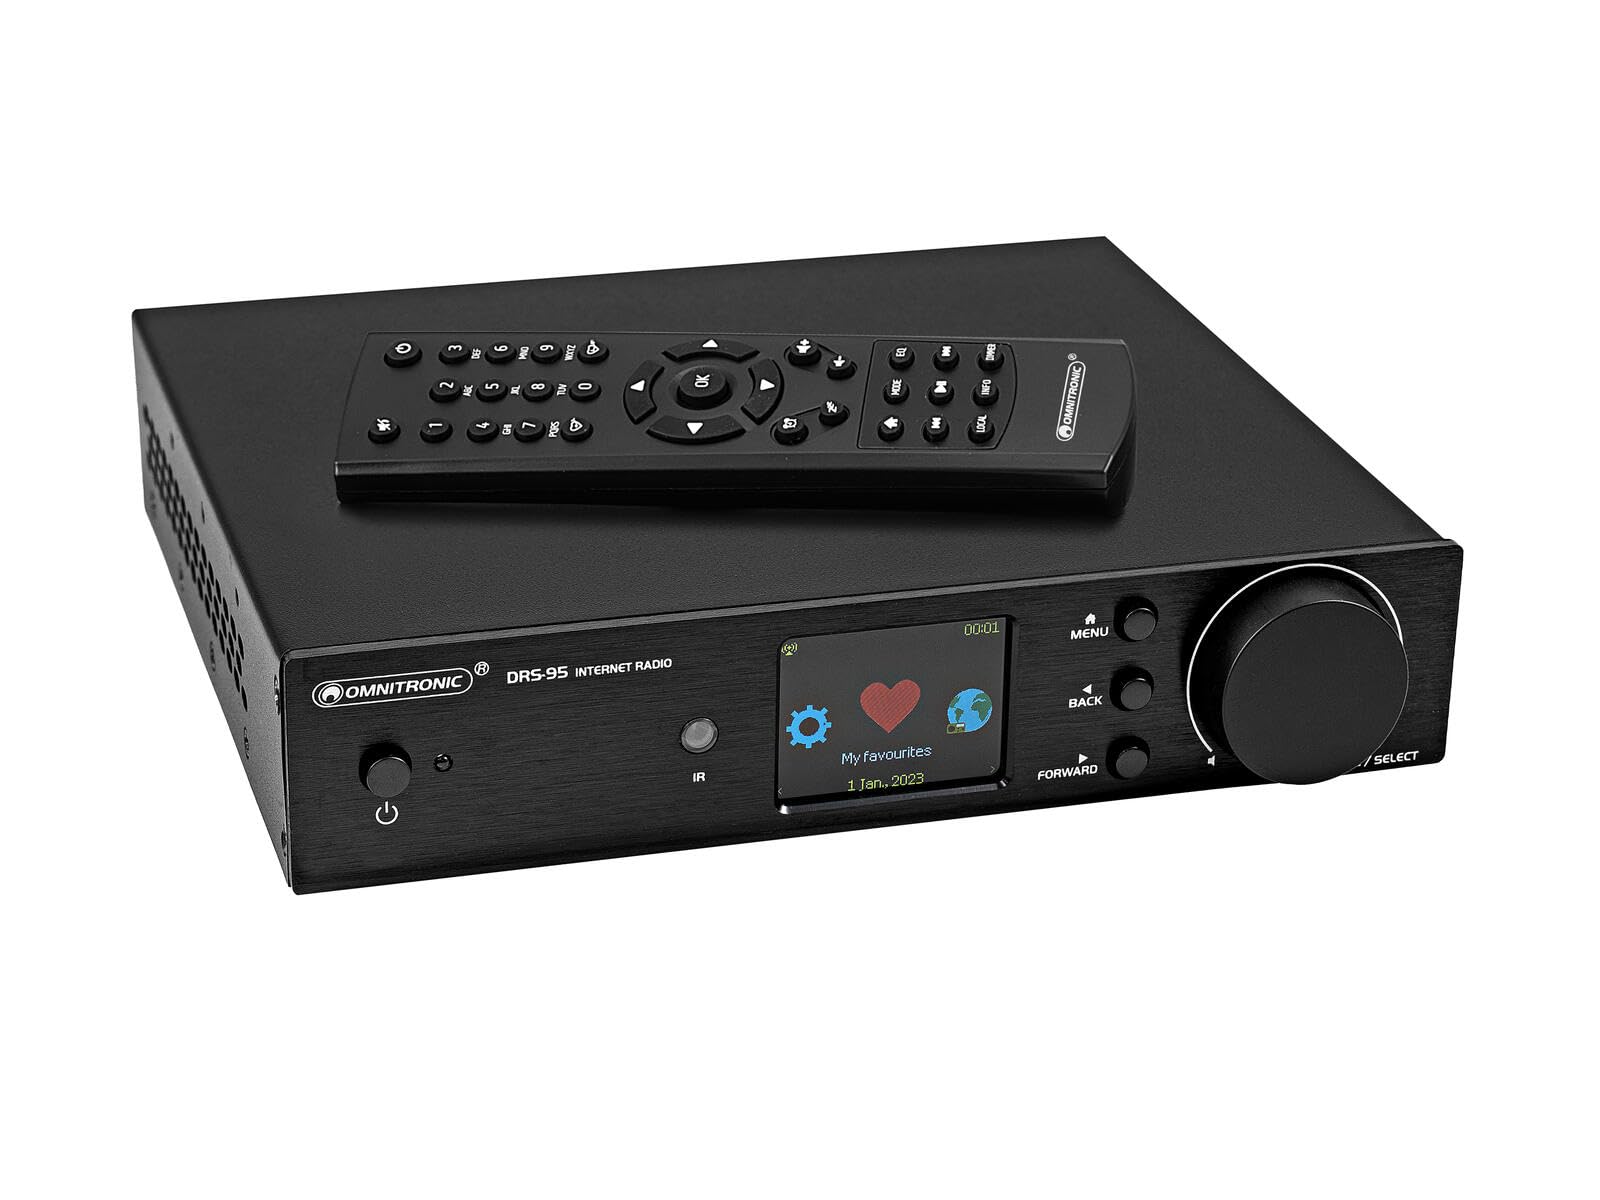
Image 1: Front view of the Omnitronic DRS-95, showing the power button, IR sensor, color TFT display, menu navigation buttons (MENU, BACK, FORWARD), and the large TUNE/SELECT rotary dial.
- Power Button: Press to turn the unit on or off.
- IR Sensor: Receives signals from the infrared remote control.
- TFT Display: Multicolor display showing station information, menus, and settings.
- MENU Button: Accesses the main menu or context-sensitive options.
- BACK Button: Returns to the previous menu or screen.
- FORWARD Button: Navigates forward in menus or lists.
- TUNE/SELECT Dial: Rotates to navigate through options or tune stations; press to select an item or confirm a setting.
3.2 Rear Panel
The rear panel houses all input and output connections.

Image 2: Rear view of the Omnitronic DRS-95, displaying the various connection ports including WiFi antenna, LAN, digital audio outputs (TOSLINK, Coaxial), analog line outputs (RCA), radio antenna, power switch, and AC input.
- WIFI ANTENNA: Connector for the included Wi-Fi antenna.
- LAN: Ethernet port for wired network connection.
- TOSLINK (Digital Out): Optical digital audio output.
- COAXIAL (Digital Out): Coaxial digital audio output.
- LINE OUT (RCA L/R): Analog stereo audio outputs for connecting to an amplifier or active speakers.
- RADIO ANTENNA: Connector for the included FM/DAB+ antenna.
- POWER Switch: Main power switch for the unit.
- AC INPUT: Power input for the mains cable.
4. Setup
4.1 Unpacking and Placement
- Carefully remove the DRS-95 from its packaging.
- Place the unit on a stable, level surface or install it into a 19-inch rack. Ensure sufficient space for ventilation around the unit.
4.2 Antenna Connections
- Wi-Fi Antenna: Screw the supplied Wi-Fi antenna onto the 'WIFI ANTENNA' connector on the rear panel.
- FM/DAB+ Antenna: Connect the supplied FM/DAB+ antenna to the 'RADIO ANTENNA' connector. Extend the antenna for optimal reception.
4.3 Audio Connections
Connect the DRS-95 to your audio system using one of the following methods:
- Analog Output: Connect the 'LINE OUT (RCA L/R)' jacks to the corresponding analog audio inputs on your amplifier or active speakers using RCA cables.
- Digital Optical Output: Connect the 'TOSLINK' port to an optical digital input on your amplifier or DAC using an optical cable.
- Digital Coaxial Output: Connect the 'COAXIAL' port to a coaxial digital input on your amplifier or DAC using a coaxial cable.
4.4 Power Connection
- Ensure the 'POWER' switch on the rear panel is in the OFF position.
- Connect the supplied power cord to the 'AC INPUT' on the rear panel and then to a grounded mains socket.
4.5 Network Connection
The DRS-95 requires an internet connection for Internet Radio and UPnP/DLNA features.
- Wi-Fi: After powering on, navigate to the network settings menu. Select 'Wireless Network' and follow the on-screen instructions to scan for available Wi-Fi networks, select yours, and enter the password.
- LAN (Wired): Connect an Ethernet cable from your router or network switch to the 'LAN' port on the rear panel. The device will automatically attempt to establish a wired connection.
5. Operating
5.1 Powering On/Off
Flip the 'POWER' switch on the rear panel to ON. Then, press the 'Power Button' on the front panel to turn the unit on. Press the 'Power Button' again to put it into standby mode. To fully power off, use the rear 'POWER' switch.
5.2 Basic Navigation
Use the 'TUNE/SELECT' dial to scroll through menu options and lists. Press the dial to select an item. Use the 'MENU' button to access the main menu and the 'BACK' button to return to the previous screen. The 'FORWARD' button can be used for quick navigation in some menus.
5.3 Internet Radio
Access thousands of radio stations and podcasts worldwide.
- From the main menu, select 'Internet Radio'.
- You can browse stations by genre, location, or search by name.
- Rotate the 'TUNE/SELECT' dial to highlight a station and press to play.
- To save a station as a favorite, navigate to the desired station and follow the on-screen prompt or remote control instructions.
5.4 DAB+ Radio
Enjoy high-quality digital radio broadcasts.
- From the main menu, select 'DAB+ Radio'.
- The unit will perform a scan for available DAB+ stations.
- Once scanning is complete, use the 'TUNE/SELECT' dial to browse the station list and press to select.
5.5 FM Radio
Tune into traditional FM broadcasts.
- From the main menu, select 'FM Radio'.
- Use the 'TUNE/SELECT' dial to manually tune or initiate an auto-scan for stations.
5.6 Bluetooth Connectivity
Stream audio wirelessly from your Bluetooth-enabled devices.
- From the main menu, select 'Bluetooth'. The DRS-95 will enter pairing mode.
- On your mobile device (smartphone, tablet), enable Bluetooth and search for available devices.
- Select 'Omnitronic DRS-95' from the list to pair.
- Once paired, you can play audio from your device through the DRS-95.
5.7 UPnP/DLNA Media Streaming
Stream media files from compatible devices on your local network.
- Ensure your media server (e.g., PC with media server software, NAS) is set up and running on the same network as the DRS-95.
- From the main menu, select 'Media Player' or 'UPnP/DLNA'.
- Browse your media server's content and select files to play.
5.8 System Settings
Access various settings to customize your DRS-95.
- Network: Configure Wi-Fi, view network status.
- Time/Date: Set time, date, and time zone, including summer/standard time.
- Display: Adjust brightness, backlight timeout.
- Equalizer: Select from various preset equalizer modes.
- Alarm/Timer: Set alarms and sleep timers.
- Software Update: Check for and install firmware updates.
- Factory Reset: Reset all settings to default.
6. Maintenance
6.1 Cleaning
Before cleaning, always disconnect the device from the mains power. Use a dry, soft cloth to wipe the exterior surfaces. Do not use abrasive cleaners, solvents, or chemical wipes, as these can damage the finish.
6.2 Software Updates
Periodically check for software updates via the system settings menu to ensure optimal performance and access to new features.
7. Troubleshooting
If you encounter issues, refer to the following common problems and solutions:
| Problem | Possible Cause | Solution |
|---|---|---|
| No power | Power cord disconnected; rear power switch off; front power button not pressed. | Check power cord connection; ensure rear power switch is ON; press front power button. |
| No sound | Volume too low; audio cables disconnected; incorrect input selected on amplifier. | Increase volume; check audio cable connections; select correct input on your amplifier. |
| No internet connection | Wi-Fi password incorrect; router issue; LAN cable disconnected. | Re-enter Wi-Fi password; restart router; check LAN cable connection; ensure Wi-Fi antenna is connected. |
| Poor DAB+/FM reception | Antenna not properly connected or positioned; weak signal. | Ensure radio antenna is fully connected and extended; try repositioning the antenna for better signal. |
| Bluetooth pairing issues | Device not in pairing mode; distance too far; other devices interfering. | Ensure DRS-95 is in Bluetooth pairing mode; move devices closer; disable Bluetooth on other nearby devices. |
8. Specifications
- Model: DRS-95
- Manufacturer: Omnitronic
- Connectivity: Wi-Fi, LAN (Ethernet), Bluetooth
- Tuners: Internet Radio, DAB+, FM
- Audio Outputs: TOSLINK (Optical Digital), Coaxial (Digital), RCA Line Out (Analog L/R)
- Display: Multicolor TFT
- Control: Front panel buttons, Jog dial, IR remote control
- Power Supply: AC 230V, 50Hz
- Power Consumption: 6W
- Weight: 5.5 kg
- Dimensions: 19-inch rack mountable, 1U height (48.3 cm)
- Bluetooth Range: Up to 20 m
- IR Remote Range: Up to 10 m
9. Warranty and Support
Omnitronic products are covered by a manufacturer's warranty. For specific warranty terms and conditions, please refer to the documentation provided with your purchase or contact your authorized dealer. For technical support or service inquiries, please contact your dealer or the Omnitronic customer service department.


