1. Product Overview
The CowWolf QQ-4G is a 4G LTE solar-powered security camera designed for outdoor use, eliminating the need for Wi-Fi connectivity. It features a dual-lens system providing a 360° panoramic view, 2K color night vision, and cellular connectivity with a built-in SIM card. Advanced PIR motion alerts, two-way audio, and IP66 weatherproofing ensure reliable surveillance in various environments.
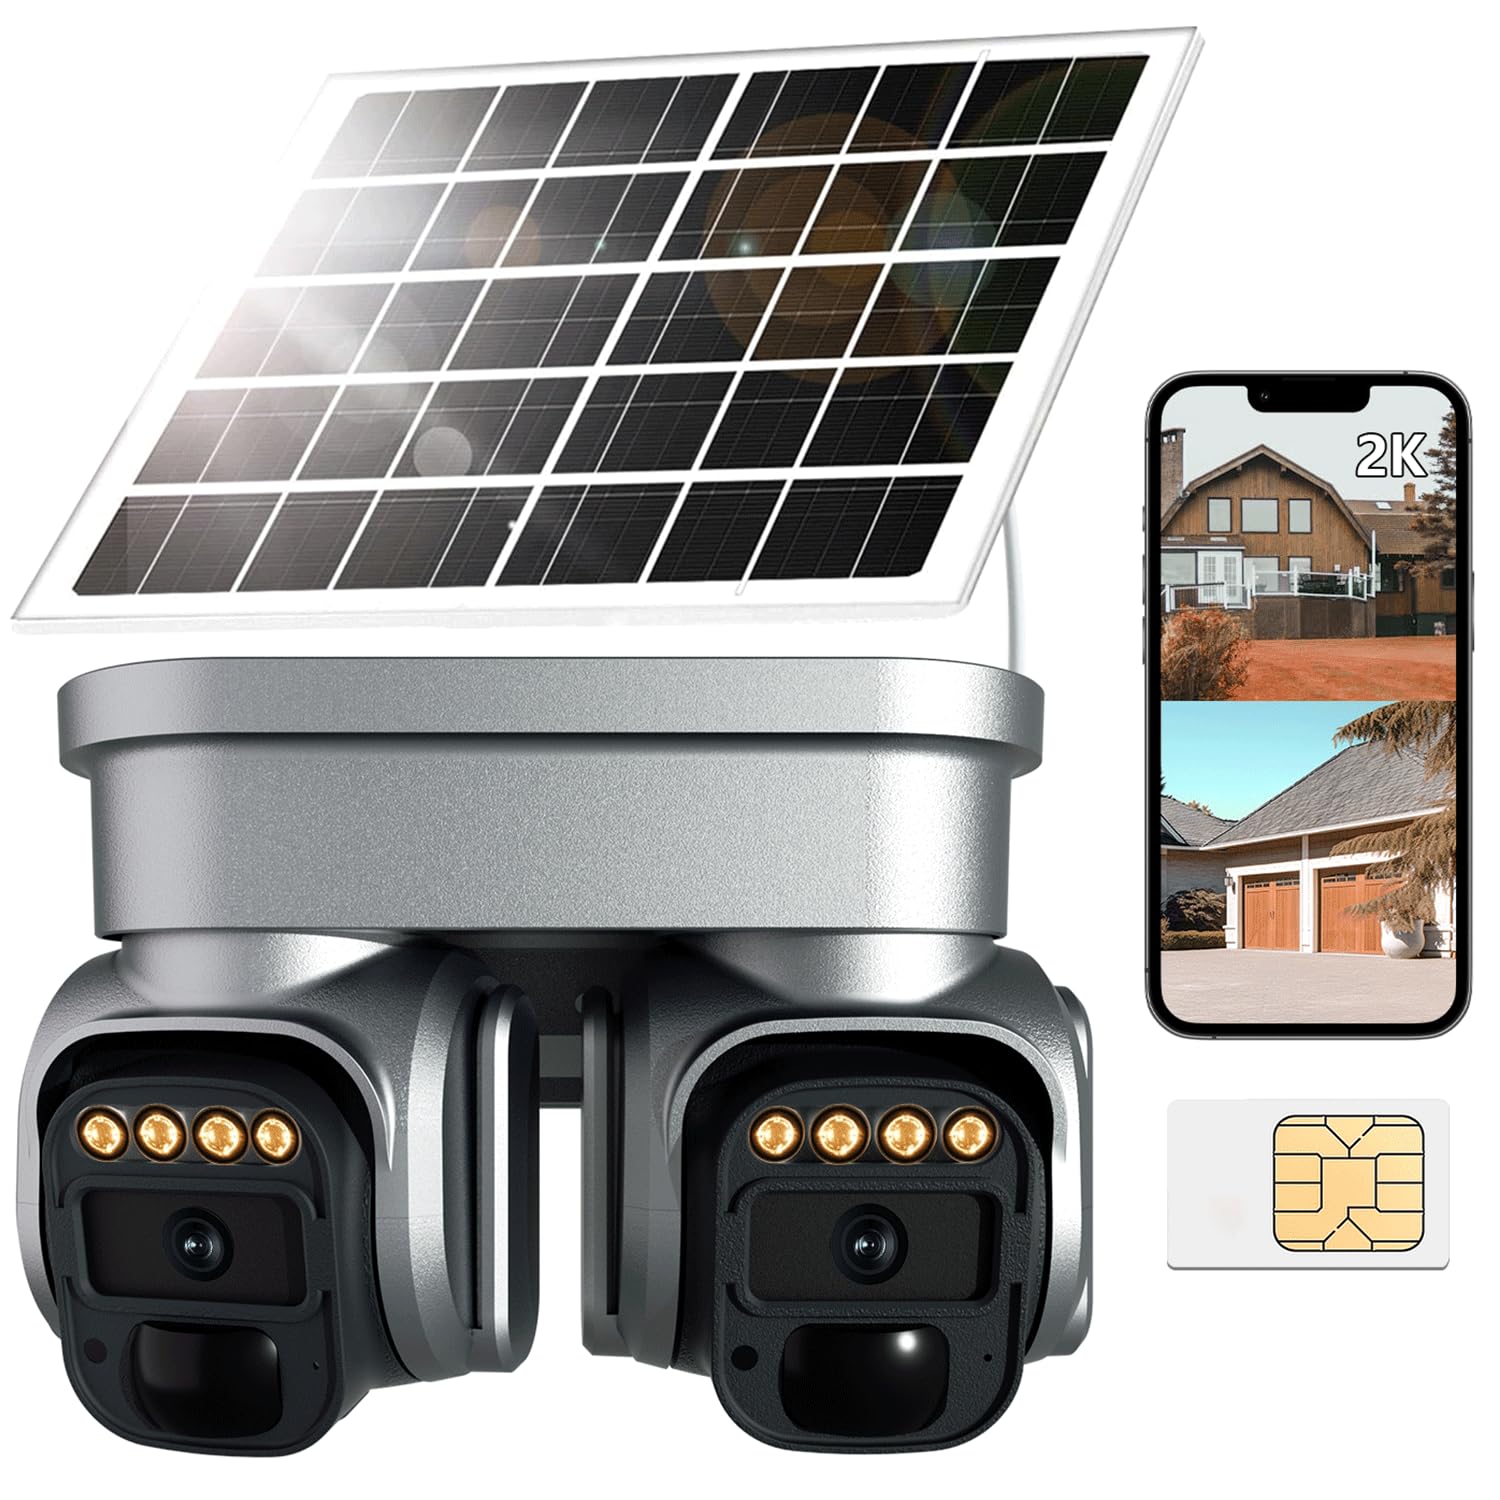
Image: The CowWolf QQ-4G camera unit with its integrated solar panel, designed for outdoor installation.
Key Features:
- 100% Wire-Free Solar Power: Equipped with a 6W high-capacity solar panel and 10400mAh rechargeable battery for continuous operation without external power or Wi-Fi.
- 4G LTE Cellular Connectivity: Operates in locations with cellular coverage, requiring no Wi-Fi. Includes a built-in SIM card.
- Dual-Lens 360° Panoramic Coverage & 2K Color Night Vision: Provides an ultra-wide 360° field of view and clear 2K resolution, with full-color night vision for low-light conditions.
- Smart PIR Motion Alerts & Real-Time Two-Way Talk: Detects human movement accurately, sends instant notifications, and allows remote communication via built-in microphone and speaker.
- IP66 Weatherproof: Built to withstand harsh outdoor conditions including rain, dust, heat, and cold.
2. What's in the Box
Please check the package contents upon unboxing to ensure all items are present:
- Camera body
- Charging Cable
- Mounting Screws
- Power Adapter
- User Manual (this document)
3. Setup Guide
3.1 Initial Charging
Before first use, fully charge the camera's internal battery using the provided power adapter and charging cable. Connect the power adapter to a standard electrical outlet and the charging cable to the camera's charging port. The charging indicator will show the status.
3.2 SIM Card Installation
The camera requires a 4G LTE cellular SIM card for connectivity. Insert the provided or purchased SIM card into the designated SIM card slot on the camera. Ensure the SIM card is inserted correctly according to the diagram on the camera or in the quick start guide.

Image: The camera unit, solar panel, SIM card, and a smartphone displaying the camera's app interface, illustrating the components for setup.
3.3 App Download and Account Setup
- Download the companion mobile application (e.g., 'iCam365' or similar, as indicated in product packaging) from your smartphone's app store (iOS or Android).
- Open the app and follow the on-screen instructions to create a new account or log in if you already have one.
- Add your camera to the app by scanning the QR code on the camera or manually entering its device ID. Follow the app's prompts to complete the pairing process.
3.4 Mounting the Camera
Select a suitable outdoor location for mounting. Ensure the solar panel receives ample direct sunlight throughout the day for optimal charging. Use the provided mounting screws to securely attach the camera to a wall or other stable surface. Adjust the camera's angle to achieve the desired viewing area.

Image: The camera mounted on an exterior wall, with its solar panel, shown enduring rainfall, highlighting its IP66 weatherproof rating.
4. Operating Instructions
4.1 Live View and Playback
Open the mobile app and select your camera to access the live view. You can pan, tilt, and zoom the camera remotely to adjust the viewing angle. Recorded footage can be accessed through the app's playback feature, typically stored on a Micro SD card (up to 128GB, not included) or cloud storage (subscription may be required).

Image: A smartphone displaying the camera's dual-lens view, with arrows indicating 360-degree pan and tilt capabilities.
4.2 Two-Way Audio
Utilize the two-way audio feature by tapping the microphone icon in the live view. This allows you to speak through the camera's built-in speaker and hear audio from the camera's microphone.

Image: A delivery driver interacting with the camera, illustrating the two-way audio communication feature.
4.3 Motion Detection and Alerts
The camera uses PIR (Passive Infrared) sensors for accurate human motion detection. Configure motion detection sensitivity and alert preferences within the app. You will receive instant push notifications on your smartphone when motion is detected.

Image: The camera detecting an individual at night, with icons indicating siren, flash, and SMS reminder functions for security alerts.
4.4 Night Vision
The camera automatically switches to 2K color night vision in low-light conditions, providing clear and detailed images up to 30 feet. This feature ensures continuous monitoring even after dark.

Image: A split image demonstrating the clarity of 2K color night vision compared to a standard daytime view of a house.
5. Maintenance
- Solar Panel Cleaning: Regularly clean the surface of the solar panel with a soft, damp cloth to ensure maximum sunlight absorption and charging efficiency.
- Lens Cleaning: Gently wipe the camera lenses with a microfiber cloth to remove dust or smudges that may affect image clarity.
- Firmware Updates: Check the mobile app periodically for available firmware updates. Keeping the camera's firmware up-to-date ensures optimal performance and access to new features.
- Battery Health: While solar-powered, monitor the battery level via the app, especially during prolonged cloudy periods, to ensure continuous operation.
- Mounting Security: Periodically check that the camera is securely mounted and that all screws are tight.
6. Troubleshooting
6.1 Camera Not Powering On
- Ensure the camera's battery is fully charged. Connect it to the power adapter for several hours.
- Verify the solar panel is connected correctly and receiving direct sunlight.
- Check the power button (if applicable) to ensure the camera is turned on.
6.2 No Cellular Connection
- Confirm the SIM card is correctly inserted and activated with a valid data plan.
- Check cellular signal strength in the camera's location via the app. Relocate the camera if the signal is weak.
- Restart the camera by powering it off and on.
6.3 Poor Video Quality
- Clean the camera lenses to remove any dirt or smudges.
- Ensure there are no obstructions in front of the camera.
- Check the cellular signal strength; a weak signal can affect streaming quality.
6.4 Motion Detection Issues
- Adjust the PIR motion detection sensitivity settings in the app.
- Ensure the camera's field of view is clear of moving objects like tree branches that could cause false alerts.
- Verify that motion alerts are enabled in the app settings.
7. Specifications
| Model Name | QQ-4G |
| Brand | CowWolf |
| Indoor/Outdoor Usage | Outdoor |
| Power Source | Solar Powered |
| Connectivity Protocol | Cellular (4G) |
| Video Capture Resolution | 2.5K |
| Viewing Angle | 360 Degrees |
| Night Vision Range | 30 Feet |
| Water Resistance Level | IP66 Waterproof |
| Battery Capacity | 10400mAh |
| Flash Memory Type | Micro SD (up to 128 GB) |
| Optical Zoom | 10x |
| Product Dimensions | 7 x 4 x 4 inches |
| Item Weight | 3.7 pounds |
| Control Method | App |
8. Warranty Information
Warranty information for the CowWolf QQ-4G 4G LTE Solar Security Camera is typically provided with the product packaging or can be found on the official CowWolf website. Please refer to these sources for details regarding warranty coverage, terms, and conditions.
9. Customer Support
For further assistance, technical support, or inquiries regarding your CowWolf QQ-4G camera, please visit the official CowWolf website or contact their customer service department. Contact details are usually available in the product packaging or on the manufacturer's website.


