1. Introduction
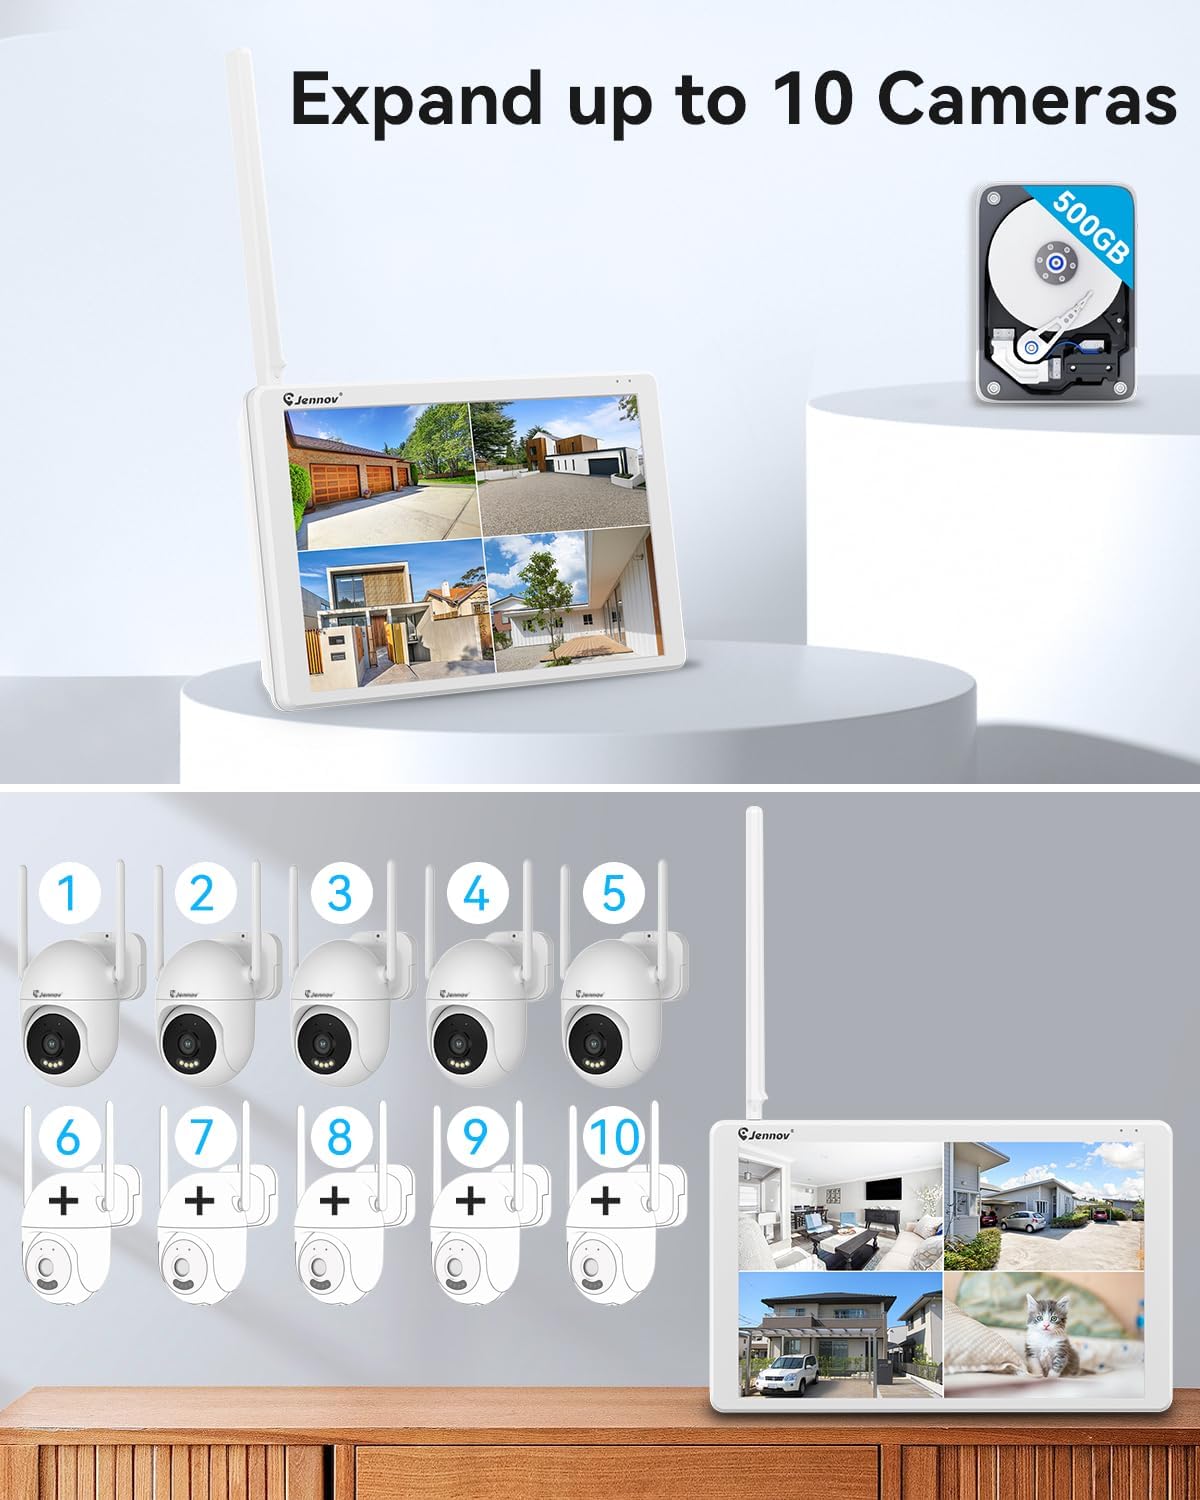
The Jennov 5MP Wireless Security Camera System provides comprehensive surveillance for your home or business. This system includes a 10-channel Network Video Recorder (NVR) with an integrated monitor and four 5MP wireless cameras. Key features include 500GB local storage, advanced motion detection, color night vision, two-way audio, and IP66 weather resistance for both indoor and outdoor use. This manual will guide you through the installation, operation, and maintenance of your security system.
2. What's in the Box
Verify that all components are present before beginning installation.
- 4 x Security Cameras Outdoor Wireless
- 1 x NVR Monitor
- 1 x Security Camera with Monitor (Refers to the integrated NVR monitor unit)
- 4 x Camera Adapters
- 1 x NVR Adapter
- 1 x 500GB Hard Disk (Pre-installed in NVR)
- 1 x Ethernet Cable
- 1 x Mouse
- Hole Stickers (for mounting)
- Bases (for camera mounting)
- HDMI Cable
- Warning Sticker
- User Manual
- Screws Pack

3. Setup
3.1 Camera Installation Methods
The Jennov cameras can be mounted in various positions to suit your surveillance needs. Ensure the mounting surface is stable and can support the camera's weight. Consider the camera's field of view and power source accessibility when choosing a location.
- Ceiling-mounted: Ideal for overhead views, providing a wide coverage area.
- Wall-mounted: Suitable for monitoring specific entry points or areas along a wall.
3.2 Adding a Camera to the NVR
Your cameras are typically pre-paired with the NVR. If you need to add a new camera or re-pair an existing one, follow these steps:
- Ensure the camera is powered on. If the camera does not enter pairing mode (indicated by a blinking red light) after powering on, press and hold the reset button for 6-10 seconds to restore factory settings.
- On the NVR monitor, navigate to Settings > IP Camera interface.
- Click the QR code icon in the upper-right corner of the NVR's IP Camera interface.
- Use the camera to scan the QR code displayed on the NVR monitor. An audio prompt will indicate successful scanning, and the device will begin adding.
- Once successfully added, the camera's blue indicator light will stay solid, and the NVR screen will display "Camera added successfully."

3.3 Initial System Connection
Connect the NVR monitor to power using the provided NVR adapter. Connect each camera to its respective power adapter. The system is designed for plug-and-play operation, with cameras automatically connecting to the NVR's dedicated wireless network.
4. Operating Instructions
4.1 Live View and Playback
Once cameras are connected, you can view live feeds on the NVR monitor. Use the included mouse to navigate the interface for viewing individual cameras, multi-camera grids, and accessing recorded footage. The 500GB HDD allows for continuous recording, which can be reviewed directly on the monitor.
4.2 Motion Detection and Alerts
The system features smart motion detection. When motion is detected, the system can trigger instant alerts and begin recording. You can customize motion detection zones and sensitivity settings via the NVR interface to minimize false alarms.


4.3 Night Vision Capabilities
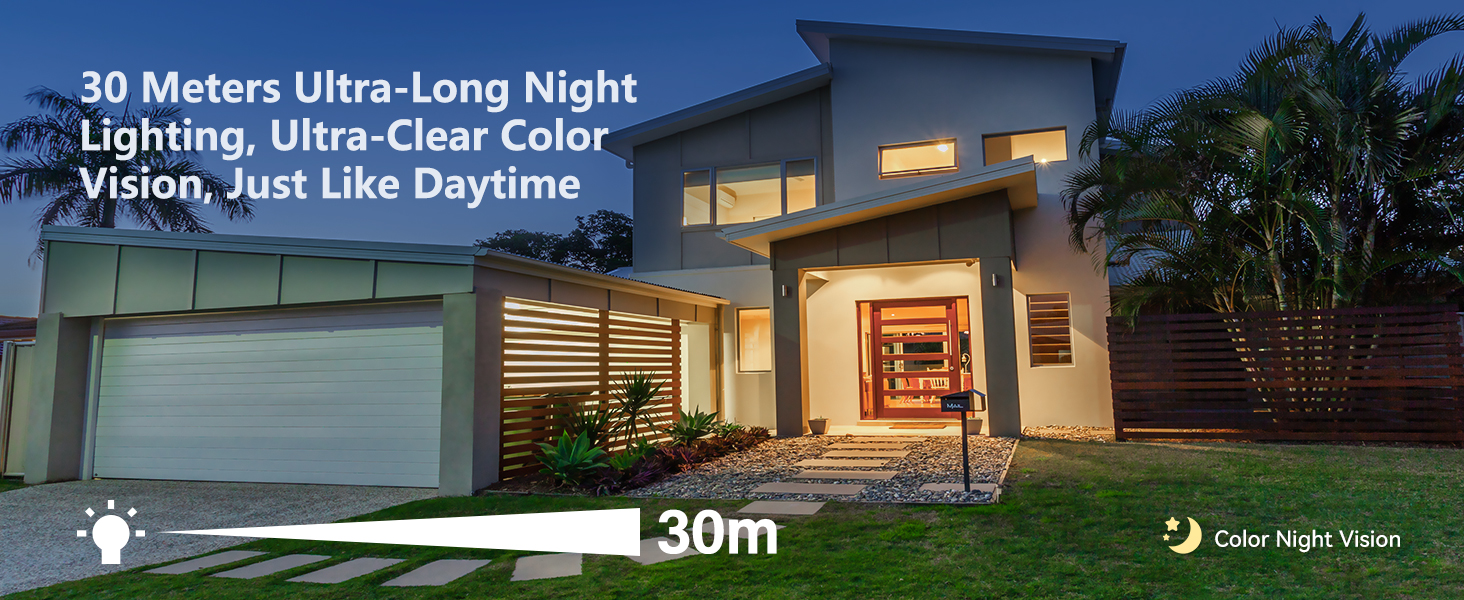
The 5MP cameras provide clear imaging even in low-light conditions. The system supports both color night vision and IR night vision, automatically switching modes as ambient light changes. The night vision range extends up to 20 meters.

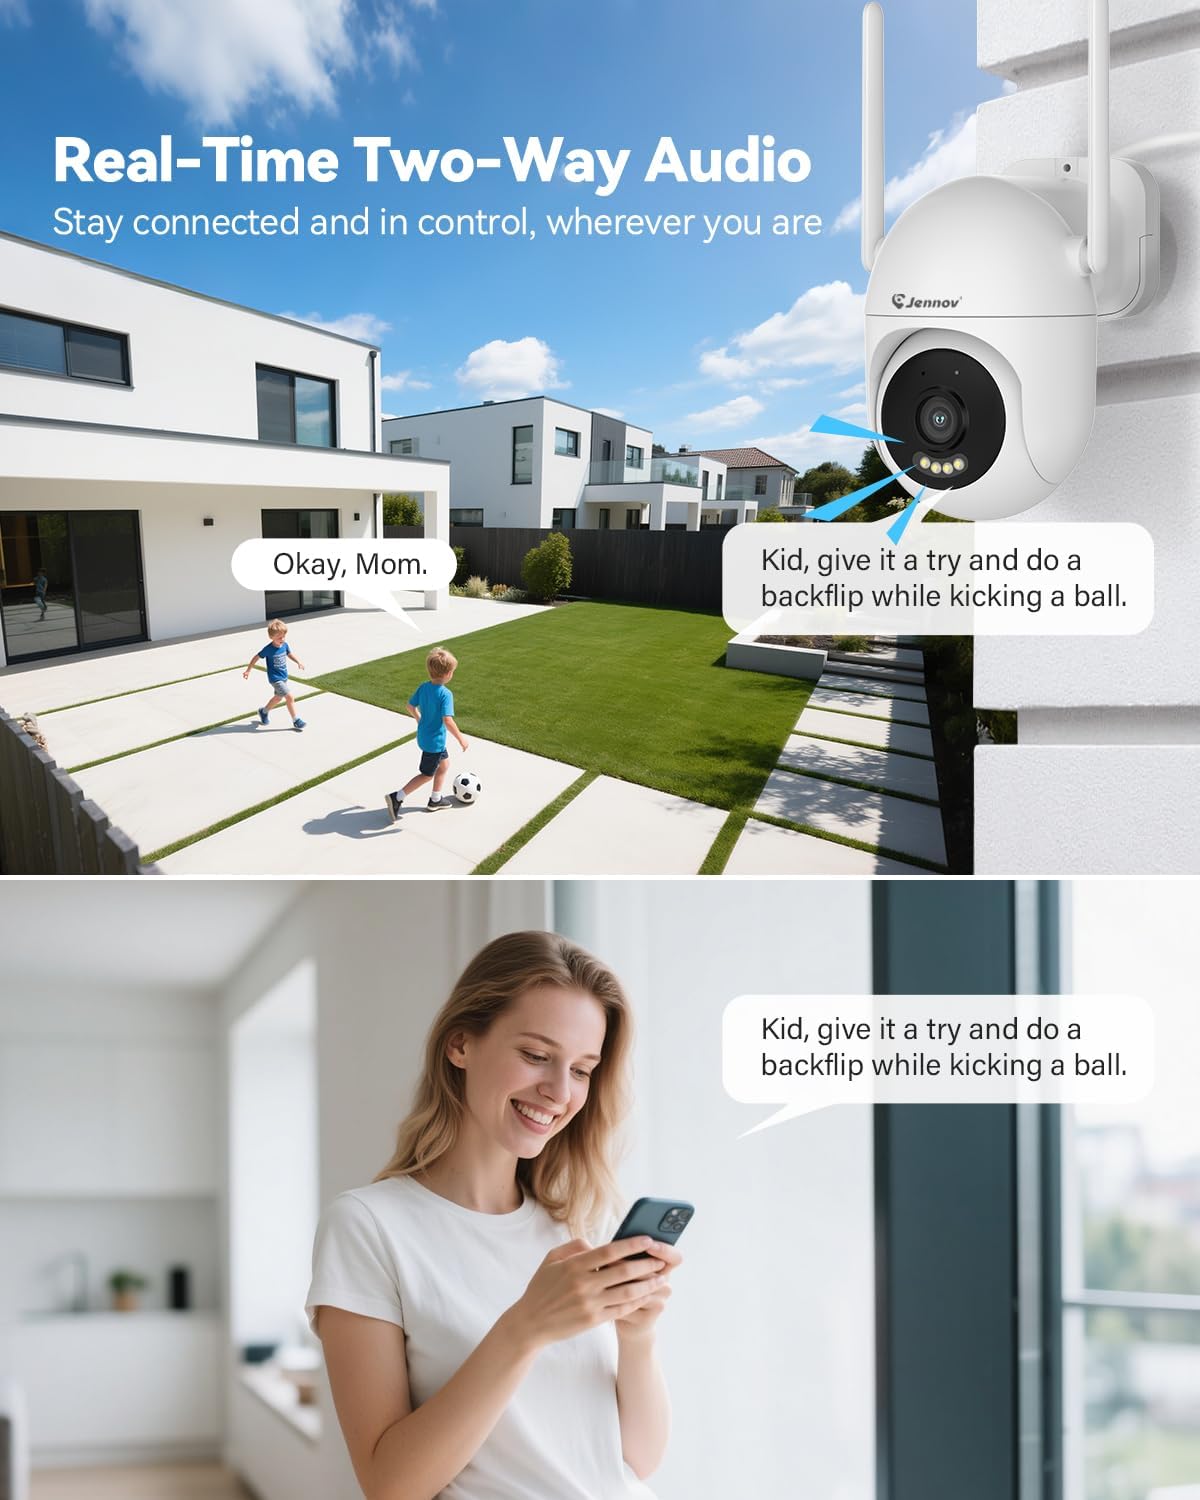
4.4 Two-Way Audio
Each camera is equipped with a microphone and speaker, enabling two-way audio communication. This allows you to listen in on the camera's surroundings and speak through the camera using the NVR or the mobile application.
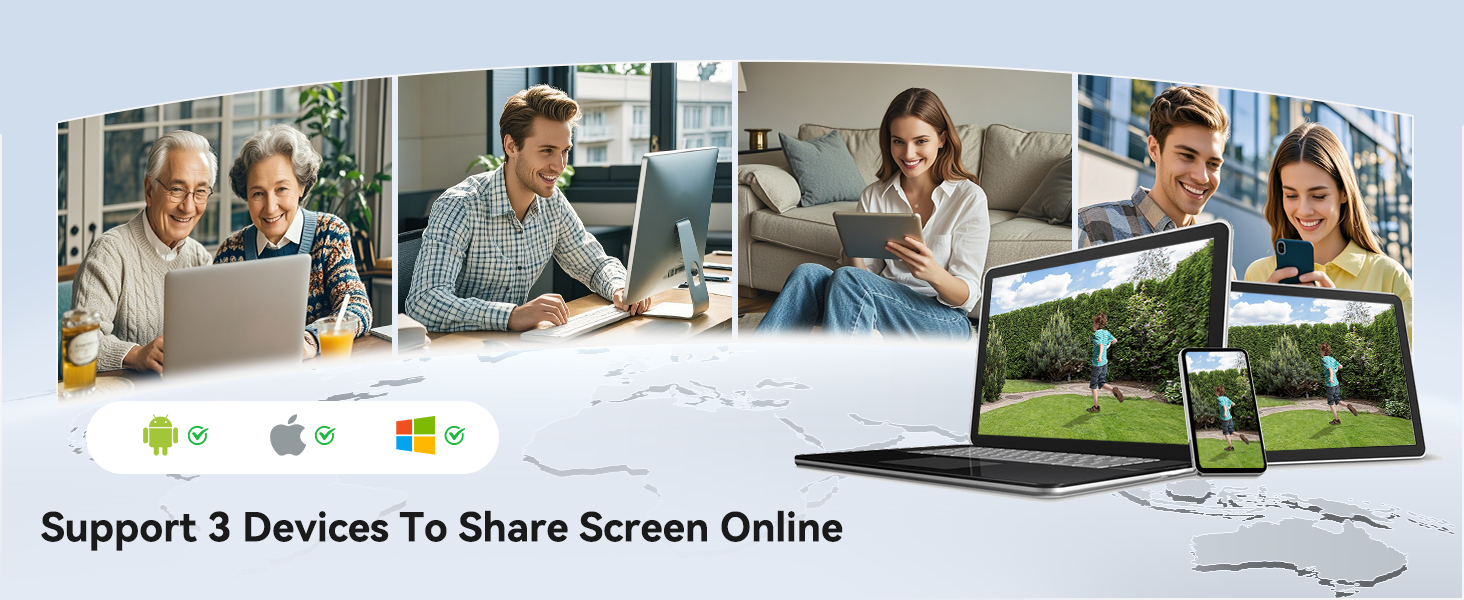
4.5 Remote Access via Mobile App
The system supports remote access through a dedicated mobile application (EseeCloud APP). Connect your NVR to your home network via the Ethernet cable to enable this feature. The app allows you to view live feeds, receive alerts, and review recordings from anywhere with an internet connection.

4.6 Storage Management
The NVR comes with a pre-installed 500GB Hard Disk Drive (HDD) for local storage, eliminating the need for subscription fees. This can store approximately 7 days of continuous recordings (actual duration may vary based on camera count and resolution settings). The NVR also supports an expandable SD card (8-256GB TF card, Class 10) for additional storage.

4.7 Camera Pan & Tilt
The cameras feature Pan & Tilt functionality, allowing for a 355° horizontal rotation and 90° vertical tilt. This enables comprehensive coverage and the ability to adjust the viewing angle remotely via the NVR or mobile application.

5. Maintenance
- Cleaning: Regularly clean the camera lenses with a soft, damp cloth to ensure clear image quality. Avoid abrasive cleaners.
- Firmware Updates: Check for and install firmware updates for the NVR and cameras to ensure optimal performance and security. This can typically be done through the NVR's settings menu.
- Environmental Protection: While cameras are IP66 weatherproof, ensure they are installed in locations that minimize direct exposure to extreme weather conditions for extended longevity.
- Data Backup: Periodically back up important recordings from the NVR's HDD to an external storage device if needed.
6. Troubleshooting
| Problem | Possible Cause | Solution |
|---|---|---|
| No image on NVR monitor | NVR not powered on; HDMI cable loose; Monitor input incorrect. | Check NVR power connection; Ensure HDMI cable is securely connected; Select correct input source on monitor. |
| Camera not connecting | Camera not powered; Out of range; Not paired; Interference. | Check camera power; Move camera closer to NVR; Re-pair camera (refer to Section 3.2); Reduce wireless interference. |
| Poor image quality | Dirty lens; Low light; Network bandwidth issues. | Clean camera lens; Ensure adequate lighting for color night vision or allow IR to activate; Check network connection. |
| Motion detection not working | Settings incorrect; Obstructions in detection zone. | Review motion detection settings on NVR; Clear any obstructions from the camera's view. |
| No remote access | NVR not connected to internet; App not configured correctly; Network firewall. | Connect NVR to router via Ethernet; Ensure app is correctly set up and logged in; Check router firewall settings. |
7. Specifications
| Feature | Detail |
|---|---|
| Brand | Jennov |
| Model Number | Camera with Monitor |
| Connectivity Technology | Wired, Wireless |
| Video Capture Resolution | 5MP |
| Number of Channels | 10 |
| Memory Storage Capacity | 500 GB (HDD) |
| Color | White |
| Power Source | Corded Electric |
| Item Dimensions L x W x H | 34 x 19 x 29 inches |
| Recommended Uses | Indoor, Outdoor |
| Special Features | App Control, Night Vision, Two-Way Audio, Video Recording, Weatherproof |
| Night Vision Range | 20 Meters |
| Frame Rate | 15 FPS |
| Recording Mode | Audio, Video |
| Total USB Ports | 1 |
| Hardware Interface | HDMI |
| Lens Type | Fixed |
| Video Input | Wifi |
| Viewing Angle | 80 Degrees |
| IP Rating | IP66 (Weatherproof) |
| Operating Temperature | -10°C to 50°C (14°F to 122°F) |

8. Warranty and Support
For warranty information, technical support, or service inquiries, please refer to the contact information provided on the product packaging or visit the official Jennov website. Keep your purchase receipt for warranty claims.


