
1. Introduction
This manual provides essential information for the safe installation, operation, and maintenance of your VIDAPOOL 19-inch Sand Filter Pump with Timer. Please read these instructions thoroughly before use to ensure optimal performance and longevity of your pool filtration system. This system is designed for efficient water circulation and filtration in pools up to 29,000 gallons.
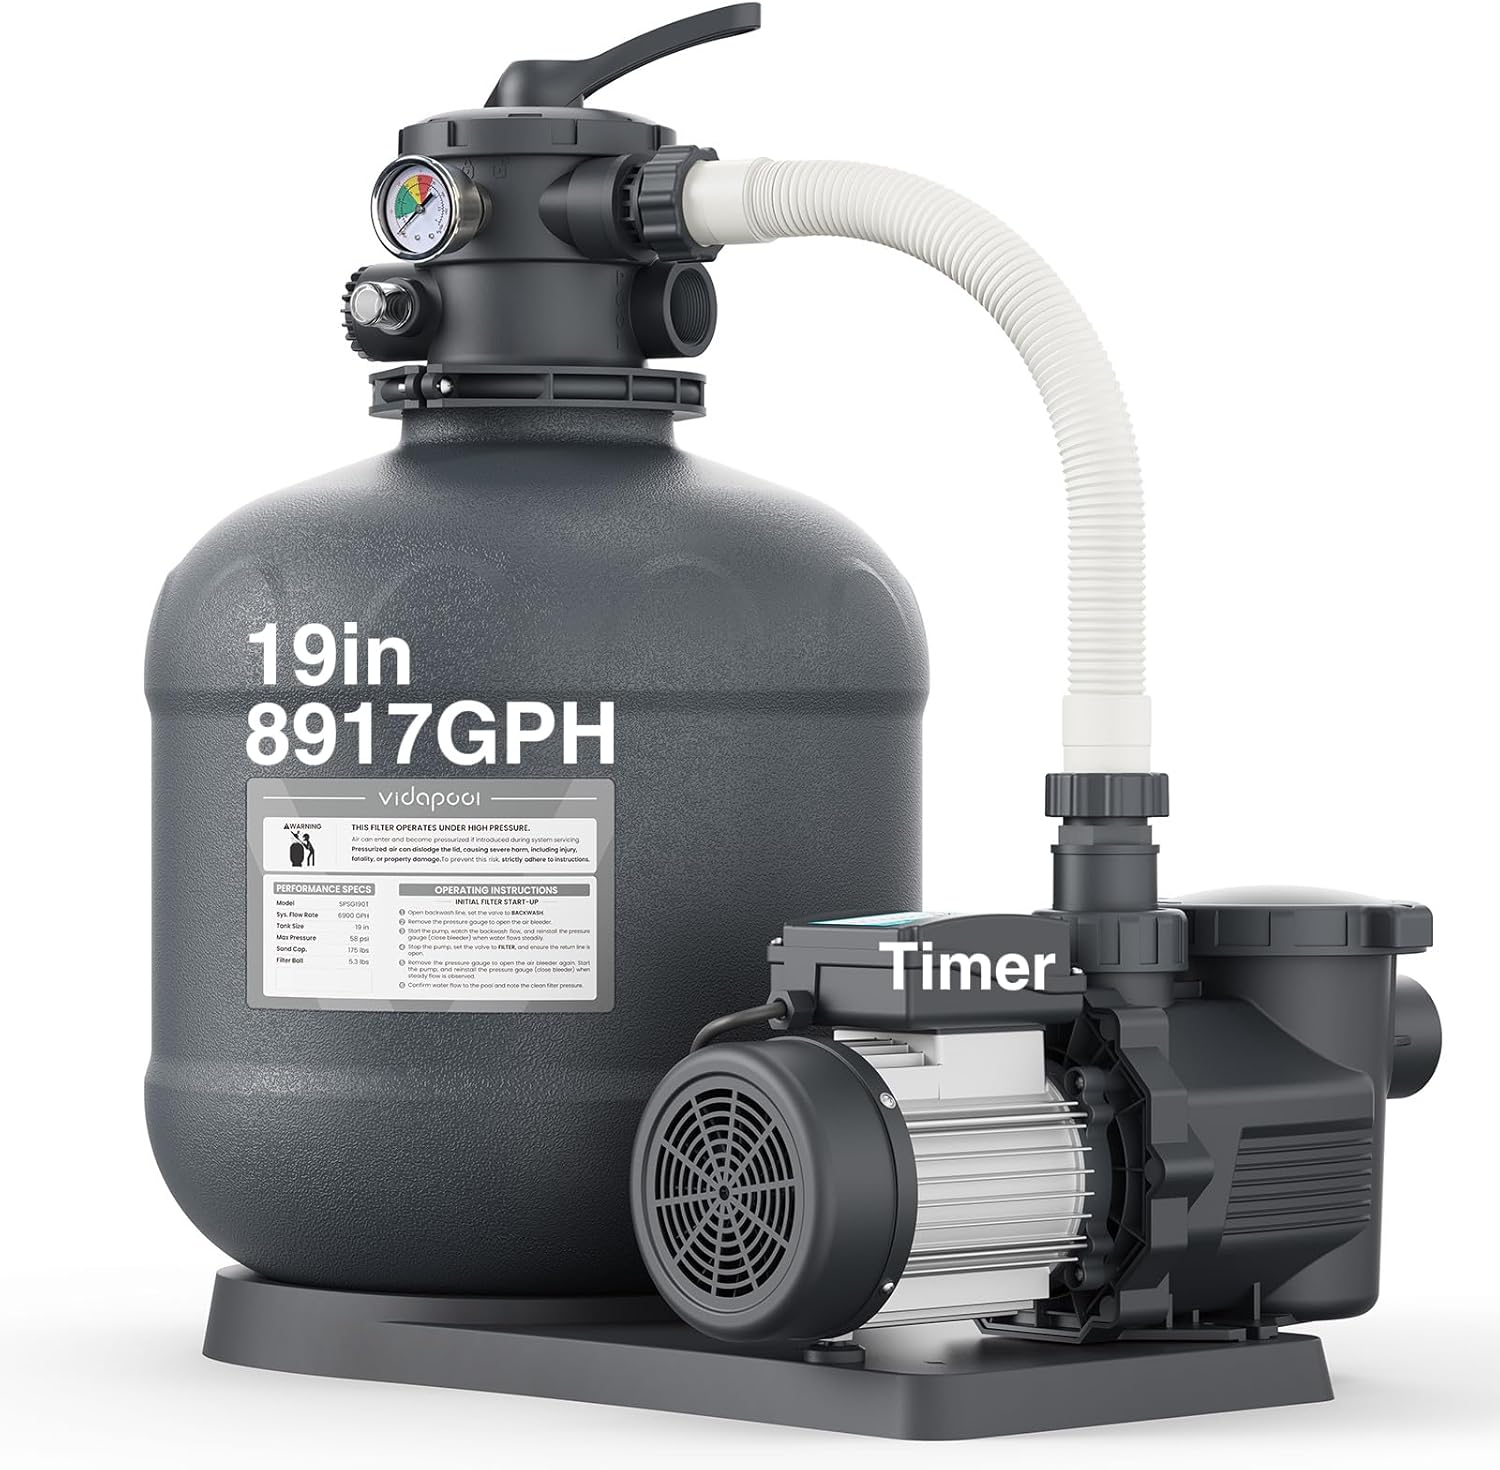
Figure 1: The VIDAPOOL 19-inch Sand Filter Pump with Timer, featuring the sand tank, 6-way valve, and pump unit.
2. Safety Information
Always observe basic safety precautions to reduce the risk of injury, fire, electric shock, or property damage. Failure to follow these instructions can result in serious injury or death.
- Electrical Safety: Ensure the pump is connected to a grounded outlet protected by a Ground Fault Circuit Interrupter (GFCI). Do not operate the pump if the power cord is damaged. Keep all electrical connections dry.
- High Pressure: This filter operates under high pressure. Do not attempt to open the filter or service the system while it is running. Always turn off the pump and relieve pressure before performing any maintenance or adjustments.
- Chemical Handling: Exercise caution when handling pool chemicals. Follow manufacturer guidelines for safe storage and use.
- Children: Keep children away from the pool equipment area.
- Installation: Ensure the pump is installed on a solid, level surface to prevent vibration and stress on connections.
3. Package Contents
Verify that all components are present before beginning installation:
- 19-inch Sand Filter Tank
- 2 HP Pool Pump with Timer
- 6-Way Multi-Port Valve with Pressure Gauge and Viewing Window
- Base Platform
- Three clamped hose adapters (1.5-inch and 1.25-inch)
- Five-piece 1.5-inch adapter conversion kit
- Three 1-1/2" PVC coupling kits
- Three 1-1/2" to 2" pipe adapters
- Instruction Manual
4. Setup and Installation
Follow these steps for proper installation of your sand filter pump system.
4.1 Site Selection
Choose a location that is level, well-drained, and easily accessible for maintenance. The pump should be as close to the pool as possible to minimize friction loss from plumbing.
4.2 Assembly Steps
- Secure the Pump on the Base: Place the pump and filter tank onto the provided base platform. Ensure all components are stable and securely fastened.
- Add Filter Media: Carefully add the appropriate filter media to the sand tank. The tank supports up to 175 lbs of pool filter sand or 5.3 lbs of pool filter balls. Ensure the media is filled between the MIN and MAX lines marked on the center pipe.
- Install the 6-Way Valve: Attach the 6-way multi-port valve to the top of the filter tank. Ensure the O-ring is properly seated and the clamp is tightened securely to prevent leaks.
- Connect Plumbing: Connect the pump to the filter valve and the filter valve to your pool's return and suction lines using the appropriate adapters. The system is compatible with both 1.25-inch and 1.5-inch hoses for above-ground pools, and 1.5-inch or 2-inch PVC pipes for in-ground pools. Use Teflon tape on threaded connections to ensure a watertight seal.

Figure 2: Visual guide for the four main installation steps: securing the pump, adding filter media, installing the valve, and setting the timer.
4.3 Connection Methods
The system includes a complete adapter set for maximum compatibility.
- For Above-Ground Pools: Use the clamped hose adapters for 1.25-inch and 1.5-inch hoses. A 1.5-inch threaded hose connection is also supported.
- For In-Ground Pools: Utilize the 1.5-inch PVC coupling kits and 1.5-inch to 2-inch pipe adapters for rigid PVC pipe connections.

Figure 3: Diagram illustrating connection methods for above-ground pools using 1.25-inch and 1.5-inch hoses.

Figure 4: Diagram illustrating connection methods for in-ground pools using 1.5-inch and 2-inch PVC pipes.
5. Operating Instructions
Understand the functions of the 6-way valve and how to program the built-in timer for efficient pool operation.
5.1 6-Way Multi-Port Valve Functions
The 6-way valve allows for various operational modes. Always turn off the pump before switching the valve position to prevent damage.

Figure 5: The 6-way valve with its integrated pressure gauge and clear viewing window, showing the various functions.
- FILTER: Normal filtration mode. Water flows through the sand bed, trapping debris, and returns clean water to the pool.
- BACKWASH: Reverses water flow through the filter to clean the sand bed. Dirty water is discharged through the waste port. Perform when pressure gauge reads 8-10 PSI above starting pressure.
- RINSE: Used after backwashing to flush residual dirt from the valve and sand bed to the waste port, ensuring no dirty water returns to the pool.
- WASTE: Bypasses the filter, sending water directly from the pool to the waste port. Useful for vacuuming heavy debris directly to waste or lowering pool water level.
- RECIRCULATE: Bypasses the filter, circulating water directly back to the pool. Useful for mixing chemicals without filtering.
- CLOSED: Shuts off all flow to the filter and pump. Use for servicing the pump or filter.
5.2 Built-in Timer Operation
The pump features a built-in timer with 9 programmable settings (2-24 hours) for automated filtration cycles.

Figure 6: The pump's control panel showing the ON/OFF button and timer settings from 2 to 24 hours.
- Power On/Off: Press the ON/OFF button to manually start or stop the pump.
- Set Timer: Press the TIMER button to cycle through the available running hour settings (2, 4, 6, 8, 10, 12, 14, 16, 24 hours). The selected duration will illuminate. The pump will run for the set duration and then automatically shut off.
- Daily Cycles: The timer will initiate a new cycle at the same time each day once set, providing consistent filtration.
6. Maintenance
Regular maintenance ensures the longevity and efficiency of your sand filter pump.
6.1 Backwashing and Rinsing
Backwash the filter when the pressure gauge reads 8-10 PSI above its clean operating pressure, or when pool water clarity decreases.
- Turn off the pump.
- Set the 6-way valve to the BACKWASH position.
- Turn on the pump and run until the water in the viewing window is clear (typically 2-3 minutes).
- Turn off the pump.
- Set the 6-way valve to the RINSE position.
- Turn on the pump and run for 30-60 seconds.
- Turn off the pump.
- Set the 6-way valve back to the FILTER position.
- Turn on the pump to resume normal filtration.

Figure 7: Diagram illustrating the sand filtration process, showing how dirty water enters, passes through the sand bed, and returns as clean water.
6.2 Filter Media Replacement
Sand filter media typically needs replacement every 3-5 years, depending on usage and water quality. Filter balls may require more frequent cleaning or replacement. Refer to the media manufacturer's guidelines.
6.3 Winterization
Before freezing temperatures, drain all water from the pump and filter. Disconnect hoses and store the unit in a dry, protected area.

Figure 8: Key features highlighting the durability of the system, including a high-temp/UV tank, pure copper motor, IPX5 waterproof rating, and heat resistance.
7. Troubleshooting
Refer to this section for common issues and their solutions.
| Problem | Possible Cause | Solution |
|---|---|---|
| Pump not starting | No power; tripped GFCI; motor issue | Check power connection; reset GFCI; consult support if motor hums but doesn't start. |
| Low water flow | Clogged skimmer/pump basket; dirty filter sand; air leak in suction line | Clean skimmer/pump basket; backwash filter; check all connections for air leaks. |
| Water returning to pool is dirty | Filter needs backwashing; sand bed channeling; valve set incorrectly | Perform backwash and rinse cycle; consider replacing sand if old; ensure valve is on FILTER. |
| Water leaking from pump/filter | Loose connections; damaged O-rings/gaskets; cracked housing | Tighten connections; inspect and replace O-rings/gaskets; contact support for housing damage. |
8. Specifications
Detailed technical specifications for the VIDAPOOL Sand Filter Pump.
- Model Number: SPSG190T
- Brand: Vidapool
- Filter Tank Size: 19 inches
- Horsepower: 2 HP
- Flow Rate (Pump): 8917 GPH (Gallons Per Hour)
- Flow Rate (System): 6900 GPH (Gallons Per Hour)
- Maximum Pool Capacity: Up to 29,000 Gallons
- Voltage: 115 Volts
- Power Source: AC
- Item Weight: 25.36 Kilograms
- Filter Media Capacity: Up to 175 lbs of pool filter sand or 5.3 lbs of pool filter balls
- Valve Type: 6-Way Multi-Port Valve
- Timer: Built-in, 9 programmable settings (2-24 hours)
- Construction: Thick-walled, UV-resistant, anti-corrosion tank

Figure 9: Product dimensions showing a height of 33 inches, width of 27.6 inches, and depth of 23.6 inches.
9. Warranty and Support
The VIDAPOOL 19-inch Sand Filter Pump with Timer comes with a 2-year warranty from the date of purchase, covering manufacturing defects. For warranty claims, technical assistance, or replacement parts, please contact our customer support team.
Customer Support:
- Email: support@vidapool.com (example)
- Phone: 1-800-XXX-XXXX (example)
- Website: www.vidapool.com (example)