
Varstrom 125XVH 48V 500W RDC (Ekd01 20.0 Inches)
Varstrom 500W Electric Bike Conversion Kit
Model: 125XVH 48V 500W RDC (Ekd01 20.0 Inches)
1. Introduction
This manual provides detailed instructions for the installation, operation, and maintenance of your Varstrom 500W Electric Bike Conversion Kit. This kit is designed to transform a standard bicycle into an electric bicycle, offering enhanced power and efficiency for various riding conditions. Please read this manual thoroughly before installation and use to ensure safe and optimal performance.
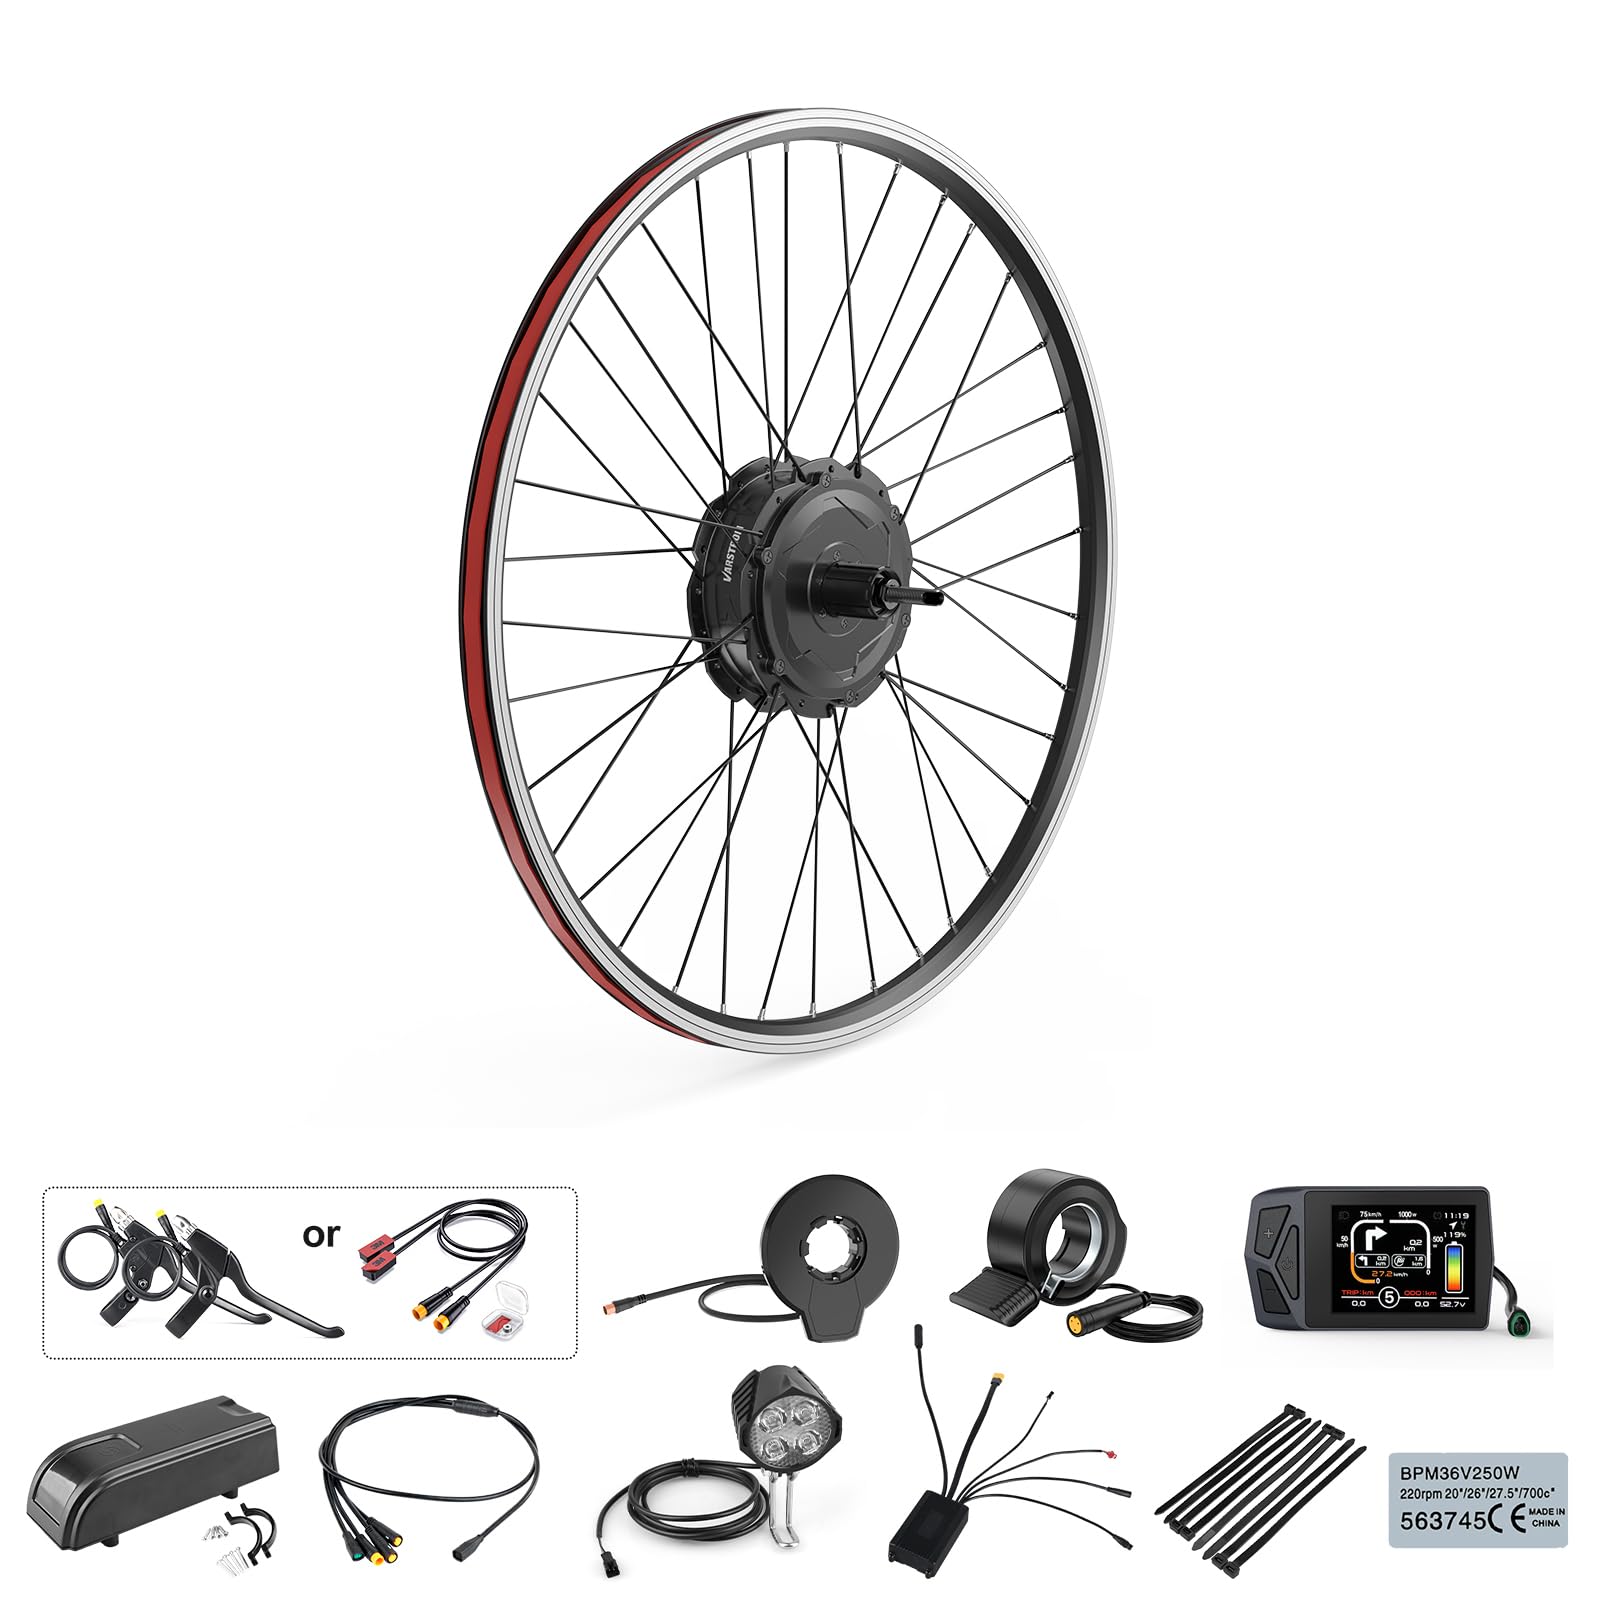
Figure 1: Overview of the Varstrom 500W Electric Bike Conversion Kit.
2. Safety Information
Always prioritize safety when installing and operating your e-bike conversion kit. Failure to follow safety guidelines may result in injury or damage to the product.
- Wear a helmet and appropriate safety gear when riding.
- Ensure all connections are secure and waterproof before riding.
- Regularly inspect your bicycle and the conversion kit components for wear or damage.
- Do not operate the e-bike in conditions beyond its IPX5 waterproof rating.
- Familiarize yourself with local regulations regarding e-bike usage.
- Always test brakes and motor function in a safe, open area before riding in traffic.
3. Package Contents
The Varstrom 500W Electric Bike Conversion Kit includes the following components:
- Upgraded 125XVH Hub Motor (48V 500W, 415RPM)
- LCD Display (EKD01, VD04, or VD03 options available, with waterproof connector)
- Controller and Controller Box
- Thumb Throttle
- Left PAS Sensor
- Brake Levers
- All necessary cables for installation
- Instruction Manual
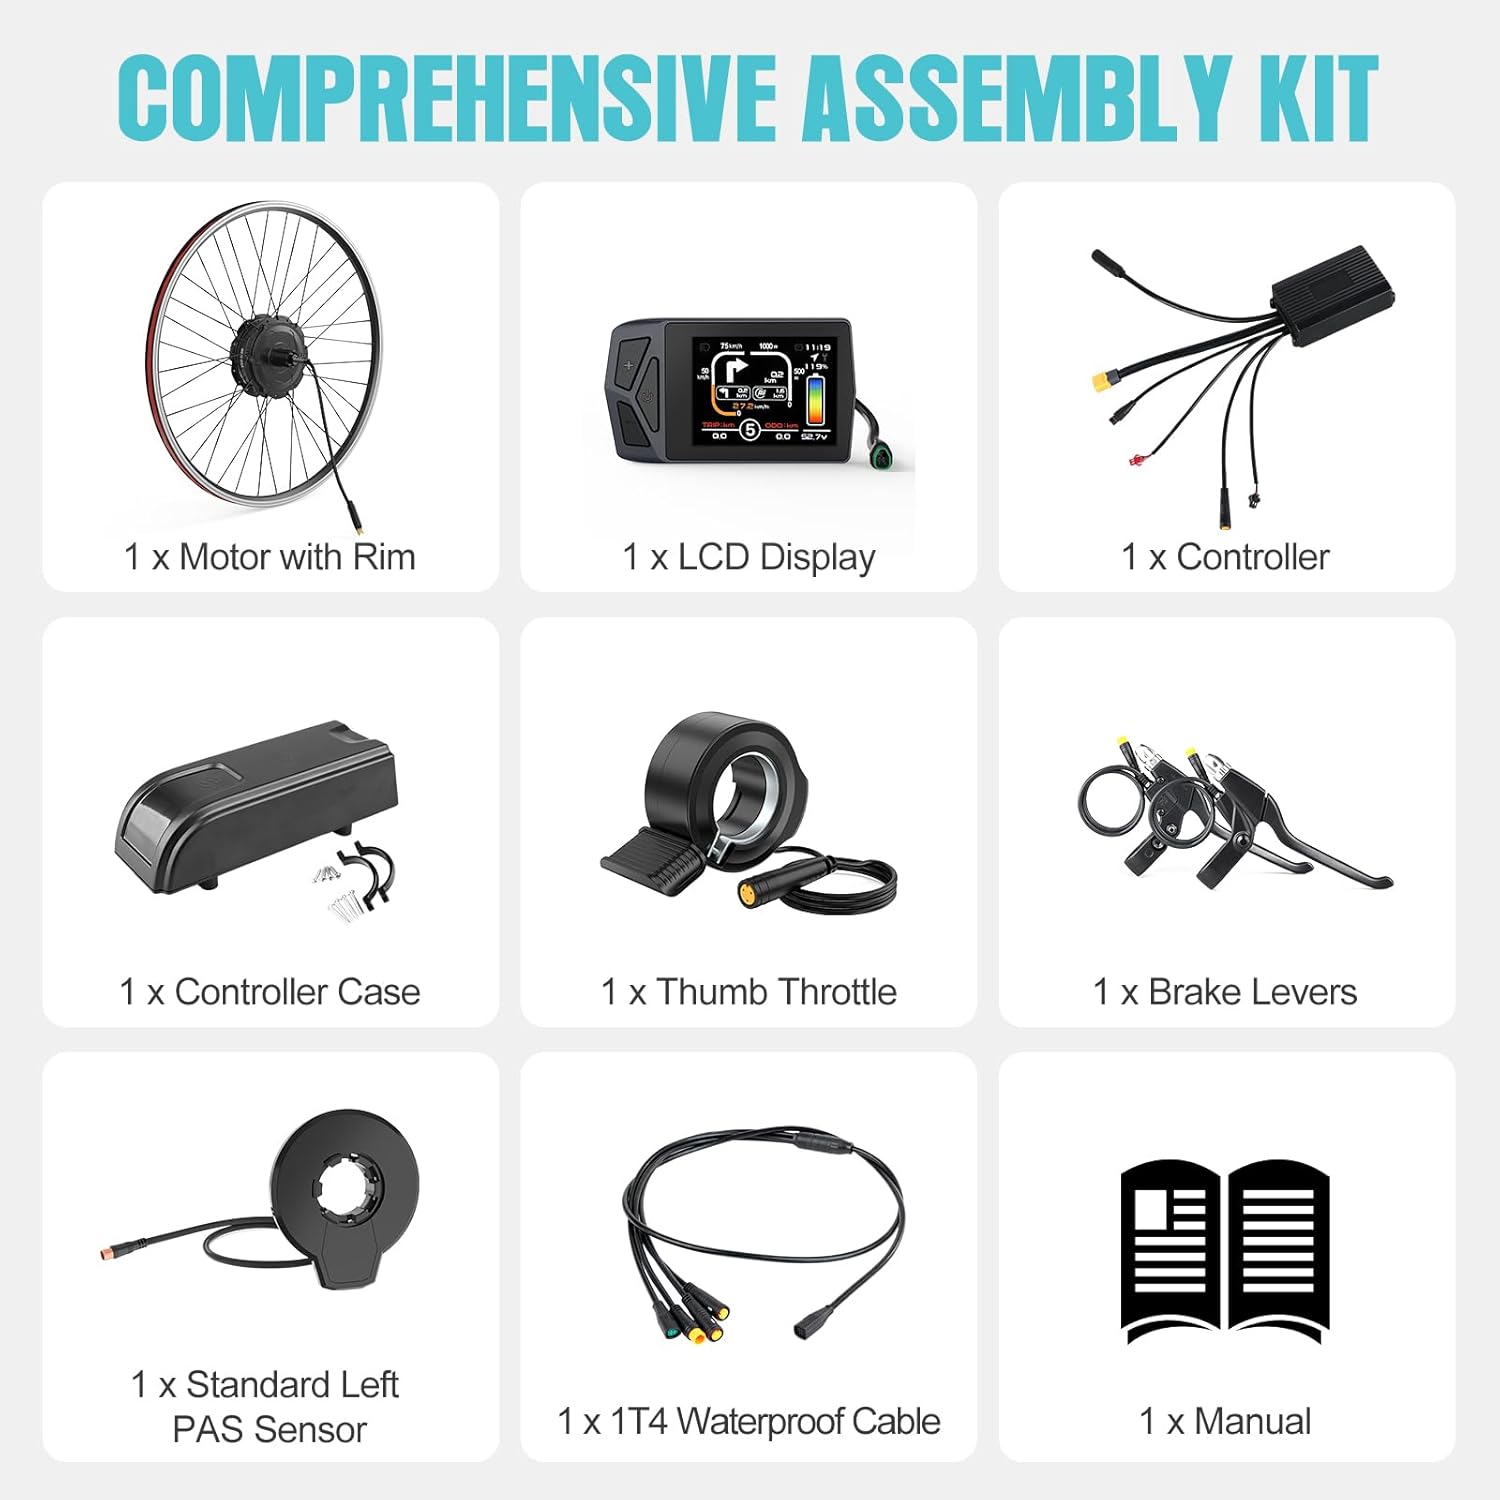
Figure 2: Visual representation of the comprehensive assembly kit.
4. Setup and Installation
This section outlines the general steps for installing your Varstrom e-bike conversion kit. Ensure your bicycle is compatible with the kit's specifications (e.g., wheel size, rear dropout spacing).
4.1. Rear Hub Motor Installation
The 125XVH rear hub motor is designed for easy integration. Ensure your bike's rear axle length is 204.1mm and dropout spacing is 138–145mm. The kit includes 12G silver spokes with a double-wall rim suitable for 20", 26", 27.5", 28", 29", or 700C wheel sizes.
- Remove your existing rear wheel.
- Install the new rear hub motor wheel into the bicycle frame, ensuring it is properly seated in the dropouts.
- Secure the wheel with the provided nuts and washers.
- Connect the motor cable to the controller.
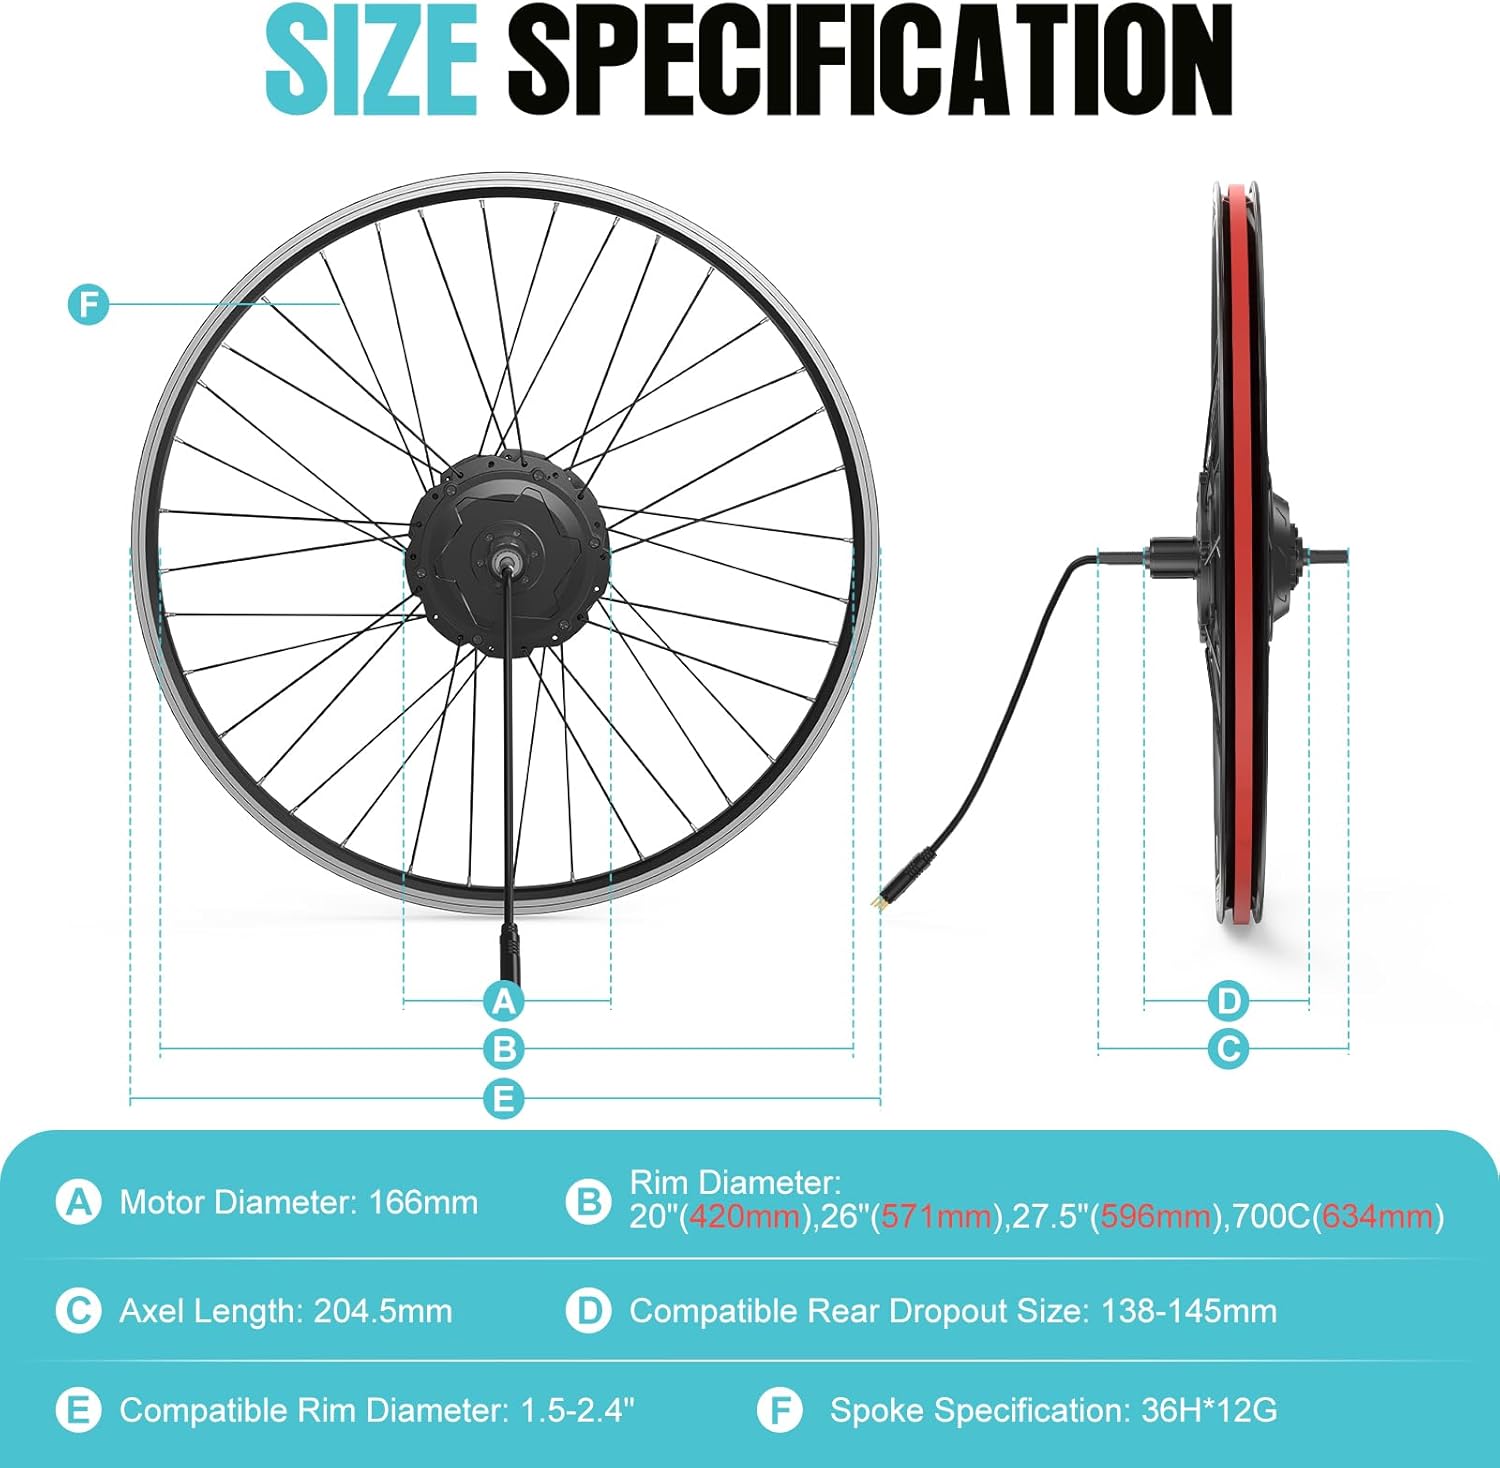
Figure 3: Size specifications for the Varstrom hub motor, including motor diameter, axle length, and compatible rim diameters.
Video 1: Installation guide for a Bafang Hub Motor Conversion Kit. This video demonstrates the process of installing a hub motor, which is similar to the Varstrom kit.
Video 2: General hub motor kit installation. This video provides additional visual steps for installing a hub motor conversion kit.
4.2. Controller and Wiring
The upgraded sine wave controller is equipped with a temperature control system. Mount the controller and controller box in a secure location on your bike frame. Connect all color-coded cables from the motor, display, throttle, brake levers, and PAS sensor to the controller as per the wiring diagram in the included manual.

Figure 4: The upgraded controller and various wiring connections for the e-bike kit.
4.3. LCD Display, Throttle, and Brake Levers
Install the LCD display (EKD01, VD04, or VD03) on your handlebar. Mount the thumb throttle and brake levers next to your grips. The brake levers include motor cut-off sensors for safety.

Figure 5: Detailed view of the EKD01 LCD Display, showing dimensions and various display functions.
4.4. PAS Sensor Installation
Install the left PAS (Pedal Assist System) sensor on your bike's bottom bracket. This sensor detects your pedaling motion and activates the motor assist.
5. Operating Instructions
5.1. LCD Display Functions
The LCD display provides essential riding information and allows you to control the kit's settings. Functions typically include:
- Speed (current, max, average)
- Battery level indicator
- PAS level selection (3, 5, or 9 levels)
- Trip distance and Odometer
- Headlight control
- Error codes
- USB charging port (Type-C 5V 1A)
- Navigation and multi-language support (for EKD01 and VD04 displays)
- Quick switch to 25km/h speed limit (for EKD01, VD04, and VD03 displays)
5.2. Riding Modes
Your Varstrom e-bike kit supports multiple riding modes:
- Throttle Mode: Provides power directly via the thumb throttle, without requiring pedaling.
- PAS (Pedal Assist System) Mode: The motor provides assistance based on your pedaling effort and selected assist level.
- Manual Mode: Ride the bicycle without any motor assistance, like a traditional bike.
- Boost Mode: Provides maximum power assistance for climbing hills or quick acceleration.
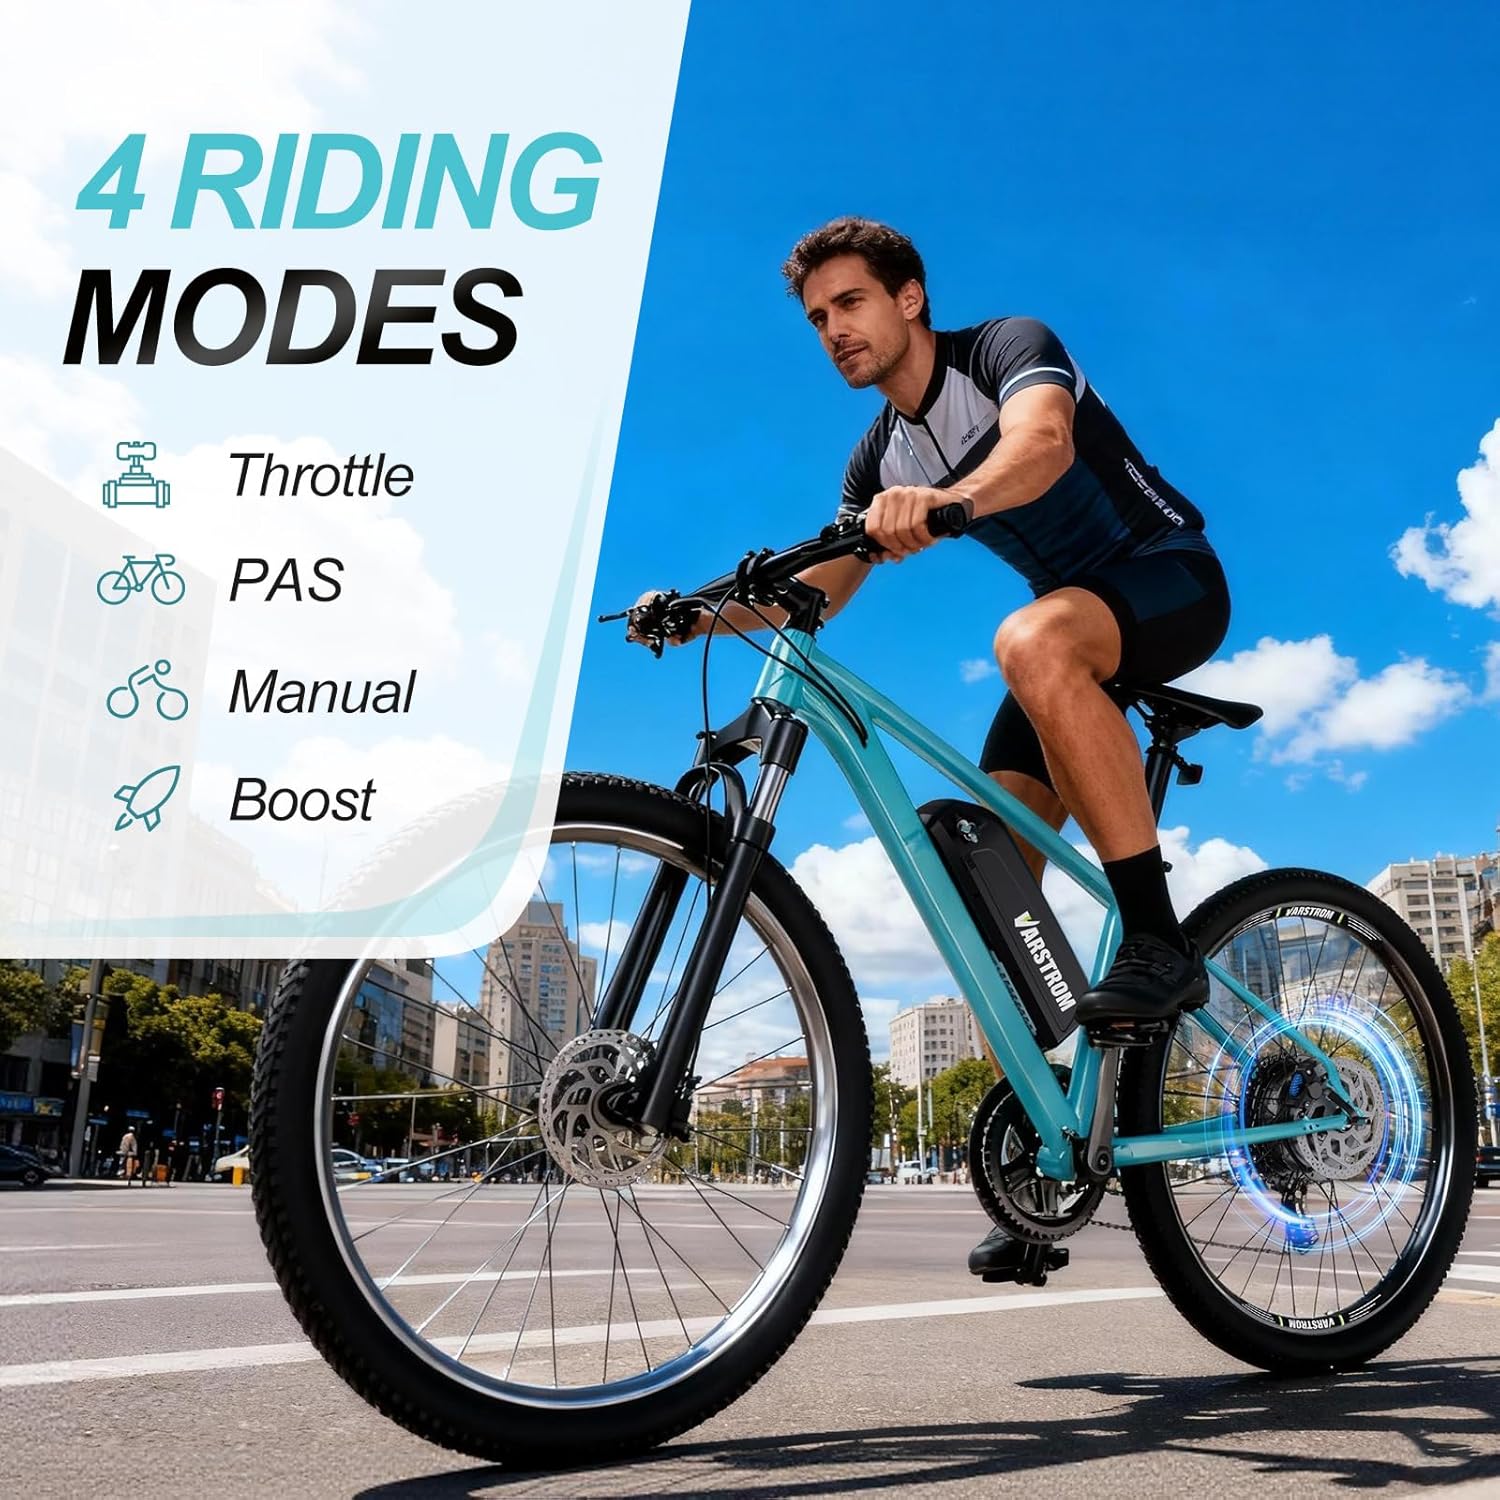
Figure 6: Illustration of the four available riding modes for the e-bike kit.
6. Maintenance
Proper maintenance ensures the longevity and performance of your e-bike kit.
- Motor: The 125XVH hub motor features a helical rubber gear design and is maintenance-free for up to 100,000 kilometers. No lubrication or internal servicing is typically required.
- Waterproof Rating: The kit has an IPX5 waterproof rating, protecting against low-pressure water jets from any direction. Avoid submerging the components in water.
- Connections: Periodically check all electrical connections for tightness and corrosion. Ensure waterproof connectors are properly sealed.
- Cleaning: Clean the motor, controller, and display with a damp cloth. Avoid high-pressure washing directly on electrical components.
- Battery (Not Included): Follow the manufacturer's guidelines for your specific e-bike battery for charging, storage, and maintenance.
7. Troubleshooting
If you encounter issues with your e-bike kit, refer to the following common troubleshooting steps:
| Problem | Possible Cause | Solution |
|---|---|---|
| Motor not engaging | Loose electrical connection, low battery, PAS sensor issue, brake lever sensor engaged. | Check all cable connections. Ensure battery is charged. Verify PAS sensor alignment. Release brake levers completely. Check display for error codes. |
| Display not turning on | Loose power connection, faulty display cable, low battery. | Check power cable to display and controller. Ensure battery is connected and charged. |
| Inconsistent pedal assist | PAS sensor misalignment or damage. | Inspect PAS sensor and magnet for proper alignment and cleanliness. |
| Unusual motor noise | Loose motor mounting, internal motor issue. | Check motor mounting bolts for tightness. If noise persists, contact customer support. |
For further assistance, please refer to the detailed troubleshooting section in the included manual or contact Varstrom customer support.
8. Specifications
| Feature | Detail |
|---|---|
| Brand | Varstrom |
| Model Name | 125XVH 48V 500W RDC |
| Motor Type | Geared Brushless Rear Hub Motor (125XVH) |
| Rated Power | 500W |
| Rated Voltage | 48V |
| No-Load Speed | 415 RPM |
| Max Torque | ≥65 N.m |
| Max Speed | 58 km/h (36 mph) |
| Max Controller Current | 18A |
| Brake Type Compatibility | Disc/V Brake |
| Installation Width (Rear) | 142mm (5.59") |
| Compatible Rear Dropout | 138–145mm (5.43–5.71") |
| Wheel Sizes | 20", 26", 27.5", 28", 29", 700C |
| Cassette Compatibility | ≤10-speed cassettes |
| Waterproof Rating | IPX5 |
| Material | Aluminum |
| Item Package Dimensions | 18.11 x 18.11 x 10.24 inches |
| Package Weight | 15.4 Pounds |
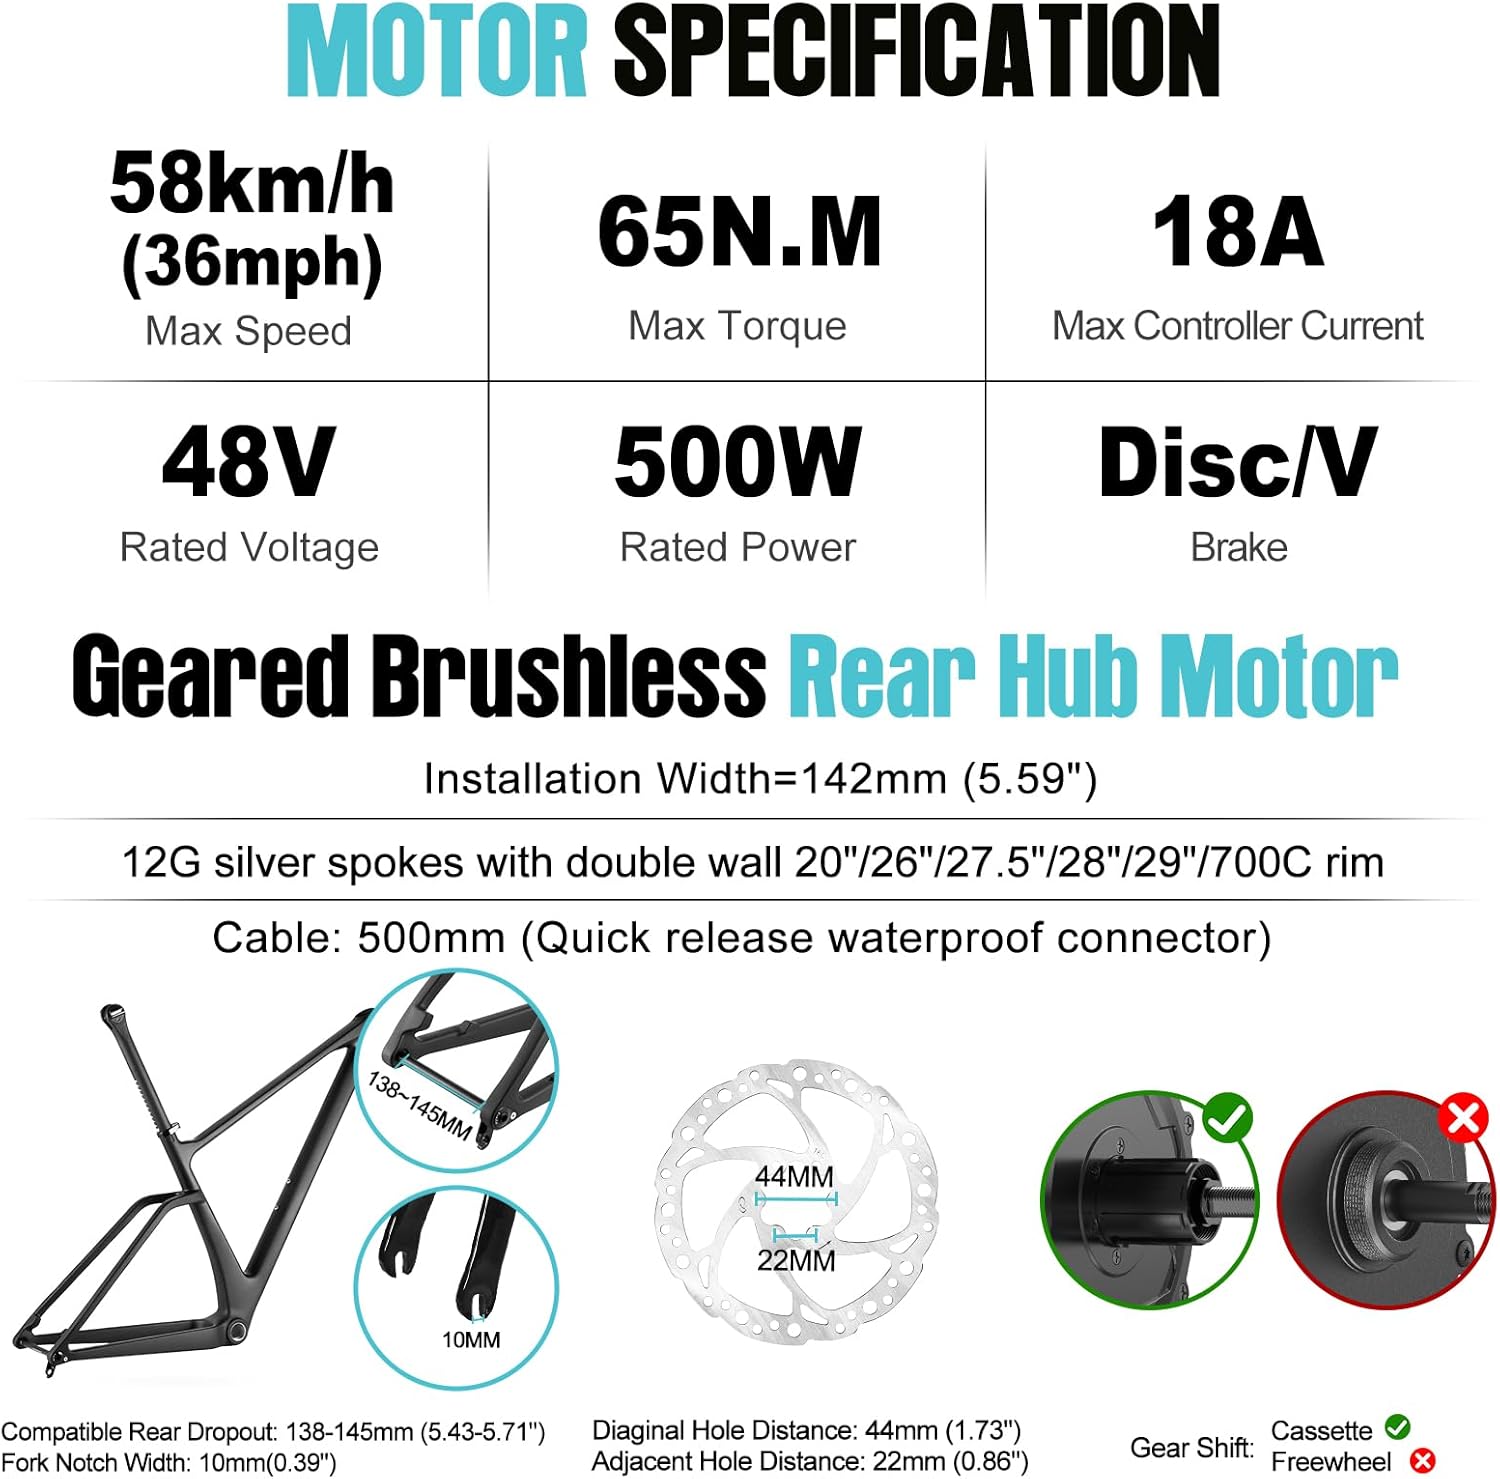
Figure 7: Detailed motor specifications including speed, torque, voltage, and power.
9. Warranty and Support
Varstrom offers the following warranty and support for this product:
- Returns: 30-day free returns.
- Repair: 1-year free repair service.
- Consultation: Lifetime after-sales consultation.
For warranty claims or technical support, please contact Varstrom customer service through the retailer where the product was purchased or visit the official Varstrom website.
Related documents125XVH 48V 500W RDC (Ekd01 20.0 Inches)


Ask a question about this manual
Ask about setup, troubleshooting, compatibility, parts, safety, or missing instructions. Manuals+ will review the question and use this page’s manual context to help answer it.