Introduction
Thank you for choosing the Insoma 3-Zone Water Timer. This device is designed to simplify your garden irrigation, ensuring your plants receive optimal watering without constant manual intervention. With independent zone control, automatic scheduling, rain delay, and child lock features, this timer offers convenience and water efficiency for various outdoor watering needs.
Important Safety Information
- Do not immerse the timer in water. It is IPX5 waterproof, meaning it can withstand water jets, but not submersion.
- Use only 2 AA 1.5V Alkaline batteries. Do not mix new and old batteries, or different types of batteries.
- Store the timer indoors during freezing temperatures to prevent damage.
- Ensure all connections are tight to prevent leaks.
- Keep out of reach of children and pets when not in use or when the child lock is not activated.
Package Contents
- Insoma 3-Zone Water Timer (Model SGW15-T)
- User Manual
- Hose Connector/Adapter (if included, typically for different hose sizes)
Note: 2 AA 1.5V Alkaline batteries are not included and must be purchased separately.
Product Overview
The Insoma 3-Zone Water Timer features a large LCD screen for easy readability and intuitive controls for programming. It includes a brass inlet for durability and three independent outlets for versatile watering.
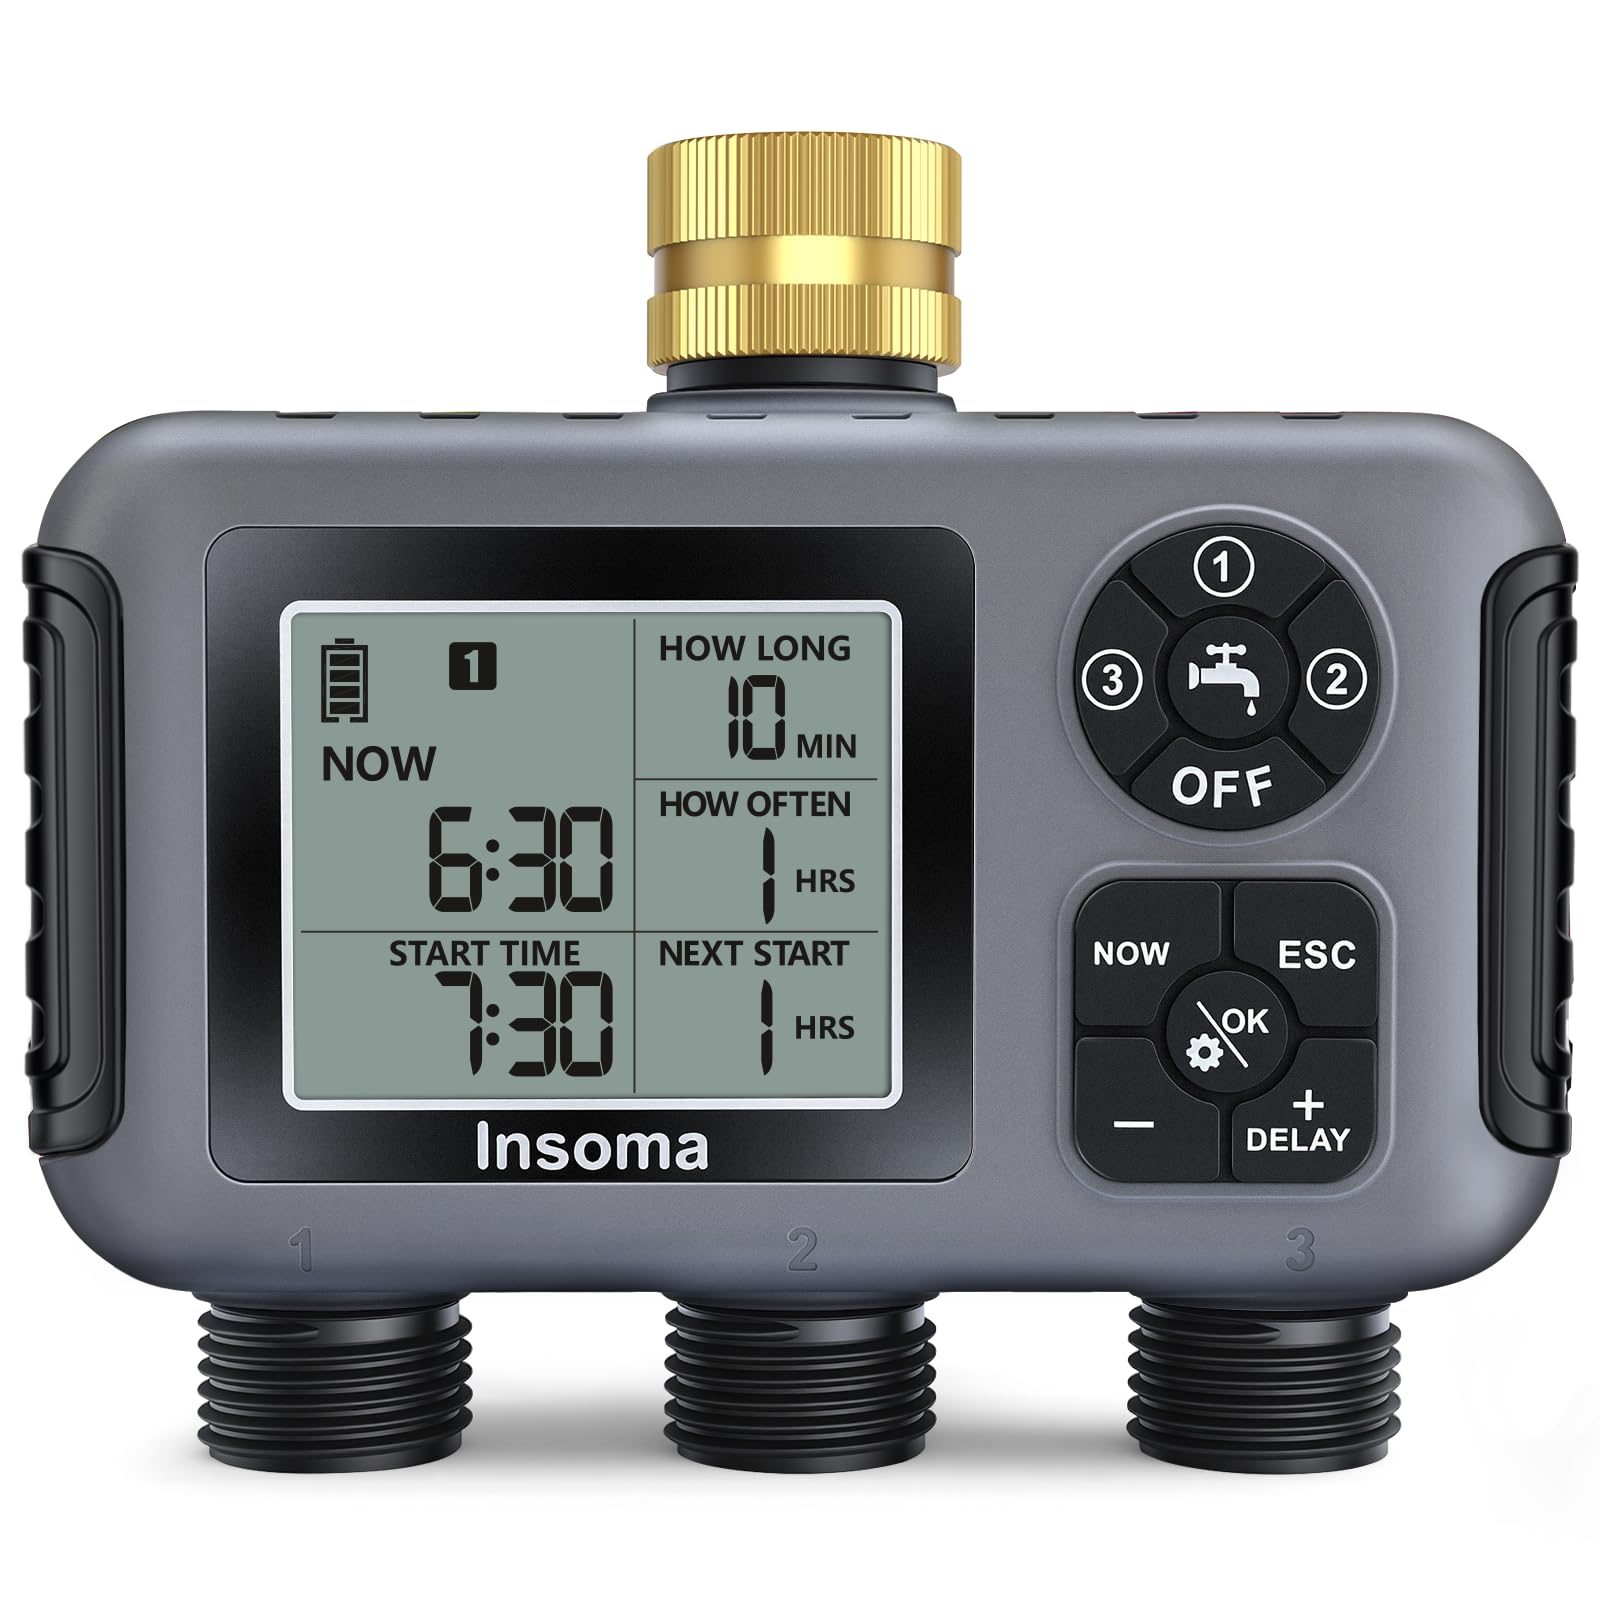
Image: Front view of the Insoma 3-Zone Water Timer, showing the display, control dial, and three hose outlets.
Key Components:
- LCD Display: Shows current time, watering schedule, battery level, and other settings.
- Control Dial: Used to navigate through different settings (Set Clock, Start Time, How Long, How Often, Auto, Off).
- '+' and '-' Buttons: Adjust values for time, duration, and frequency.
- OK Button: Confirms selections.
- Faucet Icon Button: Activates manual watering mode.
- Delay Button: Activates rain delay function.
- Brass Inlet: Connects to your outdoor faucet. Features a filter to prevent debris.
- 3 Independent Outlets: Connect up to three hoses for separate watering zones.
- Battery Compartment: Located on the back, requires 2 AA batteries.

Image: Close-up of the enhanced brass inlet with a 360-degree rotation feature and integrated metal filter.
Setup Guide
- Install Batteries:
- Open the battery compartment on the back of the timer.
- Insert 2 new AA 1.5V Alkaline batteries, ensuring correct polarity (+/-).
- Securely close the battery compartment to maintain IPX5 waterproof rating.
Video: Demonstrates how to install batteries and set up the water timer. This video is from a seller and is relevant.
- Connect to Faucet:
- Ensure the brass inlet filter is clean and properly seated.
- Screw the timer onto your outdoor garden faucet. Hand-tighten only to prevent damage.
- Connect Hoses:
- Attach your garden hoses to the three independent outlets.
- Ensure connections are secure to prevent leaks.

Image: The water timer connected to a faucet with three hoses leading to different watering zones.
Operating Instructions
1. Set Current Time (Set Clock)
- Turn the control dial to "Set Clock".
- Use the '+' and '-' buttons to adjust the current hour. Press "OK" to confirm.
- Adjust the minutes using '+' and '-'. Press "OK" to confirm.
- Select 12-hour or 24-hour format if prompted, then press "OK".
2. Program Watering Schedules (Auto Mode)
The timer allows you to set independent schedules for each of the three zones. Zones will water sequentially based on their start times.

Image: The water timer display showing options for setting clock, start time, watering duration, and frequency.
- Select Zone: Press the '1/2/3' button (if available, or cycle through zones using a specific button, based on common timer interfaces) to select Zone 1, Zone 2, or Zone 3. The display will indicate the active zone.
- Set Start Time:
- Turn the control dial to "Start Time".
- Use '+' and '-' to set the desired start hour. Press "OK".
- Set the minutes. Press "OK".
- Set Watering Duration (How Long):
- Turn the control dial to "How Long".
- Use '+' and '-' to set the watering duration from 1 minute to 360 minutes. Press "OK".
- Set Watering Frequency (How Often):
- Turn the control dial to "How Often".
- Use '+' and '-' to set the frequency: every 1-23 hours or every 1-30 days. Press "OK".

Image: Illustrates setting watering frequency in hours (e.g., every 2 hours) or days (e.g., every 3 days).
- Activate Auto Mode:
- Once all settings are configured for a zone, turn the control dial to "Auto". The timer will now operate according to your programmed schedule.
- Repeat for other zones as needed. Remember, zones water one by one according to their set start times.
3. Manual Watering Mode
This mode allows for immediate watering without affecting your programmed schedule.
- Press the Faucet Icon Button.
- Use '+' and '-' to set the desired manual watering duration (1 to 360 minutes).
- Press "OK" to start manual watering.
- To stop manual watering, press the Faucet Icon Button again or turn the dial to "Off".
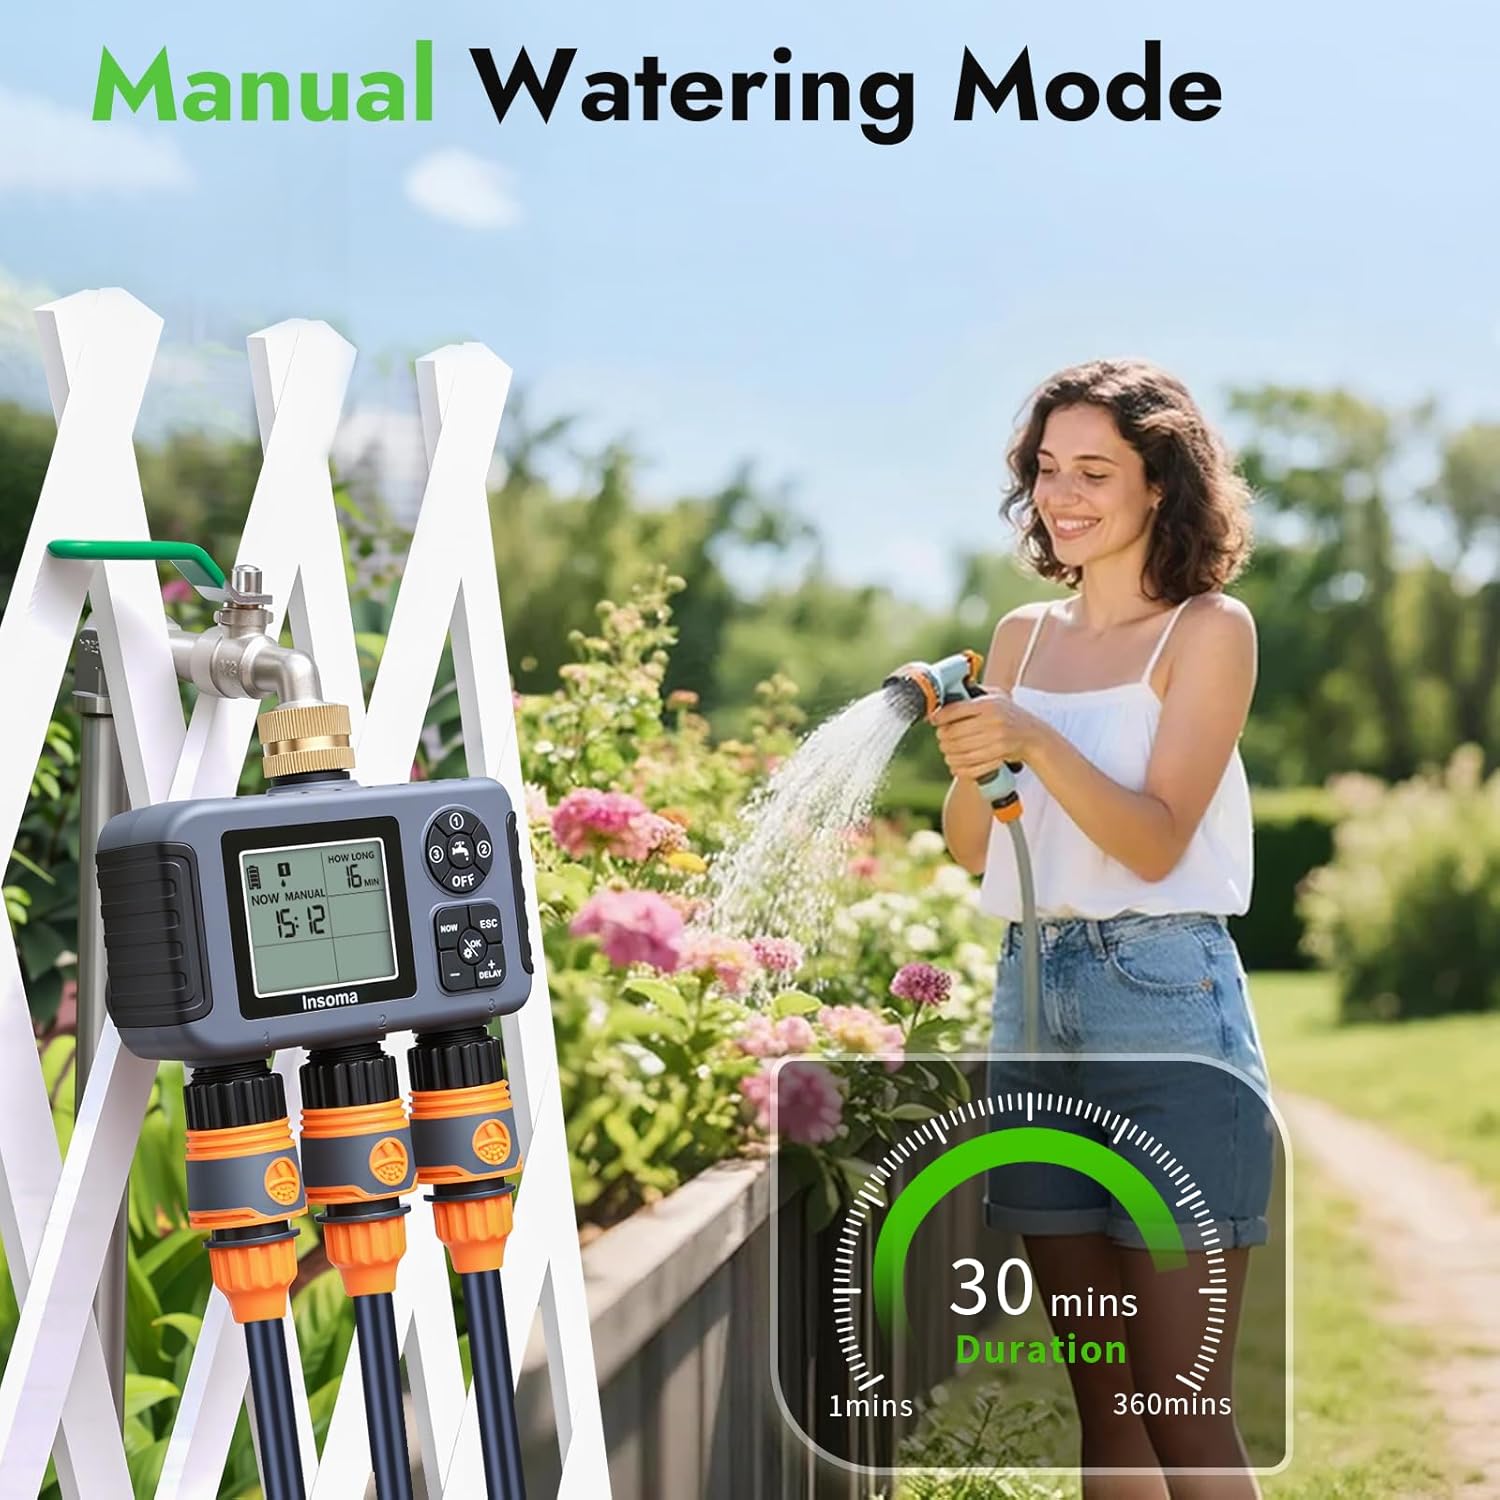
Image: The water timer display showing manual watering duration, with a person manually watering plants in the background.
4. Rain Delay Mode
Pause your watering schedule for a set period to conserve water during rainy weather.
- Turn the control dial to "Auto".
- Press and hold the "Delay" button (often combined with '+') for 3 seconds.
- Use '+' and '-' to select the delay duration (1 to 15 days).
- Press "OK" to confirm. The timer will resume its schedule automatically after the delay.
- To cancel rain delay, press and hold the "Delay" button again for 3 seconds.

Image: The water timer display showing rain delay options (1-15 days) with a rainy garden background.
5. Child Lock Function
Prevent accidental changes to your watering program.
- To activate, turn the control dial to "Auto". Press and hold the '-' button for 5 seconds until a lock icon appears on the screen.
- To deactivate, press and hold the '-' button again for 5 seconds until the lock icon disappears.

Image: The water timer display showing a lock icon, with a child playing in a sprinkler in the background.
Maintenance
- Battery Replacement: Replace batteries when the low battery indicator appears on the screen. The timer will automatically shut off when batteries are critically low to prevent unexpected watering.
- Filter Cleaning: Regularly check and clean the filter in the brass inlet to prevent clogging and ensure proper water flow.
- Winter Storage: Before the first frost, remove the timer from the faucet, remove batteries, and store it indoors in a dry, frost-free location.
- General Cleaning: Wipe the timer with a damp cloth. Do not use abrasive cleaners or solvents.
Troubleshooting
| Problem | Possible Cause | Solution |
|---|---|---|
| Timer not watering. |
|
|
| Water leaking from connections. |
|
|
| Low water pressure. |
|
|
Specifications
- Model: SGW15-T
- Water Outlets: 3 Independent Zones
- Working Pressure: 7.25 psi - 116 psi
- Watering Duration: 1 min - 360 min
- Watering Frequency: Every 1-23 hours or Every 1-30 days
- Power Source: 2 x AA 1.5V Alkaline batteries (not included)
- Waterproof Rating: IPX5
- Material: Brass Inlet
- Dimensions: 4.7"D x 2.3"W x 4.7"H
- Item Weight: 1.5 pounds (0.68 Kilograms)
Warranty and Support
Insoma provides a standard warranty for this product. For specific warranty details, please refer to the warranty card included in your package or contact Insoma customer support.
If you have any questions, concerns, or require technical assistance, please contact our customer support team:
- Email: support@insomasmart.com
- Website: Visit the Insoma Store on Amazon


