
1. Product Overview
The Robocraze SmartElex Speaker Module is a compact and versatile component designed to integrate sound into various electronic and DIY projects. It functions as both a high-fidelity speaker and a buzzer, enabling the addition of audio alerts, tones, and music. This module is compatible with Arduino and other microcontrollers, offering a straightforward interface for quick integration. It features an integrated volume control and a built-in LRA vibration motor for tactile feedback.
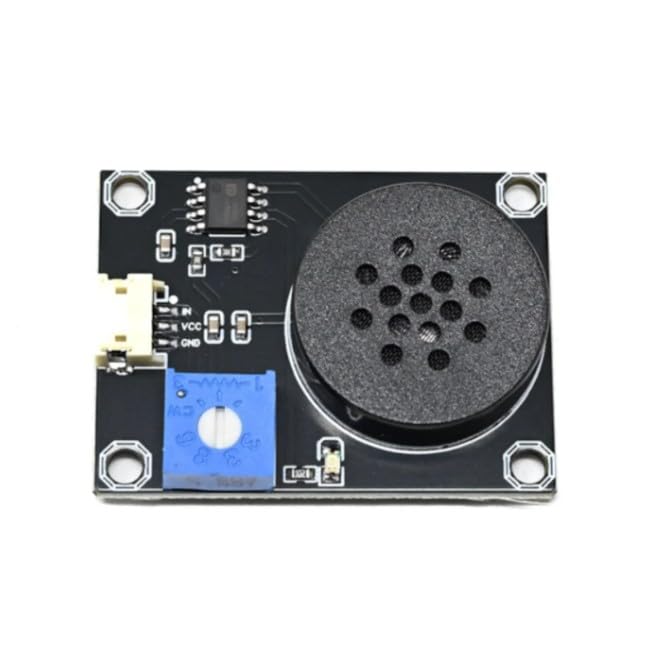
Figure 1: Top view of the SmartElex Speaker Module, showing the speaker, potentiometer, and connection pins.
2. Package Contents
Verify that all items listed below are included in your package:
- 1 x SmartElex Speaker Module (Model TIFCC0274)
- 1 x Connecting Cable (JST-SH to Dupont)
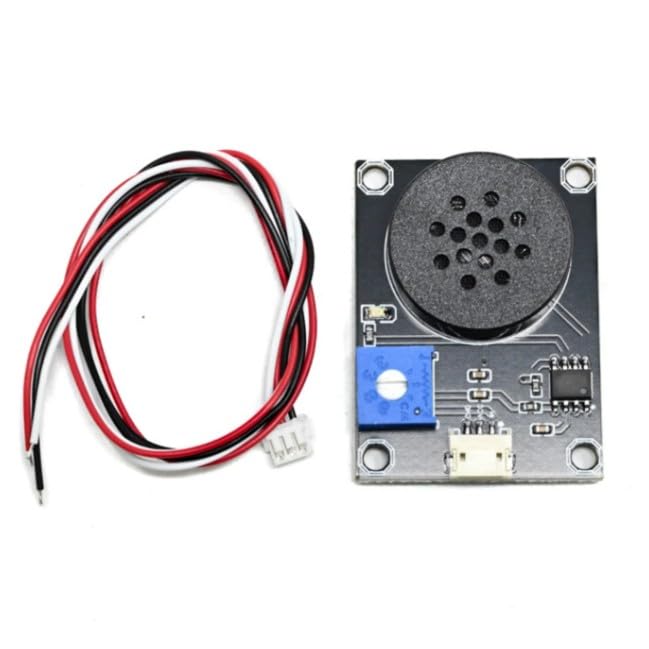
Figure 2: The SmartElex Speaker Module accompanied by its connecting cable.
3. Specifications
| Feature | Description |
|---|---|
| Brand | Robocraze |
| Model Number | TIFCC0274 |
| Functionality | Dual-function speaker and buzzer |
| Operating Voltage | 2.0V – 5.5V DC |
| Dimensions (LxWxH) | 50 x 40 x 20 mm (approx. 40mm x 40mm module size) |
| Item Weight | 15 g |
| Volume Control | Integrated potentiometer |
| Connectivity | 2x JST-SH ports |
| Additional Features | Built-in LRA vibration motor, Arduino compatible |
4. Setup and Connection
Follow these steps to connect your SmartElex Speaker Module to a microcontroller like Arduino:
- Identify Pins: The module has clearly labeled pins for VCC (Power), GND (Ground), and IN (Signal Input).
- Power Connection: Connect the VCC pin of the module to a 3.3V or 5V power supply pin on your microcontroller. Connect the GND pin of the module to the Ground pin of your microcontroller. Ensure the voltage is within the 2.0V-5.5V operating range.
- Signal Connection: Connect the IN pin of the module to a digital output pin on your microcontroller. This pin will be used to send audio signals or trigger buzzer tones.
- Connecting Cable: Use the provided JST-SH connecting cable to establish connections. The JST-SH connector plugs into the module, and the Dupont connectors can be used with breadboards or directly to microcontroller pins.
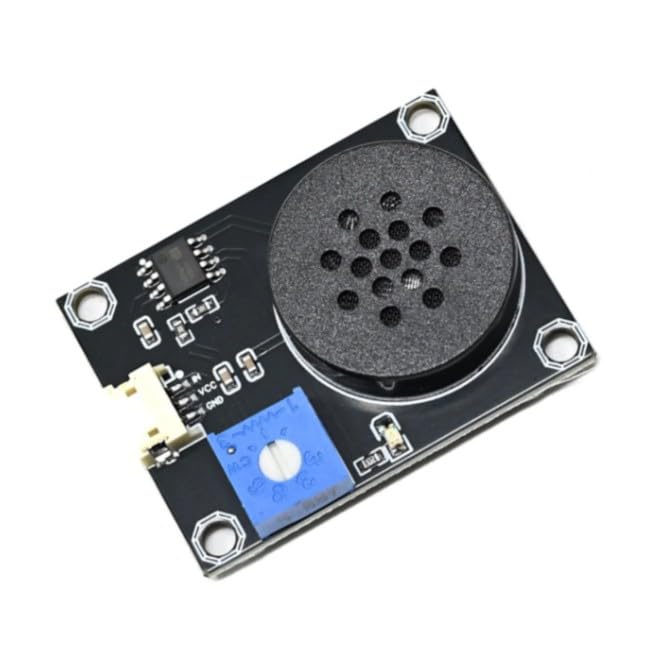
Figure 3: Angled view of the module, highlighting the VCC, GND, and IN connection points.
5. Operating Instructions
5.1 Generating Sound (Speaker/Buzzer Function)
The module can produce sound by receiving a digital signal. For Arduino, the tone() function is commonly used to generate square waves of specific frequencies, effectively using the module as a buzzer. For playing more complex audio, you would typically use a digital-to-analog converter (DAC) or a dedicated audio playback module that outputs a suitable signal to the IN pin.
- Buzzer Mode: Use the
tone(pin, frequency, duration)function in Arduino to generate a tone. For example,tone(IN_PIN, 1000, 500);will produce a 1kHz tone for 500 milliseconds. - Speaker Mode: For playing pre-recorded audio files (e.g., WAV), you will need an additional component like an SD card module and a DAC, or a microcontroller with built-in DAC capabilities, to convert digital audio data into an analog signal that the speaker module can reproduce.
5.2 Adjusting Volume
The module features an integrated potentiometer (a small blue knob) for volume control. Rotate this knob using a small screwdriver to increase or decrease the sound output level. Turn clockwise to increase volume and counter-clockwise to decrease it.
5.3 Using the Vibration Motor
The built-in LRA (Linear Resonant Actuator) vibration motor can be activated by sending a specific signal to the module's input, often in conjunction with the audio signal or independently, depending on the module's internal design and your microcontroller's programming. Consult the module's datasheet or example code for specific control methods for the vibration motor.
6. Maintenance
To ensure the longevity and optimal performance of your SmartElex Speaker Module, observe the following maintenance guidelines:
- Storage: Store the module in a dry, dust-free environment, away from direct sunlight and extreme temperatures.
- Cleaning: If necessary, gently clean the module with a soft, dry cloth. Avoid using liquids or abrasive cleaners.
- Handling: Handle the module by its edges to avoid touching the electronic components, which can be sensitive to static discharge.
- Power Supply: Always ensure the power supply voltage is within the specified 2.0V-5.5V range to prevent damage.
7. Troubleshooting
If you encounter issues with your SmartElex Speaker Module, consider the following troubleshooting steps:
- No Sound Output:
- Check all power (VCC, GND) and signal (IN) connections for proper seating and continuity.
- Verify that the power supply voltage is correct (2.0V-5.5V).
- Adjust the volume potentiometer on the module; it might be set to minimum.
- Ensure your microcontroller code is correctly generating a tone or audio signal to the IN pin.
- Low Volume:
- Rotate the volume potentiometer clockwise to increase the volume.
- Check if the input signal from the microcontroller is strong enough.
- Distorted Sound:
- Ensure the input signal is clean and within the module's acceptable range.
- Verify the power supply is stable and free from noise.
- Vibration Motor Not Working:
- Confirm that your code is correctly activating the vibration motor.
- Check for any physical obstructions or damage to the motor.
8. Warranty and Support
This Robocraze SmartElex Speaker Module is manufactured by Robocraze. For warranty information, technical support, or assistance with product-related inquiries, please contact Robocraze directly.
Manufacturer Contact Information:
Robocraze
Ground Floor, 912/10 Survey no. 104 4th G street, Chelekare, Kalyan Nagar, Bengaluru - 560043
Phone: 8123057137
Please retain your proof of purchase for any warranty claims.