1. Introduction
This manual provides detailed instructions for the safe and efficient use of your Sharper Image Automatic Cat Feeder Wireless, Model SI005-4IP. This feeder is designed to provide scheduled meals for your pet, accommodating various food types including wet and dry, and includes features for food freshness and pet safety.
2. Safety Information
- Read all instructions before using the appliance.
- Do not immerse the electronic components of the feeder in water.
- Keep the feeder away from children and pets when not in use or during cleaning.
- Use only the specified charging cable (Type-C) and a 5V 1~2A adapter/outlet.
- Ensure the feeder is placed on a stable, level surface.
- Do not use the feeder for purposes other than feeding pets.
- Regularly inspect the feeder for any damage. Discontinue use if damaged.
3. Package Contents
Verify that all items are present in the package:
- Smart 6-Meal Auto Feeder unit
- 4 Ice Packs
- Rechargeable 3600mAh Battery (pre-installed)
- USB-C Charging Cable (adapter not included)
- Instruction Manual

Image: Contents of the Sharper Image Automatic Cat Feeder package, including the feeder unit, ice packs, and charging cable.
4. Product Overview
The Sharper Image Automatic Cat Feeder consists of several key components designed for ease of use and pet safety.
- Main Unit: Houses the electronic controls, battery, and motor.
- Food Tray: Features 6 separate compartments for different meals or food types.
- Top Cover: Secures the food tray and provides access to the current meal.
- Ice Packs: Placed beneath the food tray to keep wet food fresh.
- LCD Display & Control Panel: For setting time and programming meals.
- Paw-Safe Sensor: Detects pet interaction to prevent injury during rotation.
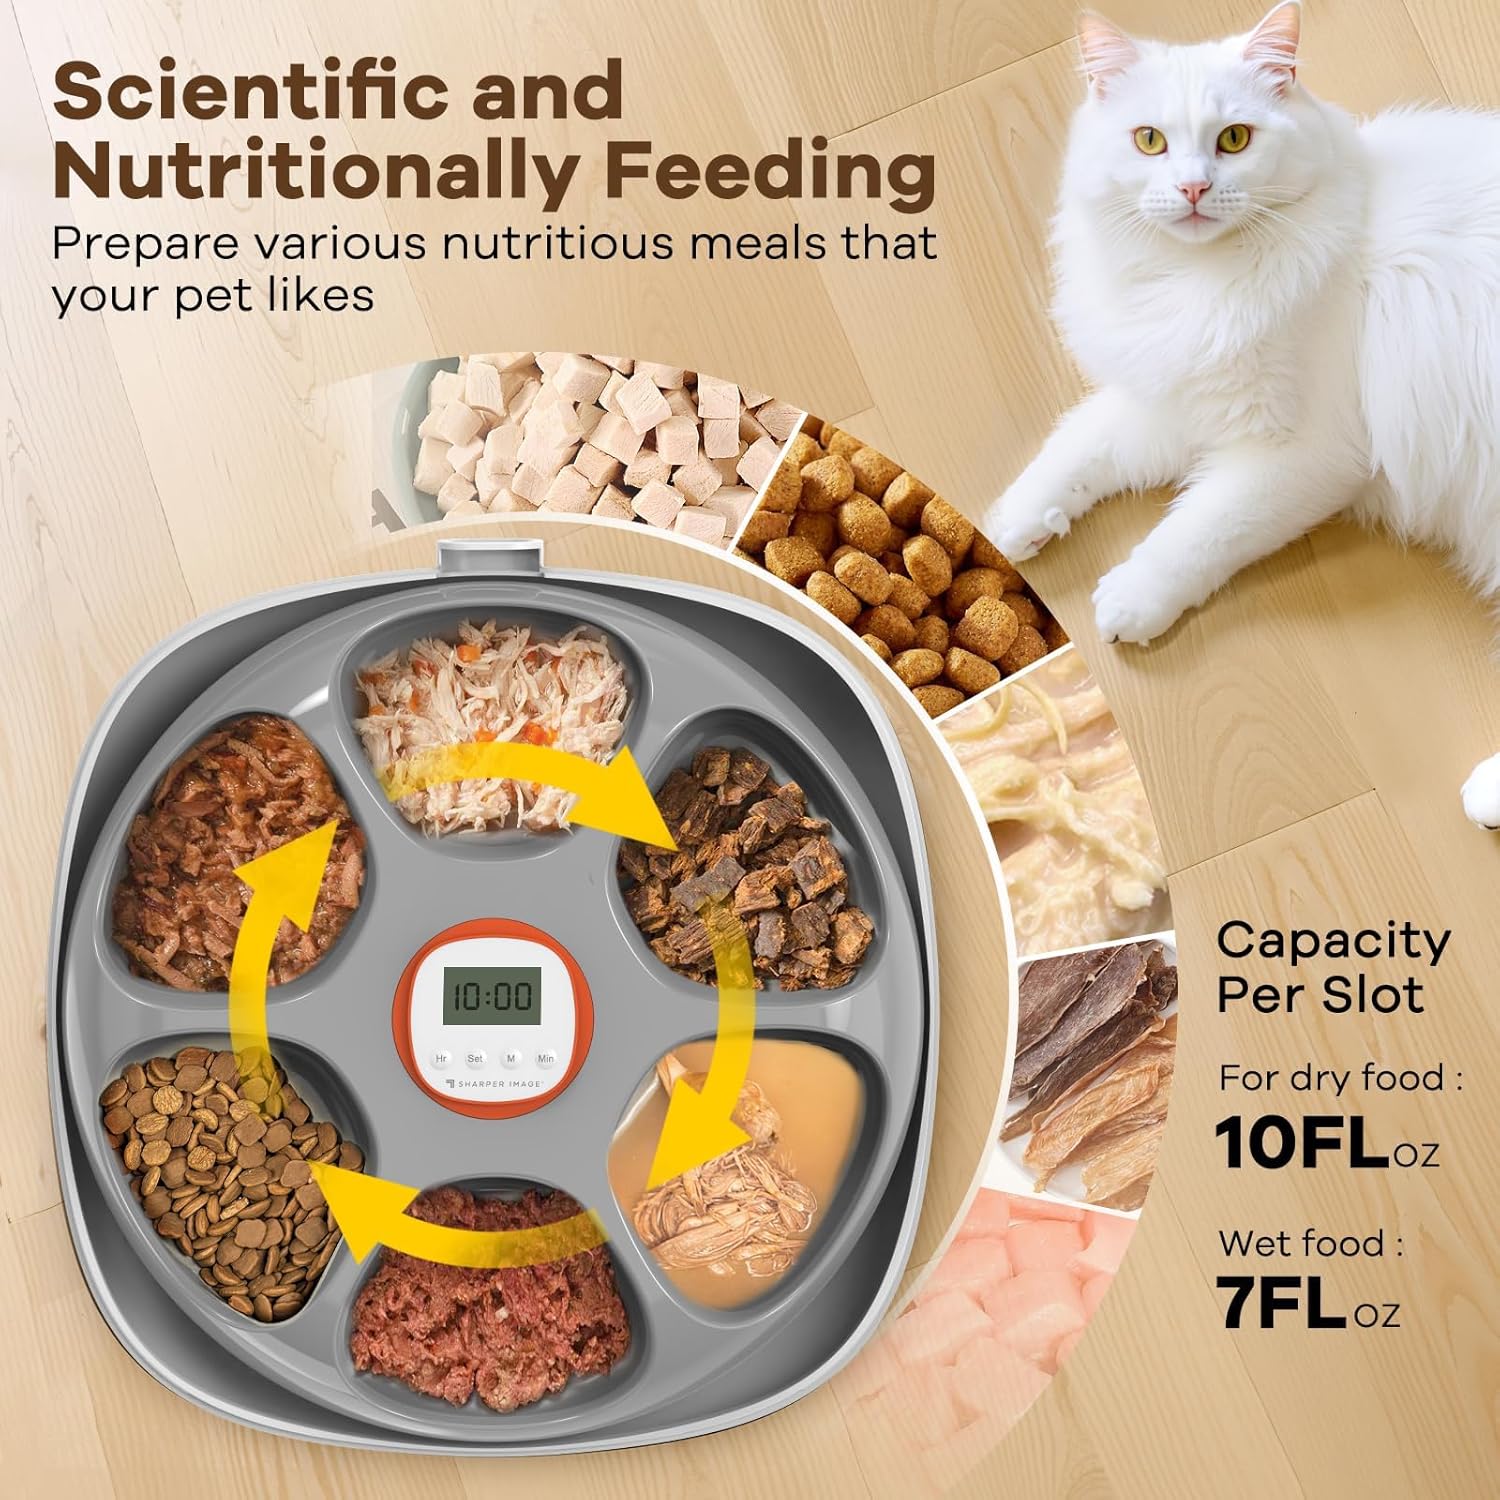
Image: Top view of the automatic cat feeder showing the six food compartments and the central control panel.
5. Setup
5.1 Charging the Feeder
The feeder has a built-in rechargeable battery. Before first use, fully charge the device.
- Connect the provided USB-C charging cable to the feeder's charging port.
- Connect the other end of the cable to a 5V 1~2A USB adapter or outlet (not included).
- The low battery indicator on the display will show charging status.
- A full charge takes approximately 4.5 hours and provides up to 40 days of use.

Image: Close-up of the feeder's display showing a low battery indicator and charging instructions.
5.2 Assembling the Feeder
The feeder components are designed for easy assembly.
- Ensure the feeder is clean and dry before assembly.
- Place the frozen ice packs into the designated slots in the base of the feeder. These help keep wet food fresh for extended periods.
- Align the food tray with the central mechanism and place it onto the base. Ensure it sits securely.
- Place the top cover onto the feeder, aligning the opening with the current meal compartment. Press down gently until it clicks into place.

Image: The automatic cat feeder disassembled, showing the base, ice packs, food tray, and top cover, ready for assembly.

Image: Close-up of the ice packs designed to fit into the feeder's base to maintain food freshness.
5.3 Filling the Food Tray
The feeder has 6 compartments. Each compartment can hold approximately 10 FL OZ of dry food or 7 FL OZ of wet food.
- Fill each compartment with the desired amount of wet, moist, dry food, or snacks.
- Ensure food does not overfill the compartments, which could obstruct the rotation mechanism.

Image: The automatic cat feeder with its compartments filled with different types of pet food, including wet and dry options.
6. Operating Instructions
6.1 Unlocking the Feeder
Before programming, the control panel must be unlocked.
- Simultaneously press and hold the "Hr" and "Min" buttons for a few seconds until the display unlocks.
- The display will show the current time or a default setting.

Image: A hand demonstrating how to unlock the feeder by simultaneously pressing the "Hr" and "Min" buttons on the control panel.
6.2 Setting the Current Time
- Ensure the feeder is unlocked.
- Press the "Set" button once. The hour digits will flash.
- Use the "Hr" button to adjust the hour.
- Press "Set" again. The minute digits will flash.
- Use the "Min" button to adjust the minutes.
- Press "Set" a third time to confirm the current time.
6.3 Programming Feeding Schedules
The feeder allows for up to 6 scheduled meals per day, plus one immediate feeding option.
- After setting the current time, press "Set" again. The display will show "1" (for meal 1) and the hour digits will flash.
- Use the "Hr" and "Min" buttons to set the desired time for the first meal.
- Press "Set" to save the time for meal 1 and move to meal 2.
- Repeat for up to 5 additional meals. If fewer than 6 meals are needed, simply stop pressing "Set" after programming the last desired meal.
- The feeder will automatically save the settings and return to the current time display.
- The feeder has a memory function, so settings are retained even after power off or battery depletion.

Image: The feeder's digital display showing multiple programmed meal times, indicating scheduled feeding.
6.4 Immediate Feeding
To dispense an immediate meal:
- Press the "M" button once. The feeder will rotate to the next available food compartment.
6.5 Paw-Safe Feature
The feeder is equipped with an auto-reverse safety feature to protect your pet.
- If a pet's paw obstructs the rotating tray, the feeder will detect resistance and automatically reverse direction to prevent injury.

Image: An illustration demonstrating the feeder's auto-reverse safety feature, showing the tray reversing if a pet's paw is detected.
7. Maintenance
7.1 Cleaning the Feeder
Regular cleaning ensures hygiene and extends the life of your feeder.
- Remove the top cover and food tray.
- The food tray and top cover are easily removable and can be rinsed under running water with mild soap.
- Important: Do not get the main unit (electronic components) wet. Wipe it clean with a damp cloth only.
- Ensure all parts are completely dry before reassembling.

Image: The food tray and top cover of the automatic cat feeder being rinsed under running water in a sink, demonstrating ease of cleaning.
7.2 Ice Pack Usage
To maximize food freshness, especially for wet or moist foods:
- Freeze the ice packs for at least 6-8 hours before use.
- Place the frozen ice packs in the designated slots beneath the food tray.
- The ice packs can keep food fresh for up to 24 hours, depending on ambient temperature.
- It is recommended to have a spare set of ice packs for continuous use.
8. Troubleshooting
| Problem | Possible Cause | Solution |
|---|---|---|
| Feeder does not turn on. | Battery is depleted. | Charge the feeder using the USB-C cable and a 5V 1~2A adapter. |
| Feeder does not rotate. |
|
|
| Food is not fresh. | Ice packs not frozen or not used. | Ensure ice packs are fully frozen and correctly placed before filling with wet food. Replace ice packs regularly. |
| Display is unresponsive. | Control panel is locked. | Unlock by pressing "Hr" and "Min" simultaneously. |
9. Specifications
- Model Number: SI005-4IP
- Dimensions: 14.5 x 13.6 x 5 inches
- Item Weight: 4.4 Pounds
- Material: Plastic
- Battery: 1 Lithium Ion battery (included)
- Charging Input: 5V 1~2A (USB-C cable included, adapter not included)
- Number of Meals: Up to 6 per day
- Food Capacity per Slot: Approx. 10 FL OZ (dry food), 7 FL OZ (wet food)
- Ice Packs: 4 included, keeps food fresh for 6-8 hours (frozen), up to 24 hours (in feeder)
- Special Features: Paw-safe design, programmable timer, memory function, low battery indicator.
10. Warranty and Support
For warranty information or technical support, please refer to the contact details provided with your purchase or visit the official Sharper Image website. Keep your proof of purchase for warranty claims.


