
1. Introduction
The ACMER S2 7000mW Laser Engraver Machine is a versatile and high-precision tool designed for engraving and cutting a wide range of materials. Featuring a powerful 7W laser head and a 300x300mm engraving area, it offers exceptional accuracy and speed for various creative and professional projects. This manual provides essential information for safe and effective operation, from initial setup to advanced usage and maintenance.

2. Safety Information
Operating a laser engraver requires strict adherence to safety guidelines to prevent injury and damage. Always prioritize safety during setup and operation.
- Eye Protection: Always wear the provided laser safety goggles when the machine is in operation. Never look directly at the laser beam.
- Protective Shield: The engraver features a protective anti-UV acrylic shield. Ensure it is properly in place during operation to reduce accidental exposure.
- Ventilation: Operate the machine in a well-ventilated area to dissipate fumes and smoke produced during engraving and cutting.
- Fire Safety: Keep a fire extinguisher nearby. Do not leave the machine unattended while operating, especially when working with flammable materials.
- Motion Detection: The machine includes a motion detection auto-pause feature. Avoid disturbing the machine during operation.
- Material Safety: Only engrave or cut materials approved for laser use. Some materials can produce toxic fumes or catch fire easily.
- Children and Pets: Keep children and pets away from the operating area.
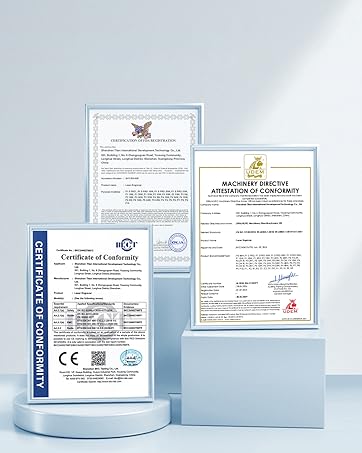
3. Package Contents
Verify that all components are present in your package:
- ACMER S2 Laser Engraver Unit (Frame and Laser Module)
- Honeycomb Working Panel
- Power Adapter
- USB Cable
- Laser Safety Goggles
- Basic Assembly Tools
- User Manual (this document)
4. Setup
The ACMER S2 is designed for easy assembly, making it beginner-friendly. Follow these general steps for initial setup:
- Unpack Components: Carefully remove all items from the packaging and verify against the package contents list.
- Assemble Frame: Connect the frame components according to the included quick-start guide. Ensure all screws are tightened securely.
- Install Laser Module: Mount the laser module onto the gantry.
- Place Honeycomb Panel: Position the honeycomb working panel within the engraving area.
- Connect Cables: Connect the power adapter and USB cable to the engraver and your computer.
- Software Installation: Install the recommended engraving software (AcmerTool, LightBurn, or LaserGRBL) on your computer.

5. Operating Instructions
The ACMER S2 offers precise engraving and cutting capabilities. Familiarize yourself with the software and material settings for optimal results.
5.1 Software Compatibility
The engraver is fully optimized for AcmerTool, a self-developed engraving software that is free to use. It also supports other popular engraving software such as LightBurn and LaserGRBL. The software is compatible with Windows, macOS, and Linux operating systems.

5.2 Engraving and Cutting Process
- Prepare Material: Place your chosen material (e.g., wood, acrylic, metal, leather) on the honeycomb working panel. Ensure it is flat and secured.
- Design in Software: Create or import your design into your chosen engraving software.
- Adjust Settings: Set the appropriate laser power, speed, and number of passes based on the material type and thickness. The ACMER S2 delivers an ultra-fine 0.08 × 0.08 mm laser spot, achieving engraving accuracy up to 0.01 mm, with speeds up to 10,000 mm/min.
- Preview and Start: Use the software's preview function to ensure the design is positioned correctly. Wear safety goggles and initiate the engraving/cutting process.
- Monitor Operation: Do not leave the machine unattended. Observe the process to ensure proper operation and safety.
5.3 Material Capabilities
The 7W laser head and 48W total system power allow engraving and cutting of over 100+ materials. It can cut up to 13 mm paulownia wood and 6 mm black acrylic with multiple passes.

5.4 Expanding Capabilities
The generous 300 × 300 mm workspace supports larger projects. Optional accessories such as rotary modules and risers (sold separately) can expand engraving to cylindrical or taller objects.
6. Maintenance
Regular maintenance ensures the longevity and optimal performance of your ACMER S2 Laser Engraver.
- Clean Laser Lens: Periodically clean the laser lens with a soft, lint-free cloth and appropriate lens cleaning solution to maintain beam quality.
- Clean Working Area: Remove debris and residue from the honeycomb panel and surrounding area after each use to prevent buildup and potential fire hazards.
- Check Connections: Ensure all cables and connections are secure and free from damage.
- Lubricate Moving Parts: Refer to the detailed product manual for specific lubrication requirements for the gantry and other moving components.
7. Troubleshooting
If you encounter issues with your ACMER S2, consider the following common troubleshooting steps:
- Poor Engraving/Cutting Quality: Adjust laser power and speed settings. Ensure the material is correctly focused and the laser lens is clean.
- Machine Not Responding: Check all power and USB connections. Restart the software and the machine.
- Software Connection Issues: Verify correct COM port selection in your software. Reinstall drivers if necessary.
- Material Burning/Not Cutting: This often indicates incorrect power/speed settings. Experiment with test cuts on scrap material to find optimal parameters.
For further assistance, refer to the comprehensive online resources or contact customer support.
8. Specifications
| Feature | Detail |
|---|---|
| Brand | ACMER |
| Model | S2 |
| Laser Power | 7W (7000mW) |
| Total System Power | 48W |
| Laser Spot Size | 0.08 x 0.08 mm |
| Engraving Accuracy | 0.01 mm |
| Engraving Area | 300 x 300 mm |
| Engraving Speed | Up to 10,000 mm/min |
| Software Compatibility | AcmerTool, LightBurn, LaserGRBL |
| Operating System | Windows, macOS, Linux |
| Supported Materials | Wood, Metal, Acrylic, Leather, etc. |
9. Warranty and Support
ACMER is committed to providing high-quality products and customer satisfaction. For any inquiries or issues, please refer to the following:
- Online Support: 24/7 online support is available for assistance with your product.
- Warranty Information: Please refer to the product packaging or the official ACMER website for detailed warranty terms and conditions.
