
1. Introduction
The ANDELI MIG-205PRO MAX is a versatile 6-in-1 multi-process welding machine designed for various welding applications. It supports Aluminum Welding, Gas MIG, Flux Core MIG, Spool Gun MIG, Lift TIG, and Stick welding. This machine features dual-voltage 110V/220V input with automatic identification, a 4.1-inch LED display for clear parameter monitoring, and smart synergic control technology for simplified setup. Its robust design includes advanced protection systems for enhanced durability and safety.
2. Safety Information
Always prioritize safety when operating welding equipment. Failure to follow safety precautions can result in serious injury or death.
- Electric Shock: Welding current can cause electric shock. Ensure proper grounding, wear dry welding gloves, and inspect cables for damage. Do not touch live electrical parts.
- Fumes and Gases: Welding produces fumes and gases that can be hazardous to health. Work in a well-ventilated area or use a fume extractor. Keep your head out of the fumes.
- Arc Rays: Arc rays can burn eyes and skin. Always wear a welding helmet with appropriate shade, safety glasses, and protective clothing.
- Fire and Explosion: Welding sparks and hot metal can cause fires. Keep flammable materials away from the welding area. Have a fire extinguisher readily available.
- Hot Parts: Welded parts and equipment can remain hot for a significant time after welding. Use insulated gloves and tongs to handle hot materials.
- Machine Protection: The MIG-205PRO MAX includes automatic voltage compensation, over-current, overload, overheating, and over-voltage protection. Do not bypass these safety features.
3. Package Contents
Verify that all items are present upon unpacking:
- ANDELI MIG-205PRO MAX Welding Machine
- MIG Torch
- Ground Clamp
- Electrode Holder (for Stick welding)
- Gas Hose
- Power Adapter (110V/220V compatible)
- Welding Gloves
- User Manual (this document)
- Consumables (contact tips, nozzles - specific quantities may vary)

Image: The ANDELI MIG-205PRO MAX welding machine shown with its included accessories, including the MIG torch, ground clamp, electrode holder, gas hose, power adapter, welding gloves, and various consumables like contact tips and a spool of welding wire.
4. Product Overview
4.1 Front Panel and Controls
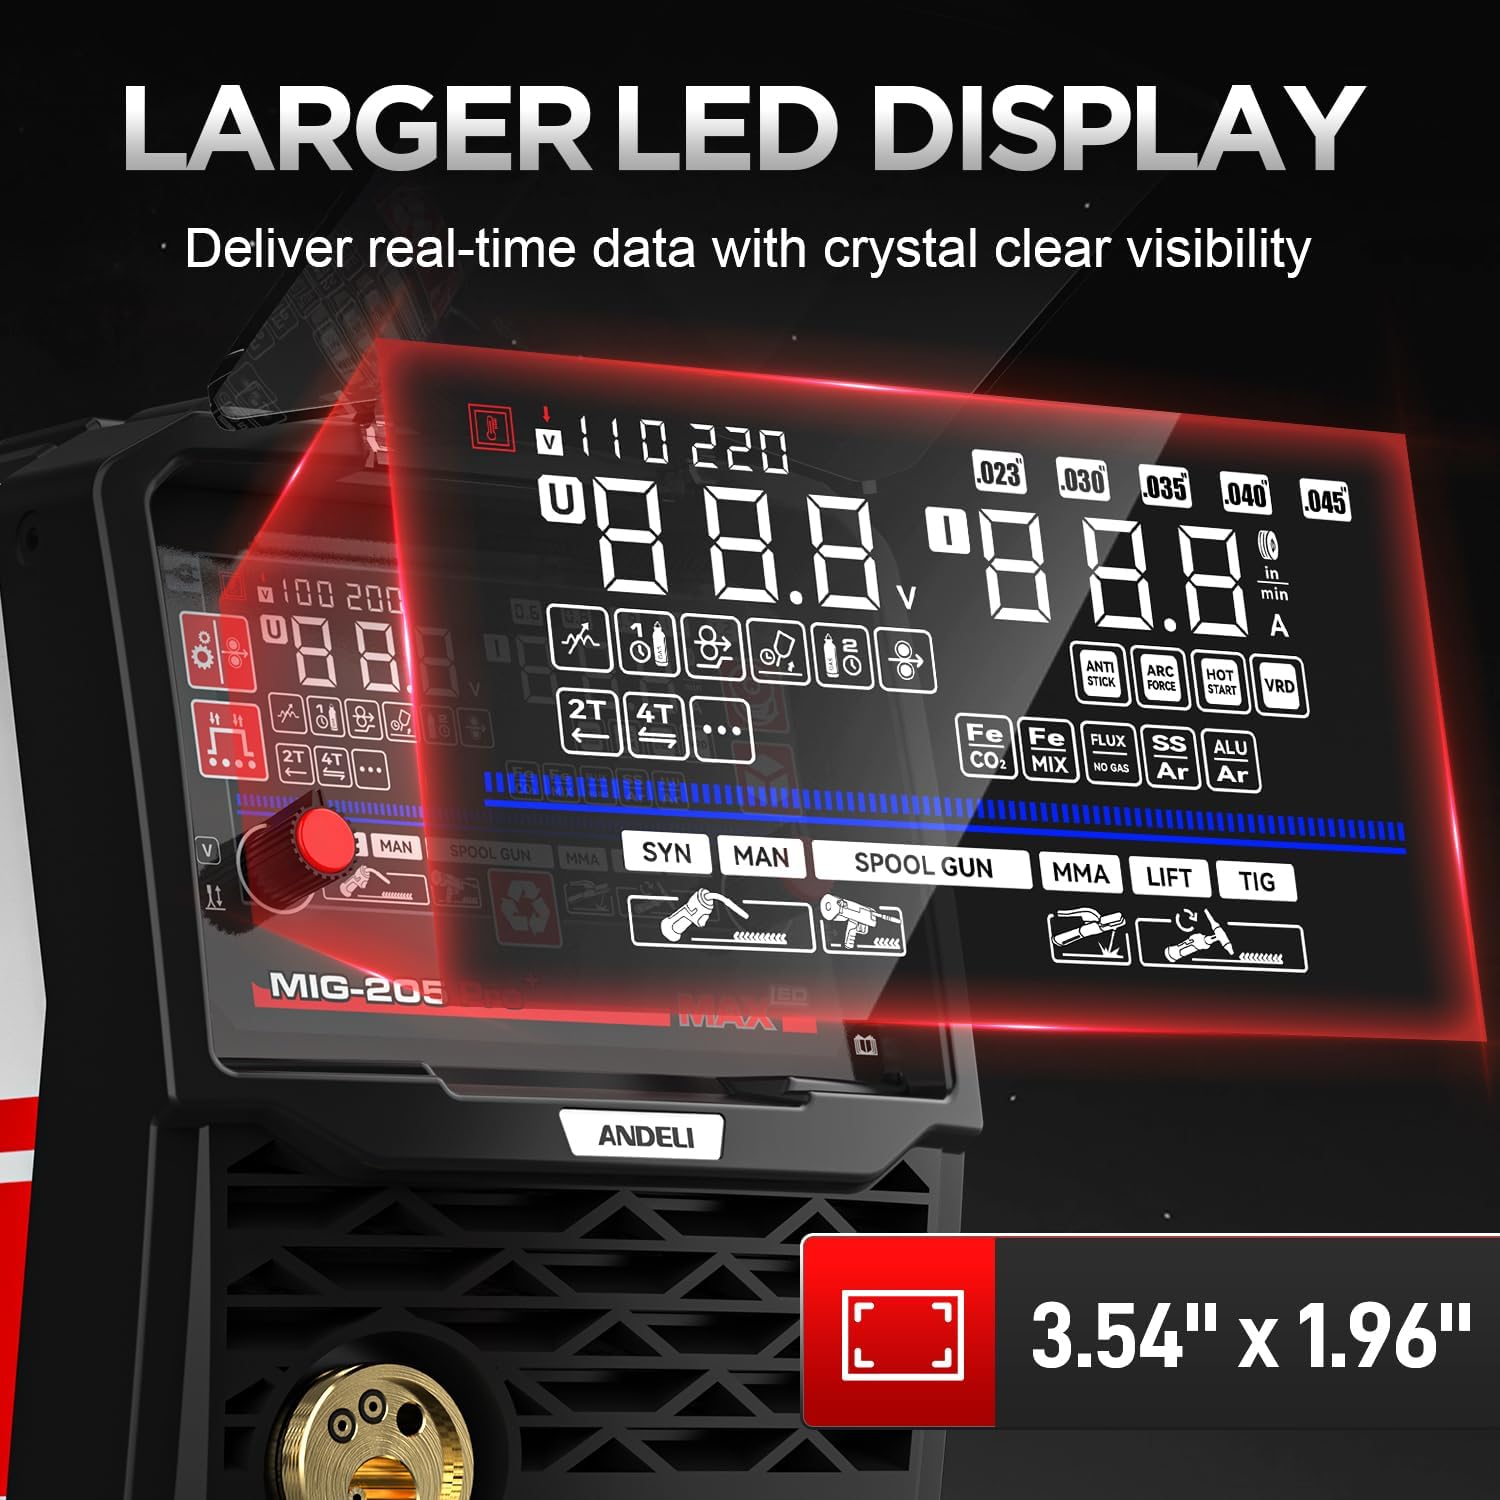
Image: A detailed view of the 4.1-inch LED display and control panel of the MIG-205PRO MAX, showing various indicators and adjustment knobs for welding modes, material types, wire diameters, and other parameters.
The 4.1-inch LED display provides clear visibility of welding parameters and real-time current monitoring. Use the control knobs and buttons to select welding modes, material types, wire diameters, electrode types, and workpiece thickness. The transparent protection cover shields the display from impacts and sparks.
4.2 Internal Components

Image: An illustration highlighting key internal components of the welder, including the MCU (Microcontroller Unit) technology, IGBT (Insulated Gate Bipolar Transistor) inverter, cooling fan, and premium wire feeder mechanism, along with an indication of 2lb/10lb wire spool compatibility.
The MIG-205PRO MAX incorporates advanced technologies for reliable performance:
- MCU Technology: For precise control and intelligent operation.
- IGBT Inverter: Ensures stable and efficient power delivery.
- Cooling Fan: Maintains optimal operating temperature and prevents overheating.
- Premium Feeder: Provides consistent wire feed speed for smooth welding.
- Wire Spool Compatibility: Supports both 2lb and 10lb wire spools.
5. Setup
5.1 Power Connection
The machine automatically identifies 110V or 220V input voltage. Connect the power cord to a suitable power outlet. Ensure the outlet is properly grounded and can supply the required amperage for welding.
5.2 Gas Connection (for Gas MIG/TIG)
For Gas MIG or Lift TIG welding, connect the gas hose from your shielding gas cylinder regulator to the gas inlet on the back of the welding machine. Ensure all connections are tight to prevent gas leaks.
5.3 Wire Spool Installation (for MIG/Flux Core)
- Open the wire feeder compartment.
- Place the wire spool onto the spool holder, ensuring it rotates freely.
- Thread the welding wire through the wire feeder mechanism, ensuring it passes through the drive rollers and into the MIG torch liner.
- Adjust the drive roller tension to prevent slipping or crushing of the wire.
- Close the wire feeder compartment.
5.4 Torch and Ground Clamp Connection
- Connect the MIG torch to the appropriate connector on the front panel.
- Connect the ground clamp cable to the negative (-) terminal and attach the clamp securely to the workpiece, ensuring good electrical contact.
- For Stick welding, connect the electrode holder to the positive (+) terminal and the ground clamp to the negative (-) terminal.
- For Lift TIG welding, connect the TIG torch (sold separately) to the appropriate connector and the ground clamp to the negative (-) terminal.

Image: A welder using a spool gun, demonstrating compatibility with the ANDELI MIG-205PRO MAX. Note that the spool gun is not included with the standard package.
6. Operating Instructions
6.1 Power On and Mode Selection
Turn on the main power switch. The LED display will illuminate. Use the control panel to select the desired welding process (Gas MIG, Flux Core MIG, Spool Gun, Lift TIG, or Stick).
6.2 Parameter Adjustment
The Smart Synergic Control Technology automatically suggests optimal voltage and wire feed speed based on your selections. You can fine-tune these parameters:
- Material Type: Select steel, aluminum, or stainless steel.
- Wire Diameter/Electrode Size: Choose the appropriate size for your consumable.
- Workpiece Thickness: Input the thickness of the material being welded.
- Wire Feed Speed: Adjustable from 2-15 m/min.
- Welding Current: Adjustable from 20-205A.
- Burn Backtime: Adjustable from 100-1100ms.
- Voltage Trimming: Fine-tune voltage up to +/-5V.
- Inductance Adjustment: Adjustable from -9.9 to +9.9 for arc characteristics.

Image: A multi-panel image illustrating key adjustable welding parameters: wire feed speed (2-15m/min), welding current (20-205A), burn backtime (100-1100ms), voltage trimming (+/-5V), and inductance adjustment (-9.9 to +9.9).
6.3 Welding Techniques
Refer to standard welding practices for each process. Maintain proper arc length, travel speed, and torch angle for optimal weld quality. Always wear appropriate personal protective equipment (PPE), including the provided welding gloves.

Image: A pair of white and grey welding gloves, included with the welder, designed for hand protection during welding operations.

Image: A close-up view of the welding glove, highlighting reinforced areas on the tiger's mouth, palm, thumb, and side pads for improved comfort and durability.
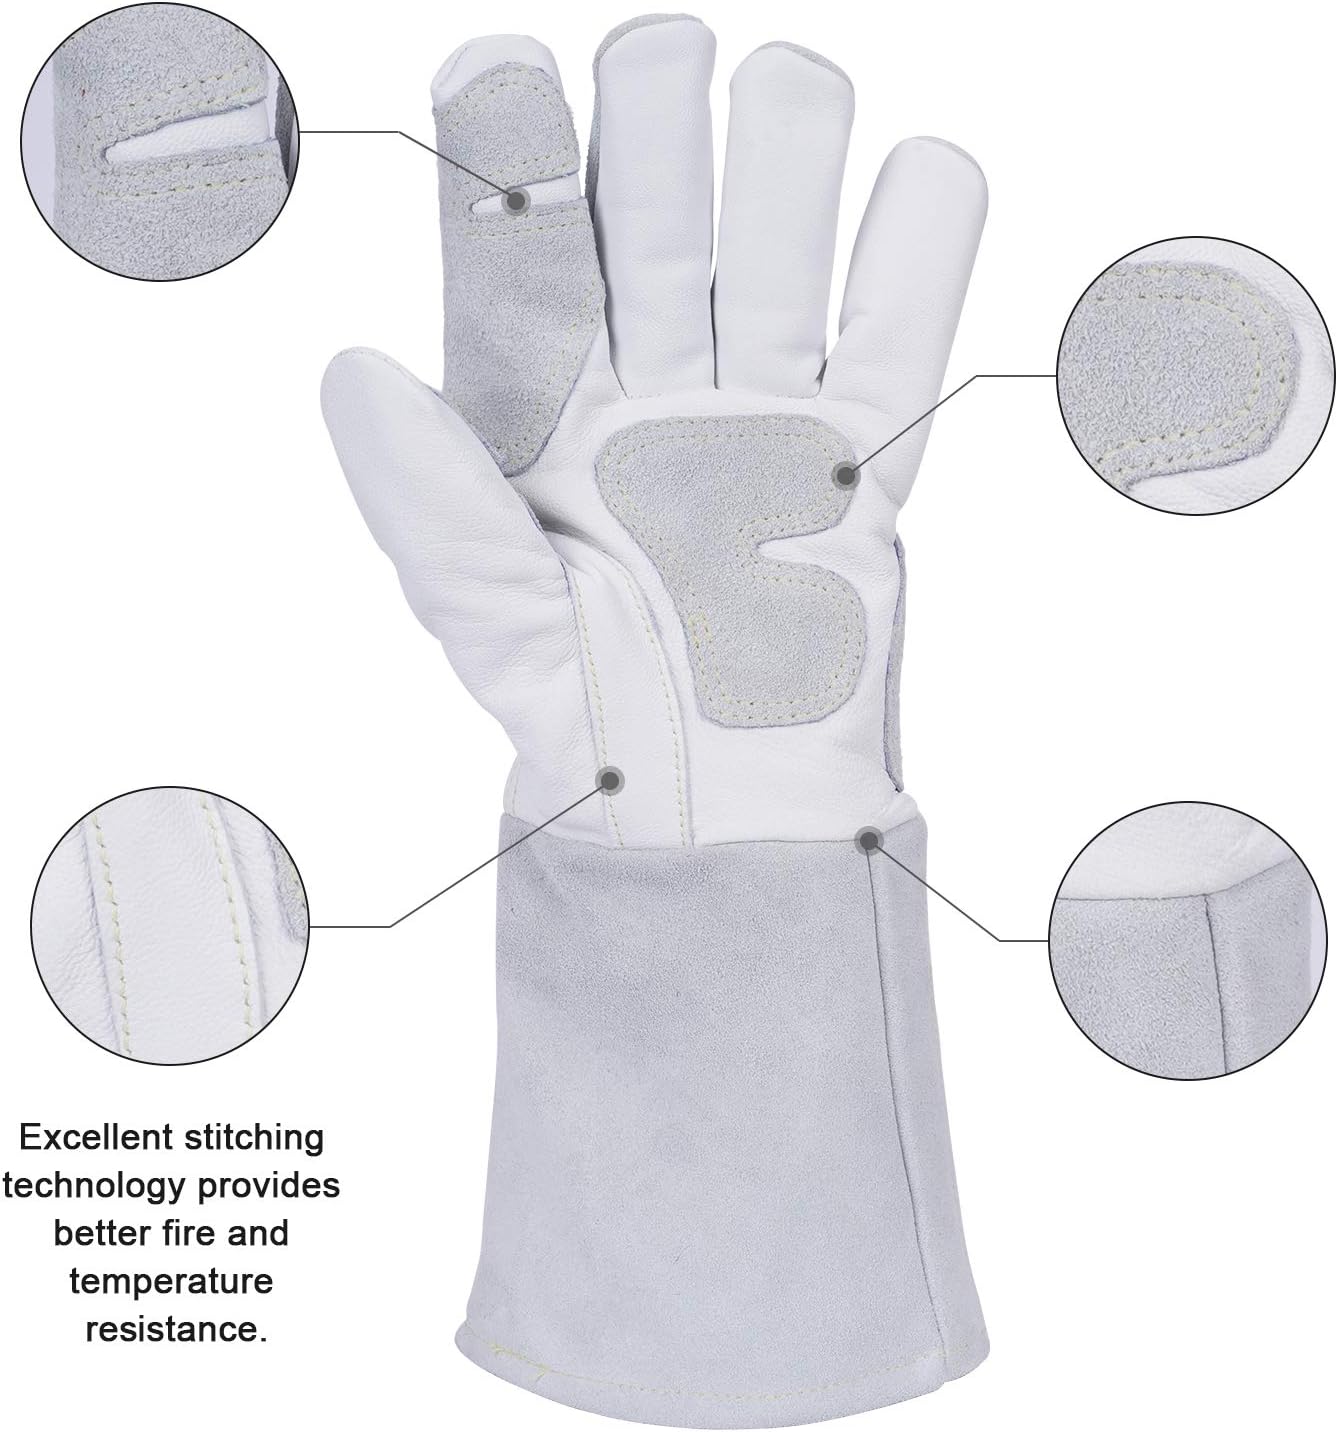
Image: A detailed view of the welding glove, showcasing excellent stitching technology designed to provide enhanced fire and temperature resistance.
7. Maintenance
- Regular Cleaning: Keep the machine clean and free from dust and metal particles. Use compressed air to blow out internal components periodically.
- Consumables: Regularly inspect and replace MIG torch contact tips, nozzles, and diffusers as they wear out. For TIG, check and sharpen tungsten electrodes.
- Cables and Connections: Inspect all cables, hoses, and connections for wear, cuts, or damage before each use. Replace damaged components immediately.
- Wire Feeder: Clean the wire feeder drive rollers and guide tubes to ensure smooth wire feeding.
8. Troubleshooting
8.1 Common Issues and Solutions
| Problem | Possible Cause | Solution |
|---|---|---|
| No arc/Poor arc start | Poor ground connection, incorrect parameters, worn contact tip, no wire feed. | Ensure ground clamp is secure. Adjust voltage/current. Replace contact tip. Check wire spool and feeder. |
| Wire feeding issues | Incorrect drive roller tension, clogged liner, wrong drive roller size, tangled wire. | Adjust tension. Clean/replace liner. Use correct drive rollers. Untangle wire spool. |
| Overheating protection activated | Exceeded duty cycle, blocked ventilation. | Allow machine to cool down. Ensure clear airflow to cooling fan. |
| Inconsistent weld quality | Incorrect parameters, improper technique, contaminated material, gas flow issues. | Verify settings. Practice technique. Clean workpiece. Check gas supply and flow rate. |
9. Specifications
- Model: MIG-205PRO MAX
- Input Voltage: 110V/220V Dual Voltage (Automatic Identification)
- Welding Processes: Gas MIG, Flux Core MIG, Spool Gun MIG, Lift TIG, Stick, Aluminum Welding
- Max Output Current: 205A
- Wire Feed Speed: 2-15 m/min
- Burn Backtime: 100-1100ms
- Voltage Trimming: +/-5V
- Inductance Adjustment: -9.9 to +9.9
- Display: 4.1-inch LED
- Wire Spool Capacity: 2lb/10lb
- Protection Systems: Automatic Voltage Compensation, Over-current, Overload, Overheating, Over-voltage
10. Warranty and Support
For warranty information and technical support, please refer to the official ANDELI website or contact their customer service. Keep your purchase receipt for warranty claims.
ANDELI Customer Service: Visit the ANDELI Store on Amazon