
Introduction
Thank you for choosing the CUTEBEE Japanese Style Miniature Dollhouse Book Nook Kit. This kit provides an engaging DIY assembly experience, allowing you to create a detailed Japanese kimono shop scene. This manual will guide you through the assembly process, provide important safety information, and offer tips for care and maintenance.
The kit is designed for individuals aged 14 and up, offering 3-5 hours of immersive building. It features intricate details, including a warm yellow paper lantern, a "Shinpin Hatsubai" (New Product Launch) sign, and miniature kimonos. The finished product serves as a unique decorative piece for bookshelves or any home space.
Safety Information
Please read and understand all safety instructions before beginning assembly.
- This product contains small parts and is not suitable for children under 3 years of age due to choking hazards.
- Adult supervision is recommended for users under 14 years old.
- Exercise caution when handling sharp tools (e.g., tweezers, craft knives) during assembly.
- Keep batteries (2 AAA, not included) out of reach of small children. Insert batteries with correct polarity.
- Avoid direct contact with glue. Use in a well-ventilated area.
- Dispose of waste materials responsibly.
No other specific warnings are applicable for this product.
Package Contents
Before starting, verify that all components are present in your kit. The package typically includes:
- Interior Wood Board
- External Wood Board
- Instruction Manual
- Dust Cover
- Miniature Kimono Shop Components (e.g., fabric racks, clothing stands, vanity, paper lanterns, signs)
- Paper Accessories
- Mirror
- Wax Paper
- Frosted Rod
Note: 2 AAA batteries and glue are not included and must be prepared separately.

Figure 1: Overview of included package contents. Please note that batteries and glue are not supplied.
Setup and Assembly
Follow the detailed, full-color instructions provided in your kit's manual. The assembly process involves fitting wooden pieces together, applying paper decorations, and installing lighting components.
General Assembly Tips:
- Organize Components: Before starting, sort all wooden pieces and paper accessories according to their labels in the instruction manual.
- Read Instructions Carefully: Review each step thoroughly before proceeding. The manual provides clear diagrams and numbering.
- Use Appropriate Tools: Tweezers are highly recommended for handling small parts. A craft knife may be useful for precise cuts on paper elements.
- Glue Application: Apply glue sparingly. While many pieces are designed for a snug fit, some may require a small amount of glue for stability. Allow sufficient drying time.
- Fitting Pieces: Some pieces may be slightly tight or loose. Gentle sanding may be required for tight fits. For loose pieces, a small amount of glue will secure them.
- Lighting Installation: Follow the wiring diagrams for the LED lighting. Ensure correct battery insertion (2 AAA batteries, not included) for functionality.
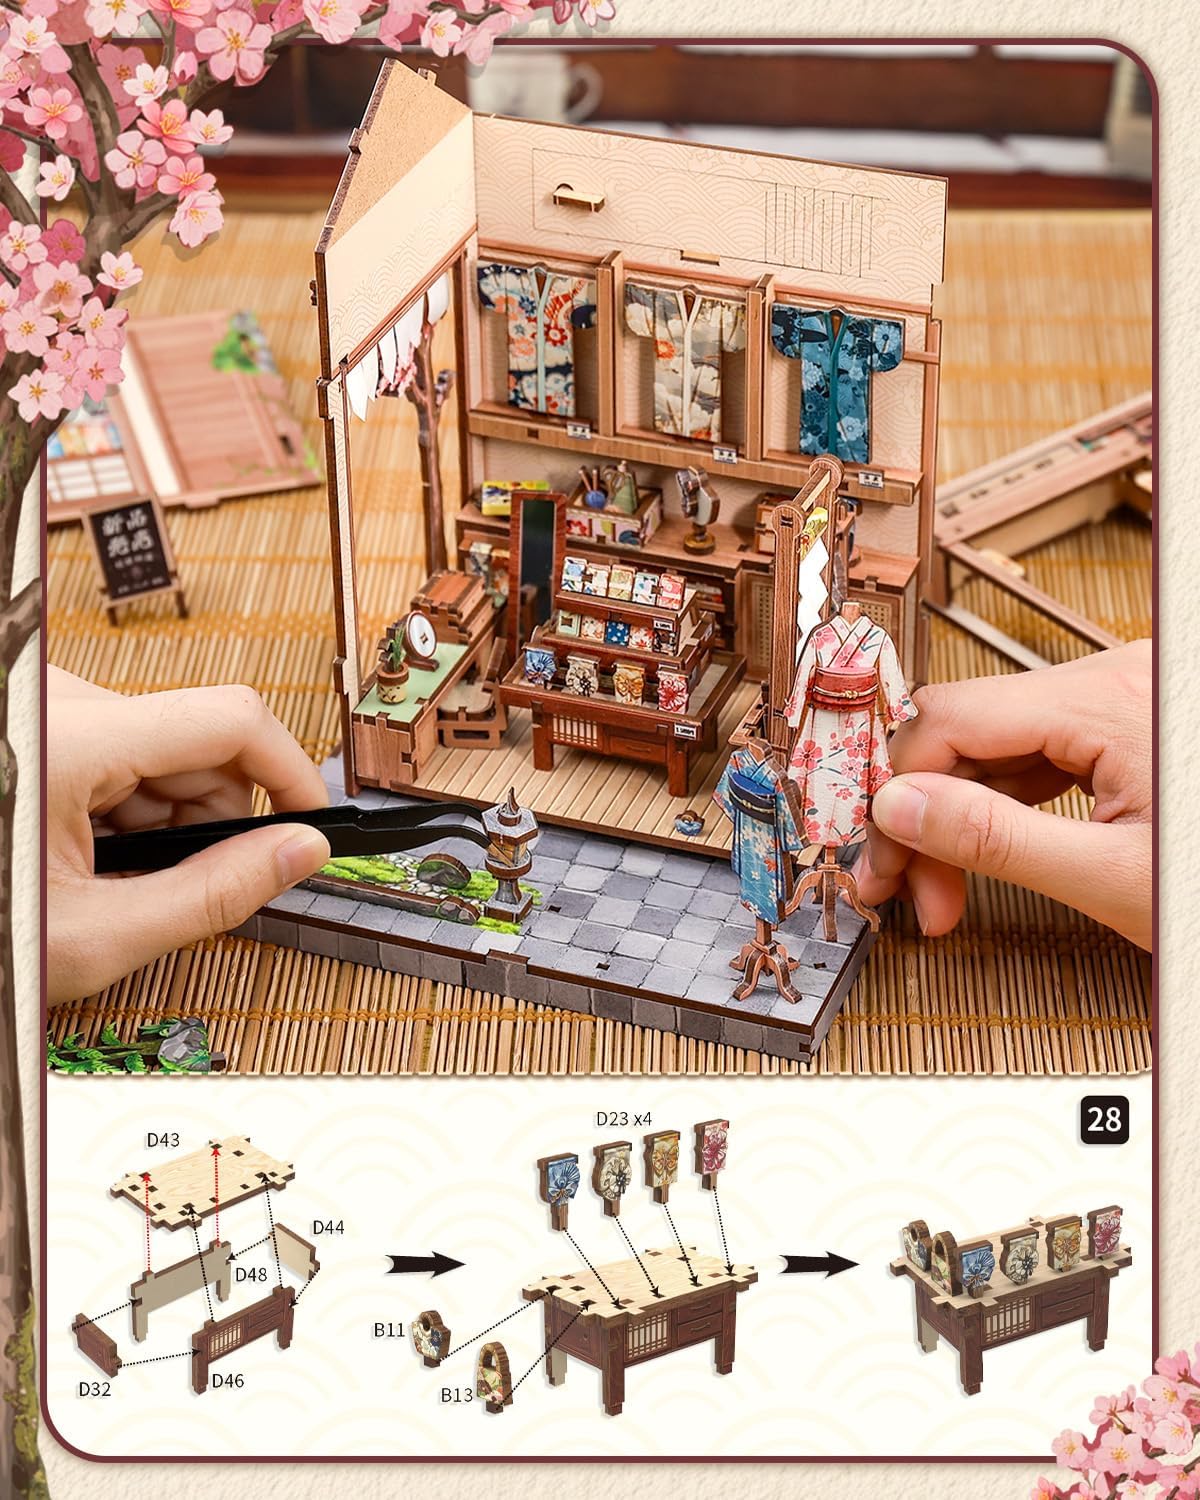
Figure 2: Example of an assembly step, illustrating how wooden components fit together.

Figure 3: A user engaged in the assembly process, demonstrating the detailed nature of the kit.
Video 1: An overview of the CUTEBEE Japanese Style Miniature Dollhouse Book Nook Kit, showcasing its 3D puzzle design and potential as a bookshelf home decor item.
Operating the Lighting Feature
The CUTEBEE Book Nook Kit includes LED lighting to illuminate the miniature scene. To operate the lights:
- Ensure 2 AAA batteries (not included) are correctly installed in the designated battery box, following the polarity markings.
- Locate the power switch, typically integrated into the design (e.g., a touch switch or a small button).
- Activate the switch to turn the LED lights on or off.

Figure 4: The book nook illuminated at night, demonstrating the effect of the LED lighting.

Figure 5: Location of the hidden battery box and other design features.
Maintenance and Care
To ensure the longevity and appearance of your CUTEBEE Book Nook Kit, follow these maintenance guidelines:
- Dusting: Regularly dust the book nook with a soft, dry cloth or a soft brush to prevent dust accumulation, especially on intricate details.
- Cleaning: For stubborn dirt, lightly dampen a cloth with water (avoiding excessive moisture) and gently wipe the surfaces. Do not use harsh chemicals or abrasive cleaners.
- Placement: Place the book nook in a stable location, away from direct sunlight, extreme temperatures, and high humidity to prevent warping or fading of materials.
- Battery Replacement: If the lights dim or stop working, replace the AAA batteries. Ensure proper disposal of old batteries.
- Dust Cover: Utilize the provided dust cover to protect the miniature scene from dust and environmental elements when not on display.
Troubleshooting
If you encounter any issues during or after assembly, refer to the following common solutions:
| Problem | Possible Cause | Solution |
|---|---|---|
| Pieces do not fit together easily. | Manufacturing tolerance; slight variations in wood thickness. | Gently sand the edges of the piece until it fits. Do not force pieces, as this may cause damage. |
| Pieces are too loose. | Manufacturing tolerance; insufficient friction. | Apply a small amount of glue to secure the pieces in place. Allow adequate drying time. |
| LED lights do not turn on. | Incorrect battery installation; dead batteries; loose wiring connection. |
|
| Missing or damaged parts. | Packaging error; shipping damage. | Contact CUTEBEE customer support with details of the missing/damaged parts. Refer to the "Warranty and Support" section. |
| Instruction manual misprint. | Printing error. | Carefully review surrounding steps and diagrams. If still unclear, contact customer support. |
Specifications
| Feature | Detail |
|---|---|
| Product Dimensions | 5 x 2 x 10 inches (approximate assembled size) |
| Item Weight | 1.7 pounds |
| Model Number | EL-CWGC223-US5-CB |
| Recommended Age | 14 years and up |
| Assembly Time | Approximately 3-5 hours |
| Materials | Wood, paper, paper accessories |
| Power Source | 2 AAA batteries (not included) for LED lighting |
Warranty and Support
CUTEBEE is committed to providing quality products and customer satisfaction. If you encounter any issues with your kit, such as damaged parts or missing accessories, please contact our customer support team.
- Contacting Support: Refer to the contact information provided with your purchase or on the official CUTEBEE website.
- Resolution: We aim to respond promptly, typically within 24 hours, and provide a satisfactory solution, which may include replacement parts or a refund.
- Return Policy: Standard return policies apply, typically allowing returns within 30 days of purchase for refund or replacement.
Please retain your proof of purchase for warranty claims.
