1. Introduction
This manual provides detailed instructions for the proper use, setup, maintenance, and troubleshooting of your zealtron Dual Lens Borescope, Model A1. This device is designed for visual inspection in hard-to-reach areas, featuring a 5-inch IPS screen and a dual-lens 1080P camera system. Please read this manual thoroughly before operating the device to ensure safe and efficient use.
2. Package Contents
Verify that all items listed below are included in your package. If any items are missing or damaged, please contact customer support.
- T50 borescope (Main Unit with 5" IPS Screen)
- 5m (16.5ft) Dual-Cam Cable (Probe)
- Hook Accessory
- Magnet Accessory
- Type-C Charging Cable
- User Manual
3. Product Overview
The zealtron Dual Lens Borescope is an advanced inspection tool designed for clarity and ease of use.

The main unit of the borescope, displaying the 5-inch IPS screen, control panel, and the attached semi-rigid inspection cable.
3.1 Key Components
- 5-inch IPS Screen: Provides a clear, high-resolution display with wide viewing angles.
- Control Panel: Intuitive buttons for navigation, photo/video capture, and settings adjustment.
- Semi-Rigid Cable: A flexible yet firm cable that retains its shape for precise probe positioning.
- Dual-Lens Probe: Features both a front-facing and a side-facing camera for comprehensive inspection.
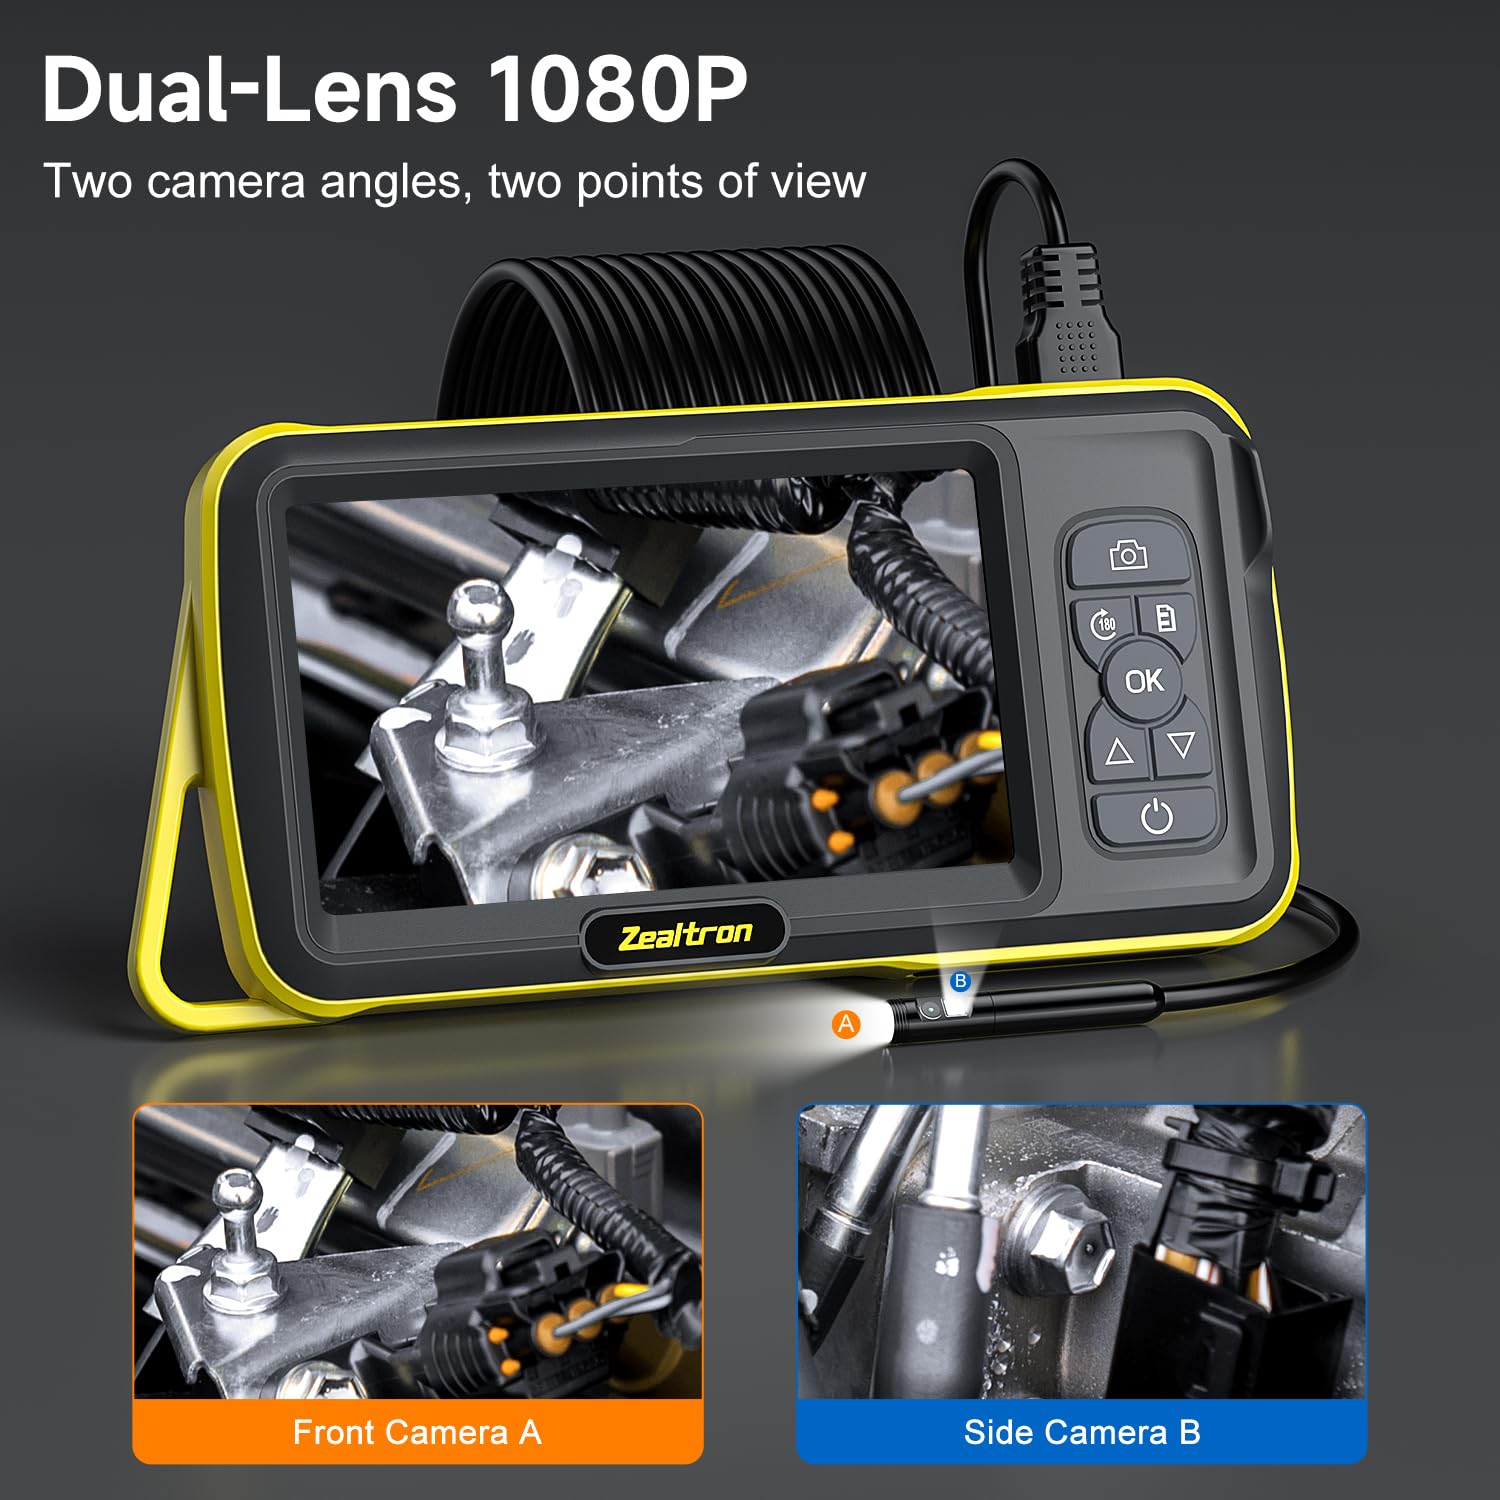
This image demonstrates the innovative dual-lens system, allowing users to switch between a forward-facing camera (A) and a side-viewing camera (B) for comprehensive inspection.
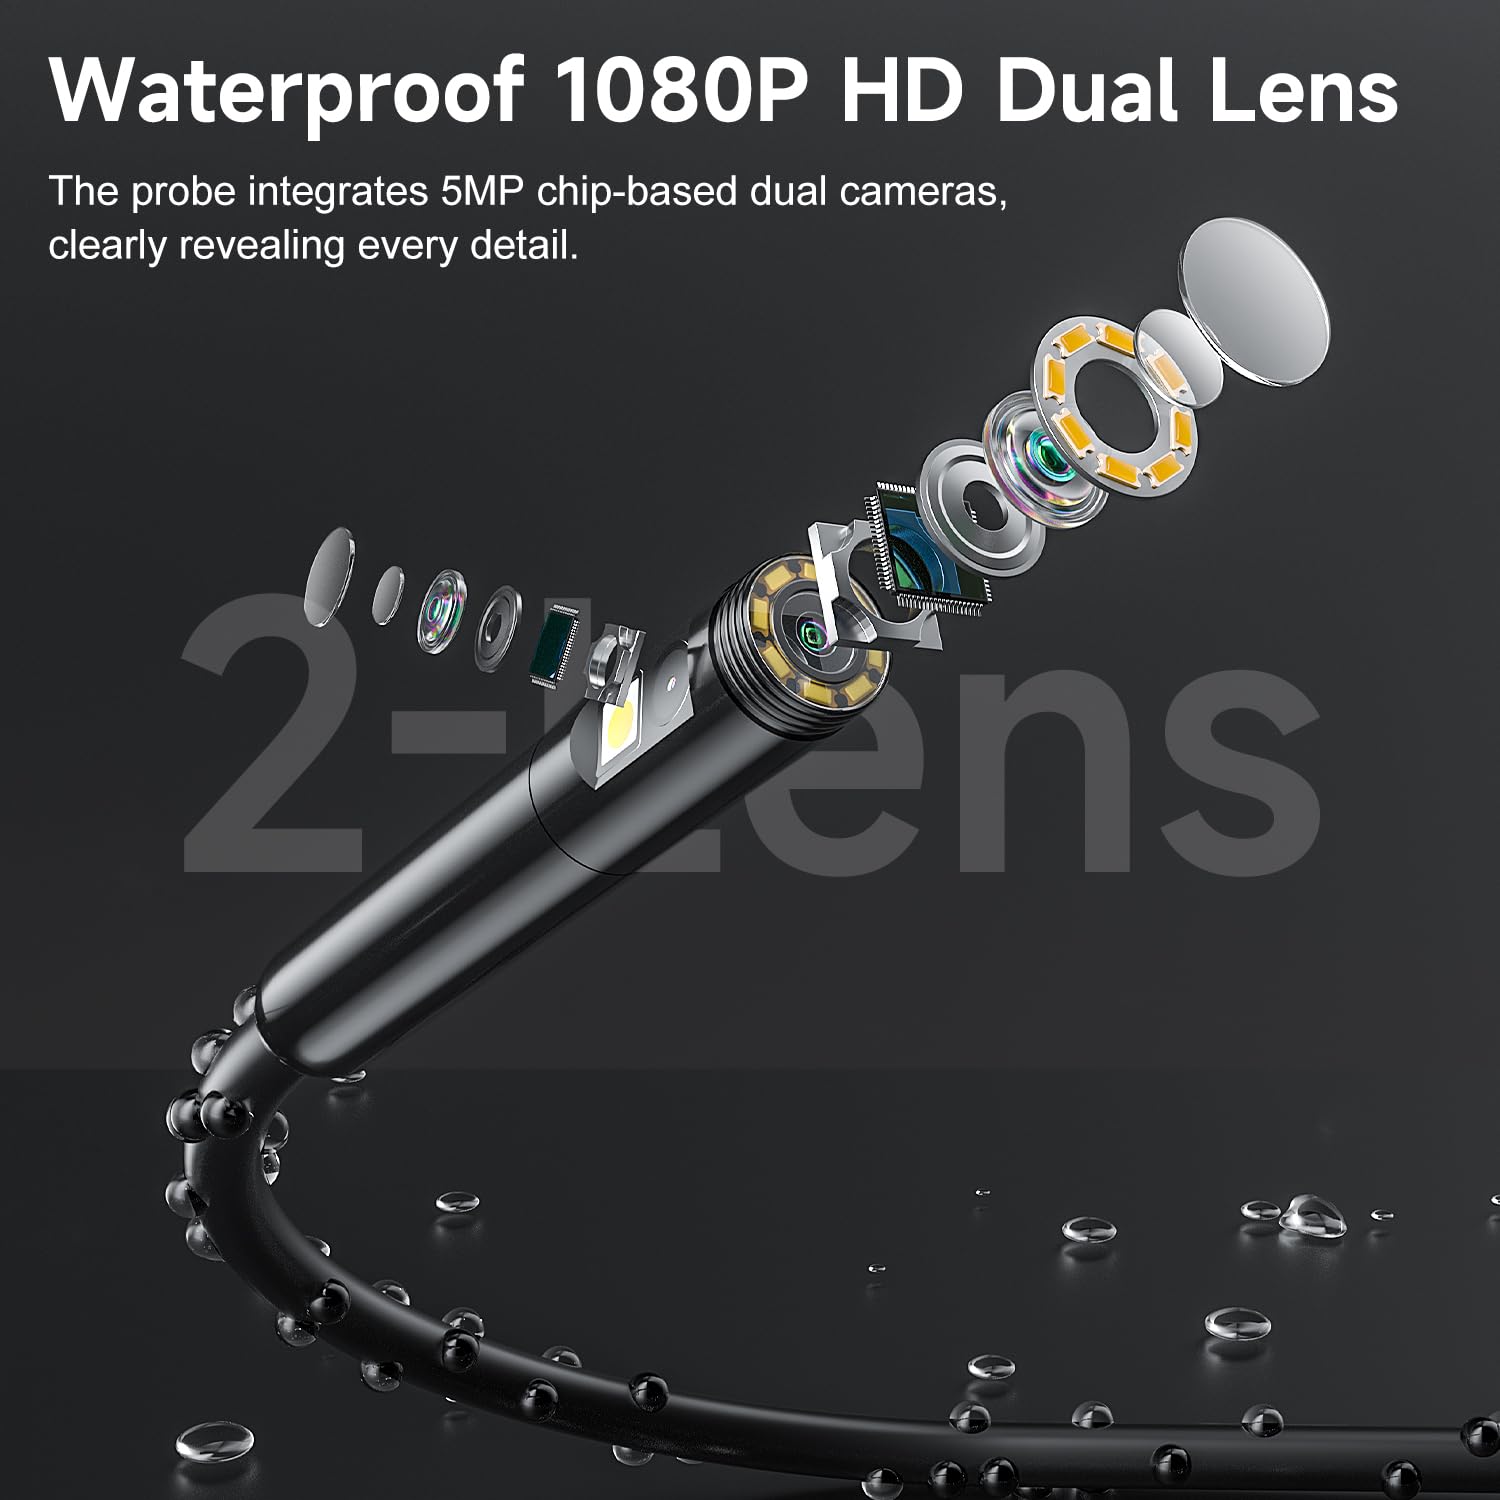
A detailed view of the borescope probe's construction, highlighting its waterproof design, dual 1080P HD cameras, and multiple LED lights for illumination in dark environments.
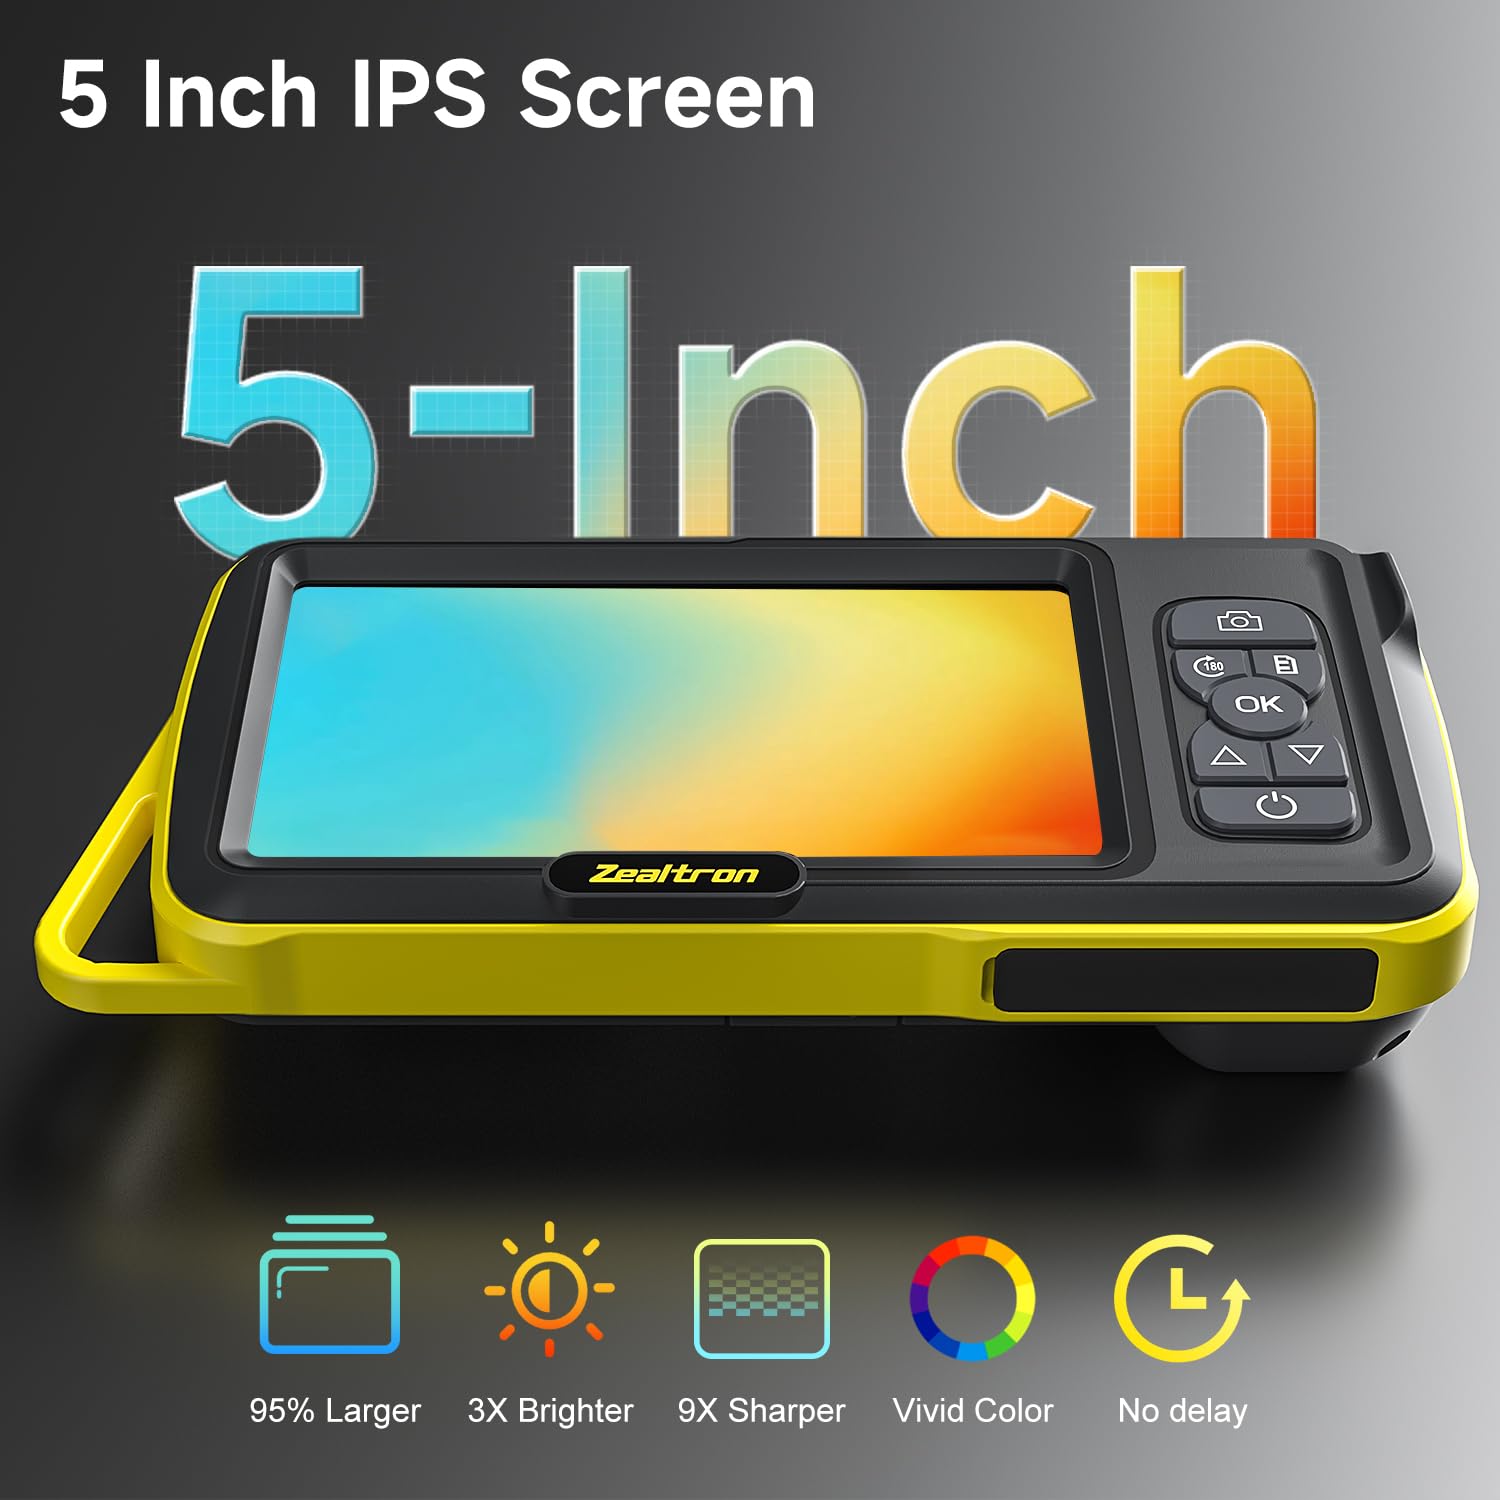
The large 5-inch IPS screen provides a clear and bright display for real-time viewing during inspections, offering wide viewing angles and accurate color reproduction.
4. Setup
4.1 Charging the Device
Before first use, fully charge the borescope using the provided Type-C charging cable and a standard USB power adapter (not included).
- Connect the Type-C cable to the borescope's charging port.
- Connect the other end to a USB power source.
- The charging indicator light will illuminate. A full charge typically takes approximately 3-4 hours and provides over 4 hours of active use.

Equipped with a built-in rechargeable battery, the borescope provides over 4 hours of continuous operation on a single charge, ensuring extended use without interruption.
4.2 Inserting a Memory Card (Optional)
To save photos and videos, insert a MicroSD (TF) card into the designated slot. The device supports cards up to 32GB (card not included).
- Locate the MicroSD card slot on the side of the main unit.
- Gently insert the MicroSD card with the contacts facing down until it clicks into place.
- To remove, push the card in slightly until it springs out.

The borescope supports MicroSD cards for storing captured photos and videos, allowing for documentation and later review of inspection findings.
4.3 Connecting the Probe Cable
The semi-rigid probe cable connects to the main unit via a USB-C port.
- Align the USB-C connector of the probe cable with the port on the main unit.
- Push firmly until it is securely connected.
- The modular design allows for hot-swapping or replacement of cables.

The modular USB-C design enables easy connection and disconnection of the probe cable, facilitating replacement or future upgrades.
5. Operation
5.1 Power On/Off
- Power On: Press and hold the Power button () for 2-3 seconds until the screen illuminates.
- Power Off: Press and hold the Power button for 2-3 seconds until the screen turns off.
5.2 Navigating Menus
Use the Up () and Down () arrow buttons to scroll through menu options. Press the OK button to confirm a selection.
5.3 Capturing Photos and Videos
- Take a Photo: In live view mode, press the Photo button () once. The image will be saved to the MicroSD card.
- Record Video: In live view mode, press the Record button (often indicated by a video camera icon or 'M' for Mode, refer to device specific icon) once to start recording. Press again to stop. Videos will be saved to the MicroSD card.
5.4 Switching Between Lenses
The borescope features a dual-lens system. To switch between the front-facing and side-facing cameras:
- In live view mode, press the Lens Switch button (often labeled with a 'C' or a dual-camera icon, refer to device specific icon).
- The display will switch between the front camera view and the side camera view.
5.5 Adjusting LED Lights
The probe is equipped with adjustable LED lights for illumination. Use the Light Adjustment buttons (often integrated with Up/Down arrows or a dedicated button) to increase or decrease the brightness of the LEDs.
5.6 Using Accessories
The included hook and magnet accessories can be attached to the probe tip for specific tasks.
- Attachment: Carefully screw the desired accessory onto the threaded tip of the probe until secure.
- Usage: The hook can be used to retrieve small wires or objects, while the magnet is suitable for metallic items.

Included accessories such as a threaded hook and magnet can be securely attached to the probe tip, aiding in the retrieval of small objects from inaccessible areas.
5.7 Integrated Kickstand
The main unit features a built-in kickstand for hands-free operation.
- Gently pull out the kickstand from the back of the unit.
- Place the unit on a flat surface for stable viewing.

The integrated kickstand on the back of the main unit allows for convenient hands-free viewing during inspections.
6. Maintenance
6.1 Cleaning the Probe and Lens
- After each use, especially in dirty or wet environments, wipe the probe and camera lenses with a soft, damp cloth.
- For stubborn dirt, use a small amount of mild soap solution. Ensure no liquid enters the USB-C connector.
- Do not use abrasive cleaners or solvents, as these can damage the lens or probe material.
6.2 Cleaning the Main Unit and Screen
- Wipe the main unit and screen with a soft, dry, lint-free cloth.
- Avoid spraying cleaning solutions directly onto the screen.
6.3 Storage
- Store the borescope in a cool, dry place, away from direct sunlight and extreme temperatures.
- Ensure the cable is neatly coiled to prevent kinks or damage.
7. Troubleshooting
| Problem | Possible Cause | Solution |
|---|---|---|
| Device does not power on. | Low battery. | Charge the device fully. |
| No image on screen. | Probe cable not connected properly. | Ensure the USB-C probe cable is securely connected. |
| Image is blurry or unclear. | Lens is dirty; Incorrect focal distance. | Clean the camera lens. Adjust the distance between the probe and the object. |
| Cannot save photos/videos. | No MicroSD card inserted; Card is full or corrupted. | Insert a MicroSD card. Check card capacity or try a different card. Format the card if necessary (refer to device settings). |
| LED lights are not working. | Lights are turned off or brightness is set to minimum. | Adjust LED brightness using the dedicated buttons. |
8. Specifications
| Feature | Detail |
|---|---|
| Display | 5-inch IPS Screen |
| Video Capture Resolution | 1080p |
| Camera Type | Dual Lens (Front & Side) |
| Cable Length | 16.5 feet (5 meters) |
| Cable Type | Semi-Rigid |
| Power Source | Built-in Rechargeable Lithium Polymer Battery |
| Battery Life | 4+ hours (active use) |
| Storage Media | MicroSD Card (up to 32GB, not included) |
| Connectivity | USB-C (for probe and charging) |
| Manufacturer | Zealtron |
9. Warranty and Support
Your zealtron Dual Lens Borescope is backed by dedicated customer support. For any questions, technical assistance, or warranty claims, please contact zealtron customer service. Refer to the product packaging or the official zealtron website for specific contact information and warranty details.
zealtron offers 24/7 support to assist you with any product-related inquiries.


