
1. Introduction
This manual provides detailed instructions for the safe installation, operation, and maintenance of your Philips LED 4-Inch Slim Downlight. This product features a canless design, dimmable functionality, and offers five selectable color temperatures (CCTs) to suit various lighting needs. Please read this manual thoroughly before installation and retain it for future reference.

Figure 1: Philips LED 4-inch slim downlight showing its canless design, dimmable function, 5 CCT options, and suitability for damp locations.
2. Safety Information
WARNING: Risk of Fire or Electric Shock.
- Always turn off power at the circuit breaker before installation or servicing.
- This product must be installed in accordance with the applicable installation code by a person familiar with the construction and operation of the product and the hazards involved.
- Ensure all electrical connections are secure and comply with local codes and ordinances.
- Do not alter, relocate, or remove wiring, lamp holders, or other electrical components.
- Suitable for damp locations. Do not use in areas with direct water exposure.
- IC rated for direct contact with insulation.
3. Package Contents
Verify that all components are present before beginning installation:
- Philips LED 4-Inch Slim Downlight (quantity as per pack)
- Junction Box (one per downlight)
- Instruction Manual (this document)
4. Installation Instructions
- Turn Off Power: Before starting, ensure the power to the installation area is turned off at the circuit breaker.
- Prepare Ceiling Opening: Cut a circular hole in the ceiling at the desired location. Refer to the product specifications for the exact hole size (typically 4.25 inches or 108 mm for a 4-inch downlight). Ensure there are no obstructions behind the ceiling before cutting.
-
Wire the Junction Box: Open the junction box cover. Connect the household electrical wires (live, neutral, ground) to the corresponding wires inside the junction box using the provided screwless connectors. Ensure all connections are secure. Close the junction box cover.

Figure 2: Screwless junction box wiring for easy connection.
-
Select Color Temperature (CCT): Before inserting the downlight into the ceiling, locate the CCT selection switch on the side of the junction box or the downlight itself. Choose your desired color temperature (2700K, 3000K, 3500K, 4000K, or 5000K) by sliding the switch to the appropriate setting.

Figure 3: CCT selection switch on the junction box.
- Connect Downlight to Junction Box: Plug the downlight's connector cable into the corresponding receptacle on the junction box. Ensure a firm connection.
-
Insert Downlight: Gently push the spring clips on the downlight upwards and insert the downlight into the prepared ceiling opening. The clips will secure the fixture in place. Ensure the downlight is flush with the ceiling surface.
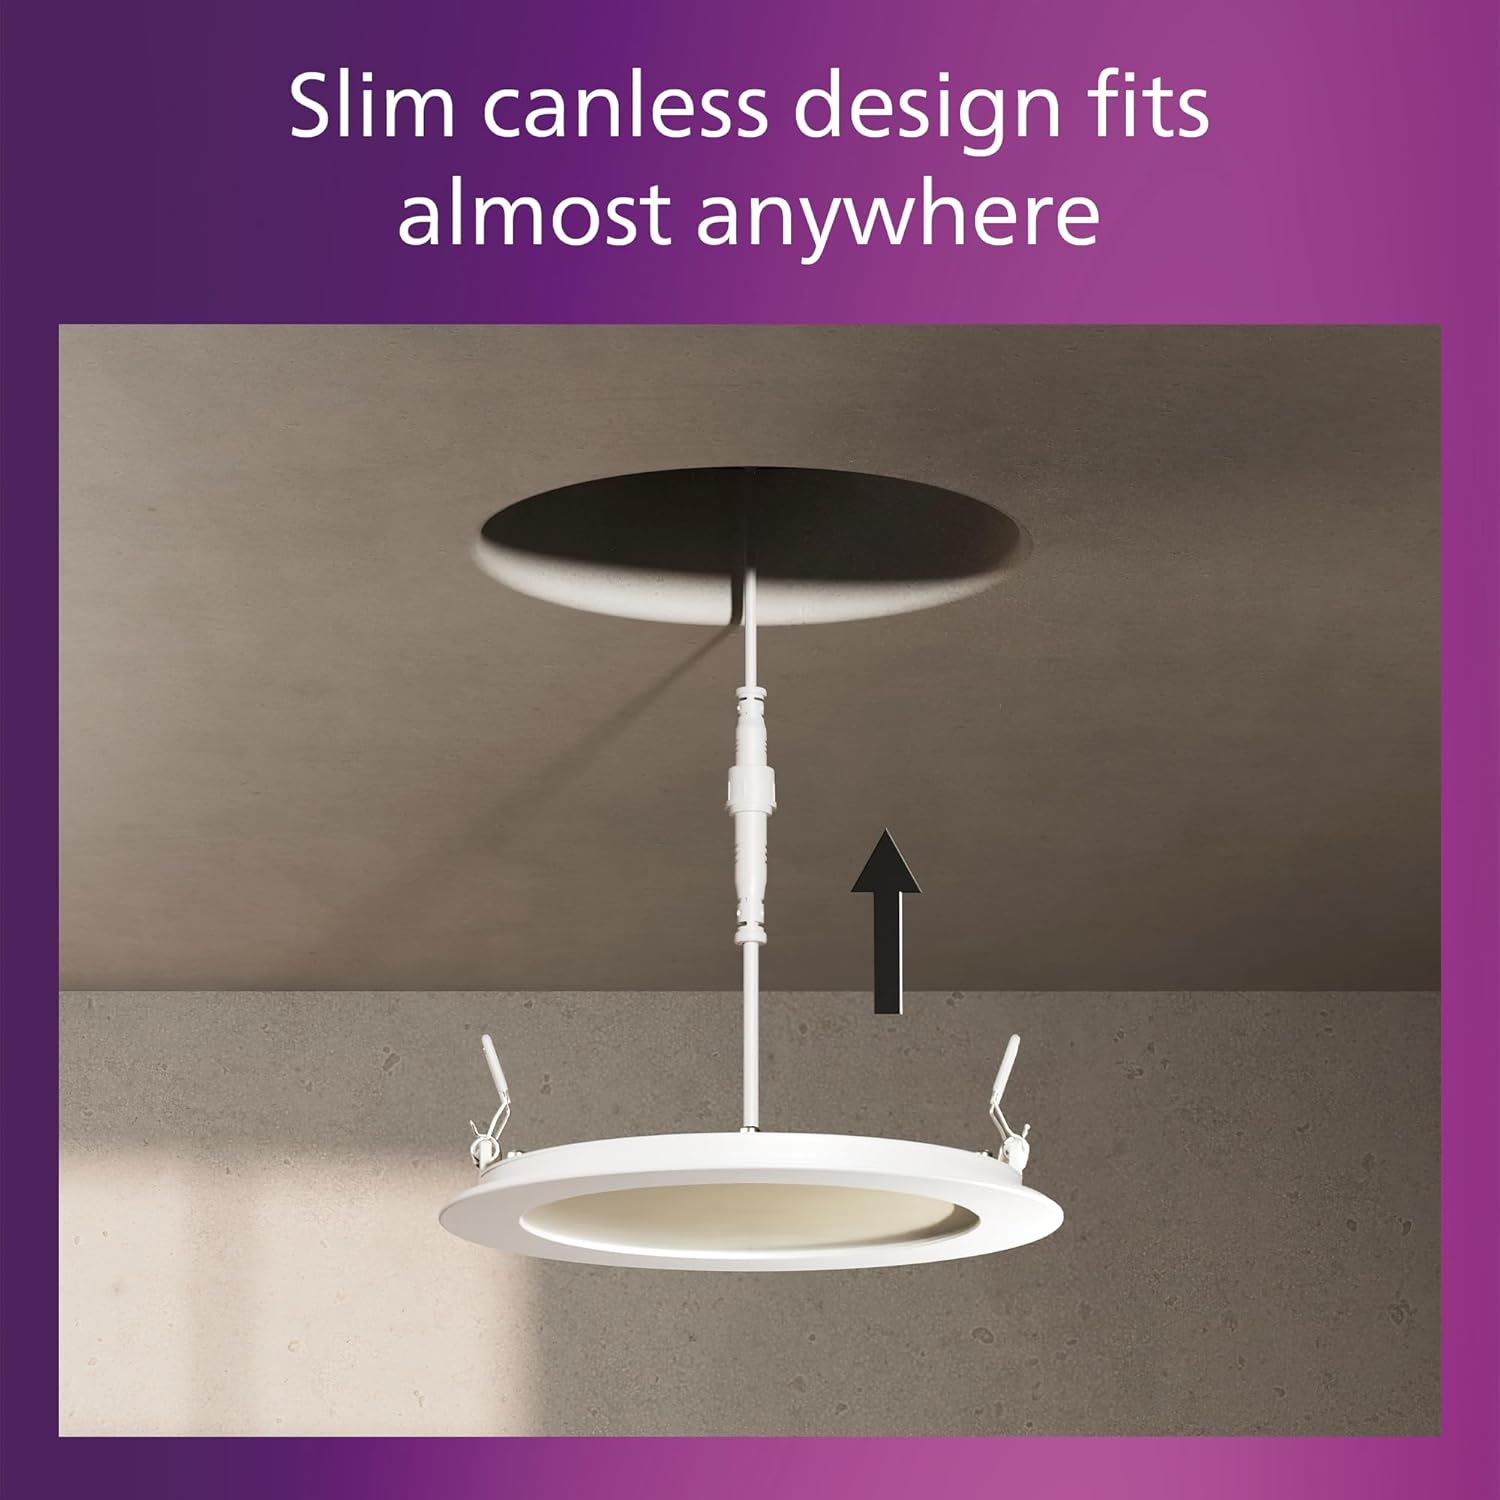
Figure 4: Installing the slim canless downlight into the ceiling.
- Restore Power: Once installation is complete, restore power at the circuit breaker.
The Philips LED Slim Downlight is IC rated, meaning it is suitable for direct contact with insulation, providing safe installation in various ceiling types.

Figure 5: IC rated for safe installation in insulated ceilings.
5. Operating Instructions
The Philips LED Slim Downlight is designed for simple operation:
- Power On/Off: Use your standard wall switch to turn the downlight on or off.
-
Dimming: This downlight is dimmable from 100% down to 5% brightness. Use a compatible dimmer switch (sold separately) to adjust the light output to your preferred level. Refer to the troubleshooting section for dimmer compatibility information.

Figure 6: Smooth dimming capability from 100% to 5% brightness.
- Color Temperature: The color temperature is set during installation using the switch on the junction box. It cannot be changed during normal operation without accessing the junction box.
6. Maintenance
The Philips LED Slim Downlight requires minimal maintenance:
- Ensure power is off before cleaning.
- Wipe the fixture with a soft, dry, or slightly damp cloth. Do not use abrasive cleaners or solvents.
- No user-serviceable parts inside. Do not attempt to open or repair the fixture.
7. Troubleshooting
| Problem | Possible Cause | Solution |
|---|---|---|
| Light does not turn on. |
|
|
| Light flickers or dims improperly. |
|
|
| Incorrect color temperature. |
|
|
Dimmer Compatibility Chart
For optimal dimming performance, use dimmers listed in the compatibility chart below. Performance may vary with other dimmer models.

Figure 7: Dimmer compatibility chart.
8. Specifications
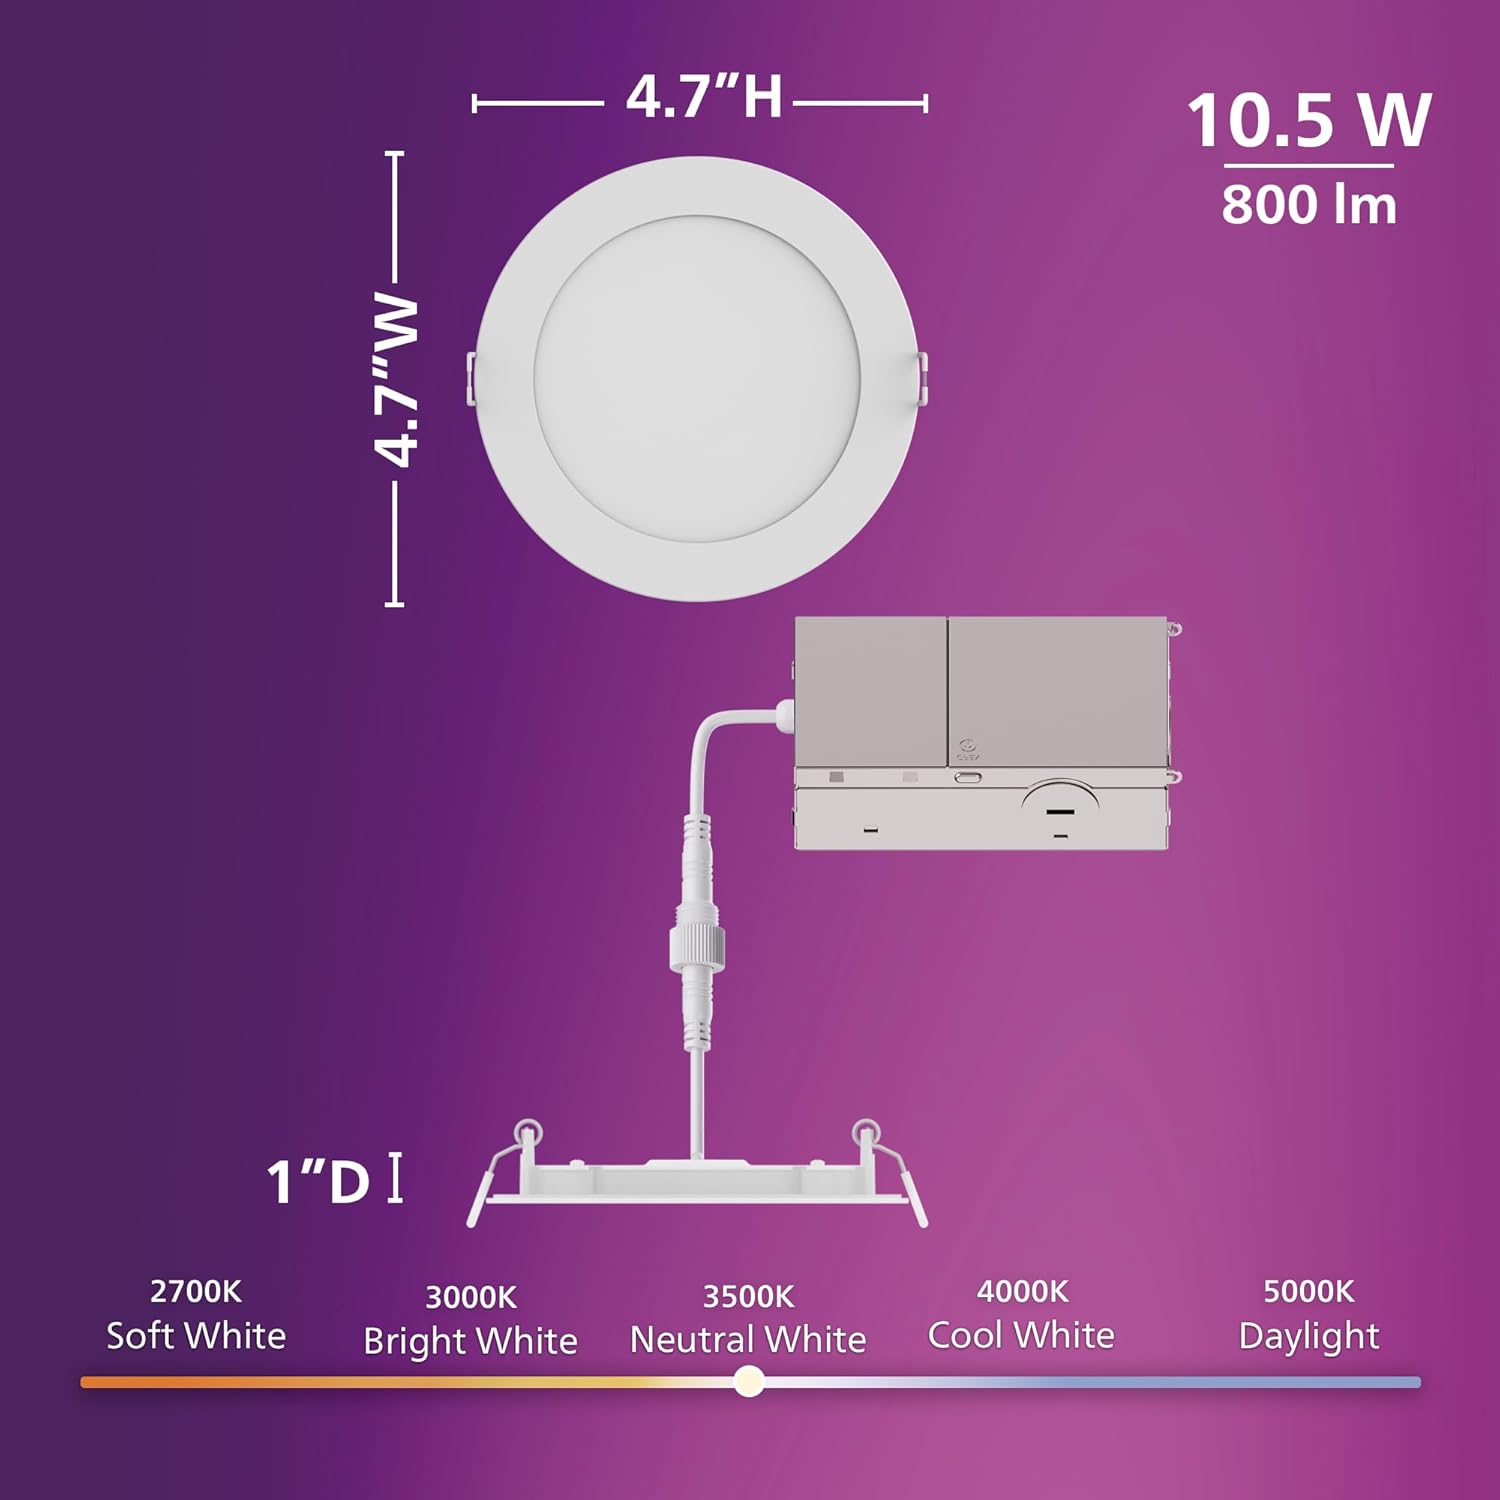
Figure 8: Product dimensions and CCT switch location.
| Feature | Detail |
|---|---|
| Model Number | 608869 |
| Brand | PHILIPS |
| Light Source | LED |
| Wattage | 10.5 watts |
| Brightness | 800 lumens |
| Voltage | 120 volts |
| Color Temperature (CCT) | 2700K, 3000K, 3500K, 4000K, 5000K (selectable) |
| Dimmable | Yes (down to 5%) |
| Life Hours | 25,000 hours |
| Installation Type | Flush Mount, Canless Design |
| Room Type | Indoor |
| Material | Plastic |
| Product Dimensions | 11.9L x 11.9W x 11.9H centimetres (approx. 4.7 x 4.7 x 4.7 inches) |
| Water Resistance Level | Water Resistant (Suitable for damp locations) |
| Certifications | IC Rated, ETL, FCC certified |
9. Warranty Information
This Philips LED 4-Inch Slim Downlight is covered by a 2-Year Manufacturer's Warranty from the date of purchase. This warranty covers defects in materials and workmanship under normal use. Please retain your proof of purchase for warranty claims.
The warranty does not cover damage caused by improper installation, misuse, abuse, accidents, or unauthorized modifications.
10. Customer Support
If you have any questions, require technical assistance, or need to make a warranty claim, please contact Philips customer support. Refer to the product packaging or the official Philips website for the most current contact information.
For more information, visit: www.philips.com