
1. Introduction
This manual provides detailed instructions for the safe and effective use of your Godox iT32 Camera Flash with the X5S Detachable Trigger. The iT32 is a compact and versatile flash unit designed for Sony cameras, offering both on-camera and off-camera wireless flash capabilities. Its lightweight design and advanced features, including TTL auto flash, High-Speed Sync (HSS), and a built-in 2.4G wireless X system, make it an ideal tool for various photographic needs.
2. Product Components
The Godox iT32+X5S package typically includes the following items:
- Godox iT32 Camera Flash Unit
- Godox X5S Detachable Trigger (for Sony)
- Mini Stand
- Diffuser
- Color Filters (1/2 CTO, 1/1 CTO)
- USB Type-C Charging Cable
- Storage Bag
- Cleaning Cloth
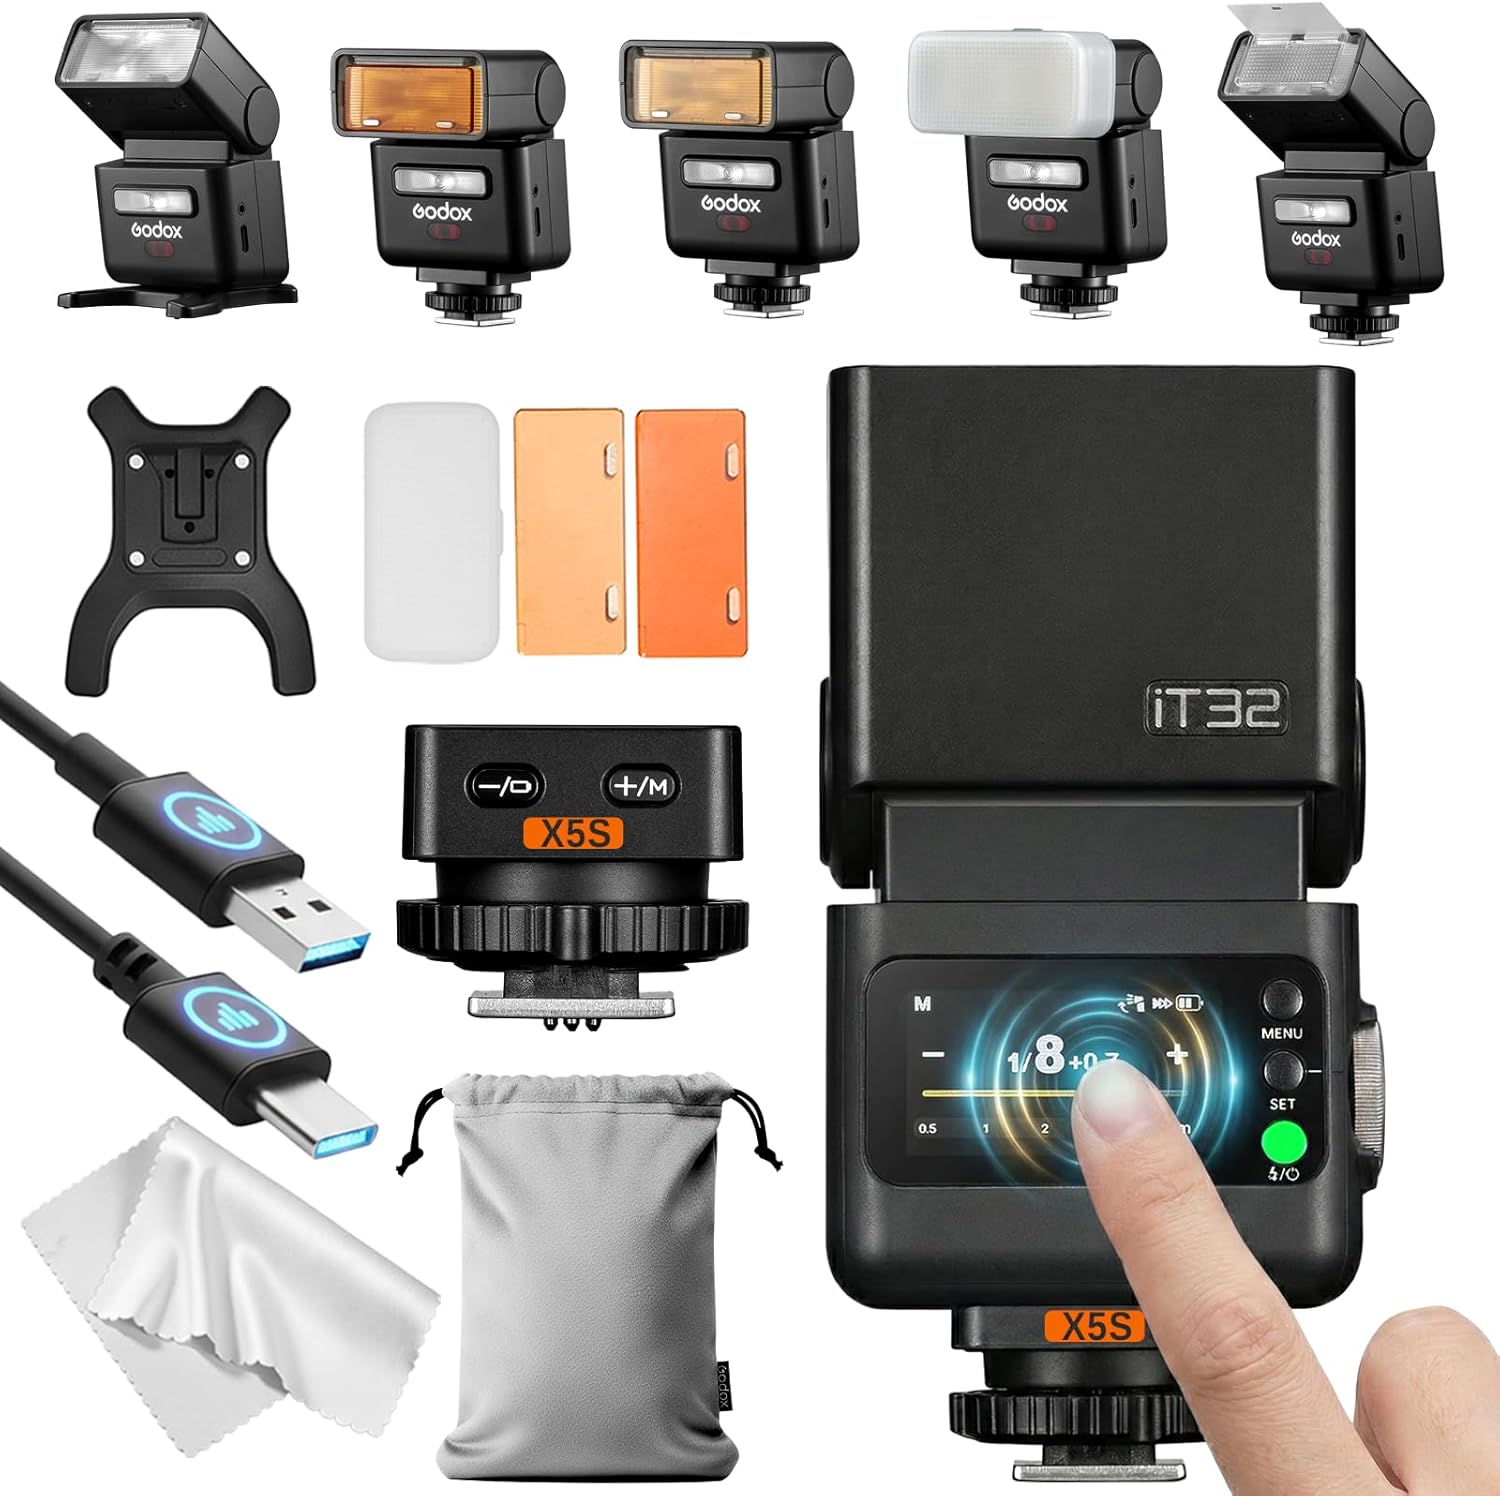
Image 2.1: Overview of the Godox iT32 flash, X5S trigger, and various accessories including diffusers, color filters, and charging cable.
3. Setup
3.1 Attaching the X5S Trigger
- To use the iT32 on-camera, ensure the X5S trigger is securely attached to the iT32 flash unit.
- Slide the combined iT32+X5S unit onto your Sony camera's hot shoe mount.
- Tighten the locking mechanism on the X5S trigger to secure it to the hot shoe.
3.2 Detaching the X5S Trigger for Wireless Use
- To use the iT32 off-camera, gently detach the X5S trigger from the iT32 flash body.
- Mount the X5S trigger onto your Sony camera's hot shoe.
- The iT32 flash can then be placed off-camera, allowing the X5S to wirelessly control its functions.

Image 3.1: Illustration of the iT32 flash with the X5S trigger integrated, highlighting its hot shoe mount and key features.
3.3 Battery Charging
The iT32 flash unit features a built-in 7.4V / 900mAh lithium battery. The X5S trigger also has an internal battery.
- iT32 Charging: Connect the supplied USB Type-C cable to the iT32's USB-C port and a suitable USB power source. The charging indicator will show progress.
- X5S Charging: The X5S trigger charges automatically when it is plugged into the iT32 flash body. A full charge for the X5S takes approximately 3 hours and provides about 16 hours of operation.

Image 3.2: The bottom-right panel illustrates the USB-C charging port on the iT32 unit, showing battery indicators for both the iT32 and X5S.
4. Operating Instructions
4.1 Power On/Off
To power on the iT32, press and hold the power button. To power off, press and hold the power button again. The X5S trigger does not have a separate power button; its power is controlled by the iT32 when connected, or it powers on when mounted on the camera hot shoe for wireless use.
4.2 On-Camera Flash Modes
When the iT32 is mounted directly on your camera's hot shoe (with X5S attached), you can utilize the following flash modes:
- TTL Auto Flash: The flash automatically adjusts its output based on the camera's metering system for correct exposure.
- Manual Flash (M): Allows you to manually set the flash output from 1/128 to 1/1 power, with fine adjustments in ±1/3 stop increments.
- Multi-flash (Stroboscopic): Fires a series of rapid flashes during a single exposure to capture multiple movements of a subject.
- High-Speed Sync (HSS): Enables flash synchronization at shutter speeds faster than the camera's native flash sync speed, useful for freezing action or using wide apertures in bright conditions.
- Rear-Curtain Sync: Fires the flash just before the second curtain closes, creating a streaking effect behind a moving subject.
- Flash Exposure Compensation (FEC): Adjusts the flash output relative to the TTL metered value.
4.3 Detached Trigger (Wireless Mode)
The X5S trigger, when detached from the iT32 and mounted on your camera, allows for wireless control of the iT32 flash and other compatible Godox slave flashes.
- 2.4G Wireless X System: The iT32 and X5S utilize Godox's 2.4G wireless X system for stable and reliable communication.
- Channel and ID Synchronization: Before wireless use, ensure the iT32 flash unit and the X5S trigger have matching channel and ID numbers. Synchronize this information from the iT32 to the X5S.
- Wireless Control: The X5S can wirelessly control the iT32's flash firing, mode switching, and output adjustment. It can also trigger other Godox slave flashes (e.g., V100, V860III), but cannot remotely adjust their output if they are not iT32 units.

Image 4.1: A photographer utilizing the 2.4G Wireless X System to trigger an off-camera flash, demonstrating flexible lighting setups.
4.4 LED Modeling Lamp
The iT32 is equipped with an LED modeling lamp. Its brightness can be adjusted in 1-10 levels, allowing you to preview the light and shadow balance before taking a shot.
4.5 Flash Head Rotation
The flash head of the iT32 can be tilted 90 degrees upwards and swiveled 270 degrees horizontally. This flexibility allows for bounce flash photography, directing light off ceilings or walls for softer, more natural illumination.

Image 4.2: A visual representation of the iT32 flash head's adjustable angles, allowing for versatile bounce flash techniques.
5. Maintenance
- Cleaning: Use a soft, dry cloth to clean the flash unit and trigger. For stubborn dirt, a slightly damp cloth can be used, followed by immediate drying. Avoid using harsh chemicals or abrasive materials.
- Storage: Store the unit in a cool, dry place away from direct sunlight and extreme temperatures. If storing for extended periods, ensure the battery is partially charged (around 50%) and recharge every few months to maintain battery health.
- Handling: Avoid dropping or subjecting the unit to strong impacts, as this can damage internal components.
6. Troubleshooting
- Flash Not Firing:
- Check if the flash is powered on and fully charged.
- Ensure the flash is securely mounted on the camera hot shoe or that the X5S trigger is properly connected and synchronized for wireless use.
- Verify camera settings (e.g., flash enabled, correct sync mode).
- Wireless Connection Issues:
- Confirm that the iT32 and X5S (and any other slave flashes) are set to the same channel and ID.
- Ensure there are no obstructions between the trigger and the flash unit.
- Check for potential interference from other 2.4G devices.
- X5S Trigger Not Responding After Sleep:
- Refer to the manufacturer's website for the latest firmware updates. Firmware version V1.10 addresses an issue where the X5S might not control sub-flashes after returning from sleep mode.
- Inconsistent Flash Output:
- Check battery level; low battery can affect flash consistency.
- Ensure the flash head is clean and free from obstructions.
- In TTL mode, environmental factors or highly reflective/absorbent subjects can sometimes lead to variations; consider using Flash Exposure Compensation or switching to Manual mode.
7. Specifications
| Feature | Specification |
|---|---|
| Brand | GODOX |
| Model | iT32+X5S |
| Compatible Camera System | Sony |
| Mount Type | Standard Hot Shoe Mount |
| Guide Number (GN) | 18 (approximate) |
| Wireless System | 2.4G Wireless X System |
| Flash Modes | TTL, Manual, Multi-flash |
| Sync Modes | High-Speed Sync (HSS), Rear-Curtain Sync |
| Flash Exposure Compensation | Supported |
| Output Range | 1/128 to 1/1 (in 1/3 stop increments) |
| Recycle Time | Approx. 1.5 seconds (full power) |
| Full Power Flashes | Approx. 510 |
| Battery | Built-in 7.4V / 900mAh Lithium Battery |
| Charging Port | USB Type-C |
| X5S Trigger Operation Time | Approx. 16 hours (on full charge) |
| LED Modeling Lamp | 1-10 level brightness adjustment |
| Flash Head Rotation | 90° Upward Tilt, 270° Horizontal Swivel |
| Weight (iT32 body only) | Approx. 169g |
| Package Dimensions | 13.9 x 11.1 x 7.4 cm |
| Package Weight | 360 g |
8. Warranty and Support
For warranty information, please refer to the warranty card included with your product or visit the official GODOX website. Support may also be available from your point of purchase. Keep your proof of purchase for warranty claims.