
1. Important Safety Information
Read all instructions carefully before using the Binecer Portable 2-Person Steam Sauna Box. Failure to follow these instructions may result in injury or damage to the product.
- Always ensure the sauna tent is assembled correctly and stable before use.
- Do not operate the steam generator without water.
- Keep children and pets away from the sauna during operation.
- Avoid direct contact with the steam nozzle during high-temperature operation to prevent burns.
- Do not plug both sauna steamer units into the same power strip to avoid electrical overload.
- Consult a physician before use if you have any medical conditions, are pregnant, or are taking medication.
- Discontinue use immediately if you feel dizzy, nauseous, or unwell.
- Ensure adequate ventilation in the room where the sauna is used.
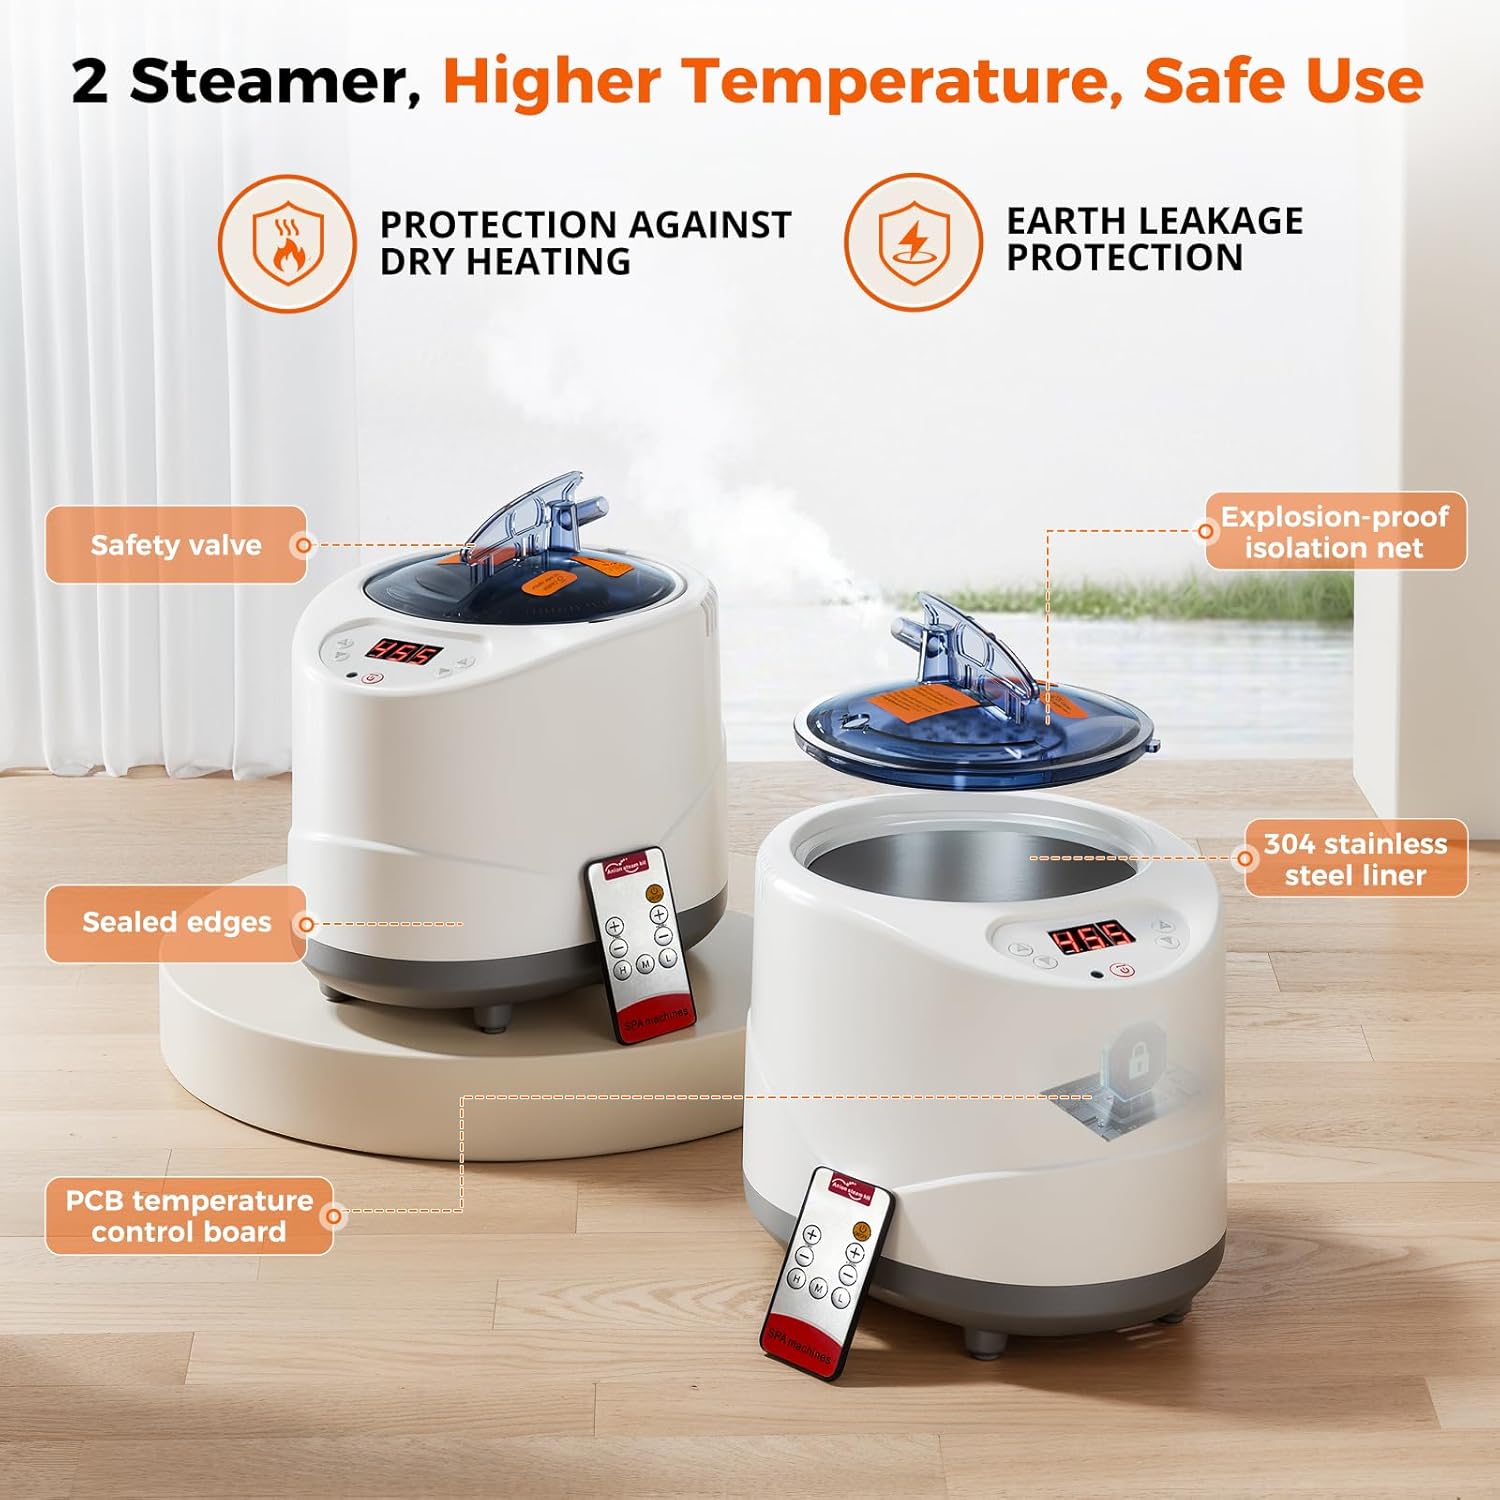
Image: Two steam generators highlighting safety features such as protection against dry heating, earth leakage protection, safety valve, explosion-proof isolation net, sealed edges, 304 stainless steel liner, and PCB temperature control board.
2. Product Components
Carefully unpack all items and verify that all components are present before assembly. Refer to the list below and the accompanying image.
- Sauna Tent (x1)
- User Manual (x1)
- Absorbent Pad (x1)
- Folding Chair (x2)
- Steamer (x2)
- Remote Control (x2)
- Steam Box (x2)
- Steam Pipe (x4)
- Shorter Steel Pipe (A) (x8)
- Longer Steel Pipe (B) (x26)
- Connector (x28)

Image: A visual representation of all included components: the sauna tent, two steam generators, two folding chairs, two remote controls, absorbent pad, steam boxes, steam pipes, and various numbered steel pipes and connectors for assembly.
3. Setup Instructions
Follow these steps for quick and easy assembly of your portable sauna tent. The entire setup process typically takes 8-10 minutes.
- Install the Bottom Frame: Assemble the bottom frame using the appropriate steel pipes and connectors. Place it at the bottom of the sauna tent.
- Install Side Frames: Install the left frame first, then pull the sauna tent fabric over the frame.
- Complete Frame Assembly: Enter the tent and install the remaining frames to fully erect the structure.
- Place Absorbent Pad: Position the absorbent pad inside the sauna tent on the floor.
- Install Steam Box: Connect the steam box to the tent using the provided pipes.
- Install Steamer: Place the steamer units outside the tent and connect them to the steam boxes with the steam pipes.

Image: A six-step visual guide demonstrating the assembly process, from installing the bottom frame to connecting the steamer units.
4. Operating Instructions
4.1 Steamer Operation
Your sauna is equipped with two high-power steamers for faster heating and enhanced steam coverage.
- Fill Steamer: Open the lid of each steamer and fill with water up to the maximum fill line. Do not overfill.
- Connect Pipes: Connect the steam pipes from the steamer units to the steam boxes inside the sauna tent.
- Power On: Plug in the steamers and turn them on.
- Set Time and Temperature: Use the controls on the steamer unit or the remote control to set the desired time (1-95 minutes) and temperature level (9 levels, 104°F to 130°F).
- Preheating: Allow the steamers to preheat. Steam will begin to fill the tent.

Image: The interior of the sauna tent filled with steam, showing the temperature range from 104°F to 130°F, and controls for a 0-95 minute timer and remote control functionality.

Image: A four-step diagram illustrating the steam generation process: connecting the steamer to the steam box, pouring water and heating, pipes transporting steam into the tent, and the resulting warm steam providing a sauna experience.
4.2 Remote Control Usage
The included remote controls allow for convenient adjustment of settings from inside or outside the tent.
- Aiming: When using the remote control, aim it directly at the steamer unit.
- Storage: For convenience, place the remote control in the built-in storage pocket on the sauna tent when not in use.

Image: A person inside the sauna tent using the remote control to adjust settings, with a tip to aim the remote at the steamer and store it in the tent's pocket.
4.3 General Usage Tips
- Access: Utilize the dual zippers for easy entry and exit.
- Visibility: The multiple transparent windows allow you to monitor your surroundings.
- Storage: Use the built-in storage pockets to keep personal items like phones or towels within reach.
- Herbal/Essential Oils: Medicine boxes can be used for herbal or essential oil sauna experiences. Place herbs or oils in the designated box, not directly in the steamer water.

Image: An interior view of the sauna tent highlighting features such as enhanced stretch space, three-sided windows, dual zippers, and a storage pocket for convenience.
5. Maintenance
Proper maintenance ensures the longevity and hygiene of your sauna box.
- Absorbent Pad: The absorbent pad is designed for easy cleaning after each sauna session. Remove and clean it as needed to prevent moisture buildup.
- Steamer Cleaning: Regularly descale the steamer units to prevent mineral buildup. Follow the manufacturer's instructions for descaling.
- Tent Cleaning: Wipe down the interior and exterior of the sauna tent with a damp cloth and mild detergent if necessary. Ensure it is completely dry before folding and storing.
- Storage: When not in use, fold the sauna tent and store it in a dry, cool place away from direct sunlight.
Image: A close-up of the washable thickened absorbent pad on the floor of the sauna tent, designed to prevent the floor from getting wet and facilitate easy cleaning.
6. Troubleshooting
If you encounter issues with your sauna box, refer to the following common problems and solutions.
| Problem | Possible Cause | Solution |
|---|---|---|
| No steam production | Steamer not filled with water; Steamer not powered on; Steam pipes blocked. | Fill steamer with water; Ensure steamer is plugged in and turned on; Check steam pipes for kinks or blockages. |
| Sauna not heating sufficiently | Low temperature setting; Tent zippers not fully closed; Insufficient preheating time. | Increase temperature setting; Ensure all zippers are closed; Allow 8-10 minutes for preheating. |
| Remote control not working | Batteries dead; Not aimed correctly; Obstruction between remote and steamer. | Replace batteries; Aim remote directly at the steamer; Remove any obstructions. |
| Water leakage from steamer | Overfilled steamer; Loose connections. | Do not fill water above the MAX line; Ensure all connections are secure. |
7. Specifications
Key specifications for the Binecer Portable 2-Person Steam Sauna Box.
- Capacity: 2 Person
- Dimensions (Assembled): Approximately 68.9 inches (L) x 49.41 inches (W) x 74.02 inches (H)
- Steamer Quantity: 2
- Temperature Levels: 9 (ranging from 104°F to 130°F)
- Timer Settings: 1-95 minutes
- Heating Speed: 8-10 minutes to reach maximum temperature
- Tent Material: Thickened heat-retaining fabric (Triple-Layer Reinforced Fabric: Waterproof heat retention polyester satin, Thickened thermal insulation cotton, Sealed polyester taffeta & silver coating)
- Frame Material: High-quality stainless steel pipes
- Features: Dual zippers, multiple transparent windows, built-in storage pockets, medicine boxes for herbs/oils.

Image: A diagram illustrating the hexagonal shape and dimensions of the 2-person sauna tent, showing its width, depth, and height.

Image: A detailed view of the triple-layer reinforced fabric construction, highlighting the stainless steel frame, waterproof zipper, and warmth-trapping technology for efficient heat retention.

Image: A comparison table showing different sauna box options, with the 2-person model highlighted, detailing its size, capacity, number of windows, chairs, steamers, and heating speed.
8. Warranty and Support
For warranty information or technical support, please contact Binecer customer service. Keep your purchase receipt as proof of purchase.
- Customer Service: Refer to the contact information provided on the product packaging or the official Binecer website.
- Product Registration: Consider registering your product to receive updates and facilitate warranty claims.