
1. Introduction and Overview
This manual provides instructions for the HiVi-Swans DIY3.1A-Cabinet, a high-fidelity 3-way bookshelf speaker enclosure. This product is designed for audio enthusiasts who wish to assemble their own speaker system. Please note that this product consists of the speaker cabinets only. Speaker drivers, crossover networks, and internal wiring must be purchased separately and installed by the user.
The DIY3.1A-Cabinet features a phase-inverted 4th-order system design, providing a robust foundation for a high-performance audio setup. Its luxurious, high-grade PVC exterior with a finely textured surface offers a sleek and minimalist aesthetic.
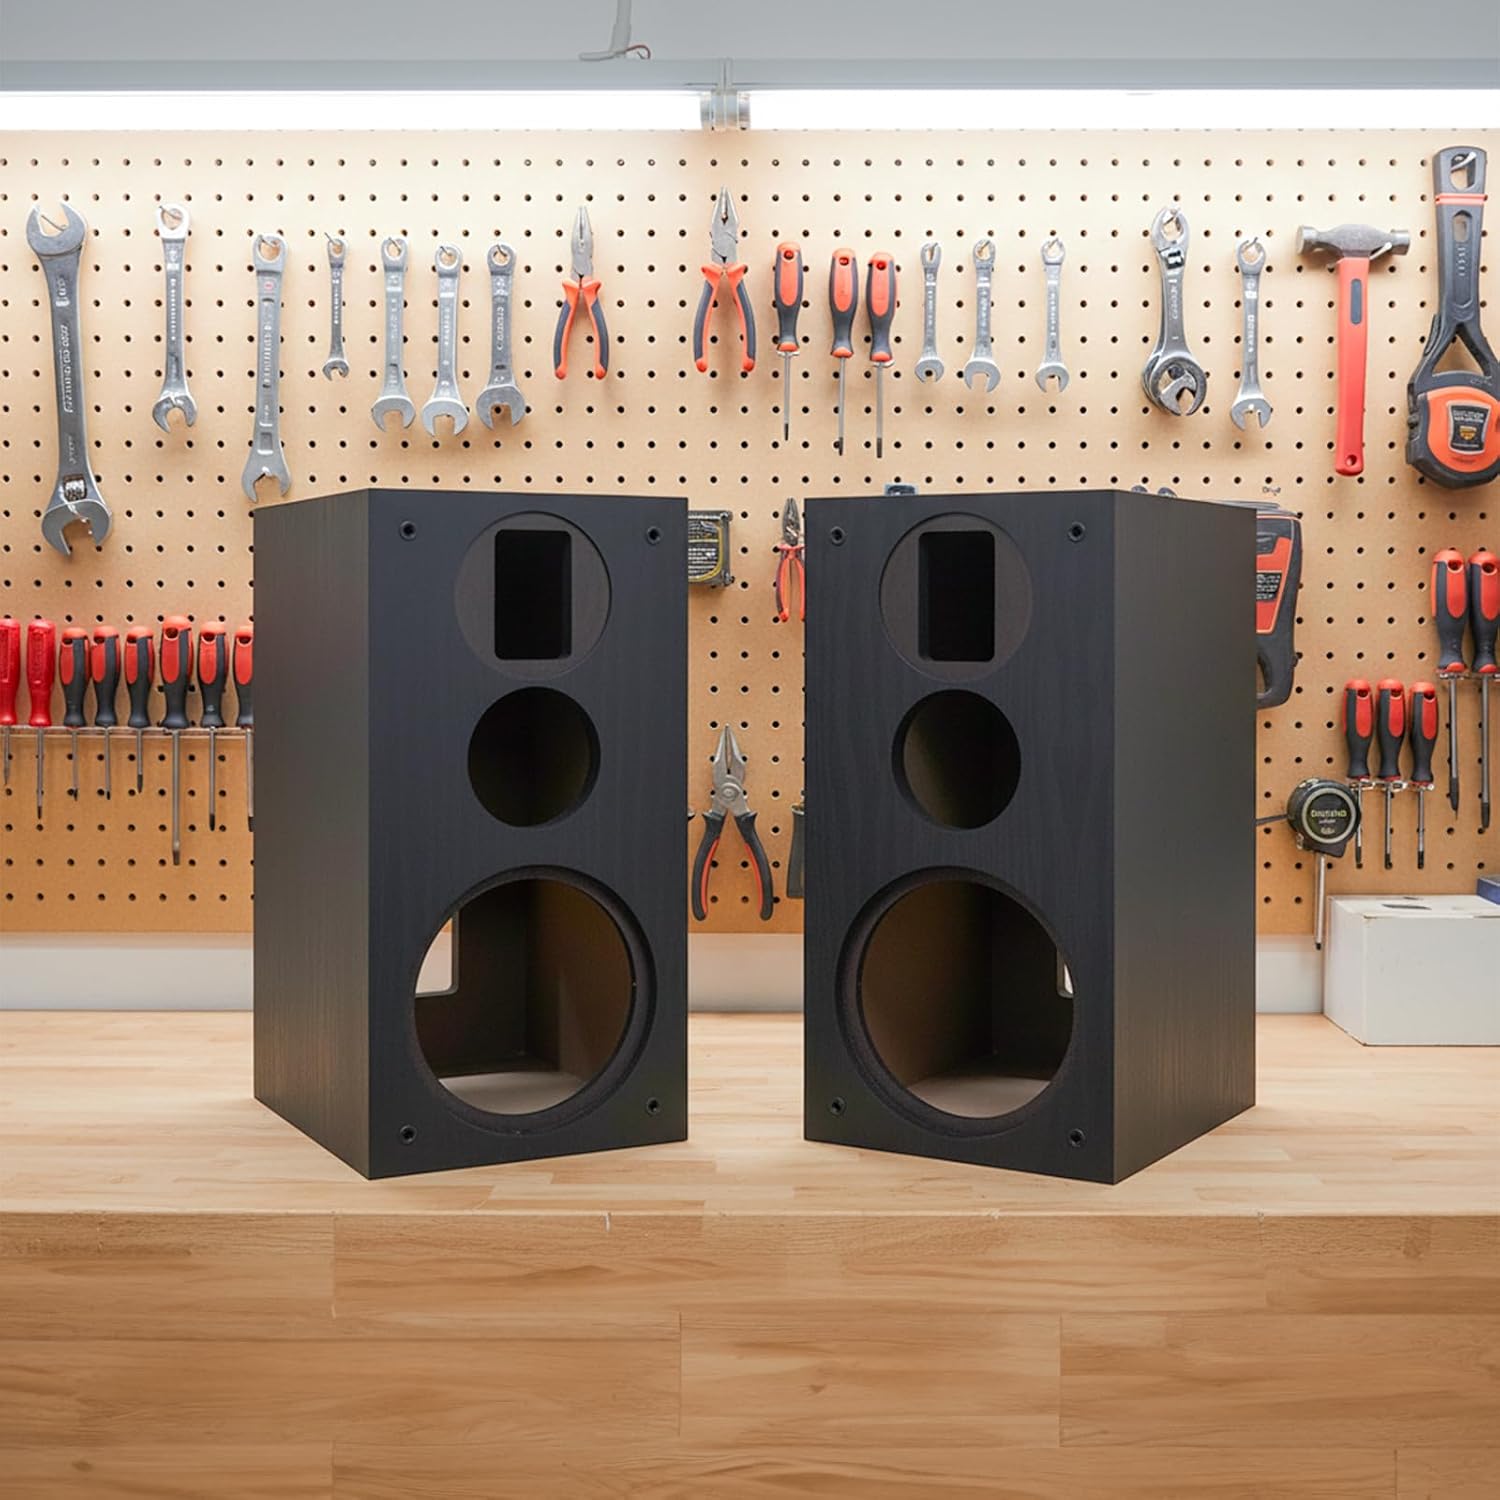
Image 1.1: A pair of HiVi-Swans DIY3.1A-Cabinet empty speaker enclosures, ready for component installation.
2. Product Features
- Material: High-grade PVC exterior with a finely textured cabinet surface.
- Design: Three-way, fourth-order speaker system with a phase-inverted design.
- Aesthetics: Sleek black finish, suitable for various home or studio environments.
- Construction: Solid and durable construction, providing a stable platform for speaker components.
- Rear-Ported: Features a rear-ported bass reflex design for enhanced low-frequency response.
3. What's in the Box
The package contains the following items:
- 1 x Pair of HiVi-Swans DIY3.1A-Cabinet Speaker Enclosures
Note: Speaker drivers, crossover networks, internal wiring, and mounting hardware for components are not included and must be sourced separately.
4. Setup Instructions
Careful assembly and wiring are crucial for optimal performance of your DIY speaker system.
4.1 Unpacking
- Carefully remove the speaker enclosures from their packaging.
- Inspect both cabinets for any signs of damage during transit. If damage is found, contact your retailer immediately.
4.2 Component Installation
This enclosure is designed for a 3-way speaker configuration. You will need a tweeter, a midrange driver, and a woofer, along with a compatible 3-way crossover network.
- Identify Openings: Locate the pre-cut openings on the front baffle for the tweeter (smallest), midrange (medium), and woofer (largest) drivers.
- Install Crossover: Mount your 3-way crossover network securely inside the cabinet. Ensure it is positioned to allow for proper wiring and does not obstruct any internal components or the rear port.
- Wire Drivers: Connect the internal wiring from your crossover network to each respective speaker driver (tweeter, midrange, woofer). Pay close attention to polarity (+ and -) for each driver as specified by your crossover and driver manufacturers. Incorrect polarity can lead to phase issues and degraded sound quality.
- Mount Drivers: Carefully place each driver into its designated opening. Secure them using appropriate screws (not included) that fit the driver's mounting holes and the cabinet material. Do not overtighten.
- Connect Terminal Posts: Connect the output from your crossover network to the gold-plated binding posts located on the rear of the enclosure. Ensure correct polarity.

Image 4.1: Illustration of speaker component installation into the enclosure.
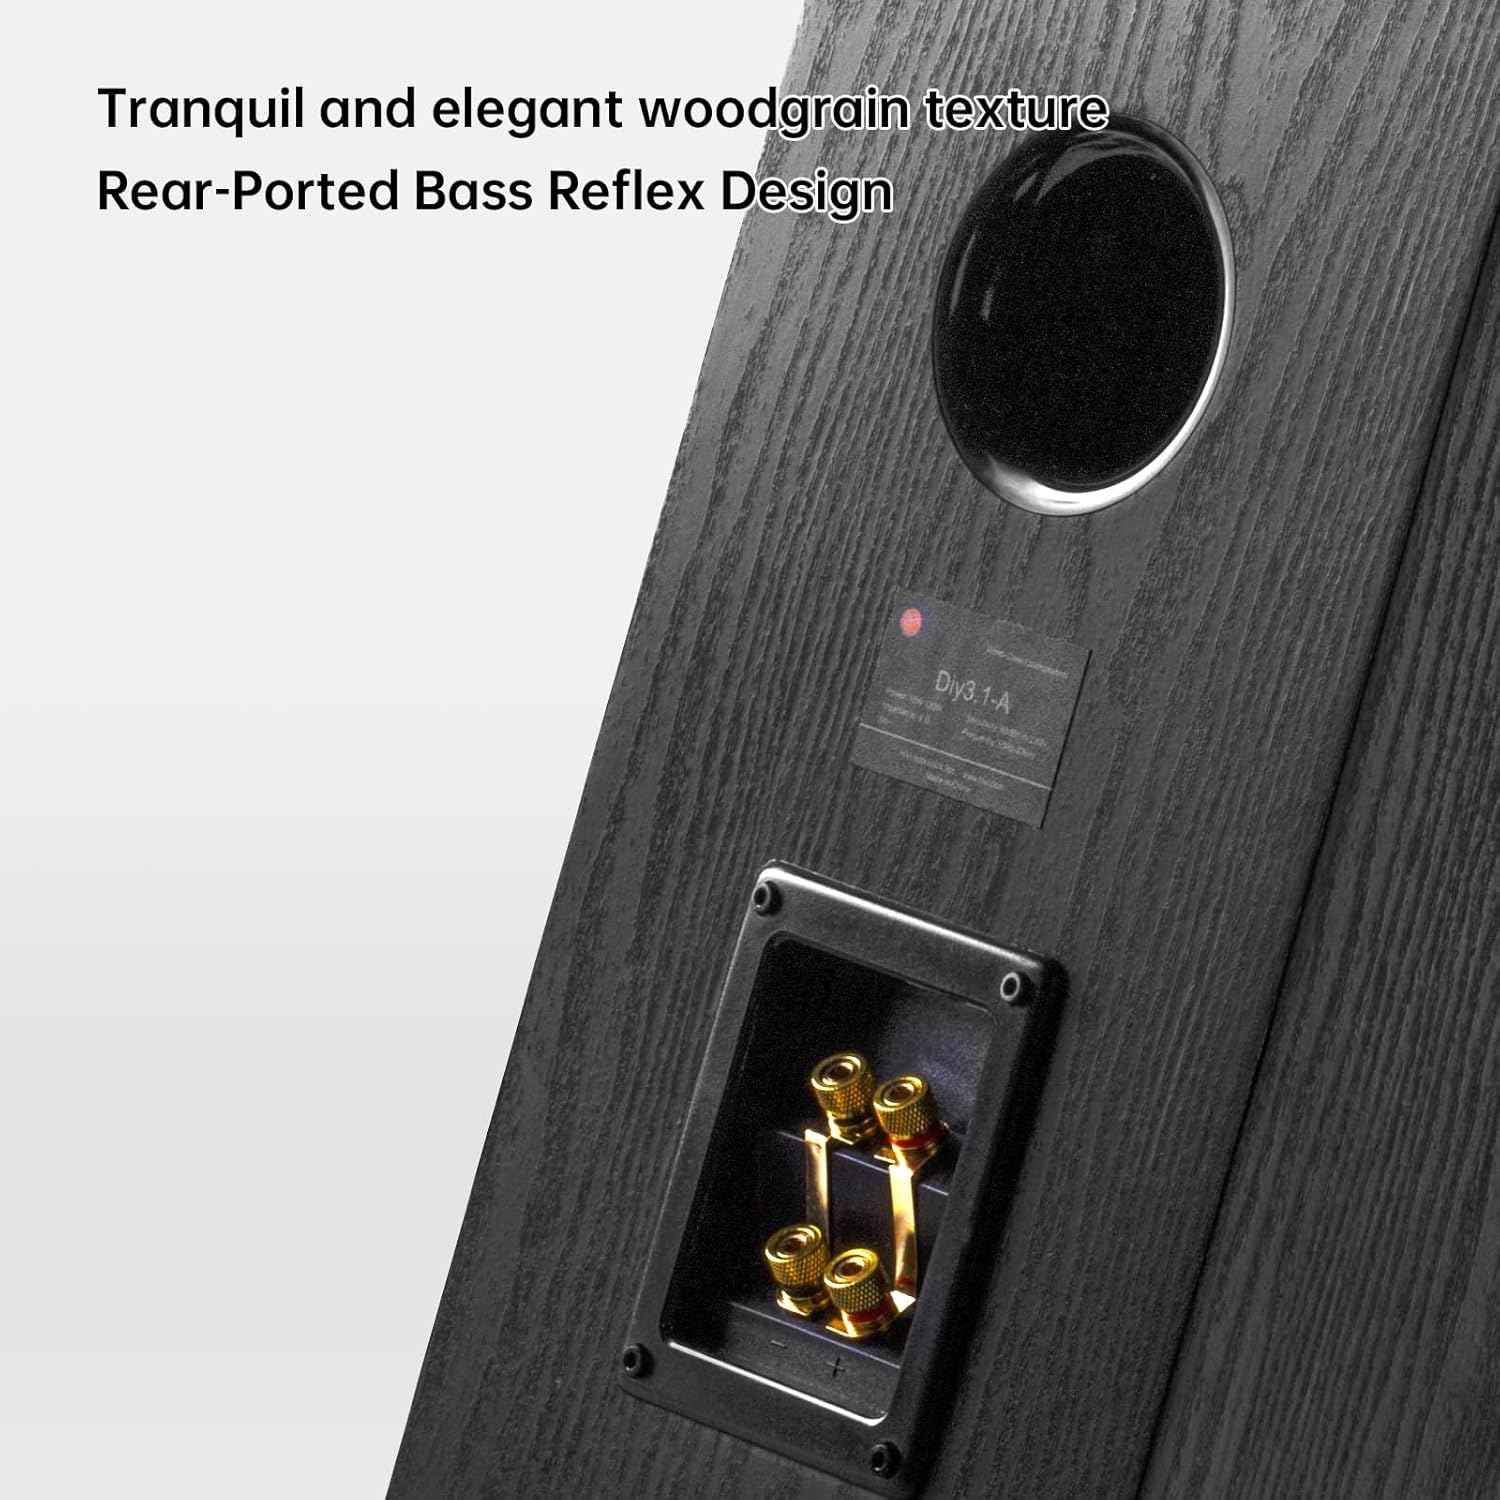
Image 4.2: Rear view of the enclosure, highlighting the bass reflex port and speaker terminals.
4.3 Placement
- Position the assembled speakers on a stable, level surface such as a bookshelf, desktop, or dedicated speaker stands.
- Due to the rear-ported design, ensure there is adequate space (at least 6-12 inches) between the rear of the speaker and any wall or obstruction to allow for proper bass reflex operation.
- For optimal stereo imaging, place the speakers equidistant from your primary listening position and angle them slightly inward (toe-in).

Image 4.3: Example placement of assembled speakers on stands.
5. Operating Instructions
Once your speaker components are fully installed and the cabinets are placed, follow these steps to operate your speaker system:
- Connect to Amplifier: Using high-quality speaker cables, connect the binding posts on the rear of each speaker enclosure to the corresponding speaker outputs on your amplifier. Ensure that the positive (+) terminal on the speaker connects to the positive (+) terminal on the amplifier, and the negative (-) terminal on the speaker connects to the negative (-) terminal on the amplifier.
- Power On: Turn on your amplifier and audio source device.
- Volume Control: Start with the amplifier volume at its lowest setting. Gradually increase the volume to a comfortable listening level.
- Break-in Period: New speaker drivers often benefit from a 'break-in' period of several hours of normal use to achieve their optimal sound performance.

Image 5.1: Assembled speakers integrated into a home audio setup.
6. Maintenance
Proper care will help maintain the appearance and performance of your speaker enclosures.
- Cleaning: Use a soft, dry, lint-free cloth to clean the cabinet surfaces. For stubborn marks, a slightly damp cloth can be used, followed immediately by a dry cloth. Avoid using abrasive cleaners, solvents, or chemical sprays, as these can damage the PVC finish.
- Environment: Keep the speakers away from direct sunlight, excessive heat sources (e.g., radiators, fireplaces), and high humidity. Extreme temperatures or moisture can affect the cabinet material and speaker components.
- Connections: Periodically check all external and internal wiring connections to ensure they remain secure. Loose connections can lead to poor sound quality or intermittent audio.
- Protection: If your assembled speakers include grilles, use them to protect the drivers from dust and accidental damage.
7. Troubleshooting
If you encounter issues with your assembled speaker system, refer to the following troubleshooting guide:
| Problem | Possible Cause | Solution |
|---|---|---|
| No sound from one or both speakers | Loose or incorrect wiring; amplifier off; source not playing. | Check all speaker cable connections (amplifier to speaker). Verify internal wiring from drivers to crossover and crossover to terminal posts. Ensure amplifier is powered on and input source is active. |
| Distorted or unclear sound | Loose connections; amplifier overdriven; incorrect polarity; damaged driver. | Check all wiring for secure connections. Reduce amplifier volume. Verify correct polarity of all speaker connections. Inspect drivers for visible damage. |
| Weak or boomy bass | Insufficient space behind rear port; incorrect woofer wiring; room acoustics. | Ensure adequate clearance behind the rear port (6-12 inches). Verify woofer wiring and polarity. Experiment with speaker placement in the room. |
| Imbalanced sound (one speaker louder/quieter) | Incorrect amplifier balance settings; wiring issue; faulty driver. | Check amplifier balance control. Verify all wiring connections are secure and identical for both speakers. |
8. Specifications
Detailed specifications for the HiVi-Swans DIY3.1A-Cabinet:
| Brand | HiVi-Swans |
| Model | DIY3.1A-Cabinet |
| Product Type | 3-Way Bookshelf Speaker Enclosure (Cabinets Only) |
| System Design | Phase-Inverted 4th-Order Bass Reflex |
| Material | High-grade PVC Finish |
| Color | Black |
| Dimensions (H x W x D) | Approximately 16.5" x 8.4" x 13.5" (41.9 cm x 21.3 cm x 34.3 cm) |
| Speaker Maximum Output Power (Design Target) | 180 watts |
| Frequency Response (Design Target) | 20 KHz |
| Impedance (Design Target) | 8 ohm |
| Mounting Type | Table Top, Desktop |
| Connectivity Technology (for assembled system) | Auxiliary (requires external amplifier) |
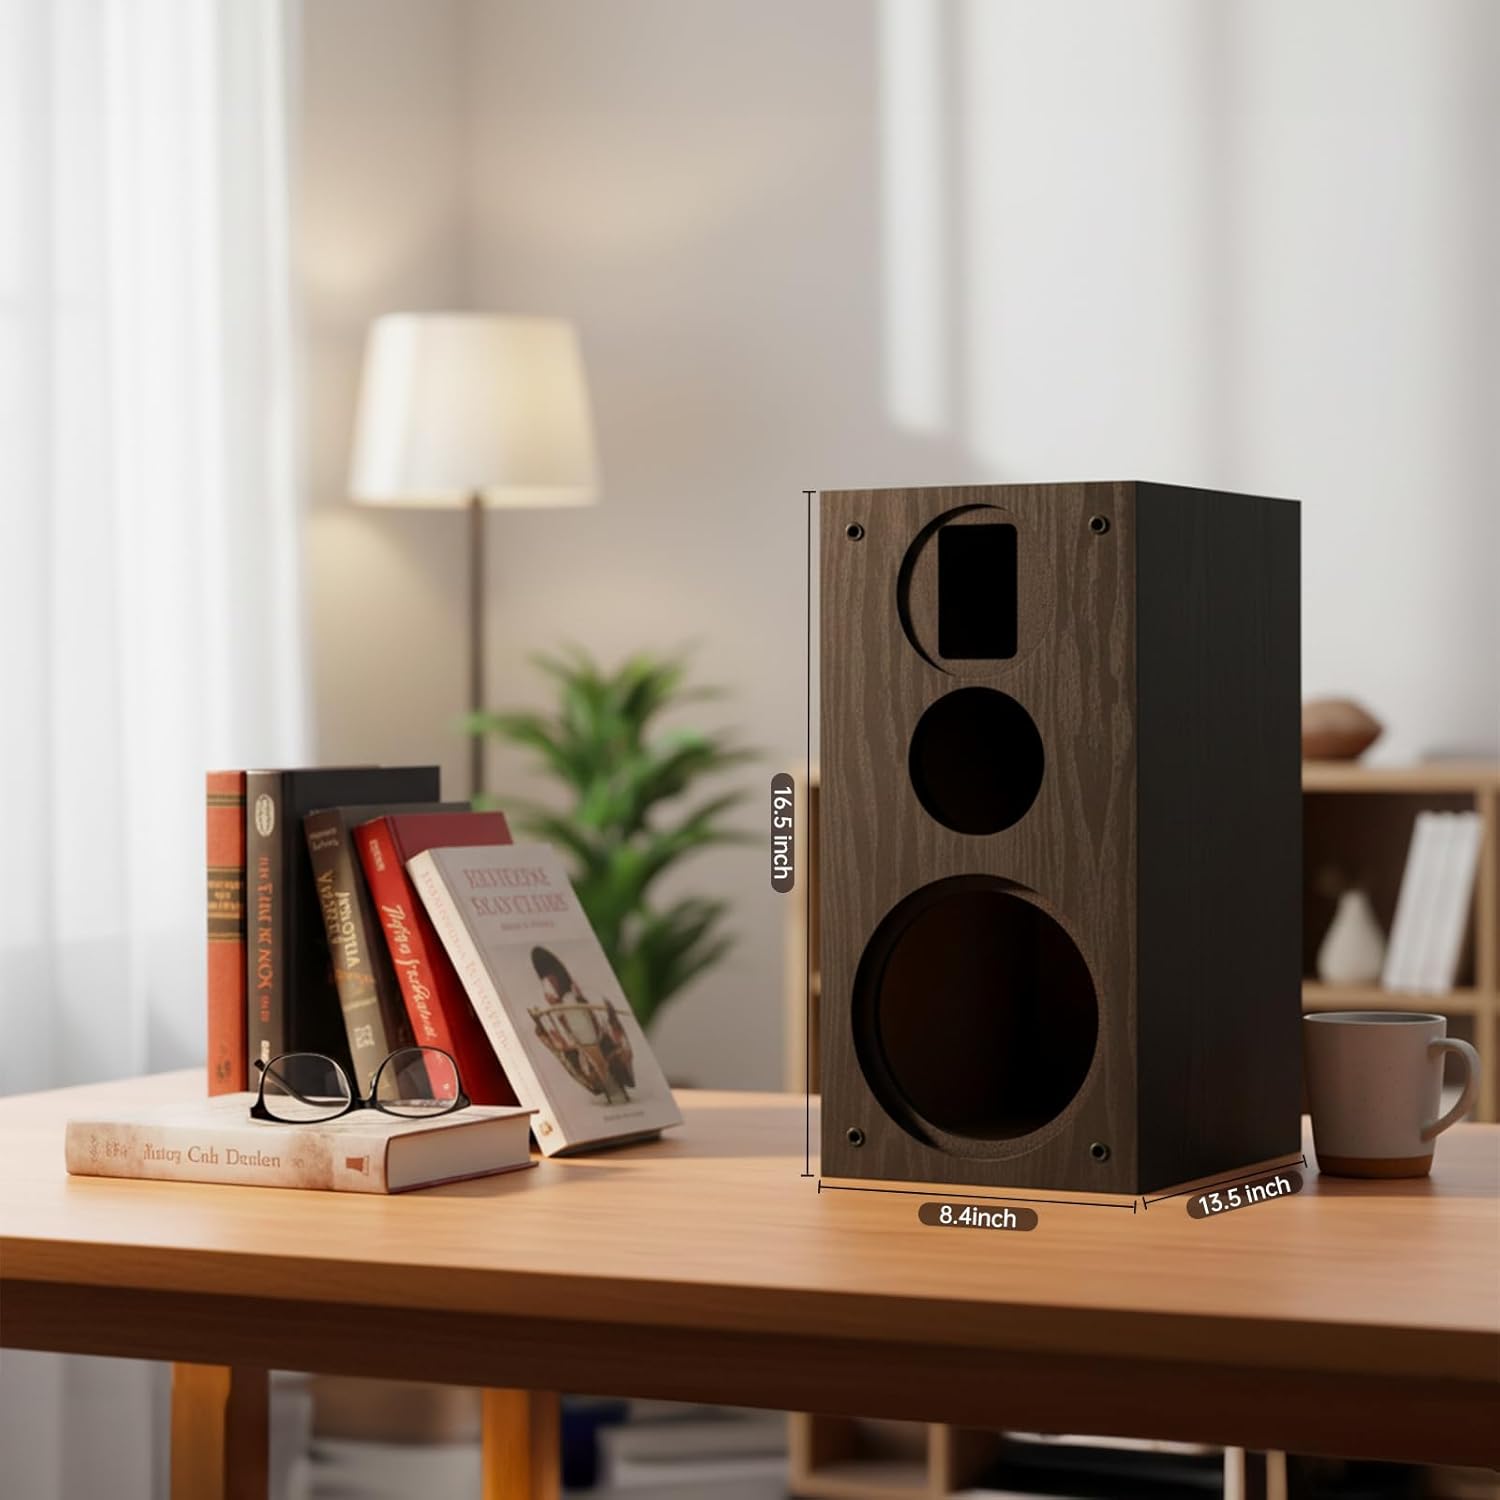
Image 8.1: Front view of the enclosure with approximate dimensions.
9. Warranty and Support
For warranty information regarding the HiVi-Swans DIY3.1A-Cabinet enclosures, please refer to the documentation provided at the time of purchase or visit the official HiVi-Swans website. Warranty terms typically cover manufacturing defects of the cabinet itself.
For technical support, assistance with component selection, or any other inquiries related to your HiVi-Swans product, please contact HiVi-Swans customer service directly through their official website or the contact information provided with your purchase.
Please note that the warranty for the enclosure does not cover damage resulting from improper installation of third-party components, misuse, or unauthorized modifications.