1. Introduction
The Neoteck Digital Sound Level Meter NTK342 is a portable device designed for accurate measurement of sound levels in various environments. It features a wide measurement range of 30-130dB with an accuracy of ±1.5dB, making it suitable for home, factory, office, and school noise testing. The meter offers A/C weighting options, fast/slow response times, a backlit LCD display, and functions like MAX Hold for comprehensive sound analysis.
2. Safety Information
- Read this manual thoroughly before operating the device.
- Do not expose the device to extreme temperatures, humidity, or direct sunlight.
- Avoid strong vibrations or impacts to prevent damage.
- Ensure correct battery polarity when installing batteries.
- Remove batteries if the device will not be used for an extended period.
- Keep the device out of reach of children.
3. Package Contents
Verify that all items are present in the package:
- Neoteck Digital Sound Level Meter NTK342
- Carry Pouch
- Mini Screwdriver
- AAA Batteries (6 pieces, 3 required for operation)
- User Manual

Figure 3.1: Neoteck Digital Sound Level Meter NTK342 and its accessories.
4. Product Overview
Familiarize yourself with the main components of the sound level meter:
- Microphone: Captures sound waves for measurement. Equipped with a foam windscreen.
- LCD Display: Shows sound level readings, weighting, response time, temperature, and other indicators.
- Control Buttons: For power, mode selection, and function activation.
- Battery Compartment: Located at the rear, secured by a screw.

Figure 4.1: Front view of the Neoteck Digital Sound Level Meter NTK342.
5. Setup
5.1 Battery Installation
- Locate the battery compartment on the back of the device.
- Use the included mini screwdriver to loosen the screw securing the battery cover.
- Remove the battery cover.
- Insert three (3) AAA batteries, ensuring correct polarity (+/-).
- Replace the battery cover and tighten the screw.
5.2 Powering On/Off
- To Power On: Press the Power button (
 ) once. The LCD will illuminate.
 - To Power Off: Press and hold the Power button for approximately 2 seconds. The device will also automatically shut off after 3 minutes of inactivity to conserve battery life.
6. Operating Instructions
6.1 Basic Measurement
After powering on, the device will immediately begin measuring sound levels. Hold the meter with the microphone pointed towards the sound source. The current sound level in decibels (dB) will be displayed on the LCD.
6.2 A/C Weighting Selection
The meter supports two weighting modes:
- A-Weighting: Simulates the human ear's response to sound, ideal for general environmental noise measurement.
- C-Weighting: Provides a flatter response, suitable for measuring the true sound level of machinery or industrial noise.
To switch between A and C weighting, press the A/C button. The selected weighting (A or C) will be indicated on the display.
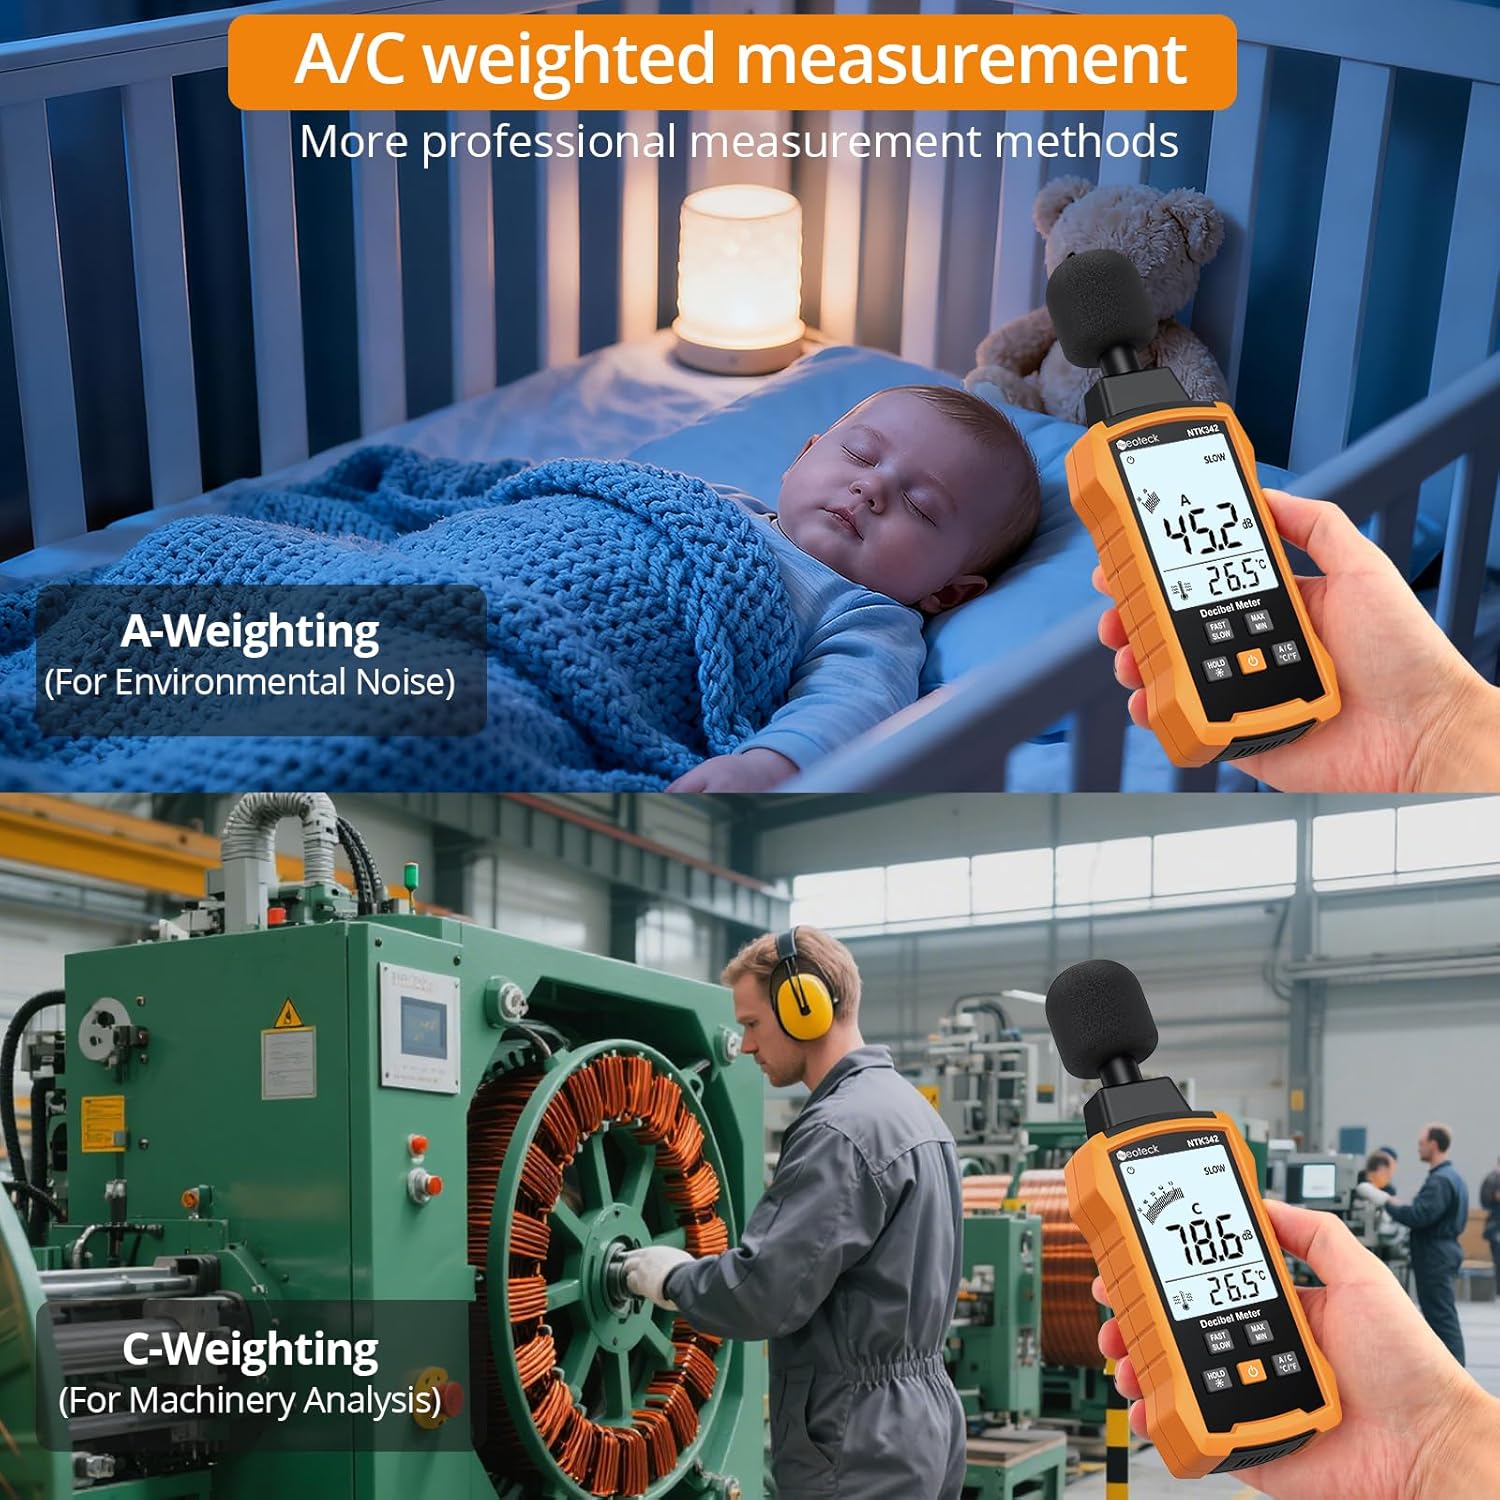
Figure 6.1: A-weighting for environmental noise and C-weighting for machinery analysis.
6.3 Fast/Slow Response Selection
The meter offers two response speeds:
- FAST (0.125s): Suitable for capturing dynamic, rapidly changing sound levels.
- SLOW (1s): Provides a more stable, averaged reading for steady sound levels or environmental measurements with large variations.
To switch between FAST and SLOW response, press the FAST/SLOW button. The selected response time will be indicated on the display.

Figure 6.2: Fast response for dynamic sounds and slow response for stable readings.
6.4 MAX/MIN Hold Function
This function allows you to capture the maximum or minimum sound level recorded during a measurement session.
- Press the MAX/MIN button once to display the maximum sound level recorded since the function was activated. The 'MAX' icon will appear.
- Press the MAX/MIN button again to display the minimum sound level recorded. The 'MIN' icon will appear.
- Press the MAX/MIN button a third time to exit MAX/MIN hold mode and return to real-time measurement.
6.5 Backlight Activation
The LCD display features a white backlight for improved visibility in low-light conditions.
- Press the HOLD /


Figure 6.3: Backlit LCD display for clear readings in various conditions.


