
1. Introduction
This manual provides detailed instructions for the assembly, operation, and maintenance of your Patiowell 4 x 8 FT Plastic Outdoor Storage Shed. Please read all instructions carefully before beginning assembly and retain this manual for future reference. This shed is designed for outdoor storage of garden tools, equipment, and other items, offering durability and weather resistance.

Image 1: Patiowell 4x8 FT Plastic Outdoor Storage Shed.
2. Safety Information
- Always wear appropriate safety gear, including gloves and eye protection, during assembly.
- Ensure the assembly area is clear of obstructions and children.
- Do not attempt to assemble the shed in strong winds or adverse weather conditions.
- Verify all parts are present and undamaged before starting assembly. Contact customer support immediately if any parts are missing or damaged.
- Secure the shed to a solid, level foundation to prevent tipping or movement.
- Do not store flammable liquids or hazardous materials inside the shed.
- Keep the shed door closed and locked when not in use to prevent unauthorized access and protect contents.
3. Setup and Installation
The Patiowell 4 x 8 FT Plastic Outdoor Storage Shed features a simplified installation process with a one-piece design, reducing the number of screws required by 20% and assembly time by 30%. It is designed for easy assembly, potentially by a single person.
3.1 Pre-Assembly Checklist
- Foundation: A solid, level base is crucial for stability and proper alignment of the shed components. Uneven surfaces can lead to assembly difficulties and gaps.
- Tools Required: Refer to the included hardware list. Typically, a screwdriver and possibly a drill are needed.
- Package Delivery: Note that this shed is delivered in two separate packages, which may arrive at different times. Please ensure both packages have arrived before starting assembly.
3.2 Assembly Steps Overview
Follow the detailed step-by-step instructions provided in the manufacturer's printed manual. The general process involves:
- Assembling the base and floor panels.
- Attaching the wall panels using the plug-in structure.
- Installing the windows and door frame. Ensure windows are installed early in the process as per instructions to avoid reassembly.
- Mounting the roof panels and ridge cap.
- Attaching the door and handle mechanism.
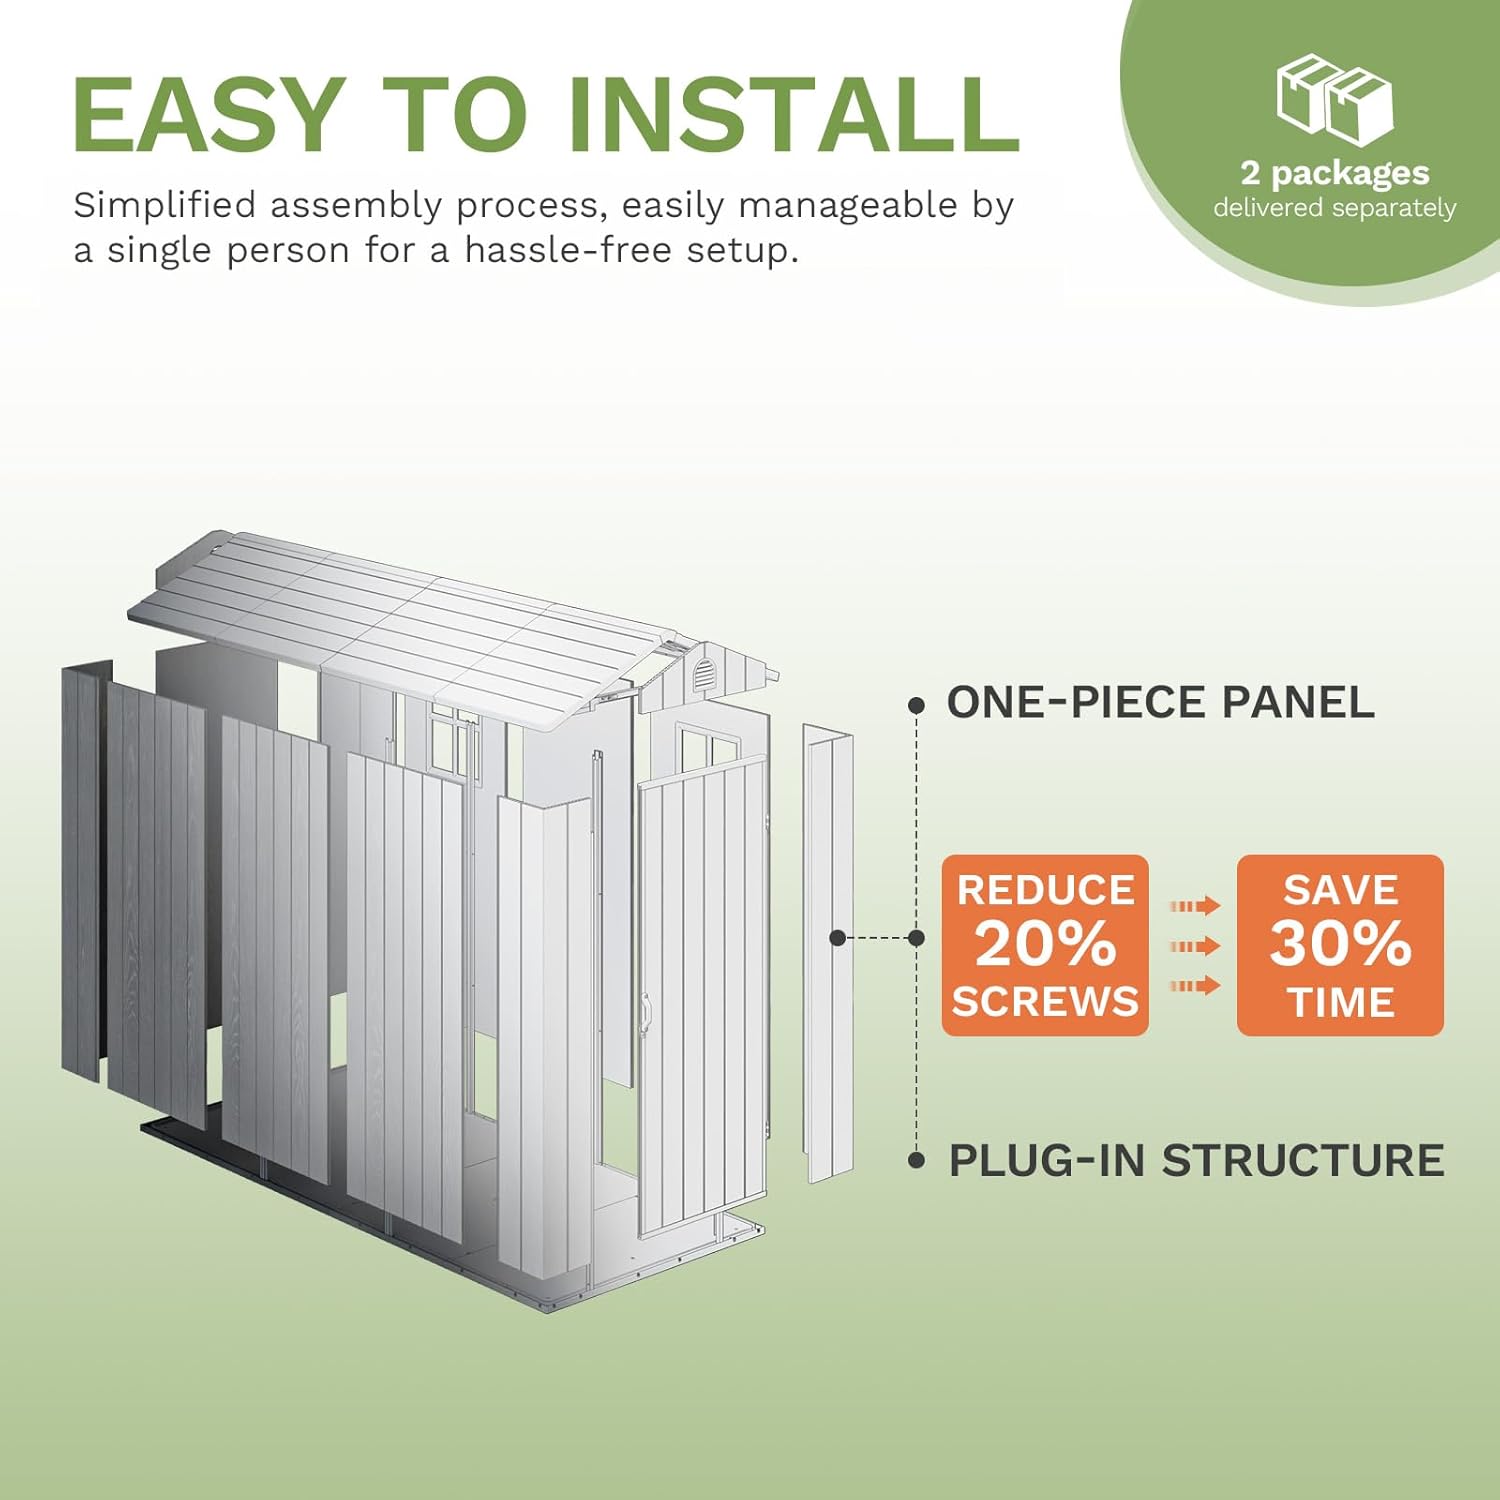
Image 2: Simplified assembly process with one-piece panels.

Image 3: Shed dimensions for planning placement.
3.3 Installation Video Guide
For a visual guide on the assembly process, please refer to the official installation video:
Video 1: Detailed assembly instructions for the Patiowell 4x8 FT Plastic Shed.
4. Operating Instructions
Your Patiowell storage shed is designed for straightforward use.
4.1 Door Operation
The shed features a single, lockable door. To open, turn the handle and pull. To close, push the door firmly until it latches. For security, use a padlock (not included) with the integrated locking mechanism.
4.2 Window Functionality
The two built-in windows allow natural light into the shed, improving visibility of stored items. These windows are fixed and do not open.

Image 4: Interior view demonstrating storage capacity and natural light.
5. Maintenance
The Patiowell storage shed is constructed from heavy-duty resin panels, designed for low maintenance and long-lasting durability.
5.1 Cleaning
Clean the shed periodically with mild soap and water. Avoid abrasive cleaners or harsh chemicals that could damage the plastic material. Rinse thoroughly with water.
5.2 Weather Resistance
The shed is built to withstand various weather conditions, including heavy rain, heavy snow, and strong winds. Its durable structure and thicker base plate ensure stability across diverse outdoor landscapes.

Image 5: All-weather protection features.
5.3 Material Properties
The resin panels feature a wood-look texture, offering aesthetic appeal while being moisture and mildew resistant, which contributes to its low maintenance requirements.

Image 6: Key features including wood-look, durable structure, lockable door, and built-in windows.
6. Troubleshooting
If you encounter issues during assembly or use, consider the following:
- Assembly Difficulty: If assembly seems challenging, re-read the instructions carefully. Ensure all pieces are oriented correctly before fastening. Many issues arise from pieces being installed inside out or facing the wrong direction.
- Gaps in Seams: Minor gaps can occur if the base is not perfectly level or if panels are not fully seated during assembly. Ensure all screws are tightened appropriately and the shed is on a completely flat surface.
- Missing or Damaged Parts: If you find any parts missing or damaged upon delivery, contact Patiowell customer support immediately for assistance.
6.1 Product Feature Video
This video highlights various features of the shed, which may assist in understanding its construction and functionality:
Video 2: Product overview highlighting features like vent design.
7. Specifications
| Feature | Detail |
|---|---|
| Brand | Patiowell |
| Model Number | 436A-DGY-6 |
| Color | Dark Gray |
| Material | Plastic (Resin Frame) |
| Product Dimensions (D x W x H) | 96"D x 45.3"W x 76.8"H |
| Item Weight | 132.36 Pounds |
| Floor Area | 32 Square Feet |
| Door Width | 26.2 Inches |
| Door Height | 67.3 Inches |
| Door Style | Single, Lockable Door |
| Water Resistance Level | Water Resistant |
| Weight Capacity (Maximum) | 550 Pounds |
| Assembly Required | Yes |
8. Warranty and Support
Patiowell is committed to customer satisfaction. If you have any questions, concerns, or require assistance with your storage shed, please contact our customer support team.
- Customer Support: 24-hour customer support is available to assist you. Refer to your purchase documentation for contact details.
- Returns: The product is eligible for 30-day easy returns. Please consult the retailer's return policy for specific terms and conditions.


