Introduction
This manual provides detailed instructions for the safe operation, installation, maintenance, and troubleshooting of your OLIXIS AS-CSJ72XK-4D5WT-OL 50-Pint Dehumidifier. Please read this manual thoroughly before using the appliance and retain it for future reference.
Important Safety Instructions
To reduce the risk of fire, electric shock, or injury when using your dehumidifier, follow these basic precautions:
- Read all instructions before using this appliance.
- Plug into a grounded 3-prong outlet. Do not remove the grounding prong.
- Do not use an adapter.
- Do not use an extension cord.
- Unplug the dehumidifier before servicing.
- Do not operate any dehumidifier with a damaged cord or plug.
- Do not use the dehumidifier in wet areas such as bathrooms or laundry rooms.
- Keep the dehumidifier away from heat sources and direct sunlight.
- Ensure proper ventilation around the unit.
- This appliance is not intended for use by persons (including children) with reduced physical, sensory or mental capabilities, or lack of experience and knowledge, unless they have been given supervision or instruction concerning use of the appliance by a person responsible for their safety.
Product Overview
Familiarize yourself with the components and control panel of your OLIXIS Dehumidifier.

Figure 1: Front view of the OLIXIS 50-Pint Dehumidifier, showcasing its compact design and white finish.
Control Panel

Figure 2: Detailed view of the intelligent control panel with various function buttons and the ambient humidity display ring.
The control panel features an intelligent humidity display ring and buttons for various functions:
- Air Purification / Child Lock: Activates air purification mode or locks the control panel.
- High / Low: Adjusts fan speed.
- 0-24H Setting (Timer): Sets the operation timer.
- Humidity Level Adjustment (ADJ): Increases or decreases the target humidity level.
- Auto / Dryer / Sleeping (MODE): Selects operating modes.
- On / Off (POWER): Turns the unit on or off.
- Swing Function: Activates or deactivates the 75° vertical oscillation.
- Auto-Defrost Indicator: Illuminates when the unit is performing an automatic defrost cycle.
Setup and Installation
Placement
For optimal performance, place the dehumidifier in a central location within the area requiring dehumidification. Ensure there is at least 8 inches (20 cm) of space around the unit for proper airflow.

Figure 3: Illustration showing the dehumidifier's effective coverage across various rooms like living rooms, bedrooms, bathrooms, and kitchens.
The OLIXIS dehumidifier is designed for areas up to 3,500 sq. ft. and is suitable for basements, bedrooms, living rooms, and other spaces prone to high humidity.
Power Connection
Plug the power cord into a grounded 3-prong electrical outlet. Ensure the voltage matches the specifications of the unit.
Drainage Options
Your dehumidifier offers two drainage methods:
- Manual Drainage (Water Tank): The unit collects water in its internal 4.5-liter (1.19-gallon) water tank. When the tank is full, the unit will automatically shut off and an indicator light will illuminate. Carefully remove and empty the tank, then reinsert it securely.
- Continuous Drainage (Drain Hose): For continuous operation without manual emptying, attach the included 3.3-foot drain hose to the continuous drain port on the back of the unit. Route the hose to a suitable floor drain or larger container, ensuring the hose is sloped downwards to allow gravity drainage.
Operating Instructions
Turning On/Off
Press the POWER button to turn the dehumidifier on or off.
Setting Desired Humidity Level
Press the ADJ button to adjust the target humidity level. The humidity can be set between 30% RH and 80% RH in 5% increments. The unit will operate until the ambient humidity reaches the set level, then cycle on and off to maintain it.
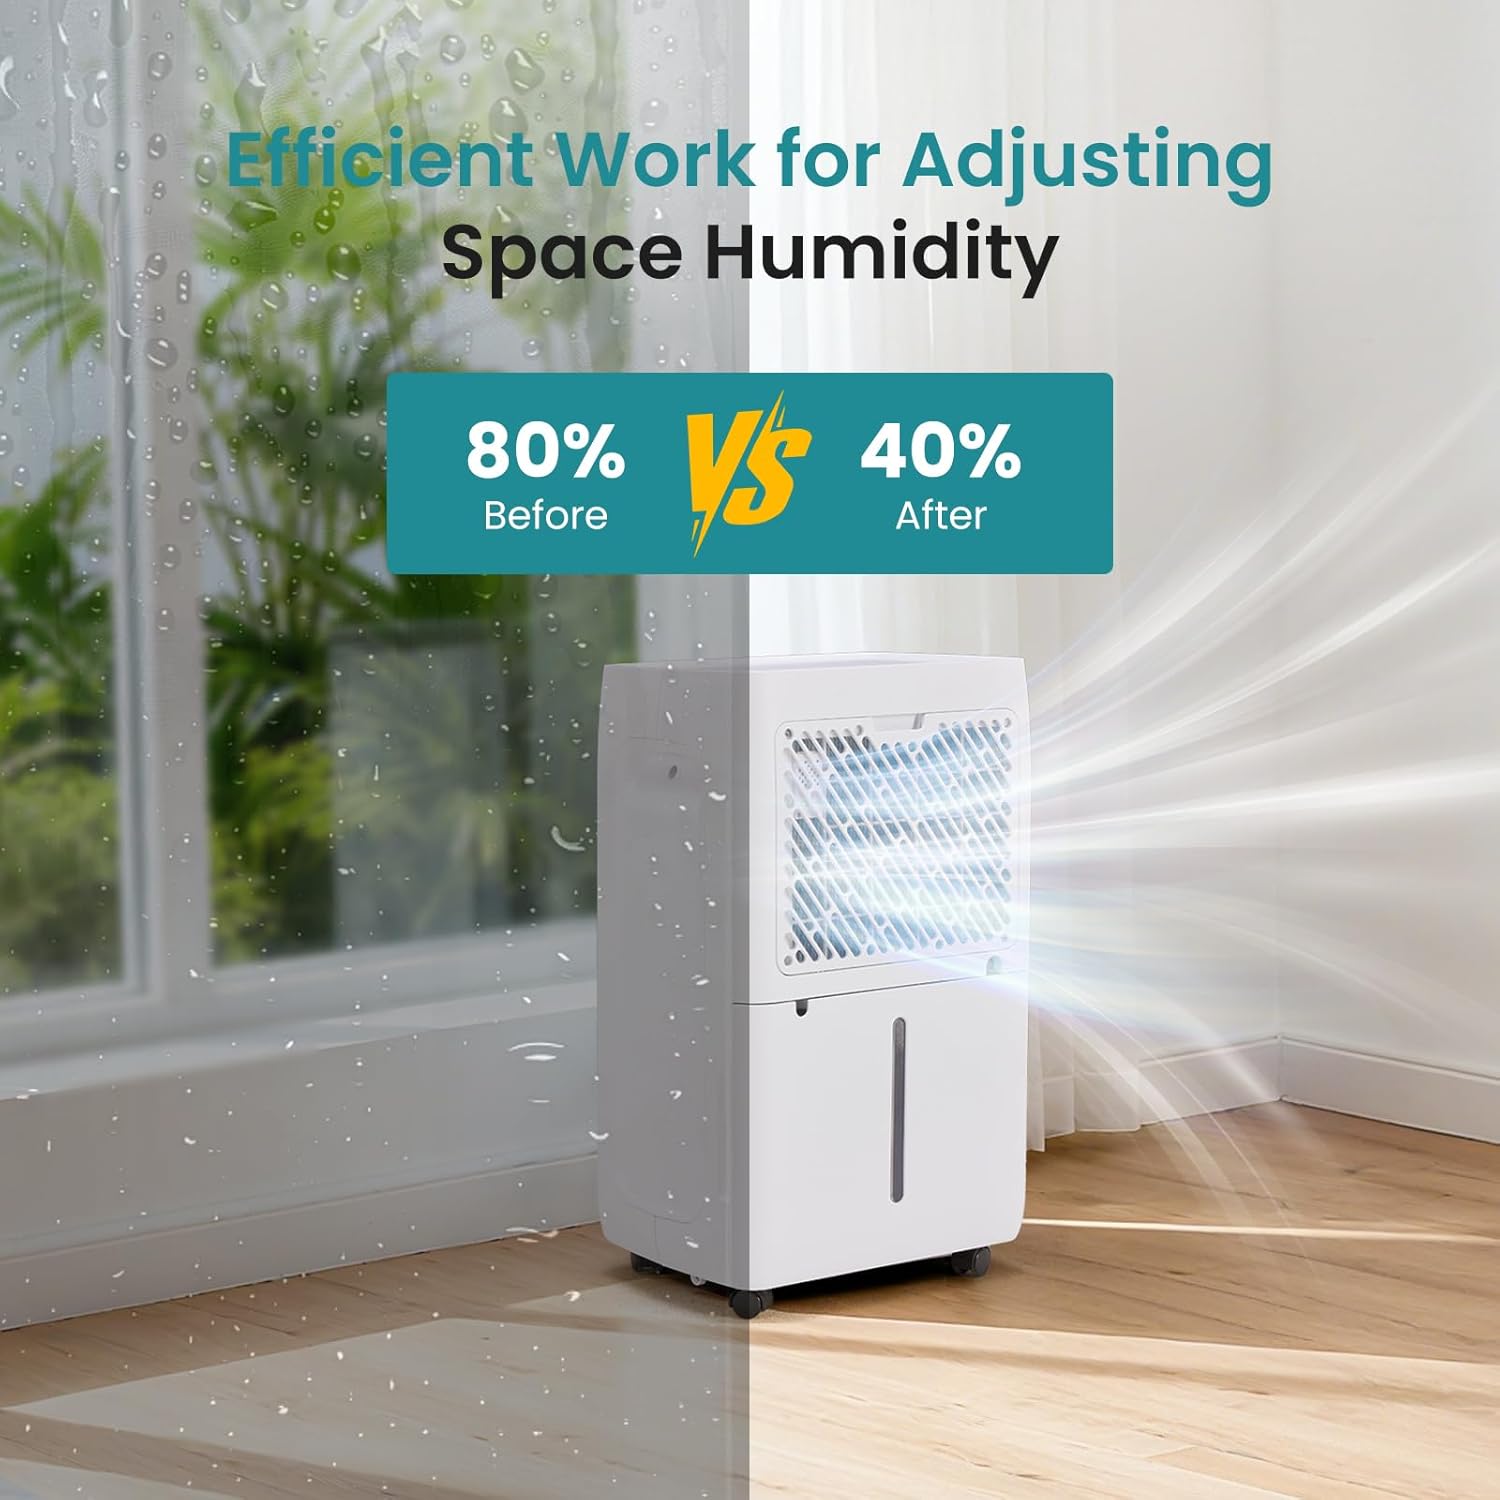
Figure 4: Visual representation of the dehumidifier's efficiency in reducing humidity from 80% to 40%.
Operating Modes
Press the MODE button to cycle through the available operating modes:
- Auto Mode: The unit intelligently adjusts fan speed and operation based on the ambient humidity to maintain the set target.
- Drying Mode: Designed for continuous high-power dehumidification, ideal for drying clothes or very damp areas.
- Sleep Mode: Operates at a lower fan speed and reduced noise level for quiet nighttime operation. The display lights may dim.
- Air Purification Mode: Activates the air purification function, reducing airborne contaminants.
Fan Speed Adjustment
Press the High / Low button to switch between high and low fan speeds.
Timer Function
Press the TIMER button to set an auto-on or auto-off time from 0 to 24 hours. Press repeatedly to adjust the desired duration.
Swing Function
Press the SWING button to activate or deactivate the 75° vertical oscillation of the air outlet, ensuring even air distribution.
Child Lock
To activate the child lock, press and hold the Air Purification / Child Lock button for 3 seconds. This will prevent accidental changes to settings. Repeat the action to unlock.
Maintenance
Regular maintenance ensures optimal performance and extends the lifespan of your dehumidifier.
Cleaning the Air Filter
The dehumidifier is equipped with a washable air filter. A dirty filter can reduce efficiency and airflow. It is recommended to clean the filter every two weeks or more frequently depending on usage and air quality.
- Turn off the unit and unplug it from the power outlet.
- Locate and remove the air filter from the back or side of the unit.
- Wash the filter with warm, soapy water. Rinse thoroughly.
- Allow the filter to air dry completely before reinserting it into the unit. Do not use a dryer or direct heat.
Emptying the Water Tank
If not using continuous drainage, the water tank will need to be emptied when full. The unit will stop operating and an indicator will light up.
- Gently pull out the water tank from the front of the unit.
- Carefully carry the tank to a sink or drain and empty the collected water.
- Rinse the tank with clean water if necessary.
- Reinsert the empty tank firmly into the unit until it clicks into place. The unit will resume operation.
Cleaning the Exterior
Wipe the exterior of the dehumidifier with a soft, damp cloth. Do not use harsh chemicals, abrasives, or solvents, as these can damage the surface.
Troubleshooting
Refer to this section for common issues and their solutions.
| Problem | Possible Cause | Solution |
|---|---|---|
| Dehumidifier does not turn on. | No power, power cord loose, water tank full or not properly inserted. | Check power connection. Ensure water tank is empty and correctly seated. |
| Unit runs but does not dehumidify. | Air filter clogged, room temperature too low, humidity setting too high. | Clean the air filter. Ensure room temperature is above 41°F (5°C). Lower the target humidity setting. |
| Unit is noisy. | Unit not level, fan obstruction. | Place the unit on a flat, stable surface. Check for any obstructions around the fan. |
| Water leaks from the unit. | Water tank not properly inserted, continuous drain hose loose or clogged. | Ensure water tank is correctly seated. Check continuous drain hose connection and clear any blockages. |
If the problem persists after attempting these solutions, please contact customer support.
Specifications
- Brand: OLIXIS
- Model Number: AS-CSJ72XK-4D5WT-OL
- Dehumidification Capacity: 50 Pints/Day
- Coverage Area: Up to 3,500 sq. ft.
- Water Tank Capacity: 4.5 Liters (1.19 Gallons)
- Noise Level: <41 dB
- Dimensions (L x W x H): 23.37 x 32.26 x 52.32 cm (approximately 9.2 x 12.7 x 20.6 inches)
- Weight: 14.02 kg (approximately 30.9 lbs)
- Special Features: Automatic Shut-off, Child Lock, Adjustable Humidity Control, Automatic Defrost, Automatic Restart, 75° Vertical Swing.
- Power: (Not explicitly stated in input, assume standard household voltage for region)

Figure 5: Certifications including Energy Star and ETL, indicating energy efficiency and safety compliance.
Warranty and Customer Support
For warranty information or technical assistance, please refer to the warranty card included with your product or contact OLIXIS customer support directly. Please have your model number (AS-CSJ72XK-4D5WT-OL) and purchase date available when contacting support.
Contact Information: (Specific contact details are not provided in the product data. Please refer to the manufacturer's official website or product packaging for current support channels.)


