1. Product Overview
The Rosewill 4U Rackmount Server Chassis RSV-H424 is engineered for high-performance server environments, offering extensive storage capacity, advanced cooling, and broad compatibility.
- 24-Bay 12Gbps Storage Powerhouse in 4U: Maximize your rack space efficiency with a petabyte-scale storage server. This chassis is designed for data-intensive environments where high bandwidth and massive capacity are paramount.
- Flagship E-ATX Compatibility for Demanding Workloads: Supports the largest E-ATX server motherboards, enabling builds with maximum CPU core count, vast RAM capacity, and extensive PCIe expansion for the most demanding computational workloads.
- Enterprise-Grade, Serviceable Cooling System: 3 Hot-Swap 120x38mm fans delivers high-static pressure to cool components effectively. The hot-swap capability guarantees that cooling integrity is never compromised, even during fan maintenance.

Figure 1: Rosewill 4U Rackmount Server Chassis RSV-H424 with key features including E-ATX support, 24-bay storage, serviceable cooling, and 4U optimization.
2. Safety Information
Please read and understand all safety instructions before installing or operating the server chassis. Failure to do so may result in personal injury or damage to the equipment.
- Always disconnect power before performing any installation or maintenance.
- Wear anti-static gloves to prevent electrostatic discharge (ESD) damage to sensitive components.
- Ensure proper grounding of the chassis and all connected equipment.
- Do not block ventilation openings. Maintain adequate airflow around the chassis.
- Handle components with care to avoid physical damage.
3. Package Contents
Verify that all items are present in the package before proceeding with installation:
- Rosewill 4U Rackmount Server Chassis RSV-H424
- Accessory Kit (screws, cables, etc.)
- Quick Installation Guide

Figure 2: Exploded view showing the chassis, top cover, fan brackets, drive cages, and various accessories.
4. Setup and Installation
4.1. Preparing the Chassis
Before installing components, remove the top cover of the chassis by unscrewing the retaining screws and sliding it off.
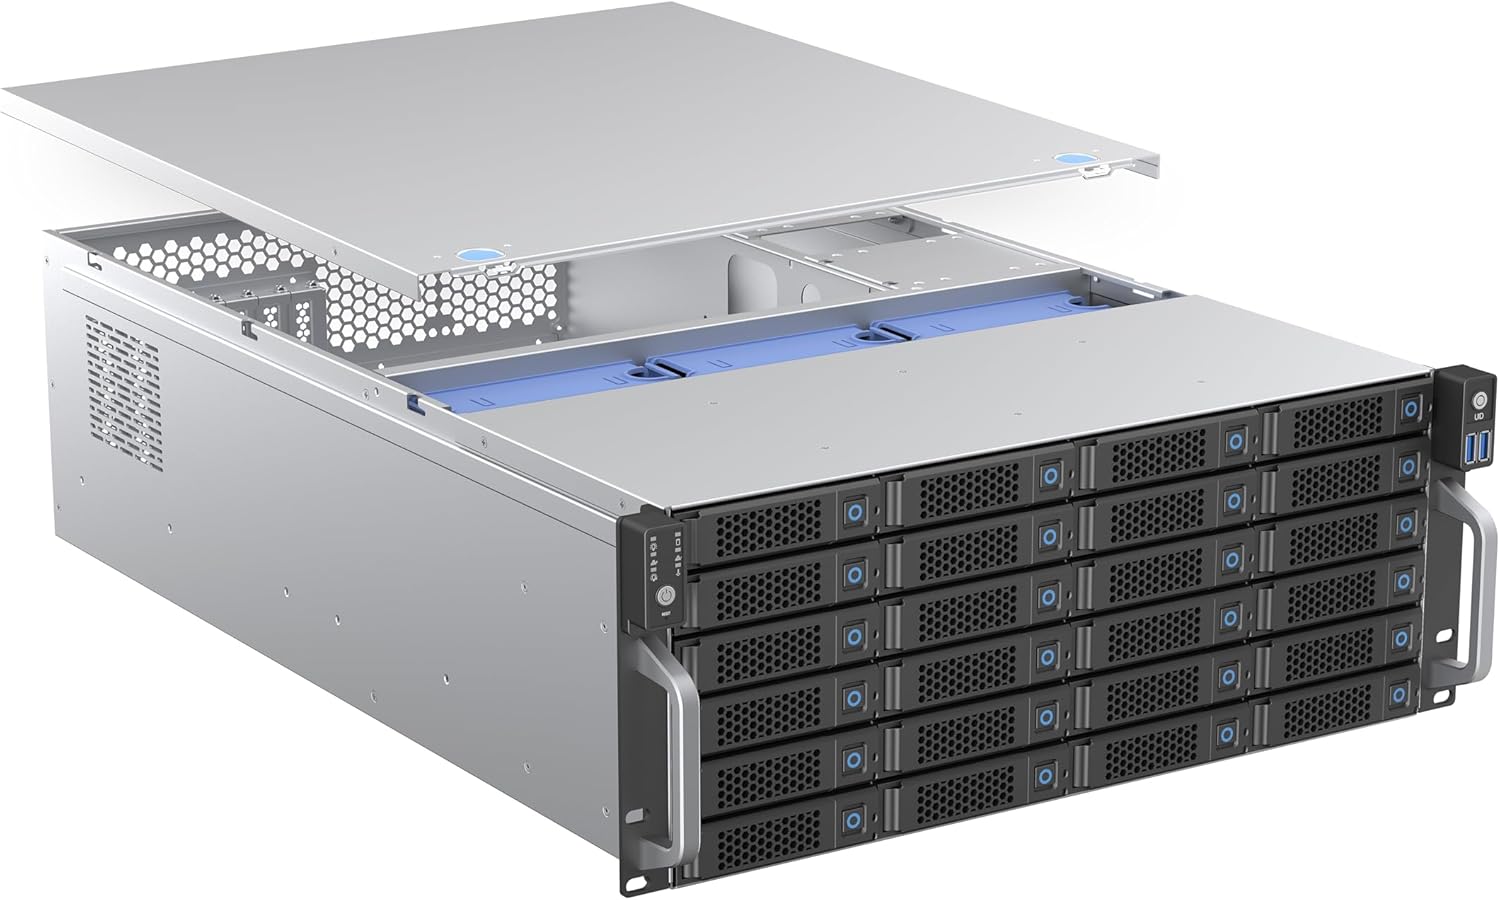
Figure 3: The top cover being removed from the chassis to access internal components.
4.2. Motherboard Installation
The RSV-H424 supports E-ATX, ATX, Micro-ATX, and Mini-ITX motherboards. Install standoffs as required for your motherboard form factor and secure the motherboard with screws.

Figure 4: Diagram showing the internal layout and highlighting E-ATX compatibility for demanding workloads.
4.3. Power Supply Unit (PSU) Installation
Install your PS2 (ATX) or Mini Redundant power supply in the designated rear mount position. Ensure proper cable management for optimal airflow.
4.4. Hard Drive Installation
The chassis features 24 hot-swap 3.5" drive bays. Slide each HDD into its respective tray and then into the hot-swap bay. For screwless installation, refer to the video below.

Figure 5: Hot-swap drive trays are easily accessible from the front for quick installation or replacement of 3.5" drives.
Video 1: Demonstration of the screwless installation process for 3.5-inch HDDs into the drive trays.
4.5. Cooling System Configuration
The chassis includes three 120x38mm hot-swap PWM fans for efficient cooling. Additional fans can be installed as needed. For liquid cooling installation, refer to the video below.

Figure 6: Airflow diagram illustrating how the enterprise-grade cooling system with hot-swap fans effectively cools components.
Video 2: Guide on how to install liquid cooling solutions up to 360mm in a 4U rackmount chassis.
4.6. Rack Installation
The chassis is designed for easy installation into a standard server rack. Utilize the reserved mounting holes for server rack sliding rails (sold separately). Refer to the videos below for guidance on installing sliding rails.
Video 3: Instructions on how to install sliding rails with the chassis and cabinet.
Video 4: Detailed steps on how to properly use sliding rails with the server chassis for rack mounting.
5. Operating Instructions
Once all components are installed and secured, connect the power cable to the PSU and the chassis to your network. Power on the server using the front panel power button. Monitor the front panel LED indicators for system status.
5.1. Front Panel Features
The front panel provides essential controls and indicators:
- Power Button
- Reset Button
- Power LED Indicator
- HDD Activity LED Indicator
- LAN Activity LED Indicators
- USB 3.0 Ports (x2)
- USB Type-C Port (x1)
Video 5: A short preview highlighting the 4U liquid cooling support, keylock door, and magnetic air filter features of the chassis.
6. Maintenance
Regular maintenance ensures the longevity and optimal performance of your server chassis.
- Cleaning: Periodically clean the dust filters on the front panel and fan intakes to maintain optimal airflow. Use compressed air to remove dust from internal components.
- Fan Maintenance: The hot-swap fans allow for easy replacement without powering down the entire system. Regularly check fan operation and replace any failing fans promptly.
- Cable Management: Ensure all internal cables are neatly routed and secured to prevent obstruction of airflow and potential damage.
7. Troubleshooting
If you encounter issues with your Rosewill RSV-H424 chassis, consider the following basic troubleshooting steps:
- No Power: Check all power connections, including the PSU, power cable, and wall outlet. Ensure the power button is fully pressed.
- Overheating: Verify that all fans are operating correctly and that ventilation openings are not blocked. Clean any accumulated dust.
- Drive Detection Issues: Ensure hard drives are properly seated in their bays and that all data and power cables are securely connected.
- System Instability: Confirm that all internal components (motherboard, RAM, expansion cards) are correctly installed and seated.
For more advanced troubleshooting, consult the documentation for your specific internal components or contact Rosewill support.
8. Specifications
| Brand | Rosewill |
| Series | RSV-H424 |
| Item Model Number | RSV-H424 |
| Item Weight | 34.2 pounds |
| Product Dimensions (LxWxH) | 25.59 x 16.96 x 6.97 inches |
| Color | Silver |
| Motherboard Compatibility | Extended ATX |
| Case Type | Tower |
| Recommended Uses For Product | AI Server |
| Material | Alloy Steel |
| Power Supply Mounting Type | Rear Mount |
| Cooling Method | Air |

Figure 7: Detailed dimensions of the Rosewill 4U Rackmount Server Chassis.
9. Warranty and Support
Rosewill products are backed by a manufacturer's warranty. For specific warranty details, please refer to the warranty card included with your product or visit the official Rosewill website. For technical support, troubleshooting assistance, or to inquire about replacement parts, please contact Rosewill customer service through their official channels.


