
1. Introduction
This manual provides detailed instructions for the setup, operation, maintenance, and troubleshooting of your LUCKY MT-202 Portable Wireless Fish Finder. Please read this manual thoroughly before using the device to ensure optimal performance and longevity.
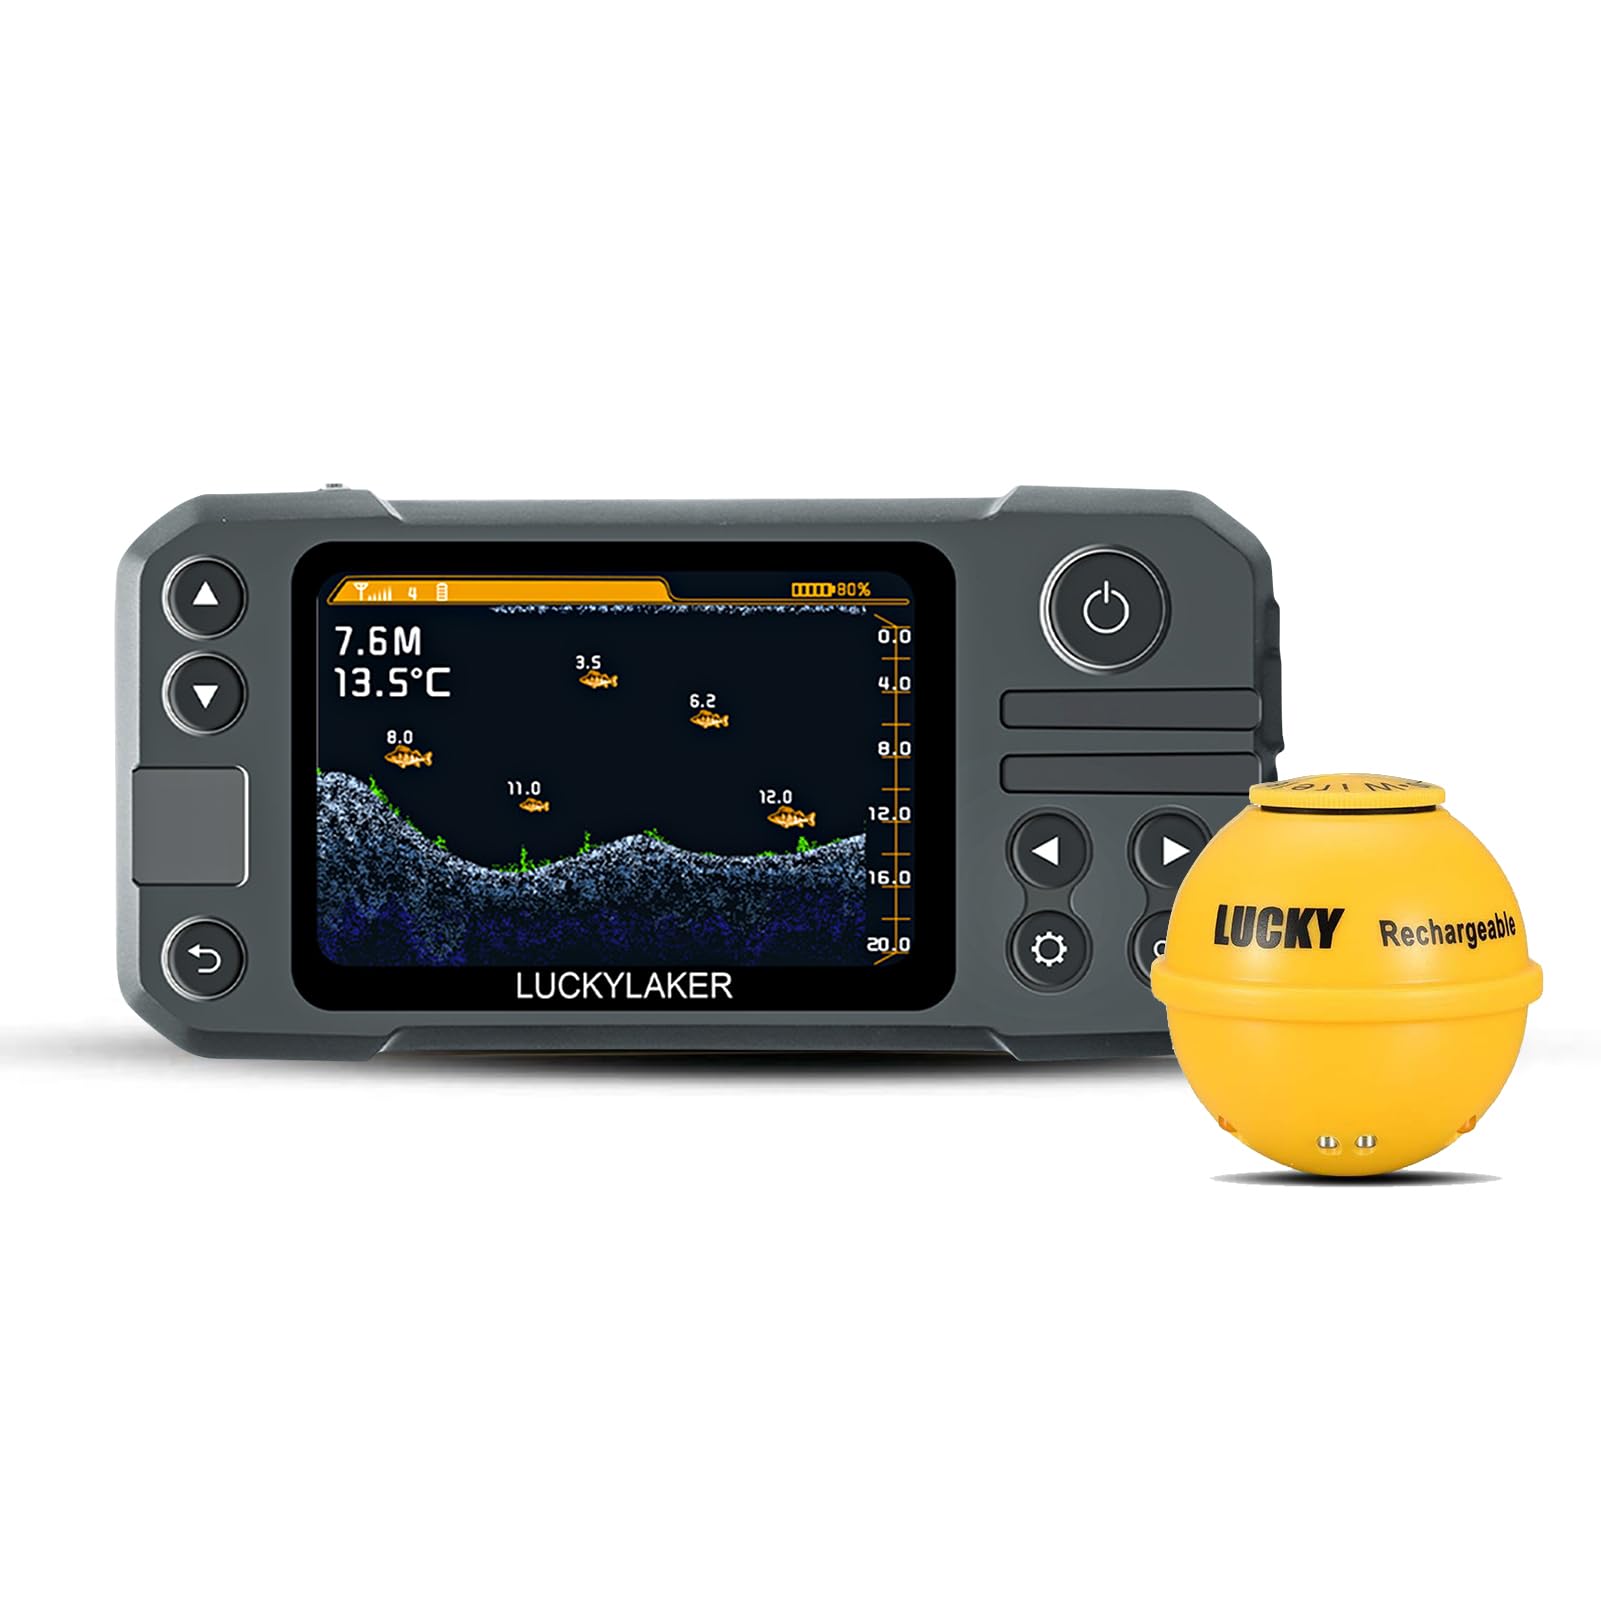
Figure 1: LUCKY MT-202 Fish Finder display unit and wireless transducer.
2. Product Overview
2.1 Key Features
- Wireless Operation: Offers a wireless reception distance of up to 853 feet (260 meters) between the display unit and the sonar transducer.
- Precise Fish Detection: Identifies water depth, fish depth, and fish location relative to underwater structures.
- Wide Sonar Coverage: Utilizes a 90-degree beam angle to scan depths from 3 feet to 147 feet.
- Clear Display: Features a 3.5-inch horizontal LCD display showing fish icons with depth numbers and a continuous scrolling history of sonar data.
- Portable Design: Lightweight and compact, designed for easy casting and use from various fishing platforms.
- Versatile Use: Suitable for shore fishing, kayak fishing, canoe fishing, boat fishing, pontoon fishing, and ice fishing.
- Long Battery Life: Equipped with a large-capacity battery and Type-C efficient charging for extended use.
2.2 Components
The LUCKY MT-202 package typically includes:
- LUCKY MT-202 Display Unit
- Wireless Sonar Transducer
- USB Type-C Charging Cable
- Safety Tether for Transducer
- User Manual (this document)

Figure 2: Main components of the LUCKY MT-202 Fish Finder.
3. Setup Guide
3.1 Charging the Device
Before initial use, fully charge both the display unit and the wireless sonar transducer. Use the provided USB Type-C cable to connect the devices to a compatible USB power source.
- The display unit features a Type-C charging port, typically located on the side.
- The transducer also has a charging port, usually sealed with a waterproof cap. Ensure the cap is securely closed after charging to maintain water resistance.
- A full charge provides extended operating time.

Figure 3: Display unit with Type-C charging port and integrated bracket.
3.2 Attaching the Transducer
The wireless transducer is designed to be cast into the water. Attach it securely to your fishing line or the included safety tether.
- Tie the transducer to your fishing line using a strong knot, ensuring it is stable during casting and retrieval.
- Alternatively, use the safety tether to secure the transducer to your boat, kayak, or a fixed point if you plan to deploy it without casting.
3.3 Powering On and Pairing
The device is designed for simple 'power-on and fish' operation.
- Press and hold the Power button on the display unit to turn it on.
- Ensure the transducer is in the water. It will automatically activate and attempt to pair with the display unit.
- Once paired, the display will show sonar readings.
4. Operating Instructions
4.1 Display Overview and Button Functions
The 3.5-inch LCD display provides clear information. The buttons on the unit allow for navigation and setting adjustments.
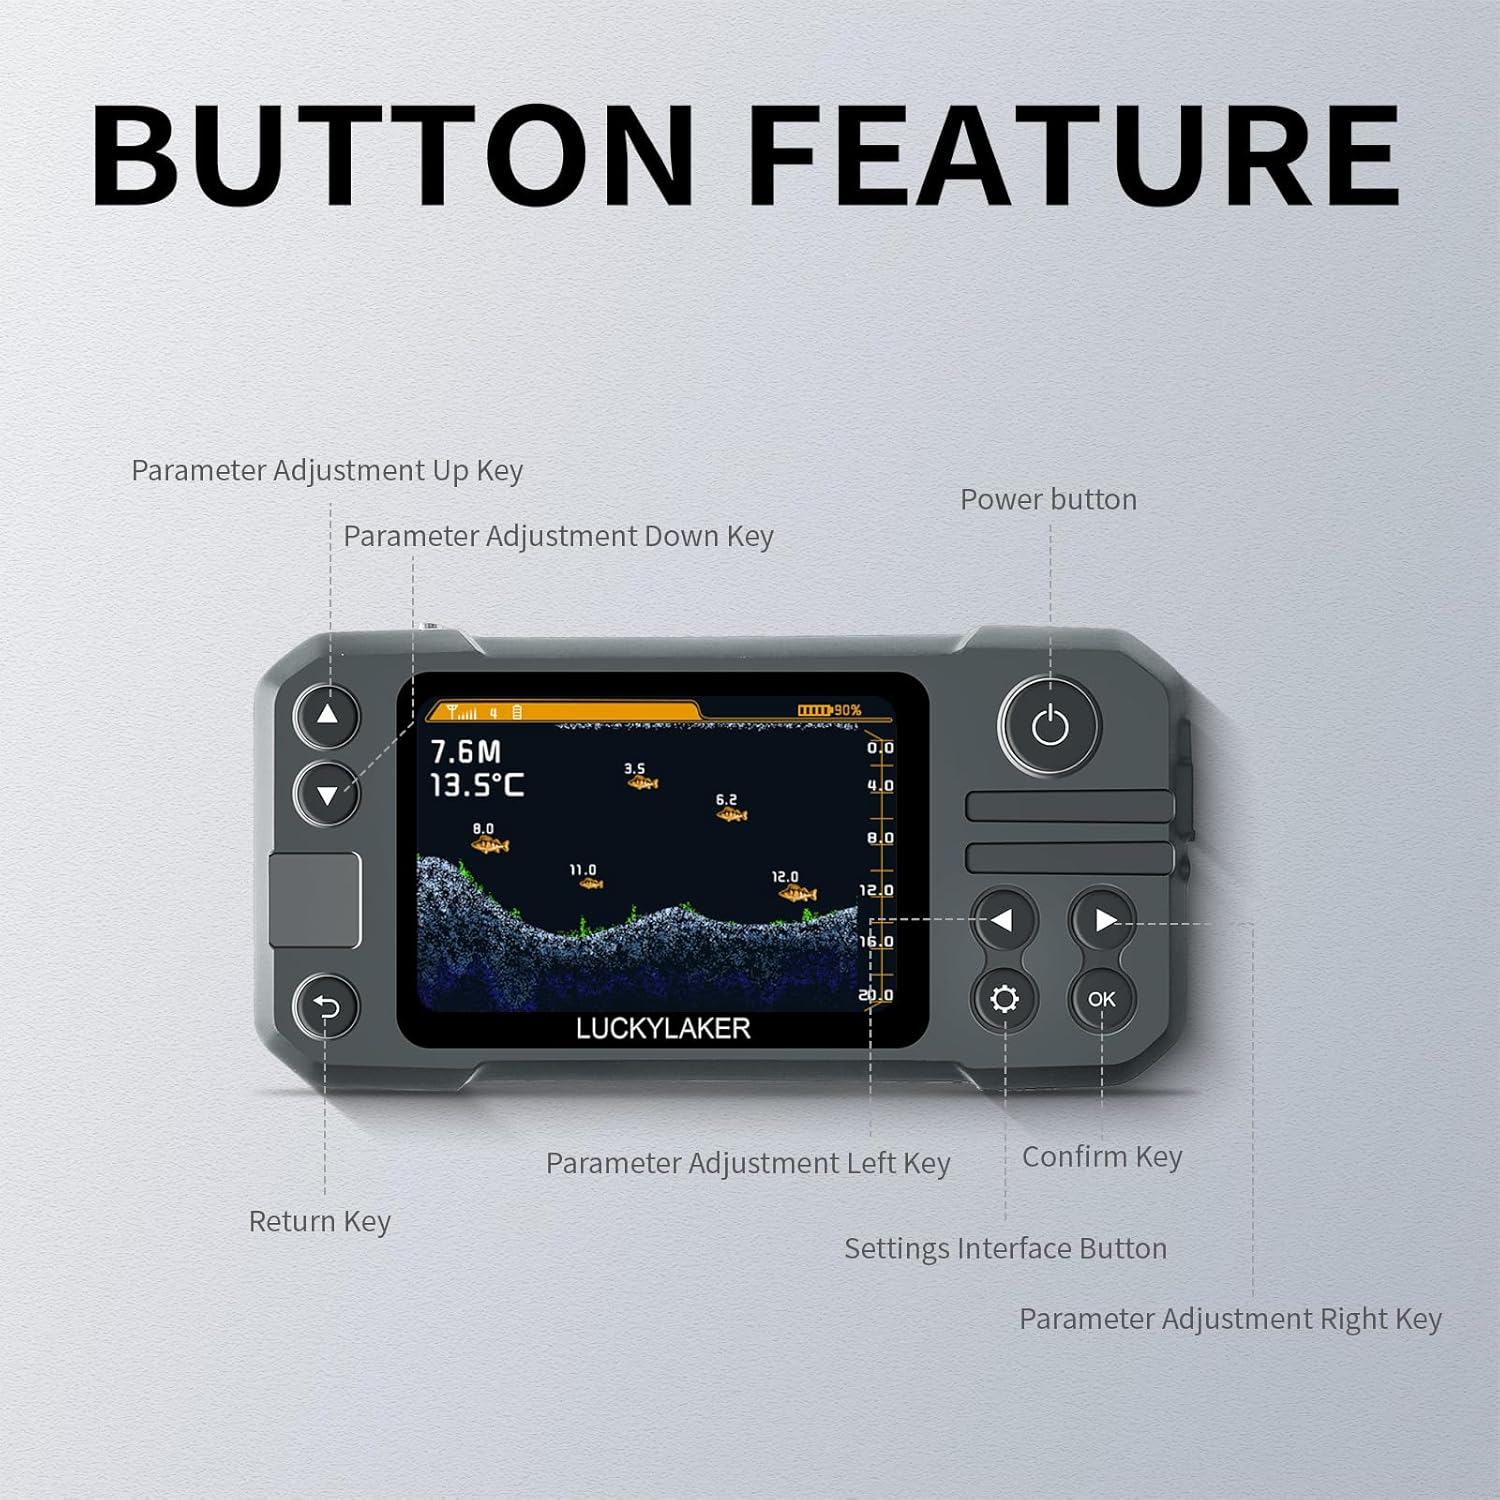
Figure 4: Button layout and display elements.
- Power Button: Turns the device on/off.
- Parameter Adjustment Up/Down Keys: Used to navigate menus and adjust settings values.
- Parameter Adjustment Left/Right Keys: Used to navigate menus and adjust settings values.
- Confirm Key (OK): Confirms selections in menus.
- Return Key: Navigates back to the previous screen or menu.
- Settings Interface Button: Accesses the main settings menu.
4.2 Basic Operation
- Casting the Transducer: Once powered on and paired, cast the transducer into your desired fishing area. The wireless range allows for deployment up to 853 feet away.
- Reading the Display: The screen scrolls from right to left, providing a continuous history of underwater conditions. Fish icons appear with their exact depth marked next to them. The display also shows water depth and bottom contour.
- Interpreting Sonar Data: The device helps identify fish presence, water depth, and the location of fish relative to underwater structures. The 90-degree sonar beam covers a wide area for effective scanning.

Figure 5: Wireless reception distance and typical sonar display.
4.3 Adjusting Settings
Access the settings menu using the dedicated button to customize your fish finder's performance.
- Sensitivity: Adjust sonar sensitivity to filter out noise or detect weaker signals. Higher sensitivity may show more detail but also more clutter.
- Depth Range: Manually set the depth range or allow the device to auto-range for optimal viewing.
- Units: Switch between metric (meters, Celsius) and imperial (feet, Fahrenheit) units for depth and temperature.
- Fish Alarm: Enable or disable an audible alarm when fish are detected.
- Backlight: Adjust screen brightness for visibility in various lighting conditions, including night mode.
4.4 Usage Scenarios
The MT-202 is designed for versatility across different fishing environments.
- Shore Fishing: Cast the transducer from the shore to explore deeper waters and structures beyond casting distance.
- Kayak/Canoe Fishing: Easily deploy the transducer from your small watercraft without complex mounting.
- Boat Fishing: Use it as a portable alternative or supplement to fixed fish finders.
- Ice Fishing: The transducer can be placed in an ice hole to detect fish beneath the ice.
Figure 6: The MT-202 is suitable for various fishing types.
5. Maintenance
5.1 Cleaning
- After each use, rinse the transducer and display unit with fresh water to remove salt, dirt, or debris.
- Wipe both units dry with a soft, clean cloth.
- Do not use abrasive cleaners or solvents, as these can damage the device's surfaces or internal components.
5.2 Battery Care
- Recharge the batteries regularly, especially if the device will be stored for an extended period.
- Avoid fully discharging the batteries frequently, as this can reduce their lifespan.
- Store the device in a cool, dry place, away from extreme temperatures.
5.3 Storage
- Ensure both the display unit and transducer are clean and dry before storage.
- Store the device in its original packaging or a protective case to prevent damage.
- Keep the device away from direct sunlight and high humidity.
6. Troubleshooting
6.1 Common Issues and Solutions
- No Signal/Poor Connection:
- Ensure both the display unit and transducer are fully charged and powered on.
- Verify the transducer is properly deployed in the water.
- Reduce the distance between the display unit and the transducer.
- Check for obstructions between the units that might interfere with the wireless signal.
- Inaccurate Depth Readings:
- Ensure the transducer is submerged correctly and not obstructed by weeds or debris.
- Adjust the sensitivity settings. Too low sensitivity might miss details, too high might show noise.
- Verify the water depth is within the device's operational range (3-147 feet).
- Display Not Turning On:
- Charge the display unit for at least 2 hours.
- Attempt to power on again. If the issue persists, contact customer support.
- Battery Not Charging:
- Ensure the USB Type-C cable is securely connected to both the device and the power source.
- Try a different USB power adapter or port.
- Inspect the charging port for any debris or damage.
6.2 Specific Limitations
- Ice Thickness: The device may not function effectively through ice thicker than approximately 10 inches. For ice fishing, it is recommended to place the transducer directly into an ice hole.
7. Specifications
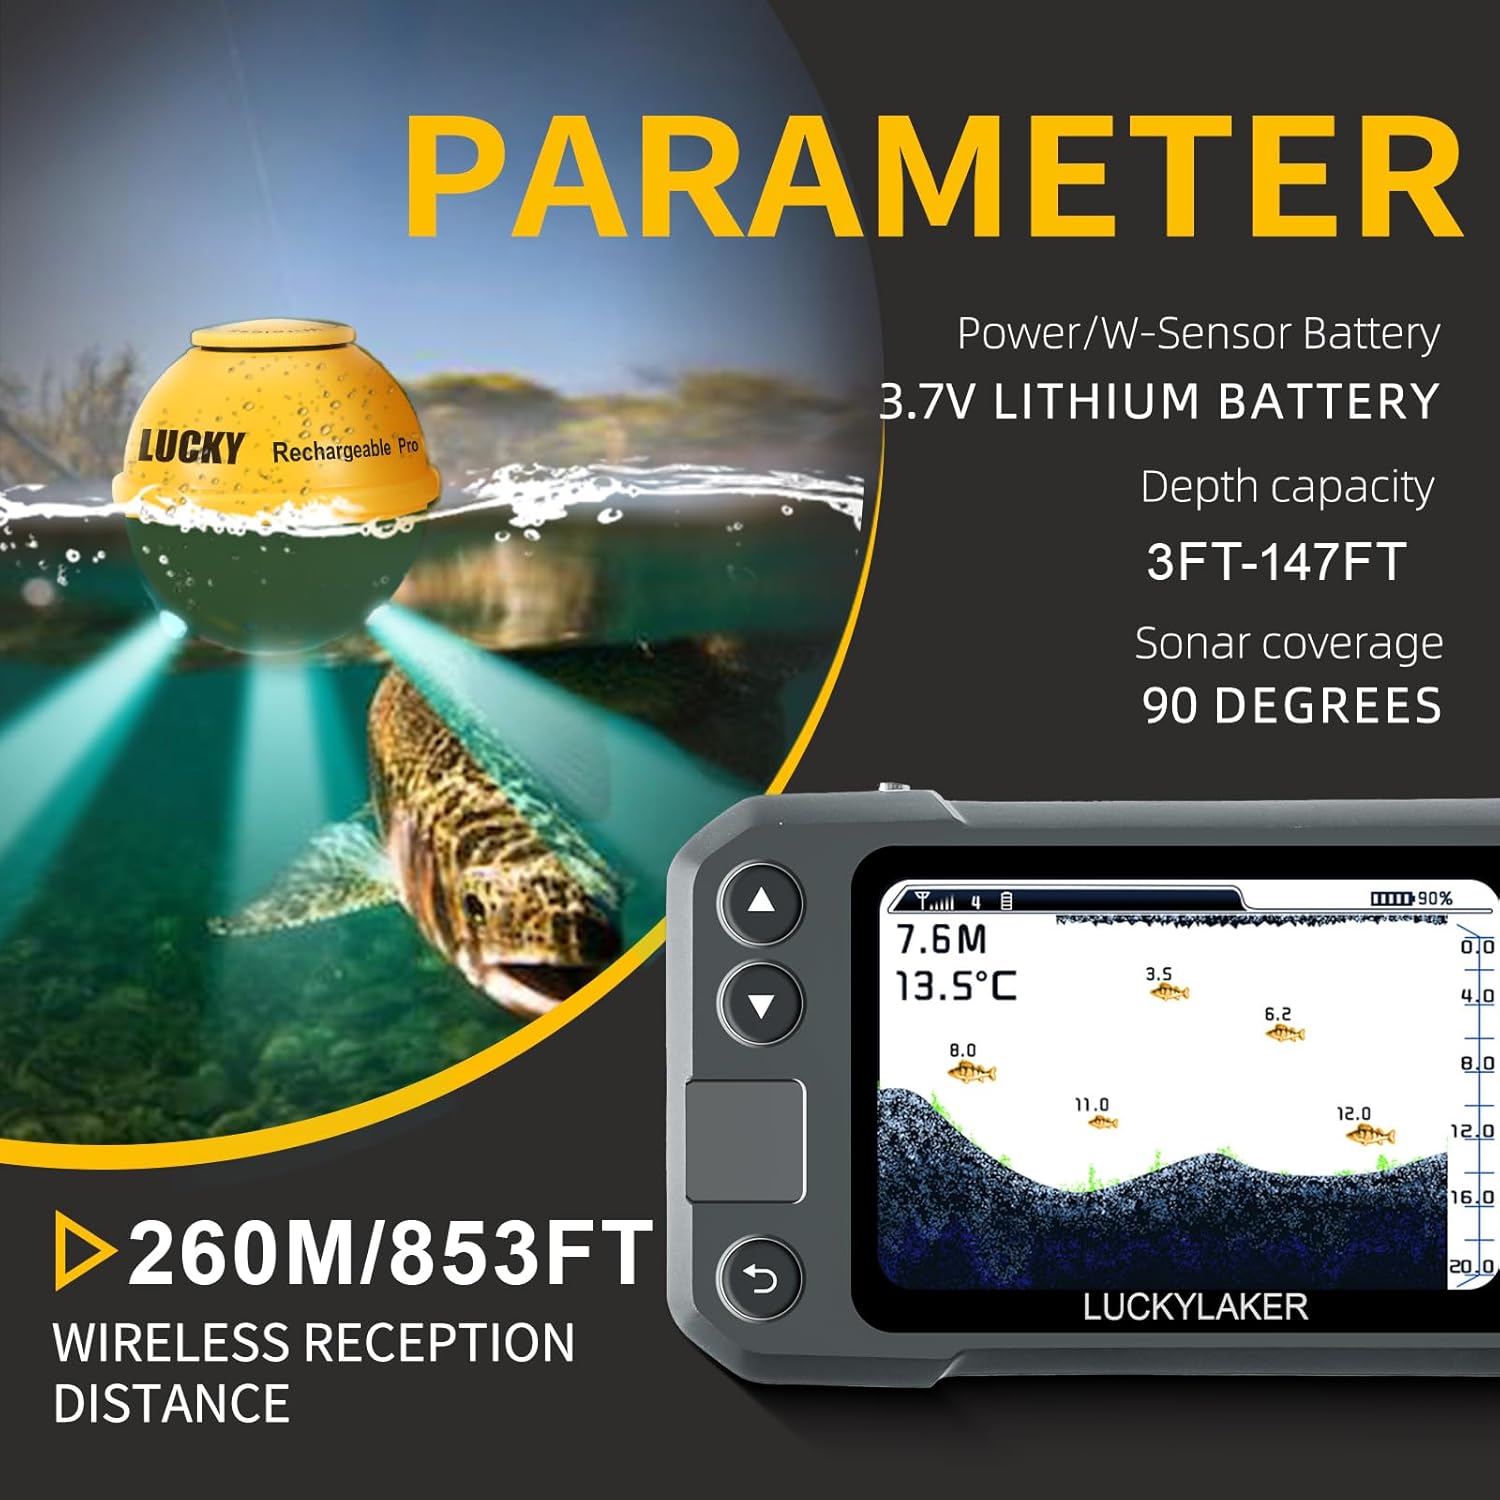
Figure 7: Key operational parameters of the device.
| Feature | Specification |
|---|---|
| Brand | LUCKY |
| Model Name | YMT-202 (MT-202) |
| Power Source | Battery Powered (3.7V Lithium Battery) |
| Screen Size | 3.5 Inches |
| Display Type | LCD |
| Sonar Type | Single beam Frequency (Beam cone) 125 kHz, 90° |
| Maximum Measuring Depth | 147 Feet (45 meters) |
| Minimum Measuring Depth | 3 Feet (0.7 meters) |
| Wireless Reception Distance | 853 Feet (260 meters) |
| Mounting Type | Portable & Castable |
| Item Weight | 0.7 Kilograms |
8. Warranty and Support
8.1 Warranty Information
The LUCKY MT-202 Portable Wireless Fish Finder comes with a One Year limited warranty from the date of purchase. This warranty covers manufacturing defects and malfunctions under normal use. It does not cover damage caused by misuse, accidents, unauthorized modifications, or improper maintenance.
Please retain your proof of purchase for warranty claims.
8.2 Customer Support
For technical assistance, warranty claims, or any questions regarding your LUCKY MT-202 Fish Finder, please contact LUCKY customer support.
- Website: Visit the LUCKY Store on Amazon
- Email: Refer to your product packaging or the official LUCKY website for the most current contact email.
- Phone: Refer to your product packaging or the official LUCKY website for the most current contact phone number.


