
1. Introduction
The NEISEMOVI HW-586 ZB2L3 is a versatile battery capacity tester module designed for evaluating the actual capacity of various battery types, including 18650 lithium batteries and lead-acid batteries. This module features a digital LED display for clear readings and is suitable for DIY electronics projects and professional battery analysis. It helps users determine the health and performance of their batteries by measuring discharge capacity and internal resistance.
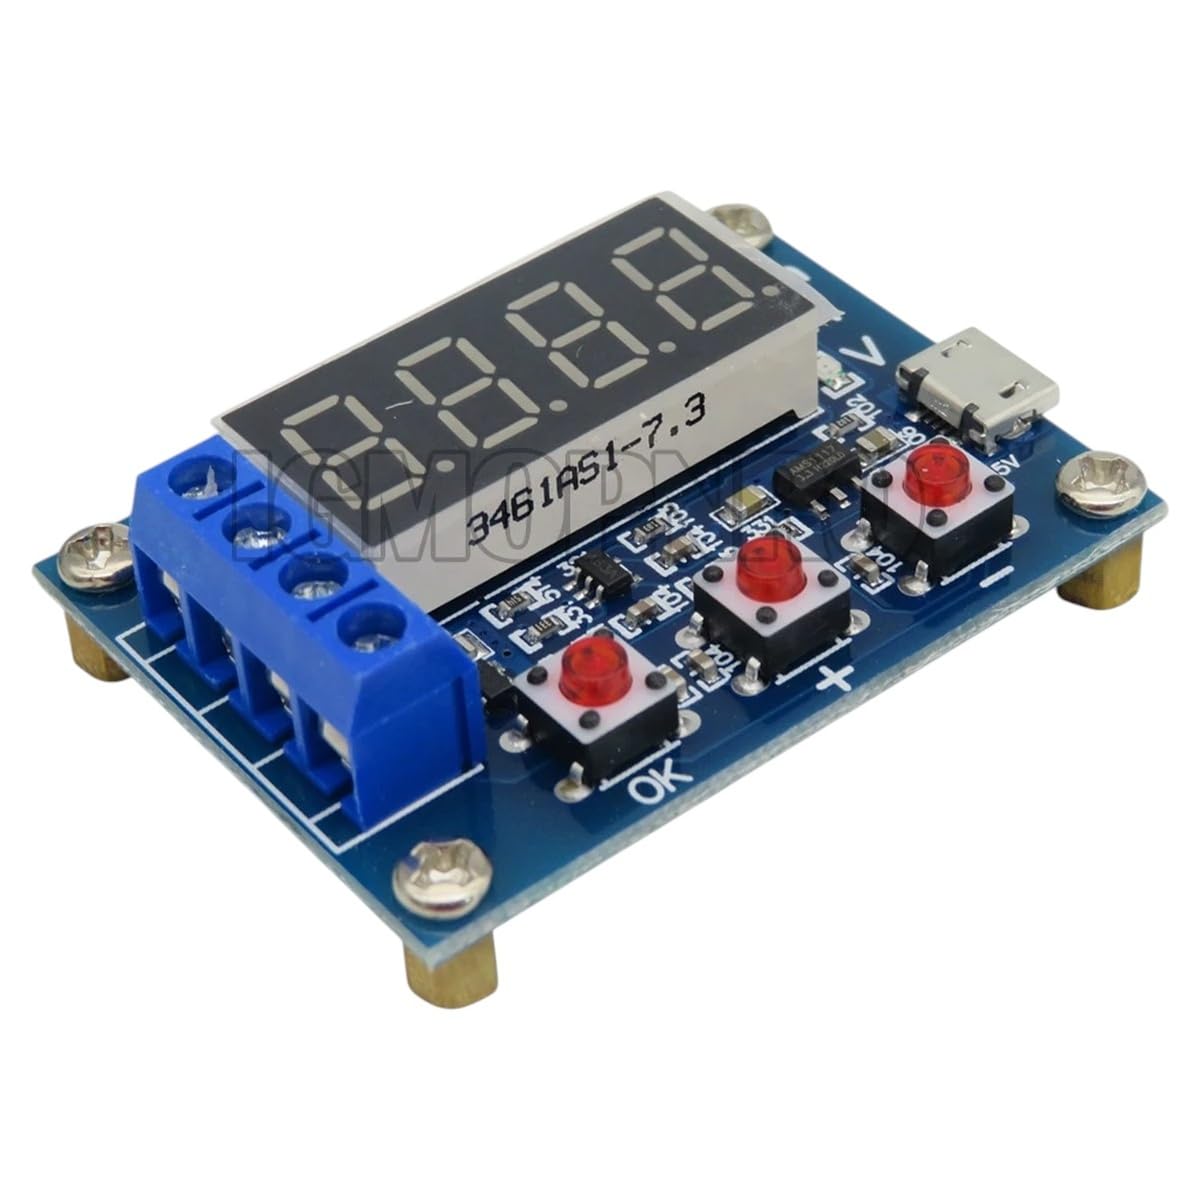
Figure 1: NEISEMOVI HW-586 ZB2L3 Battery Tester module with its integrated LED display.
2. Setup
Before operating the HW-586 ZB2L3 battery tester, ensure all connections are made correctly. This module requires an external 5V power supply and a suitable discharge load.
2.1 Components Required
- HW-586 ZB2L3 module
- 5V Micro USB power supply (e.g., phone charger)
- Battery to be tested (e.g., 18650 lithium, lead-acid)
- Discharge load resistor (e.g., 5W 7.5 Ohm for 1A discharge, or appropriate value for desired current)
- Connecting wires
2.2 Connection Diagram
Refer to the image below for proper wiring. The module has terminals for power input, battery input, and load output.

Figure 2: Detailed view of the HW-586 ZB2L3 module's circuit board, highlighting potential connection points for power, battery, and load. Note the QR codes and revision numbers (REV_0 V055) on the boards.
- Power Supply: Connect a 5V Micro USB power supply to the module's Micro USB port. Alternatively, connect a 5V DC power source to the designated 5V input terminals if available.
- Battery Connection: Connect the positive (+) terminal of the battery to be tested to the 'BAT+' terminal on the module. Connect the negative (-) terminal of the battery to the 'BAT-' terminal. Ensure correct polarity.
- Load Resistor Connection: Connect your chosen discharge load resistor between the 'LOAD+' and 'LOAD-' terminals on the module. The resistor value determines the discharge current. For example, a 7.5 Ohm resistor will draw approximately 1A from a 7.5V battery.
3. Operating Instructions
Once the module is powered and all connections are secure, you can begin the battery capacity test.
3.1 Initial Power-On
Upon connecting the 5V power supply, the LED display will illuminate, typically showing the current voltage or a default mode. Ensure the battery is connected before starting a test.
3.2 Setting Discharge Parameters (if applicable)
Some versions of the ZB2L3 module allow setting a discharge cut-off voltage. Refer to the specific button functions on your module. Typically, a button (often labeled 'SET' or 'MODE') is used to cycle through display modes or enter settings. For basic operation, the module may automatically detect the battery voltage and discharge until a preset low voltage is reached.
3.3 Starting the Test
Press the 'START' button (or equivalent) to initiate the discharge test. The module will begin discharging the battery through the connected load resistor. The display will typically show real-time voltage, current, and accumulated capacity (mAh or Wh).
3.4 Monitoring the Test
During the test, the display will cycle through various parameters. Pay attention to the accumulated capacity reading. The test will automatically stop when the battery voltage drops to its predetermined cut-off voltage (e.g., 3.0V for 18650 lithium batteries).
3.5 Reading Results
Once the test is complete, the display will show the total discharged capacity. This value represents the actual capacity of the battery. Disconnect the battery and power supply after recording the results.
3.6 Stopping the Test Manually
To stop a test prematurely, press the 'STOP' button (or equivalent).
4. Maintenance
The NEISEMOVI HW-586 ZB2L3 module is designed for durability, but proper care ensures its longevity and accurate performance.
- Cleaning: Keep the module clean and free from dust. Use a soft, dry cloth to wipe the surface. Avoid using liquids or abrasive cleaners.
- Storage: Store the module in a dry, cool environment away from direct sunlight and extreme temperatures.
- Handling: Handle the circuit board with care to avoid damaging components or solder joints. Avoid static discharge.
- Connections: Periodically check all wiring connections for looseness or corrosion to ensure reliable operation.
5. Troubleshooting
If you encounter issues with your HW-586 ZB2L3 module, refer to the following common problems and solutions:
| Problem | Possible Cause | Solution |
|---|---|---|
| No display when powered on | No 5V power supply; faulty USB cable; incorrect power connection. | Check 5V power source and USB cable. Ensure power connections are secure. |
| Test does not start | Battery not connected; load resistor not connected or incorrect value; 'START' button not pressed. | Verify battery and load connections. Ensure the load resistor is appropriate. Press the 'START' button. |
| Incorrect capacity reading | Loose connections; incorrect load resistor; battery not fully charged before test. | Check all connections. Ensure the load resistor is correctly rated. Fully charge the battery before testing. |
| Module gets excessively hot | Load resistor too small for current; insufficient heat dissipation for load resistor. | Ensure the load resistor is rated for the power it dissipates. Use a higher wattage resistor or multiple resistors in parallel/series if needed. Provide adequate ventilation. |
6. Specifications
- Model Number: HW-586 ZB2L3
- Material: Electronic components, Metal
- Operating Temperature: Standard
- Heat Dissipation Capacity: Standard
- Category: Battery Tester Module
- Supported Battery Types: 18650 Lithium, Lead-Acid (and similar voltage batteries)
- Power Input: 5V Micro USB (or 5V DC via terminals)
- Display: Digital LED
7. Warranty and Support
NEISEMOVI is committed to providing high-quality products and exceptional customer support. We stand by the quality of our electronics components and offer a money-back guarantee.
If you have any questions, concerns, or require assistance with your HW-586 ZB2L3 Battery Tester, please do not hesitate to contact our knowledgeable support team. We are available to help ensure your satisfaction and provide guidance on product usage.