
1. Introduction
Thank you for choosing the ErGear Dual Monitor Arm. This manual provides detailed instructions for the safe and efficient installation, operation, and maintenance of your new monitor arm. Please read this manual thoroughly before installation and keep it for future reference.
This heavy-duty dual monitor arm is designed to fit most 17-34 inch flat or curved monitors, supporting up to 19.8 lbs per arm. It is compatible with VESA mounting patterns of 75x75mm or 100x100mm. The arm offers dynamic angle adjustments, including height adjustments up to 17.5 inches, extension up to 18.1 inches, +80°/-50° tilt, ±90° swivel, and 360° rotation. It also features upgraded cable clips for tidy cable management.
2. Safety Information
- Ensure your monitor's VESA pattern, size, and weight are within the specified limits before installation.
- Do not exceed the maximum load capacity of 19.8 lbs (9 kg) per arm.
- Install the monitor arm on a sturdy desk surface. For C-clamp mounting, the desk thickness should be 0.39 to 2.56 inches (10-65mm). For grommet mounting, the desk thickness should be 0.39 to 2.95 inches (10-75mm).
- Only install on a wooden desk, preferably without a crossbeam blocking the underside.
- Always use appropriate tools and follow the installation steps carefully.
- Keep children and pets away during installation.
- Periodically check all screws and connections to ensure they remain tight and secure.
3. Package Contents
Please verify that all components are present and undamaged. If any parts are missing or defective, contact customer support.
- Monitor Arm Assembly (2 arms)
- Desk Mounting Base (C-clamp and Grommet options)
- VESA Plates (2 units)
- Hardware Kit (various screws, washers, spacers for VESA mounting)
- Allen Keys (for adjustments)
- Cable Clips
4. Specifications
| Feature | Detail |
|---|---|
| Brand | ErGear |
| Model Number | EGDMA70G-DS-US |
| Mounting Type | Tabletop Mount (C-Clamp or Grommet) |
| Material | Alloy Steel |
| Color | Grey |
| Compatible Screen Size | 17-34 Inches |
| Max Load Capacity | 19.8 lbs (9 kg) per arm |
| VESA Compatibility | 75x75mm, 100x100mm |
| Height Adjustment | Up to 17.5 Inches |
| Arm Extension | Up to 18.1 Inches |
| Tilt Angle | +80°/-50° |
| Swivel Angle | ±90° |
| Rotation | 360° |
| C-Clamp Desk Thickness | 0.39" to 2.56" (10-65mm) |
| Grommet Desk Thickness | 0.39" to 2.95" (10-75mm) |
5. Setup and Installation
The ErGear Dual Monitor Arm offers a fast and tool-free VESA mounting system. Follow these steps for a secure installation.
5.1 Choose Your Mounting Option
You can choose between C-clamp mounting or grommet mounting based on your desk type and preference. Ensure your desk meets the thickness requirements.

Figure 1: Two Mounting Options. C-Clamp for desks 0.39" to 2.56" thick, Grommet for desks 0.39" to 2.95" thick.

Figure 2: C-Clamp and Grommet Hole Mounting Details.
5.2 Check Desk Compatibility
Verify your desk surface is suitable for mounting. It is recommended to install on a wooden desk. Ensure sufficient space and a flat surface underneath for the clamp.

Figure 3: Desk Compatibility Check for Clamp Dimensions.
5.3 Attach VESA Plate to Monitor
Attach the VESA plate to the back of your monitor using the provided screws. Ensure the VESA pattern (75x75mm or 100x100mm) matches your monitor.
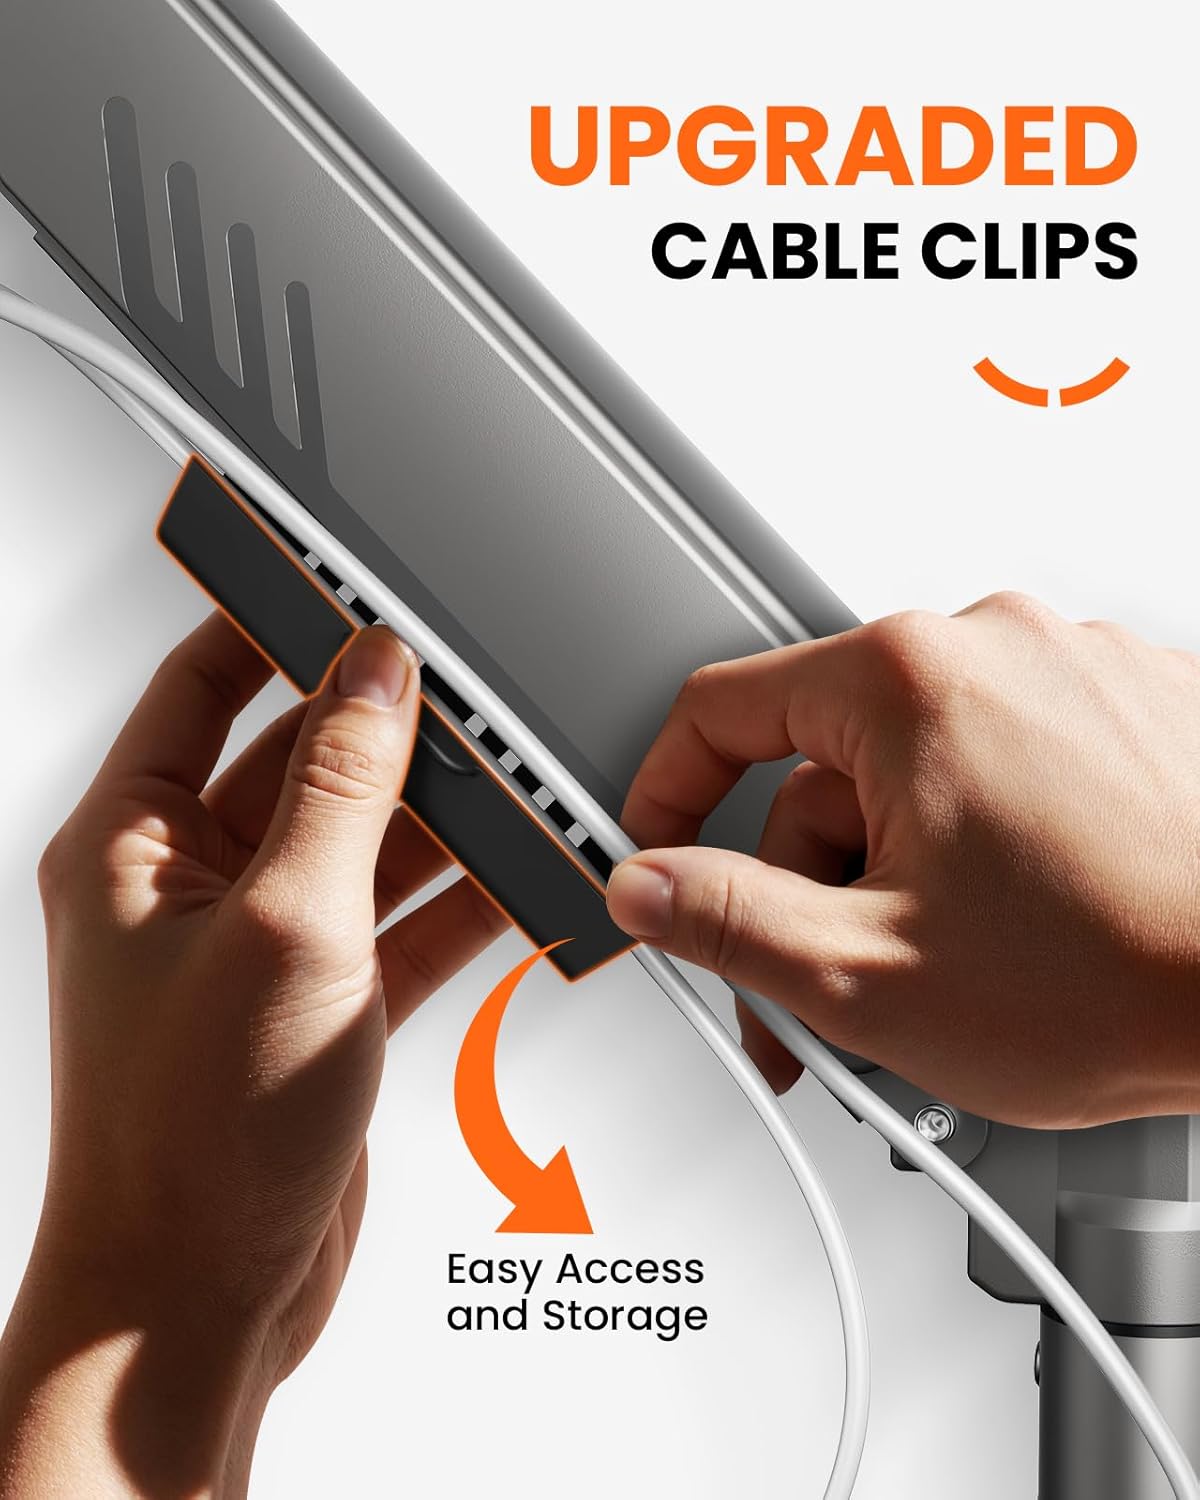
Figure 4: Attaching the VESA Plate to the Monitor.
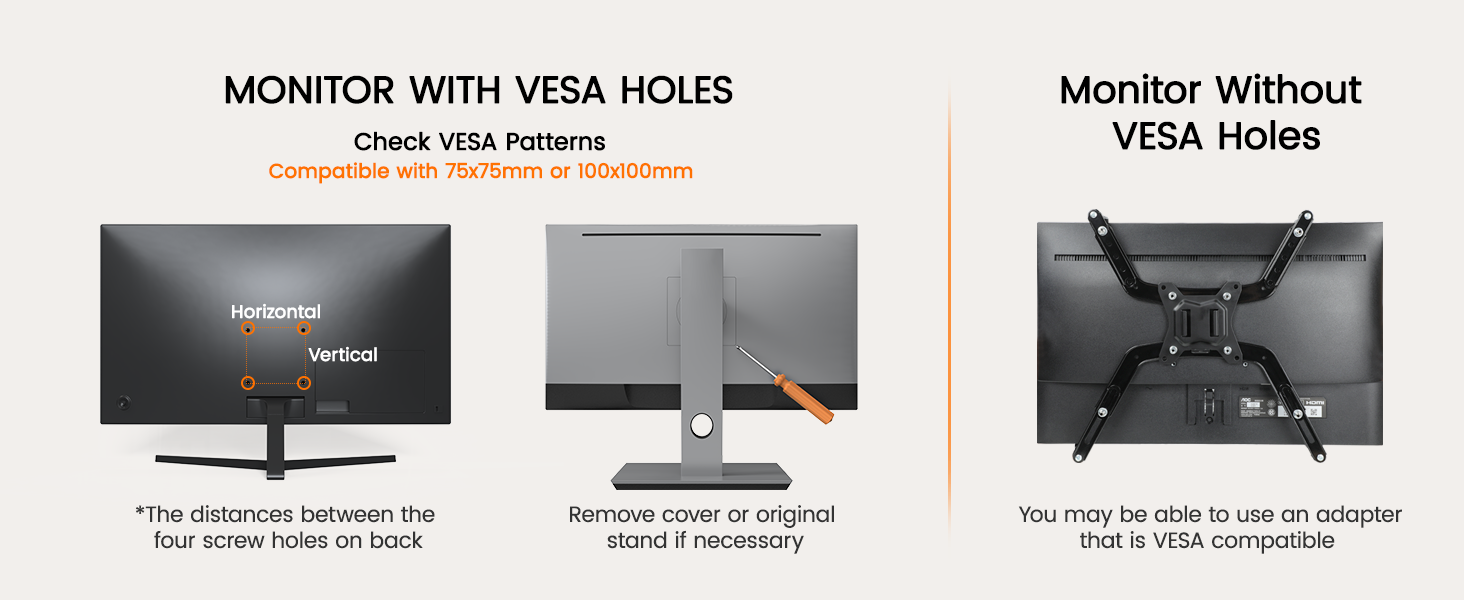
Figure 5: VESA Standard Compatibility.
5.4 Assemble and Mount the Arm
Assemble the arm sections and mount the base to your desk using either the C-clamp or grommet method. Then, slide the monitor (with attached VESA plate) onto the arm's VESA head and secure it.
Video 1: Monitor Stand Installation Introduction. This video demonstrates the general steps for installing the monitor arm, including attaching the base to the desk and mounting the monitor.
5.5 Cable Management
Utilize the integrated cable clips to route and organize your monitor cables along the arm, creating a clean and clutter-free workspace.

Figure 6: Upgraded Cable Clips for Tidy Management.
6. Operating Instructions
The ErGear Dual Monitor Arm offers extensive adjustability for optimal viewing comfort.
6.1 Adjusting Gas Spring Tension
After mounting your monitor, adjust the gas spring tension to ensure the arm holds the monitor's weight securely. If the monitor falls, increase tension by turning the bolt counter-clockwise. If it rises, decrease tension by turning the bolt clockwise. Hold the upper arm horizontally during adjustment.
Video 2: Adjusting Gas Spring Tension. This video demonstrates how to adjust the tension of the monitor arm to properly support your monitor's weight.
6.2 Tilt, Swivel, and Rotation
The arm allows for +80°/-50° tilt, ±90° swivel, and 360° rotation. Adjust your monitors to the desired position for enhanced comfort and productivity.

Figure 7: Dynamic Angle Adjustments.

Figure 8: Raise to Eye Level for Comfortable Viewing.
7. Maintenance
- Regularly inspect all connections and screws to ensure they are tight.
- Clean the monitor arm with a soft, damp cloth. Avoid abrasive cleaners.
- Do not attempt to disassemble the gas spring mechanism.
8. Troubleshooting
- Monitor is sagging or falling: Increase the gas spring tension by turning the adjustment bolt counter-clockwise.
- Monitor rises too easily: Decrease the gas spring tension by turning the adjustment bolt clockwise.
- Arm is wobbly: Ensure all mounting screws (desk clamp/grommet and VESA plate) are securely tightened. Check desk stability.
- Difficulty adjusting tilt: Tighten or loosen the tilt head bolt as needed to achieve desired resistance.
9. Warranty and Support
The ErGear Dual Monitor Arm comes with a 5-year warranty. For technical support, warranty claims, or any questions regarding your product, please visit the official ErGear Store or contact customer service.
Visit the ErGear Store: ErGear Store on Amazon


