
1. Introduction
The ANDELI MIG-250 is a versatile 3-in-1 welding machine designed for various welding tasks. It supports MIG (Gasless Flux Core), Lift TIG, and MMA (Stick) welding processes. This machine operates on both 110V and 220V power supplies, making it suitable for diverse workshop and job site environments. This manual provides essential information for the safe and effective operation, maintenance, and troubleshooting of your welding machine.
2. Safety Instructions
Always prioritize safety when operating welding equipment. Failure to follow these instructions can result in serious injury or death.
- Personal Protective Equipment (PPE): Always wear a welding helmet with appropriate shade, flame-resistant clothing, welding gloves, and safety shoes.
- Ventilation: Ensure adequate ventilation to remove welding fumes and gases from the work area.
- Electrical Safety: Never touch live electrical parts. Ensure the machine is properly grounded. Disconnect power before performing any maintenance or adjustments.
- Fire Prevention: Keep flammable materials away from the welding area. Have a fire extinguisher readily available.
- Work Area: Keep the work area clean, dry, and free of clutter.
- Unauthorized Personnel: Keep children and unauthorized persons away from the welding area.
- Read Manual: Read and understand the entire instruction manual before operating the machine.
3. Product Overview
The ANDELI MIG-250 welding machine is a compact and powerful unit. Familiarize yourself with its components and controls.
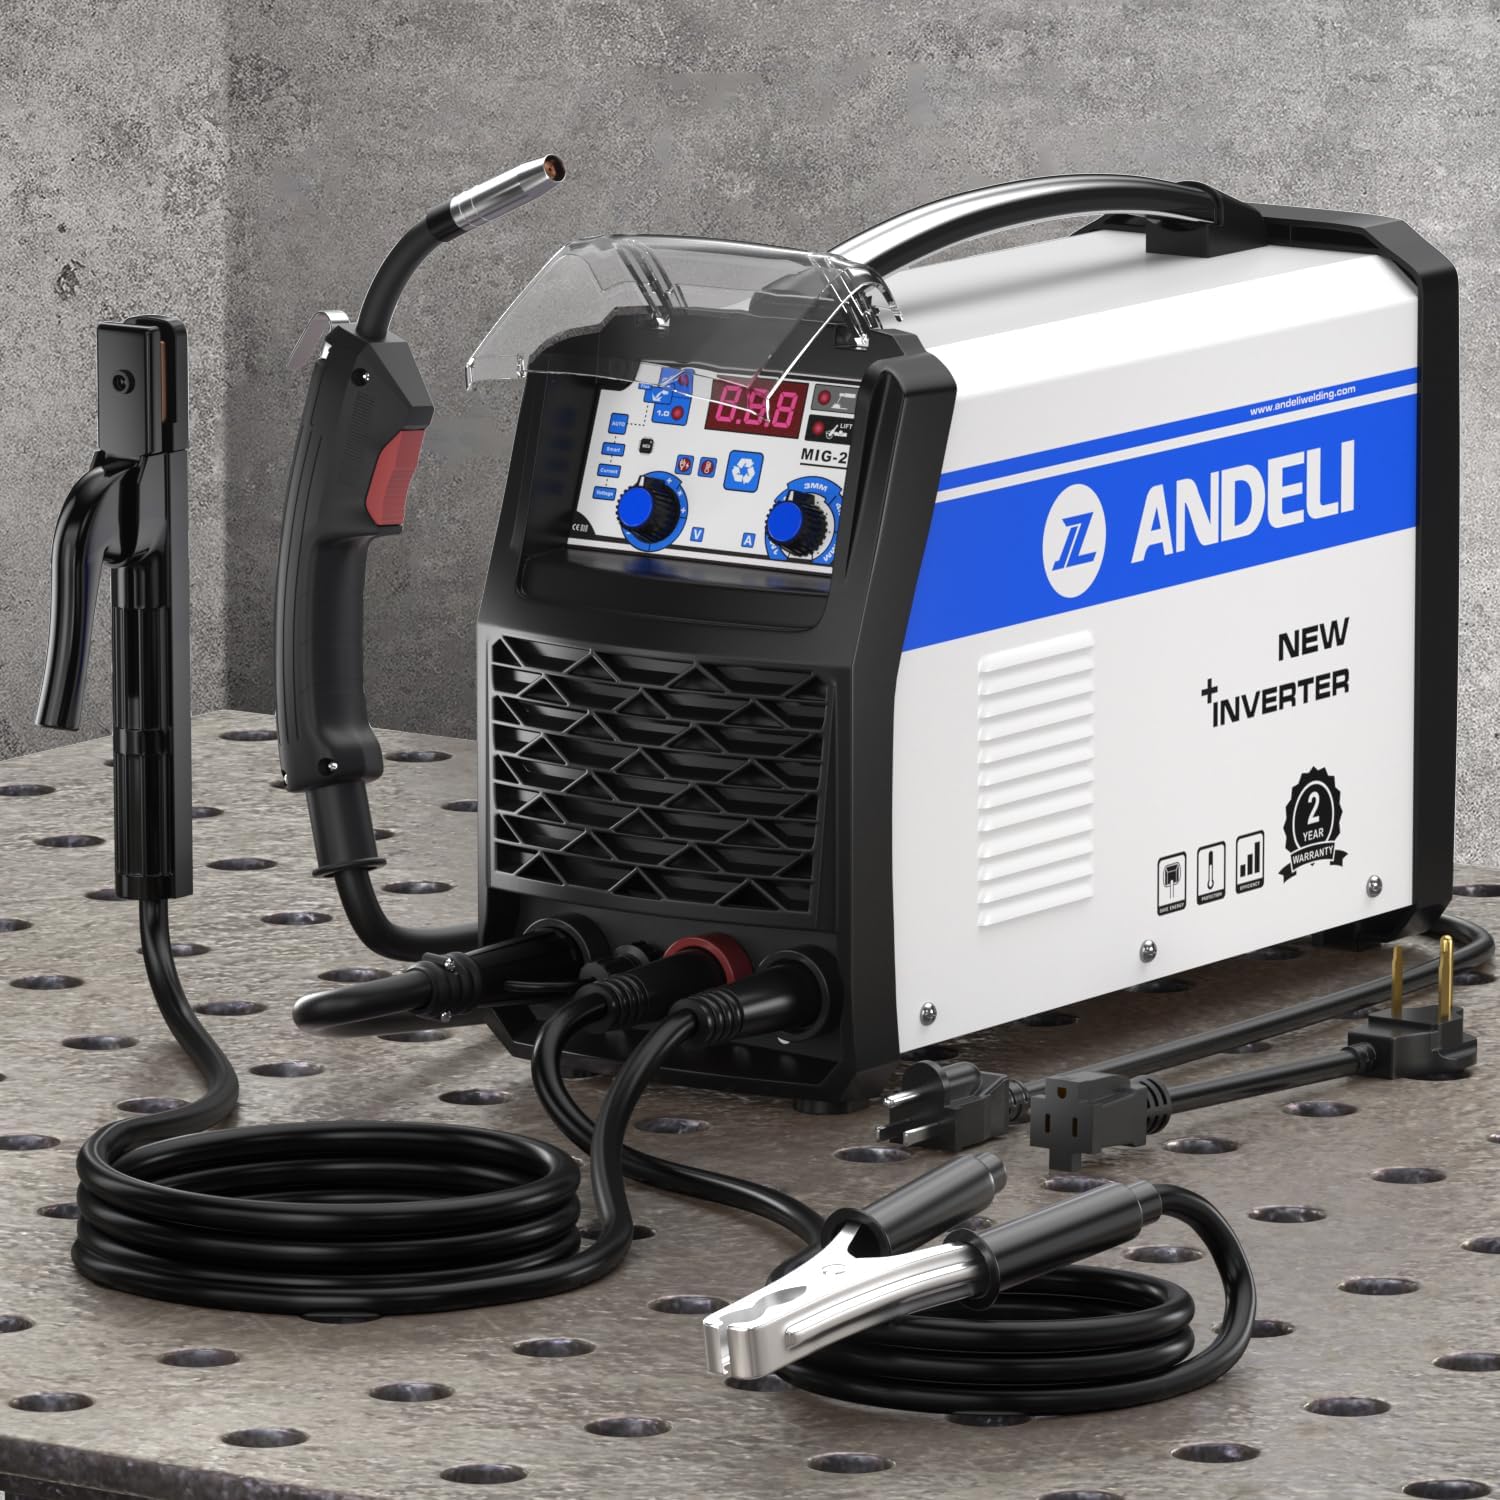
Figure 3.1: Overall view of the ANDELI MIG-250 3-in-1 Welding Machine, including the main unit, MIG torch, electrode holder, and ground clamp.
3.1. Control Panel
The control panel allows you to select welding modes and adjust parameters. Refer to the image below for key components:

Figure 3.2: Close-up of the ANDELI MIG-250 control panel. Key elements include (1) Current Knob, (2) Voltage Knob, (3) Mode Button, (4) MIG Mode indicator, (5) Stick Mode indicator, and (6) Lift TIG Mode indicator.
- 1. Current Knob: Adjusts the welding current (amperage).
- 2. Voltage Knob: Adjusts the welding voltage.
- 3. Mode Button: Cycles through MIG, Lift TIG, and MMA (Stick) welding modes.
- 4. MIG Mode Indicator: Illuminates when MIG welding mode is selected.
- 5. Stick Mode Indicator: Illuminates when MMA (Stick) welding mode is selected.
- 6. Lift TIG Mode Indicator: Illuminates when Lift TIG welding mode is selected.
4. Setup
4.1. Power Connection
The MIG-250 supports dual voltage input (110V/220V). The machine automatically detects the input voltage. Ensure the power source matches the machine's requirements and is properly grounded.

Figure 4.1: The ANDELI MIG-250 features dual voltage capability, allowing operation on both 110V and 220V power supplies.
4.2. Connecting Welding Accessories
Connect the appropriate welding accessories based on the desired welding process.

Figure 4.2: Connection points for different welding modes. Top: Lift TIG torch connection. Middle: MIG torch connection. Bottom: Stick electrode holder connection.
- Ground Clamp: Connect the ground clamp cable to the negative (-) terminal and securely attach the clamp to the workpiece.
- MIG Torch: For MIG welding, connect the MIG torch cable to the positive (+) terminal.
- Electrode Holder (MMA/Stick): For MMA welding, connect the electrode holder cable to the positive (+) terminal.
- Lift TIG Torch: For Lift TIG welding, connect the TIG torch cable to the negative (-) terminal.
4.3. Wire Installation (MIG Mode)
For MIG (Flux Core) welding, install the welding wire spool into the machine's wire feeder compartment.

Figure 4.3: Internal view of the ANDELI MIG-250 demonstrating the installation of a 2lb flux-cored wire spool. The machine supports .03" (0.8mm) and .039" (1.00mm) wire sizes.
- Open the wire feeder compartment.
- Place the wire spool onto the spindle, ensuring it rotates freely.
- Feed the wire through the guide tube and into the drive rollers.
- Close the drive roller tension arm and adjust the tension appropriately.
- Ensure the correct drive roller size is selected for your wire diameter (.03"/0.8mm or .039"/1.00mm).
- Thread the wire through the MIG torch liner until it exits the contact tip.
5. Operating Instructions
5.1. Mode Selection
Press the Mode Button (3) on the control panel to cycle between the three welding processes: MIG, Lift TIG, and MMA (Stick). The corresponding indicator light (4, 5, or 6) will illuminate to show the active mode.
5.2. Parameter Adjustment
Once a mode is selected, use the Current Knob (1) and Voltage Knob (2) to set the desired welding parameters. Refer to welding charts or practice on scrap material to find optimal settings for your specific application and material thickness.
5.3. Welding Processes
- MIG (Gasless Flux Core) Welding:
- Ensure flux-cored wire is installed and the MIG torch is connected.
- Select MIG mode.
- Adjust current and voltage.
- Position the MIG torch, press the trigger to start the arc and feed wire.
- Lift TIG Welding:
- Ensure TIG torch is connected and a tungsten electrode is installed.
- Select Lift TIG mode.
- Adjust current.
- Touch the tungsten to the workpiece, then lift slightly to initiate the arc.
- MMA (Stick) Welding:
- Ensure electrode holder is connected and a suitable electrode is clamped.
- Select Stick mode.
- Adjust current.
- Strike the electrode against the workpiece to initiate the arc.
6. Maintenance
Regular maintenance ensures the longevity and optimal performance of your welding machine.
- Cleaning: Periodically clean the machine's exterior with a dry cloth. Use compressed air to blow out dust and debris from inside the machine, especially from cooling vents. Ensure the machine is unplugged before cleaning.
- Cable Inspection: Regularly inspect all welding cables, power cords, and connections for cuts, fraying, or damage. Replace damaged cables immediately.
- Consumables: Check and replace MIG torch nozzles, contact tips, and TIG tungsten electrodes as they wear out. Ensure proper fitment of all consumables.
- Wire Feeder (MIG): Clean the wire feeder rollers and guide tubes to prevent wire feeding issues. Adjust wire tension as needed.
- Storage: Store the welding machine in a clean, dry environment, away from excessive dust, moisture, and extreme temperatures.
7. Troubleshooting
This section addresses common issues you might encounter. For problems not listed here, contact customer support.
| Problem | Possible Cause | Solution |
|---|---|---|
| No power to machine | Power cord unplugged, circuit breaker tripped, faulty power switch | Check power cord connection, reset circuit breaker, contact service if switch is faulty |
| No arc (MMA/TIG) | Poor ground connection, incorrect current setting, faulty electrode/tungsten, dirty workpiece | Ensure good ground contact, increase current, replace electrode/tungsten, clean workpiece |
| No wire feed (MIG) | Wire tangled, drive rollers loose, contact tip clogged, incorrect wire size | Untangle wire, adjust drive roller tension, clean/replace contact tip, ensure correct wire size |
| Poor weld quality | Incorrect parameters (current/voltage), improper technique, dirty material, wrong consumables | Adjust settings, refine welding technique, clean workpiece, use correct consumables |
| Overheating | Exceeding duty cycle, blocked ventilation, high ambient temperature | Allow machine to cool, clear ventilation openings, operate in cooler environment |
8. Specifications
| Feature | Specification |
|---|---|
| Model | MIG-250 |
| Input Voltage | 110V/220V AC |
| Welding Processes | MIG (Gasless Flux Core), Lift TIG, MMA (Stick) |
| Manufacturer | ANDELI |
| ASIN | B0FYD5SH1C |
| Date First Available | October 30, 2025 |
9. Warranty and Support
9.1. Warranty Information
The ANDELI MIG-250 welding machine typically comes with a 2-year warranty from the date of purchase. Please retain your proof of purchase for warranty claims. The warranty covers manufacturing defects and malfunctions under normal operating conditions. It does not cover damage due to misuse, improper maintenance, or unauthorized modifications.
9.2. Customer Support
For technical assistance, warranty claims, or spare parts, please contact ANDELI customer support. You can often find contact information on the product packaging, the official ANDELI website, or through the retailer where you purchased the product.
You may also visit the official ANDELI store on Amazon for more information and products: ANDELI Store