Introduction
This manual provides detailed instructions for the installation, operation, and maintenance of your GKU D200 Dash Cam. Please read this manual thoroughly before using the product to ensure proper function and safety. The GKU D200 is a 4K UHD dash camera designed to record your driving experience with advanced features such as built-in WiFi, night vision, Wide Dynamic Range (WDR), a 170° wide-angle lens, loop recording, and G-Sensor technology.
Safety Information
- Do not operate the dash cam while driving. Adjust settings only when the vehicle is safely parked.
- Ensure the dash cam is securely mounted and does not obstruct the driver's view or interfere with vehicle controls.
- Use only the provided power cable and accessories. Using unauthorized accessories may damage the device or cause fire.
- Avoid exposing the dash cam to extreme temperatures, direct sunlight for prolonged periods, or high humidity.
- Keep the lens clean to ensure clear recordings.
- Do not attempt to disassemble or repair the dash cam yourself. Contact customer support for assistance.
Package Contents
Verify that all items are present in the package:
- GKU D200 Dash Cam
- USB-A to USB-C Power Cord (9.84 ft)
- 64GB MicroSD Card
- User Manual (this document)
- Mounting Bracket

Image: GKU D200 Dash Cam and smartphone app interface.

Image: USB-A to USB-C power cable.
Product Overview
Dash Cam Components
- Lens: Captures video footage.
- Mounting Slot: For attaching the dash cam to the mounting bracket.
- USB-C Port: For power connection.
- MicroSD Card Slot: For inserting the memory card.
- Indicator Light: Displays operational status.
- Microphone: Records audio.

Image: GKU D200 Dash Cam dimensions and key features including 4K UHD, WiFi & APP, Free 64GB Card, Parking Monitor, Loop Recording, G-Sensor, Super Capacitor, and Voice Broadcast.
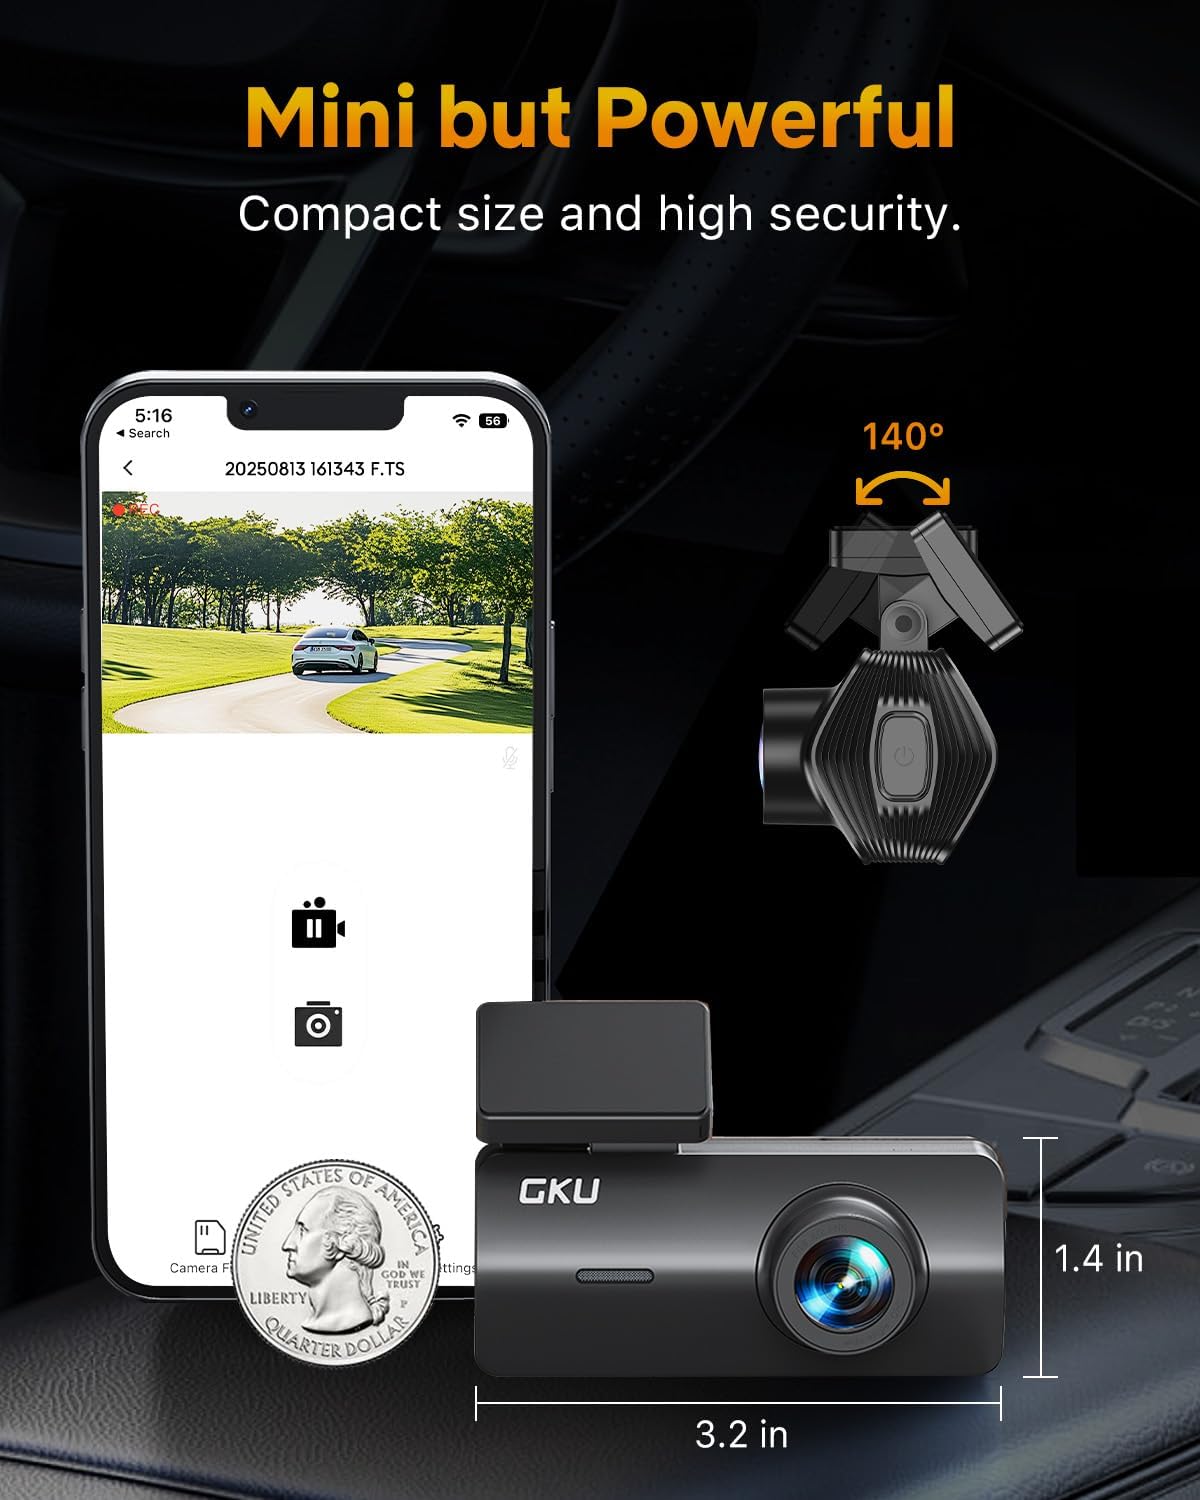
Image: GKU D200 Dash Cam compact size comparison with a US quarter and showing its adjustable mount, measuring 3.2 inches in length and 1.4 inches in height.
Setup
1. Insert MicroSD Card
- Ensure the dash cam is powered off.
- Locate the MicroSD card slot on the dash cam.
- Insert the provided 64GB MicroSD card into the slot until it clicks into place. Ensure the card is inserted in the correct orientation.
2. Mount the Dash Cam
- Clean the area on your windshield where you intend to mount the dash cam.
- Attach the mounting bracket to the dash cam.
- Remove the protective film from the adhesive pad on the mounting bracket.
- Firmly press the dash cam with the bracket onto the windshield, ensuring it does not obstruct your view. Position it behind the rearview mirror for optimal placement.
3. Connect Power
- Connect one end of the USB-A to USB-C power cord to the dash cam's USB-C port.
- Connect the other end (USB-A) to your vehicle's 12V power outlet (cigarette lighter socket) using a car charger adapter (not included, typically comes with the car).
- Route the power cable neatly along the windshield and dashboard edges to avoid interference with driving.
Operating Instructions
Automatic Recording
Once powered on, the GKU D200 Dash Cam will automatically begin recording. The indicator light will typically show a solid color or flash to indicate recording status.
Loop Recording
The dash cam records video in continuous loops. When the MicroSD card is full, the oldest unlocked files will be overwritten by new recordings. This ensures continuous recording without manual intervention.
G-Sensor (Emergency Recording)
The built-in G-Sensor detects sudden impacts or collisions. When triggered, it automatically locks the current video segment, preventing it from being overwritten by loop recording. These locked files are stored in a separate folder on the MicroSD card.

Image: GKU D200 Dash Cam demonstrating G-Sensor functionality, automatically locking video footage upon collision to protect critical evidence, while loop recording continues to overwrite older, unlocked files.
Night Vision with WDR
The dash cam features advanced WDR (Wide Dynamic Range) technology and an F1.8 aperture with a 6-glass lens to enhance video clarity in low-light conditions and at night. This helps balance exposure and capture details in both bright and dark areas of the frame.

Image: GKU D200 Dash Cam demonstrating enhanced night vision capabilities with WDR technology, capturing clear details of a car on a street at night.
WiFi Connection & App Control
The GKU D200 has built-in WiFi for seamless connection to your smartphone via a dedicated app. This allows you to:
- View live footage from the dash cam.
- Playback recorded videos.
- Download videos directly to your phone.
- Adjust dash cam settings.
To connect:
- Download the official GKU Dash Cam app from your smartphone's app store.
- Turn on the dash cam.
- Enable WiFi on your smartphone and connect to the dash cam's WiFi network (SSID and password usually found on the dash cam or in the app).
- Open the app to manage your dash cam.

Image: GKU D200 Dash Cam demonstrating WiFi connectivity and app control, showing options for viewing, playback, sharing, and downloading footage on a smartphone.
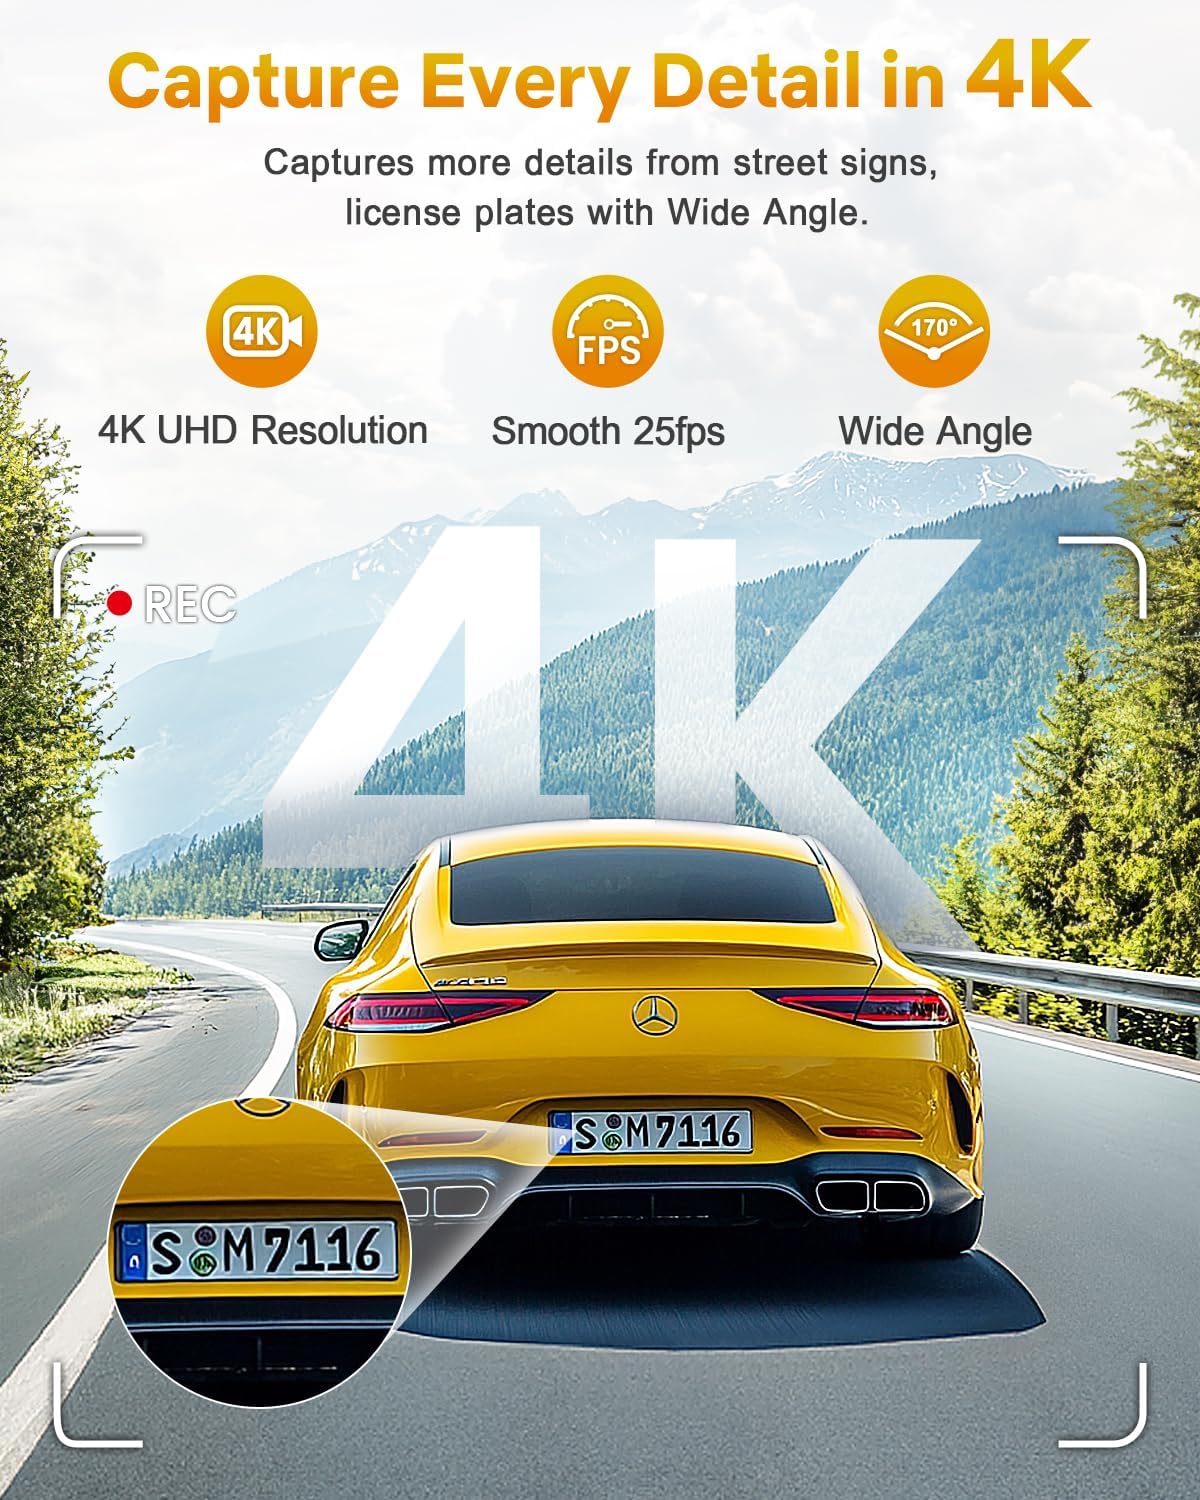
Image: Example of 4K video clarity from the GKU D200 Dash Cam, highlighting the ability to capture details like license plates and street signs with a 170° wide angle at 25 frames per second.
Maintenance
- Cleaning the Lens: Use a soft, lint-free cloth to gently wipe the lens. Avoid abrasive materials or chemical cleaners.
- MicroSD Card: Format the MicroSD card regularly (e.g., once a month) through the dash cam's settings or the app to maintain optimal performance and prevent data corruption. Back up any important files before formatting.
- Firmware Updates: Check the GKU website or app periodically for firmware updates to ensure your dash cam has the latest features and bug fixes.
Troubleshooting
| Problem | Possible Solution |
|---|---|
| Dash cam does not power on. | Check the power cable connection. Ensure the vehicle's 12V power outlet is functioning. Try a different power source if available. |
| Recording stops unexpectedly. | Ensure the MicroSD card is properly inserted and not full (loop recording should prevent this unless locked files fill the card). Format the MicroSD card. Use a high-speed (Class 10 or U3) MicroSD card. |
| Video footage is blurry or unclear. | Clean the dash cam lens and your windshield. Ensure the protective film has been removed from the lens. |
| WiFi connection issues. | Ensure the dash cam's WiFi is enabled. Restart both the dash cam and your smartphone. Re-enter the WiFi password. Ensure you are within range. |
| G-Sensor is too sensitive/not sensitive enough. | Adjust the G-Sensor sensitivity setting via the app. |
Specifications
| Feature | Detail |
|---|---|
| Model | D200 |
| Video Resolution | UHD 2160P (4K) |
| Lens Angle | 170° Wide Angle |
| Aperture | F1.8 |
| Lens Construction | 6-Glass Optics |
| Connectivity | Built-in WiFi |
| Special Features | Night Vision, WDR, Loop Recording, G-Sensor, Parking Monitor, Super Capacitor, Voice Broadcast |
| Storage | Supports MicroSD Card (64GB card included) |
| Dimensions | Approximately 3.2 × 2.2 × 1.6 inches |
| Power Source | USB-C (via 12V car adapter) |
Warranty and Support
GKU products are designed for reliability and performance. For specific warranty details, please refer to the warranty card included with your product or visit the official GKU website. If you encounter any issues or have questions not covered in this manual, please contact GKU customer support for assistance.
Contact Information: Please refer to the packaging or the official GKU website for the most up-to-date customer support contact details.


