1. Introduction
Thank you for choosing the ANDELI MIG-135MINI Multiprocess Welder. This machine is a versatile 3-in-1 welding solution, offering Flux MIG, Lift TIG, and Stick (MMA) welding capabilities. Designed for portability and ease of use, it features IGBT inverter technology and dual voltage input (110V/220V), making it suitable for a wide range of welding tasks. This manual provides essential information for the safe and efficient operation, setup, and maintenance of your welding machine.
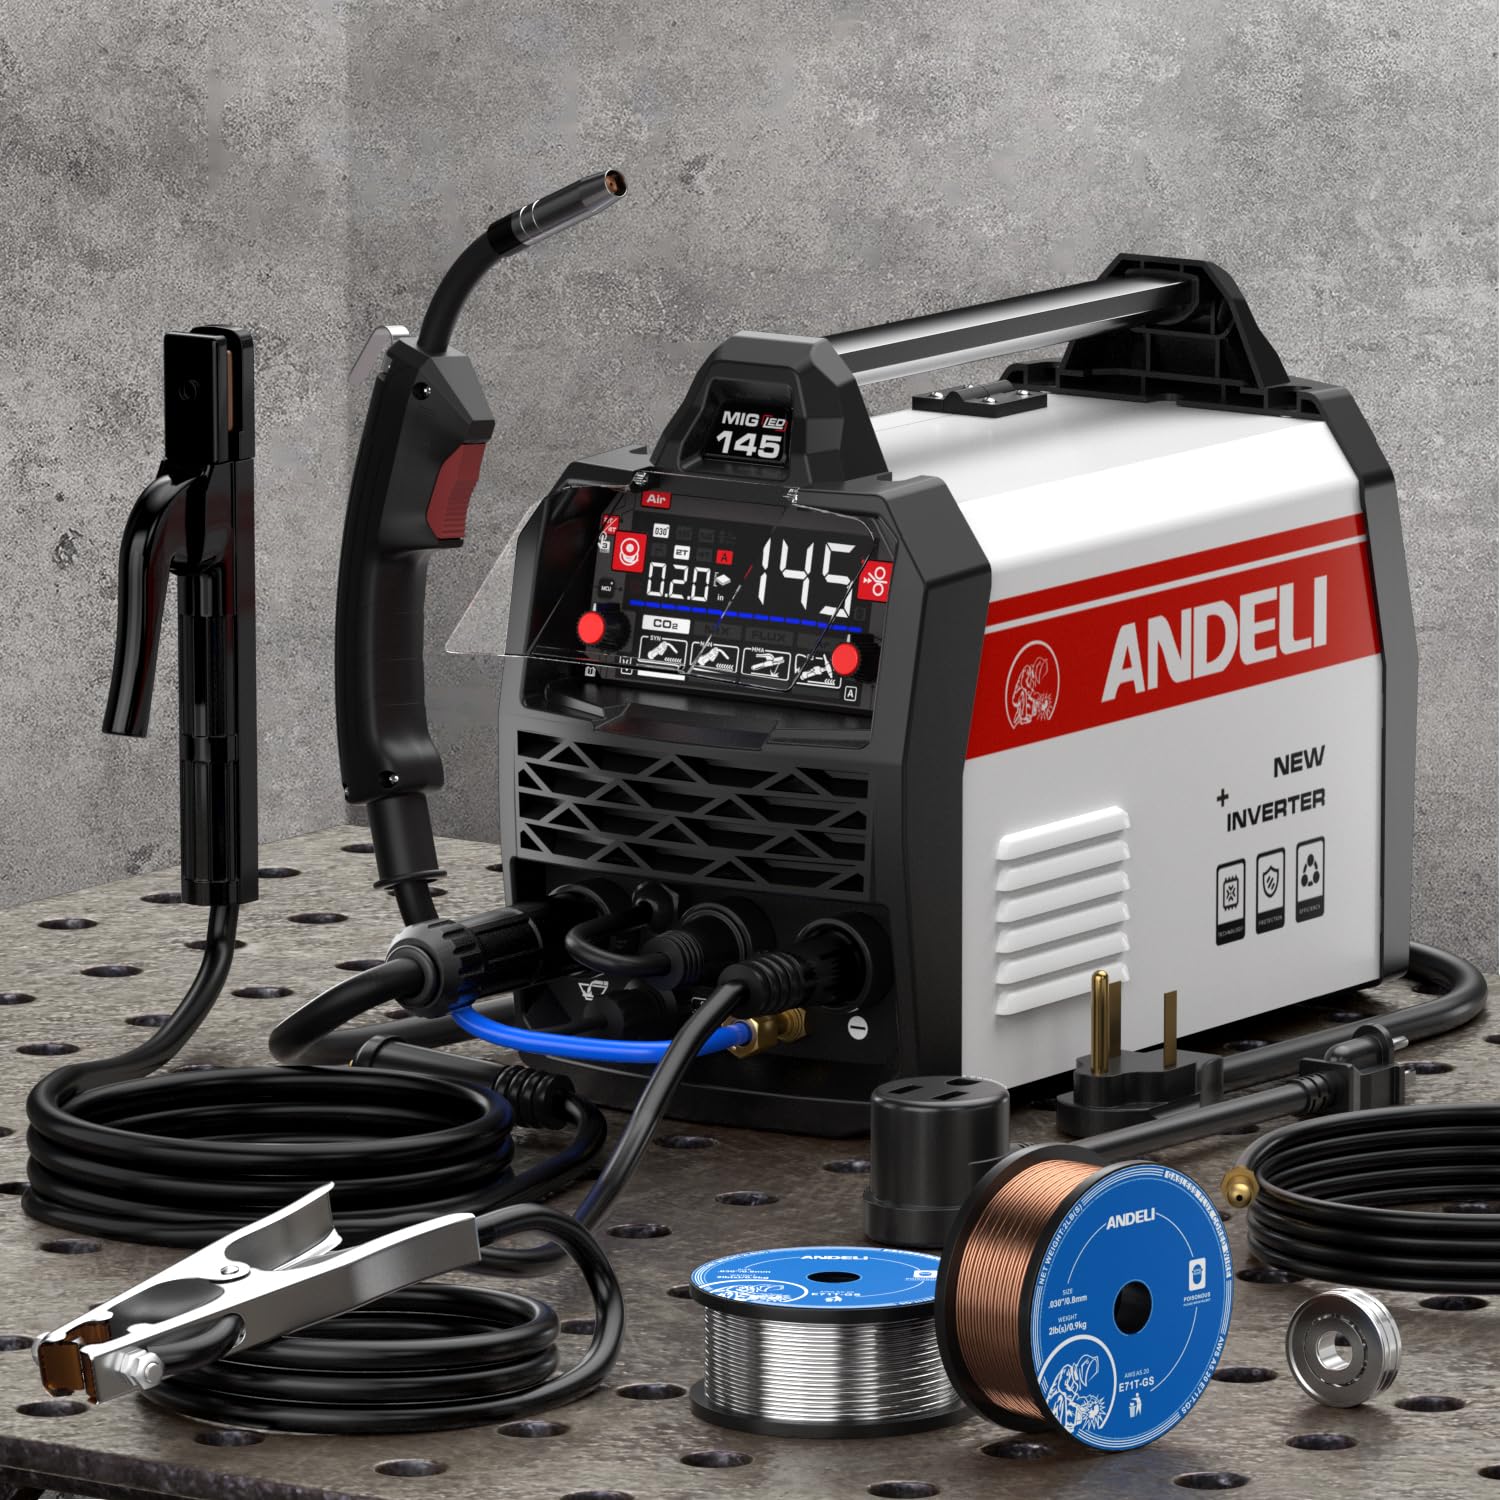
Figure 1: Front view of the ANDELI MIG Welding Machine 135Amp, showing the control panel, wire feeder, and connection ports.
2. Safety Instructions
Welding can be dangerous. Always follow safety precautions to prevent injury or damage. Read and understand all safety warnings before operating the machine.
- Electric Shock Can Kill: Ensure proper grounding. Do not touch live electrical parts. Wear dry welding gloves.
- Fumes and Gases Can Be Dangerous: Keep your head out of the fumes. Use ventilation or exhaust to remove fumes from the breathing zone.
- Arc Rays Can Burn Eyes and Skin: Wear a welding helmet with a proper shade filter. Wear appropriate protective clothing.
- Fire and Explosion Hazard: Remove all flammable materials from the welding area. Have a fire extinguisher readily available.
- Hot Parts Can Cause Severe Burns: Allow welded materials and equipment to cool before handling.
- Magnetic Fields: Pacemaker wearers should consult their doctor before welding.
- Noise: Excessive noise can damage hearing. Wear ear protection.
- Only Qualified Personnel: Only trained and qualified personnel should install, operate, maintain, and repair this unit.
3. Package Contents
Verify that all items are present and undamaged upon unpacking. If any items are missing or damaged, contact your supplier immediately.
- ANDELI MIG-135MINI Multiprocess Welder
- MIG Welding Torch
- Electrode Holder (for Stick welding)
- Ground Clamp
- Flux Core Wire (sample spool)
- User Manual
- Power Adapter (for dual voltage connection, if applicable)
4. Setup
4.1 Power Connection
The MIG-135MINI supports dual voltage input (110V/220V). Ensure the correct power cord and adapter are used for your power supply. Connect the power plug to a properly grounded outlet. The machine will automatically detect the input voltage.
4.2 Connecting Welding Accessories
- Ground Clamp: Connect the ground clamp cable to the appropriate terminal on the front panel (usually marked with a ground symbol or "-"). Secure the clamp to the workpiece or welding table, ensuring good electrical contact.
- MIG Torch: For Flux MIG welding, connect the MIG torch cable to the designated MIG connector on the front panel.
- Electrode Holder: For Stick (MMA) welding, connect the electrode holder cable to the positive (+) terminal and the ground clamp to the negative (-) terminal.
- TIG Torch: For Lift TIG welding, connect the TIG torch cable to the negative (-) terminal and the ground clamp to the positive (+) terminal.
4.3 Wire Installation (for MIG Welding)
- Open the wire feeder compartment.
- Place the spool of flux core wire onto the spindle, ensuring it rotates freely.
- Thread the wire through the guide tube and into the drive roller mechanism.
- Close the drive roller tension arm and adjust the tension appropriately.
- Feed the wire through the MIG torch liner until it exits the nozzle.
5. Operating Instructions
5.1 Control Panel Overview
The control panel allows selection of welding mode and adjustment of parameters. Refer to the labels on your machine for specific dial and button functions.
5.2 Mode Selection
- MIG (Flux Core): Select the MIG mode for gasless flux core welding.
- Lift TIG: Select the TIG mode. Initiate the arc by touching the tungsten electrode to the workpiece and lifting it slightly.
- Stick (MMA): Select the MMA mode.
5.3 Parameter Adjustment
Adjust welding current (amperage) and voltage according to the material thickness and type of welding being performed. For MIG welding, also adjust wire feed speed. Start with recommended settings for your material and fine-tune as needed.
5.4 Welding Procedure
- Ensure all safety gear is worn.
- Prepare the workpiece by cleaning off rust, paint, and grease.
- Select the appropriate welding mode and adjust parameters.
- Position the ground clamp securely.
- Initiate the arc according to the selected mode (trigger for MIG, lift for TIG, scratch for Stick).
- Maintain a consistent travel speed and arc length for optimal weld quality.
- Allow the weld to cool before handling.
6. Maintenance
Regular maintenance ensures the longevity and safe operation of your welding machine.
- Daily: Inspect cables, connections, and torch for damage. Clean the nozzle and contact tip of the MIG torch.
- Weekly/Monthly: Clean the wire feeder mechanism. Check and replace worn drive rollers or liners. Use compressed air to blow dust out of the machine's cooling vents.
- Storage: Store the machine in a clean, dry environment, protected from dust and moisture.
7. Troubleshooting
| Problem | Possible Cause | Solution |
|---|---|---|
| No power to machine | Power cord unplugged, circuit breaker tripped, faulty power switch | Check power connections, reset breaker, contact service if switch is faulty |
| No arc | Poor ground connection, incorrect mode selection, faulty torch/electrode holder | Ensure good ground, verify mode, check connections, replace faulty parts |
| Wire feeding issues (MIG) | Incorrect drive roller tension, clogged liner, wrong size contact tip, tangled wire | Adjust tension, clean/replace liner, use correct tip, untangle wire spool |
| Poor weld quality | Incorrect settings (voltage/amperage/wire speed), improper technique, dirty workpiece | Adjust parameters, refine technique, clean workpiece thoroughly |
| Overheating protection activated | Exceeded duty cycle, blocked cooling vents | Allow machine to cool, ensure proper ventilation, clear vents |
8. Specifications
| Model Number | MIG-135MINI |
| Input Voltage | 110V/220V Dual Voltage |
| Welding Processes | Flux MIG, Lift TIG, Stick (MMA) |
| Max Output Current | 135 Amp |
| Technology | IGBT Inverter |
| Item Weight | 18.85 pounds |
| Package Dimensions | 19.7 x 14.6 x 13.4 inches |
| Manufacturer | XINGYI |
9. Warranty and Support
ANDELI products are manufactured to high-quality standards. For warranty information, technical support, or service inquiries, please refer to the warranty card included with your product or visit the official ANDELI website. Keep your purchase receipt as proof of purchase for warranty claims.
Contact Information: Please refer to the contact details provided on the product packaging or the official ANDELI website for customer support.


