
1. Introduction
Thank you for choosing the Warmdance Stage Light Bar ZQ06204. This 120W 18LEDs RGBW Wall Wash Light is designed to provide versatile and dynamic lighting effects for various events and settings. It features a high-output dual lighting system with 18 intense RGBW LEDs and 234 auxiliary white LEDs, offering vibrant color mixing and uniform wash effects. This manual provides essential information for safe operation, setup, and maintenance of your device.
2. Safety Instructions
- Read all instructions carefully before operating the device.
- Keep this manual for future reference.
- Ensure the power supply voltage matches the device's requirements (100-240V).
- Always connect the device to a grounded power outlet.
- Do not expose the device to rain or moisture to prevent fire or electric shock.
- Avoid direct eye exposure to the light source.
- Ensure proper ventilation around the unit to prevent overheating.
- Do not attempt to repair the device yourself. Refer all servicing to qualified personnel.
- Mount the device securely to prevent accidental falls.
3. Package Contents
Verify that all items are present in the package:
- 1 x Washer Light
- 1 x Power Cord
- 1 x Instruction Manual

Image: The package contents include the light bar, power cord, and instruction manual.
4. Product Overview
The Warmdance Stage Light Bar ZQ06204 is a robust lighting fixture designed for various applications. Key features include:
- High-Output Dual Lighting: 18 intense RGBW LEDs and 234 auxiliary white LEDs for vivid colors and uniform wash effects.
- Extensive Built-in Programs: 29 main and 59 auxiliary chase programs, all with adjustable speed.
- Multiple Operating Modes: Auto, Sound-Active, Master-Slave, and DMX modes.
- Professional DMX512 and RDM Compatibility: Standard 3-pin XLR port for reliable signal transmission and console address management.
- Durable Design: Constructed from robust iron, suitable for indoor and outdoor use.
- High CRI: Ra≥85 for true-to-life color reproduction.

Image: Detailed product specifications including a 25-degree beam angle, 18.8W (RGBW) + 234 0.2W (W) LEDs, 0-100% linear dimming, 1-20Hz strobe, and 50,000+ hours lifespan.
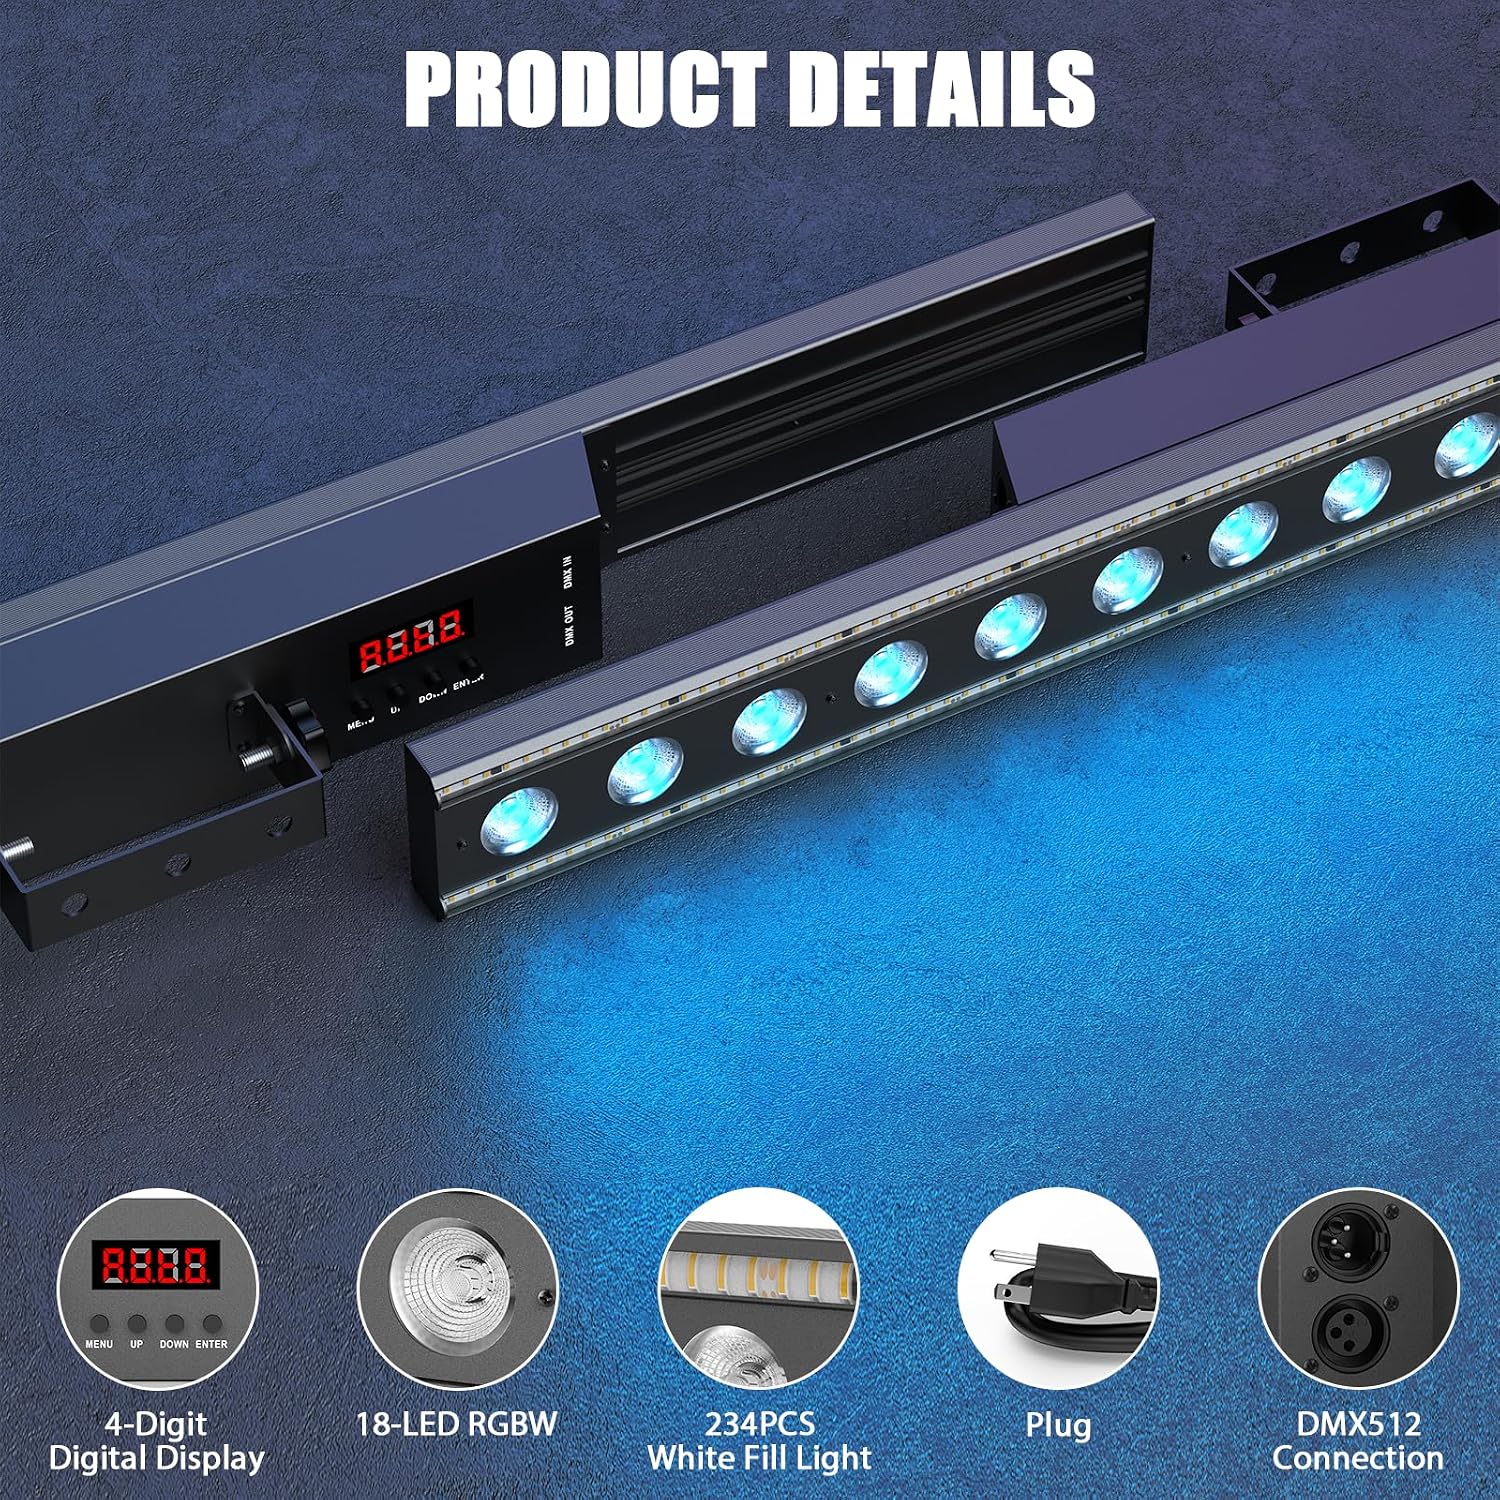
Image: A close-up view of the light bar's control panel and connections, highlighting the 4-digit digital display, 18-LED RGBW, 234PCS White Fill Light, power plug, and DMX512 connection ports.

Image: Dimensions of the light bar are 37.1 inches (94.2 cm) in length, 4.9 inches (12.5 cm) in width, and 2.9 inches (7.4 cm) in height. The power cord length is 47.24 inches (1.2 meters). The unit weighs 4.85 lbs (2.2 kg).
5. Setup
5.1 Mounting
The light bar can be mounted using its adjustable bracket. Ensure the mounting surface or truss is capable of supporting the weight of the fixture. Secure all bolts and clamps tightly.
5.2 Power Connection
Connect the provided power cord to the light bar's power input and then to a standard grounded electrical outlet (100-240V AC, 50/60Hz). Ensure the connection is secure.
5.3 DMX Connection (Optional)
For DMX control, connect a 3-pin XLR cable from your DMX controller's output to the DMX IN port on the first light bar. For multiple units, daisy-chain them by connecting the DMX OUT of the first unit to the DMX IN of the next, and so on. Ensure the last unit in the chain has a DMX terminator if experiencing signal issues.
6. Operating Modes
The light bar offers several operating modes, selectable via the 4-digit digital display and control buttons on the unit, or through a DMX controller.

Image: Operational details including Self-Propelled, Voice Control, Master-Slave, DMX modes; Control Channels 5/14/33/37CH; Standard DMX512 Protocol, RDM Protocol; Three-Core XLR Input/Output Data Connection; and 4-Digit Digital Display.
6.1 Auto Mode (Self-Propelled)
In Auto mode, the light bar cycles through its built-in programs automatically. Use the control buttons to select different auto programs and adjust their speed.
6.2 Sound-Active Mode (Voice Control)
The built-in microphone detects ambient sound, allowing the light effects to synchronize with music. Adjust the microphone sensitivity via the control panel to optimize responsiveness.
6.3 Master-Slave Mode
Connect multiple light bars via DMX cables. Set one unit as the 'Master' and the others as 'Slaves'. The slave units will mirror the master unit's programs and effects, ensuring synchronized lighting across all connected fixtures.
6.4 DMX Mode
For advanced control, connect the light bar to a DMX512 controller. The unit supports various control channels (5, 14, 33, 37 channels) and RDM protocol for two-way communication. Refer to your DMX controller's manual and the light bar's DMX chart (usually found in a separate DMX protocol sheet) for detailed channel assignments and functions.

Image: The RGBW LED wall washer light demonstrating its ability to produce a wide spectrum of colors including Red, Green, Blue, White, Yellow, Orange, Purple, and Pink.

Image: This image illustrates the 25-degree lens design, which ensures pure color and high brightness, along with a smooth linear dimming capability from 0% to 100% for precise light intensity control.

Image: A visual representation of the 29 chase and 59 fill light effects available, showcasing various dynamic patterns and color transitions.
7. Maintenance
7.1 Cleaning
Regularly clean the lens and housing with a soft, lint-free cloth. Do not use abrasive cleaners or solvents. Ensure the device is powered off and unplugged before cleaning.
7.2 Storage
When not in use, store the light bar in a dry, dust-free environment. Disconnect all cables and, if possible, store it in its original packaging or a protective case.
8. Troubleshooting
- No Power: Ensure the power cord is securely connected to both the light bar and a working power outlet. Check the power source.
- No Light Output: Verify the unit is powered on and not in a blackout or standby mode. Check DMX settings if applicable.
- Incorrect DMX Control: Ensure DMX cables are correctly connected (IN to OUT, OUT to IN). Verify the DMX address setting on the light bar matches your controller. Consider using a DMX terminator on the last unit in a chain.
- Sound-Active Mode Not Responding: Adjust the microphone sensitivity. Ensure there is sufficient sound for the microphone to pick up.
- Overheating: Ensure the unit has adequate ventilation and is not obstructed. If overheating persists, power off the unit and allow it to cool before resuming operation.
9. Specifications
| Feature | Specification |
|---|---|
| Model Number | ZQ06204 |
| Brand | Warmdance |
| Color | Black |
| Material | Iron |
| Light Source Type | Light Emitting Diode (LED) |
| Power Source | Corded Electric |
| Input Voltage | 100-240V |
| Product Dimensions | 37"L x 4.92"W x 2.91"H (94.2cm L x 12.5cm W x 7.4cm H) |
| Item Weight | 5.5 Pounds (2.2 kg) |
| LED Configuration | 18 RGBW LEDs + 234 White Fill LEDs |
| Beam Angle | 25° |
| Dimming Curve | 0-100% Linear Dimming |
| Strobe Rate | 1-20Hz |
| Lifespan | 50,000+ Hours |
| Control Modes | Auto, Sound-Active, Master-Slave, DMX512 |
| DMX Channels | 5/14/33/37 Channels |
| DMX Protocol | Standard DMX512, RDM Protocol |
| Display | 4-Digit Digital Display |
10. Warranty and Support
For warranty information or technical support, please refer to the purchase documentation or contact Warmdance customer service through the retailer where the product was purchased. Keep your proof of purchase for any warranty claims.