
1. Introduction
This manual provides comprehensive instructions for the safe and effective installation of your new SCREENARAMA replacement LCD LED display. This screen is specifically designed for HP 14-EP2011WM and 14-EP2012WM laptop models, featuring a matte finish, 30-pin connector, and 1366x768 HD resolution. Please read all instructions carefully before beginning the installation process.
2. Safety Information
- Always disconnect the laptop from its power adapter and remove the battery before starting any repair work.
- Handle the new screen with extreme care. LCD panels are fragile and can be easily damaged by impact or excessive pressure.
- Wear anti-static gloves or use an anti-static wrist strap to prevent electrostatic discharge (ESD) damage to electronic components.
- Keep small parts, such as screws, away from children.
- If you are unsure about any step, seek professional assistance.
3. Package Contents
Verify that all items are present in your package:
- SCREENARAMA 14.0-inch Matte 30-pin HD 1366x768 LCD LED Display
- Installation Tool Kit (typically includes screwdrivers, prying tools, tweezers, and adhesive tape)

Image: Included installation tools, typically consisting of screwdrivers, prying tools, tweezers, and adhesive tape.
4. Setup and Installation
Before proceeding, ensure your original screen has the same specifications: 14.0-inch size, 1366x768 HD resolution, 30-pin video connector, and is non-touch. This replacement is not compatible with touchscreen laptops or other resolutions.

Image: Guide on how to select the correct screen, highlighting the importance of matching the video connector type (30-pin), resolution (1366x768 HD), and ensuring it is a non-touch display.

Image: Visual confirmation that this screen replacement is only compatible with 1366x768 resolution and not higher resolutions.

Image: Clarification that this product is an LCD screen only and does not support touchscreen functionality.
Installation Steps:
- Prepare Your Workspace: Ensure a clean, well-lit, and static-free environment. Gather your tools.
- Power Off and Disconnect: Shut down your laptop completely. Disconnect the power adapter and remove the laptop battery.
- Remove Screen Bezel: Carefully pry off the plastic bezel surrounding the screen. Start from the corners and work your way around, using a plastic prying tool to avoid damage.
- Unscrew Old Screen: Locate and remove the small screws holding the old screen in place. These are usually on the sides of the screen frame.
- Disconnect Video Cable: Gently lay the old screen face down on the keyboard. Carefully peel back the tape securing the video cable connector (30-pin) on the back of the screen. Unlock the connector latch and slide out the cable.
- Connect New Screen: Take your new SCREENARAMA display. Carefully insert the 30-pin video cable into the connector on the back of the new screen. Ensure it is fully seated and secure the latch. Apply new adhesive tape (provided in the tool kit) to hold the cable in place.
- Test the New Screen: Before reassembling, temporarily place the new screen into position. Reconnect the laptop battery and power adapter. Turn on the laptop to verify that the new screen functions correctly. Check for display issues, dead pixels, or incorrect colors. If the screen works, power off the laptop again and disconnect power/battery.
- Secure New Screen: Place the new screen into the frame and secure it with the screws you removed earlier.
- Reattach Bezel: Carefully snap the screen bezel back into place around the new screen. Ensure all clips are securely fastened.
- Final Assembly: Reinstall the laptop battery and reconnect the power adapter. Your installation is complete.
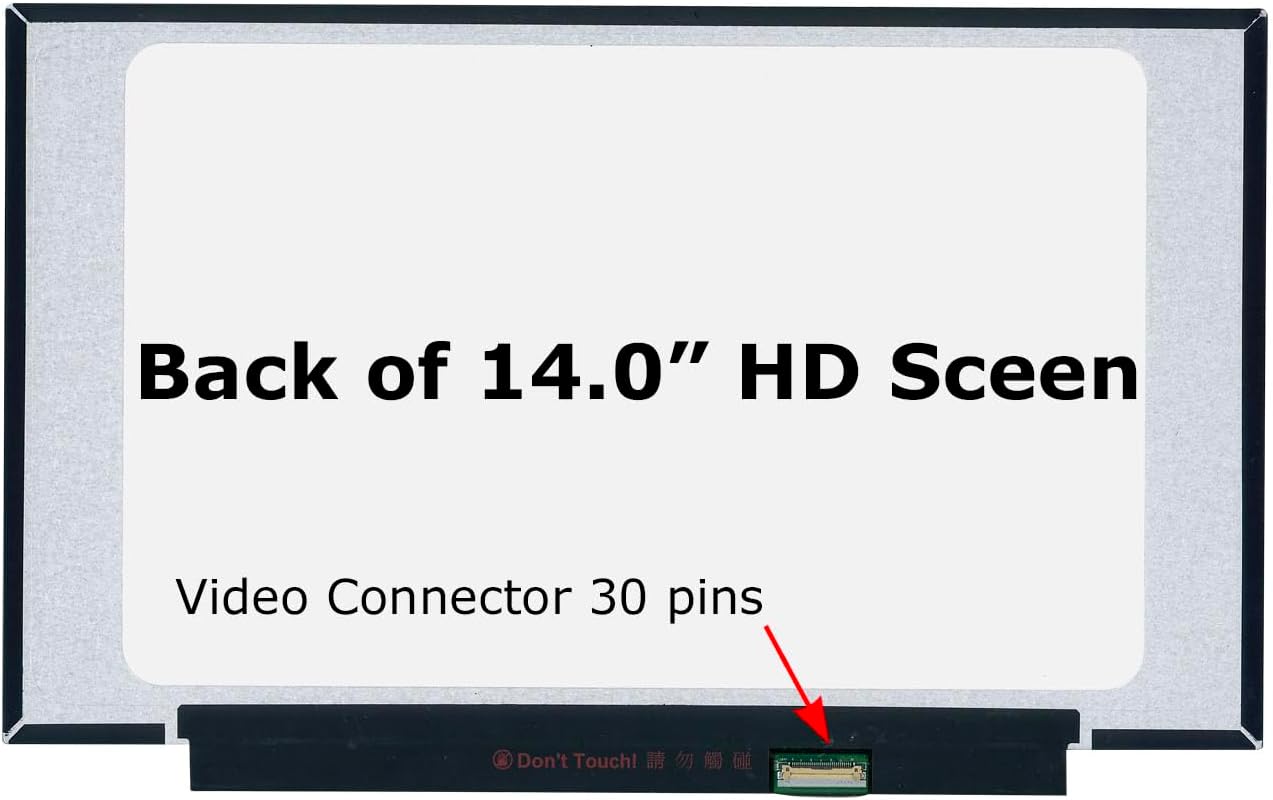
Image: Rear view of the 14.0-inch HD screen, highlighting the location of the 30-pin video connector.

Image: Detailed view of a 30-pin video connector, contrasting it with a 40-pin connector to ensure correct identification.

Image: Example of a screen undergoing testing, displaying a color test pattern to ensure proper functionality.
5. Operating
Once installed, the SCREENARAMA replacement screen operates as an integral part of your laptop's display system. The matte finish helps reduce glare from ambient light, providing a more comfortable viewing experience. No additional software or drivers are typically required for basic display functionality.
6. Maintenance
- Cleaning: To clean the screen, power off the laptop. Use a soft, lint-free microfiber cloth. For stubborn smudges, lightly dampen the cloth with water or a screen-specific cleaning solution. Avoid harsh chemicals, ammonia-based cleaners, or abrasive materials.
- Handling: Avoid touching the screen surface directly with your fingers. When closing the laptop, ensure no objects are left on the keyboard that could press against the screen.
- Storage: If the laptop is stored for extended periods, keep it in a cool, dry place away from direct sunlight and extreme temperatures.
7. Troubleshooting
If you encounter issues after installation, refer to the following troubleshooting steps:

Image: Troubleshooting guide for common screen replacement issues.
- No Display / Blank Screen:
- Connect an external monitor to your laptop to confirm the laptop itself is operational.
- Ensure the 30-pin video cable is securely connected to both the new screen and the laptop's motherboard. Reconnect if necessary, ensuring the latch is closed and tape is applied.
- Verify that the number of pins on your original screen's connector matches the 30-pin connector of the new screen.
- Dim Image / No Backlight:
- Try connecting your old LCD screen (if it still lights up) to determine if the issue is with the new screen or the laptop's backlight circuit.
- Check the backlight fuse on the laptop's motherboard, usually located near the video connector. A blown fuse can cause a dim or dark display.
- Incorrect Colors / Distorted Image:
- Ensure the video cable is fully seated and not damaged.
- Restart the laptop.
- If the issue persists and is identical to the problem with your old LCD: The problem is likely with another component of the laptop (e.g., motherboard, video card) rather than the new screen.
8. Specifications
| Brand | SCREENARAMA |
| Model Compatibility | HP 14-EP2011WM, HP 14-EP2012WM |
| Screen Size | 14.0 inches |
| Resolution | 1366x768 HD |
| Video Connector | 30-pin |
| Surface Type | Matte |
| Display Technology | LCD LED |
| Touchscreen | No (Non-Touch) |
| Item Weight | Approximately 1 pound |
| Package Dimensions | 17 x 11 x 1 inches |
9. Warranty and Support
This SCREENARAMA replacement screen comes with a 2-Year Warranty. For warranty claims, technical assistance, or any questions regarding your product, please contact SCREENARAMA customer support through the retailer's platform or visit the official SCREENARAMA website for contact information.