
1. Introduction
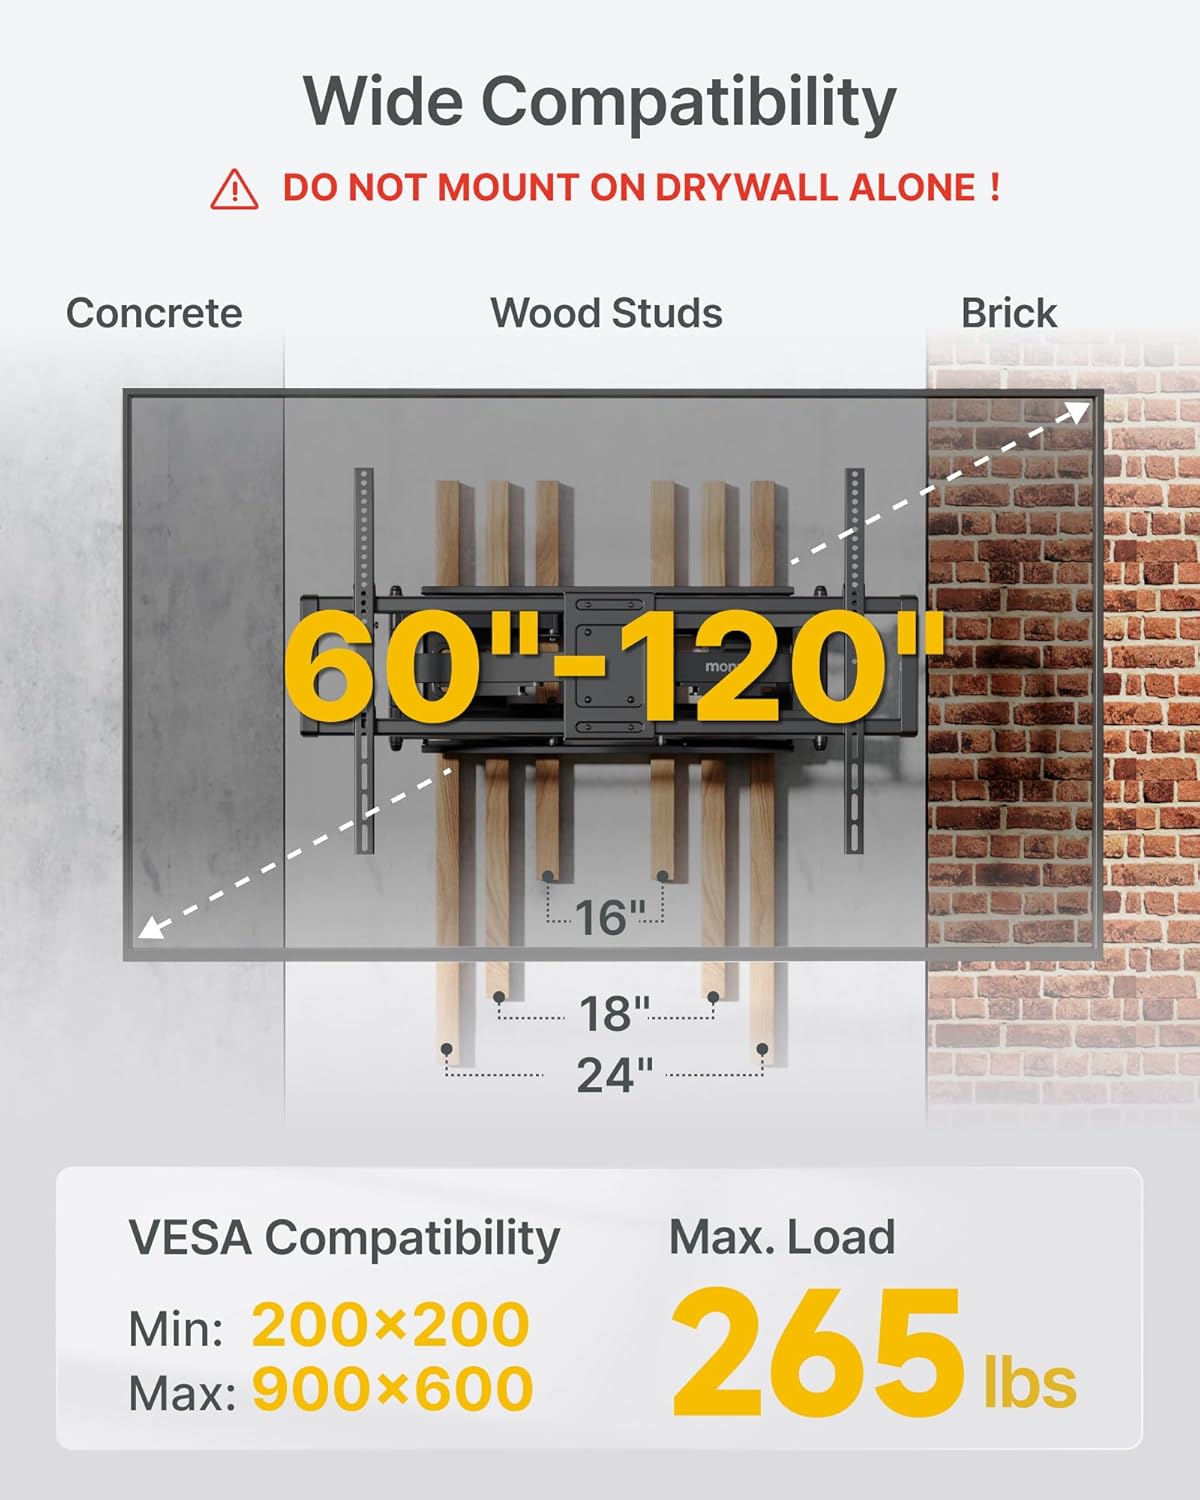
This manual provides detailed instructions for the safe and proper installation, operation, and maintenance of your monTEK Heavy Duty XXL Full Motion TV Wall Mount and monTEK Heavy Duty Tilting TV Wall Mount. These mounts are designed to securely hold large televisions ranging from 60 to 120 inches. Please read this manual thoroughly before beginning installation to ensure optimal performance and safety.
2. Important Safety Information
Failure to follow these safety instructions may result in property damage, serious injury, or death. If you have any questions, please contact monTEK customer support.
- Weight Capacity: Do not exceed the maximum weight capacity. The Full Motion mount supports up to 265 lbs (120 kg). The Tilting mount supports up to 300 lbs (136 kg).
- Wall Type: This mount is designed for installation on wood studs, concrete walls, or brick walls. DO NOT MOUNT ON DRYWALL ALONE! Drywall cannot support the weight of the mount and TV.
- Stud Spacing: Ensure your wall studs are compatible with the mount's requirements (12"/16"/18"/24" for Full Motion, 16"/18"/24" for Tilting).
- Professional Installation: Due to the weight of the mount and large TVs, professional installation is recommended. If installing yourself, ensure you have adequate assistance.
- Tools: Use appropriate tools and wear safety gear during installation.
- Cable Management: Ensure all cables are routed safely and do not interfere with the mount's movement or pose a tripping hazard.
3. Setup and Installation
Your monTEK TV wall mount comes preassembled for easier installation. Follow these steps carefully.
3.1 Package Contents
Verify that all components are present before beginning installation. The package includes the preassembled TV wall mount, all necessary mounting hardware (screws, anchors, washers), a bubble level, and a mounting template.
3.2 Wall Preparation
- Locate Studs (for wood stud installation): Use a stud finder to locate the center of your wood studs. Mark the stud locations. Ensure the stud spacing matches the mount's requirements (12"/16"/18"/24" for Full Motion, 16"/18"/24" for Tilting).
- Mark Drilling Locations: Use the provided mounting template and bubble level to mark the precise drilling locations on your wall.
- Drill Pilot Holes: Drill pilot holes according to the instructions in the detailed English install guide. The drill bit size will vary based on wall type and hardware used.

3.3 Attaching the Wall Plate
- Align the wall plate with the drilled pilot holes.
- Secure the wall plate to the wall using the appropriate lag bolts and washers provided. Ensure all bolts are tightened securely.
3.4 Attaching TV Brackets to TV
- Identify the VESA mounting holes on the back of your TV.
- Select the correct screws, washers, and spacers from the hardware kit that fit your TV's VESA pattern (200x200 to 900x600mm).
- Attach the TV brackets to the back of your TV, ensuring they are level and securely fastened.
3.5 Mounting TV to Wall Plate
- With assistance, carefully lift the TV and hook the TV brackets onto the wall plate.
- Engage the quick lock & release feature to secure the TV to the mount. Refer to the detailed guide for specific locking mechanisms.
- Perform a gentle tug test to ensure the TV is securely attached to the wall mount.
4. Operating Your TV Wall Mount
4.1 Full Motion Mount Adjustments
The XXL Full Motion mount offers extensive flexibility for optimal viewing angles.
- Extension: Gently pull the TV away from the wall to extend it up to 27.7 inches for optimal viewing and easy cable access.
- Swivel: Swivel the TV up to ±60° left or right to achieve the desired side-to-side viewing angle.
- Tilt: Use the tool-free tilt system to adjust the vertical angle from +5° to -15°. This helps reduce glare from lights or windows.


4.2 Tilting Mount Adjustments
The Tilting TV Wall Mount allows for simple vertical angle adjustments.
- Tilt: The mount features a 10° tilt capability, allowing you to adjust the TV's vertical angle to reduce glare and achieve a comfortable viewing position. This is often a toolless adjustment.

4.3 Cable Management
Both mounts include features for cable management to keep your setup tidy and safe. Route all TV and power cables through the designated cable clips or channels on the mount arms to prevent tangling and damage.
5. Maintenance
Regular maintenance ensures the longevity and safe operation of your TV wall mount.
- Periodic Inspection: Annually, inspect all mounting hardware and connections to ensure they remain tight and secure. Re-tighten any loose screws or bolts.
- Cleaning: Clean the mount with a soft, dry cloth. Avoid abrasive cleaners or solvents that could damage the finish.
- Lubrication: Moving parts on the full motion mount are designed for smooth operation. If any stiffness occurs, a small amount of silicone-based lubricant can be applied to pivot points.
6. Troubleshooting
If you encounter issues, refer to the following common solutions.
- TV is not level: Check the bubble level during installation. Most mounts allow for minor post-installation leveling adjustments. Refer to your specific mount's detailed guide.
- Mount feels loose: Immediately remove the TV and re-check all wall plate and TV bracket connections. Ensure all bolts are securely tightened into appropriate wall structures.
- Difficulty adjusting mount: Ensure no cables are snagged. For full motion mounts, check if any locking mechanisms are engaged. If stiffness persists, apply lubricant as per maintenance instructions.
- Missing parts: Contact monTEK customer support immediately for assistance.
7. Specifications
| Feature | XXL Full Motion Mount | Heavy Duty Tilting Mount |
|---|---|---|
| Screen Size Compatibility | 60 - 120 inches | 60 - 120 inches |
| Max Load Capacity | 265 lbs (120 kg) | 300 lbs (136 kg) |
| VESA Compatibility | 200x200mm to 900x600mm | 200x200mm to 900x600mm |
| Extension from Wall | 2.95 inches (retracted) to 27.7 inches (extended) | Low Profile Slim Bracket |
| Swivel Angle | ±60° | N/A |
| Tilt Angle | +5° / -15° (Tool-Free) | 10° (Toolless) |
| Wall Type Compatibility | Wood Studs (12"/16"/18"/24"), Concrete, Brick | Wood Studs (16"/18"/24"), Concrete, Brick |
| Construction Material | Industrial-grade steel, heavy-duty dual arms | Industrial-grade steel |


8. Warranty and Customer Support
monTEK is committed to providing high-quality products and excellent customer service.
- Lifetime Customer Support: Enjoy peace of mind with lifetime customer support and professional guidance whenever you need it.
- For any questions, concerns, or assistance with installation or operation, please contact monTEK customer support through the retailer's platform or the official monTEK website.