
Important Safety Instructions
When using electrical appliances, basic safety precautions should always be followed, including:
- READ ALL INSTRUCTIONS BEFORE USE.
- Do not touch hot surfaces. Use handles or knobs.
- To protect against electrical shock, do not immerse cord, plugs, or any part of the appliance in water or other liquids.
- Close supervision is necessary when any appliance is used by or near children.
- Unplug from outlet when not in use and before cleaning. Allow to cool before putting on or taking off parts, and before cleaning the appliance.
- Do not operate any appliance with a damaged cord or plug, or after the appliance malfunctions or has been damaged in any manner. Return the appliance to the nearest authorized service facility for examination, repair, or adjustment.
- The manufacturer does not recommend the use of accessory attachments. Use of accessory attachments may cause injuries.
- Do not use outdoors.
- Do not let the cord hang over the edge of a table or counter, or touch hot surfaces.
- Do not place on or near a hot gas or electric burner, or in a heated oven.
- Extreme caution must be used when moving an appliance containing hot oil or other hot liquids.
- Do not use the appliance for other than its intended use.
- A short power-supply cord is provided to reduce the risk resulting from becoming entangled in or tripping over a longer cord.
- Extension cords may be used if care is exercised in their use. If an extension cord is used, the marked electrical rating of the extension cord should be at least as great as the electrical rating of the appliance. The longer cord should be arranged so that it will not drape over the countertop or tabletop where it can be pulled on by children or tripped over unintentionally.
- This appliance has a polarized plug (one blade is wider than the other). To reduce the risk of electric shock, this plug is intended to fit into a polarized outlet only one way. If the plug does not fit fully into the outlet, reverse the plug. If it still does not fit, contact a qualified electrician. Do not attempt to modify the plug in any way.
- Only use popcorn kernels. Do not use other ingredients like sugar, oil, or butter in the popping chamber.
- Never leave the appliance unattended when in use.
- Allow unit to cool completely before cleaning or storing.
Parts & Features
Familiarize yourself with the components of your Nostalgia Hot Air Popcorn Maker:
- Base Unit: Contains the heating element and fan for hot air popping.
- Popping Chamber: Where popcorn kernels are placed for popping.
- Clear Top Cover/Chute: Directs popped corn into the serving bowl.
- Measuring Cup/Butter Melting Tray: Used to measure kernels and can melt butter during operation.
- 2-in-1 Serving Bowl/Lid: Functions as a lid during popping and can be flipped to serve popcorn.
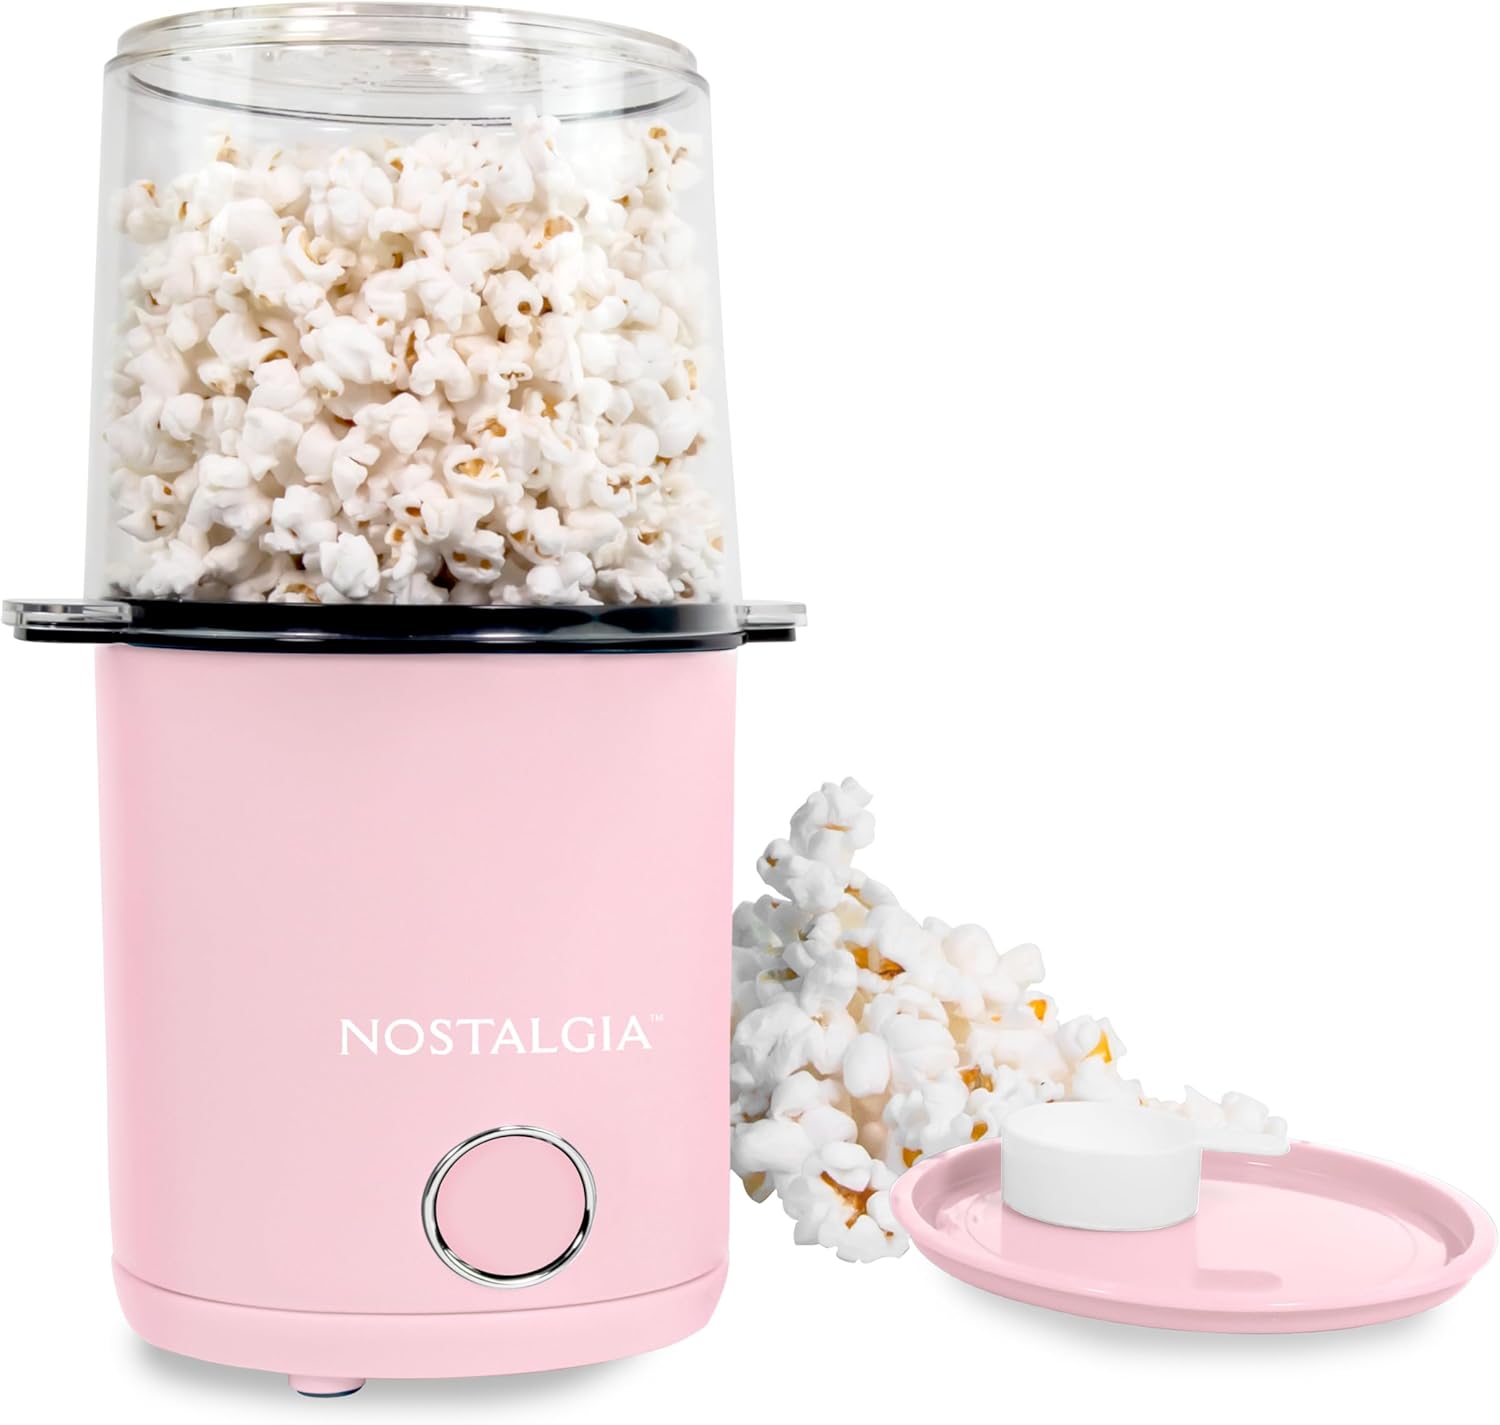
Figure 1: Nostalgia 8-Cup Hot Air Popcorn Maker (Pink)

Figure 2: Included Accessories (Measuring Cup, Popcorn & Serving Bowl, Lid Cover)
Setup Before First Use
- Carefully unpack the popcorn maker and all its components from the packaging.
- Wash the removable parts: the clear top cover, measuring cup, and 2-in-1 serving bowl/lid in warm, soapy water. Rinse thoroughly and dry completely.
- Wipe the exterior of the base unit with a damp, non-abrasive cloth. Ensure no water enters the electrical components.
- Ensure all parts are completely dry before assembly and use.
Operating Instructions
Follow these steps to make delicious hot air popcorn:
- 1. Prepare the Unit: Place the popcorn maker on a stable, heat-resistant surface. Ensure the power switch is in the OFF position.
- 2. Measure Kernels: Use the provided measuring cup to measure up to 2 ounces of popcorn kernels. Do not overfill.

Figure 3: Adding kernels to the popping chamber.
- 3. Add Kernels to Popping Chamber: Pour the measured kernels into the popping chamber of the base unit.
- 4. Assemble Components: Place the clear top cover securely onto the base unit. Then, place the measuring cup into the opening on top of the clear cover. Position the 2-in-1 serving bowl directly under the popcorn chute.
- 5. Start Popping: Plug the unit into an electrical outlet. Flip the power switch to the ON position. The popping process will begin shortly.

Figure 4: Pressing the start button.
- 6. Melt Butter (Optional): If desired, place a small amount of butter into the measuring cup on top of the clear cover. The heat from the popping process will melt the butter.
- 7. Finish Popping: Once the popping sound slows significantly (typically after 2-3 minutes), flip the power switch to the OFF position.
- 8. Serve Popcorn: Carefully remove the measuring cup (if used) and the clear top cover. Pour any melted butter over the popcorn in the serving bowl. The 2-in-1 bowl can be used directly for serving.
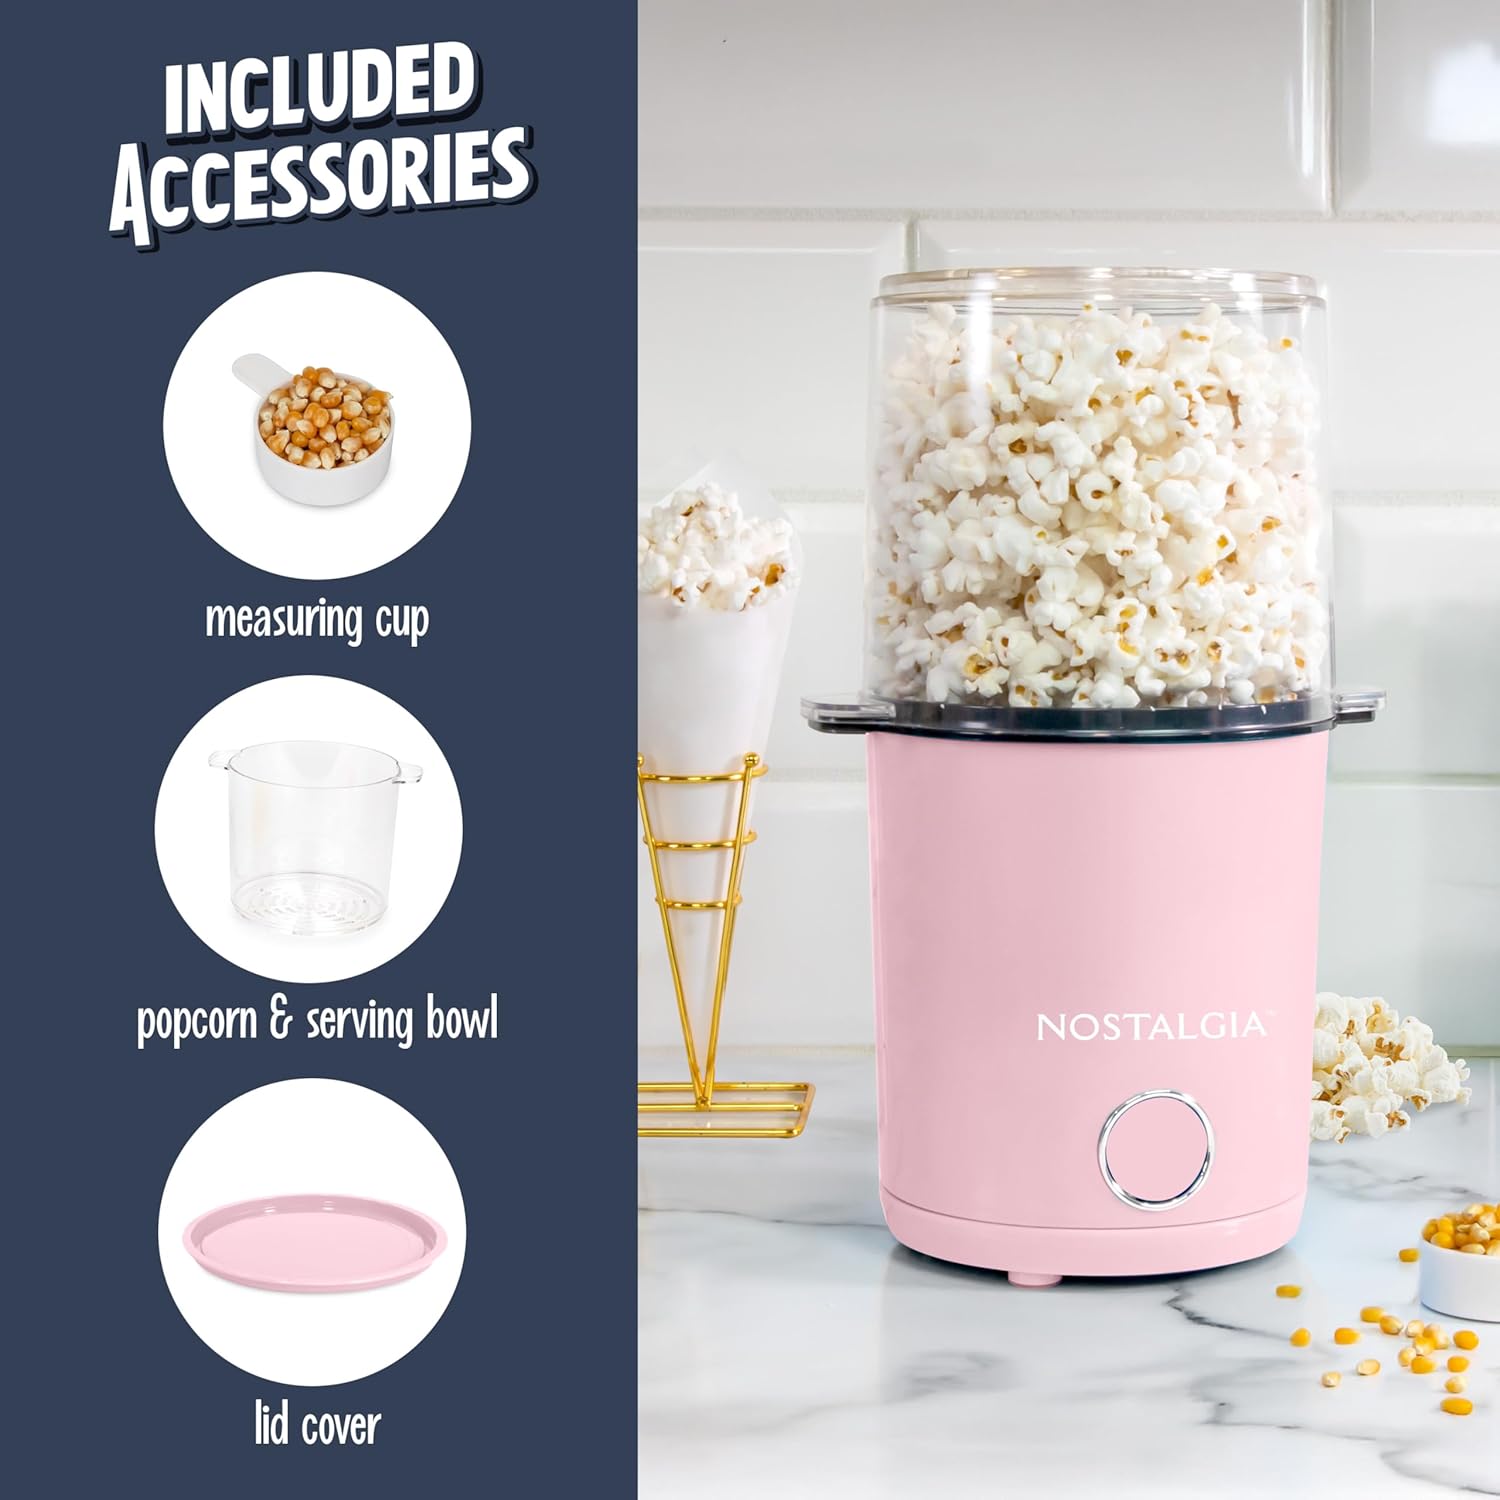
Figure 5: Flipping the lid to use as a serving bowl.

Figure 6: Enjoying freshly popped popcorn.
- 9. Cool Down: Allow the unit to cool for 10-15 minutes between batches to prevent overheating and ensure optimal performance.

Figure 7: Healthy, oil-free popcorn.
Maintenance & Cleaning
Proper cleaning and maintenance will extend the life of your popcorn maker.
- Unplug and Cool: Always unplug the appliance from the electrical outlet and allow it to cool completely before cleaning.
- Remove Parts: Remove the measuring cup and clear top cover from the base unit.
- Wash Removable Parts: The measuring cup, clear top cover, and 2-in-1 serving bowl/lid can be washed in warm, soapy water. They are also top-rack dishwasher safe. Rinse thoroughly and dry completely.
- Clean Base Unit: Wipe the exterior of the base unit with a damp, non-abrasive cloth. Do not immerse the base unit in water or any other liquid.
- Storage: Ensure all parts are completely dry before storing the appliance. For compact storage, the clear top cover and measuring cup can be inverted and placed inside the 2-in-1 bowl, which then fits over the base unit.

Figure 8: Compact storage design.
Troubleshooting
If you encounter any issues with your popcorn maker, refer to the following common problems and solutions:
| Problem | Possible Cause | Solution |
|---|---|---|
| Popcorn not popping or very few kernels pop. |
|
|
| Popcorn is burning. |
|
|
| Popcorn flying out of the chute. |
|
|
Specifications
- Brand: Nostalgia
- Model Number: NHAPBKT8PK6A
- Capacity: 8 Cups (popped popcorn)
- Dimensions (L x W x H): 7.24" x 5.87" x 11.81"
- Material: Plastic
- Special Features: Measuring Cup, 2-in-1 Bowl & Lid
- UPC: 810140675064

Figure 9: Product dimensions and key features.
Warranty & Support
This Nostalgia product is warranted to be free from defects in material and workmanship under normal use and conditions for a period of one (1) year from the date of original purchase. This warranty extends only to the original retail purchaser and is not transferable.
For warranty service or technical support, please visit the official Nostalgia website or contact their customer service department. Keep your proof of purchase for warranty claims.
Please note: Specific warranty terms and conditions may vary. Refer to the official product packaging or manufacturer's website for the most current and detailed warranty information.


