
Introduction
Thank you for choosing the K Knowbody 10x12 FT Outdoor Storage Shed. This manual provides essential information for the safe assembly, operation, and maintenance of your new storage shed. Please read all instructions carefully before beginning assembly and retain this manual for future reference.
Safety Information
WARNING: Failure to follow these safety instructions may result in serious injury or property damage.
- Always follow assembly instructions carefully.
- This product involves heavy components and may require two people to assemble.
- Do not exceed the weight capacity of 500 pounds.
- Keep children and pets away from the assembly area.
- Always use appropriate safety gear (e.g., gloves, eye protection) when handling heavy objects and sharp metal edges.
- Ensure the shed is assembled on a suitable, level base. Floor foundation is NOT included.
- Properly secure the shed to the ground to prevent wind damage.
Components Overview
Your K Knowbody storage shed comes in multiple boxes, typically labeled A, B, and C. Each box contains specific parts for different stages of assembly. Before starting, ensure all parts are present and undamaged by comparing them with the parts list provided in your packaging.
Key Components:
- Metal Wall Panels: Corrugated steel panels forming the shed's walls.
- Frame Components: Various metal bars and connectors for the base, walls, and roof structure.
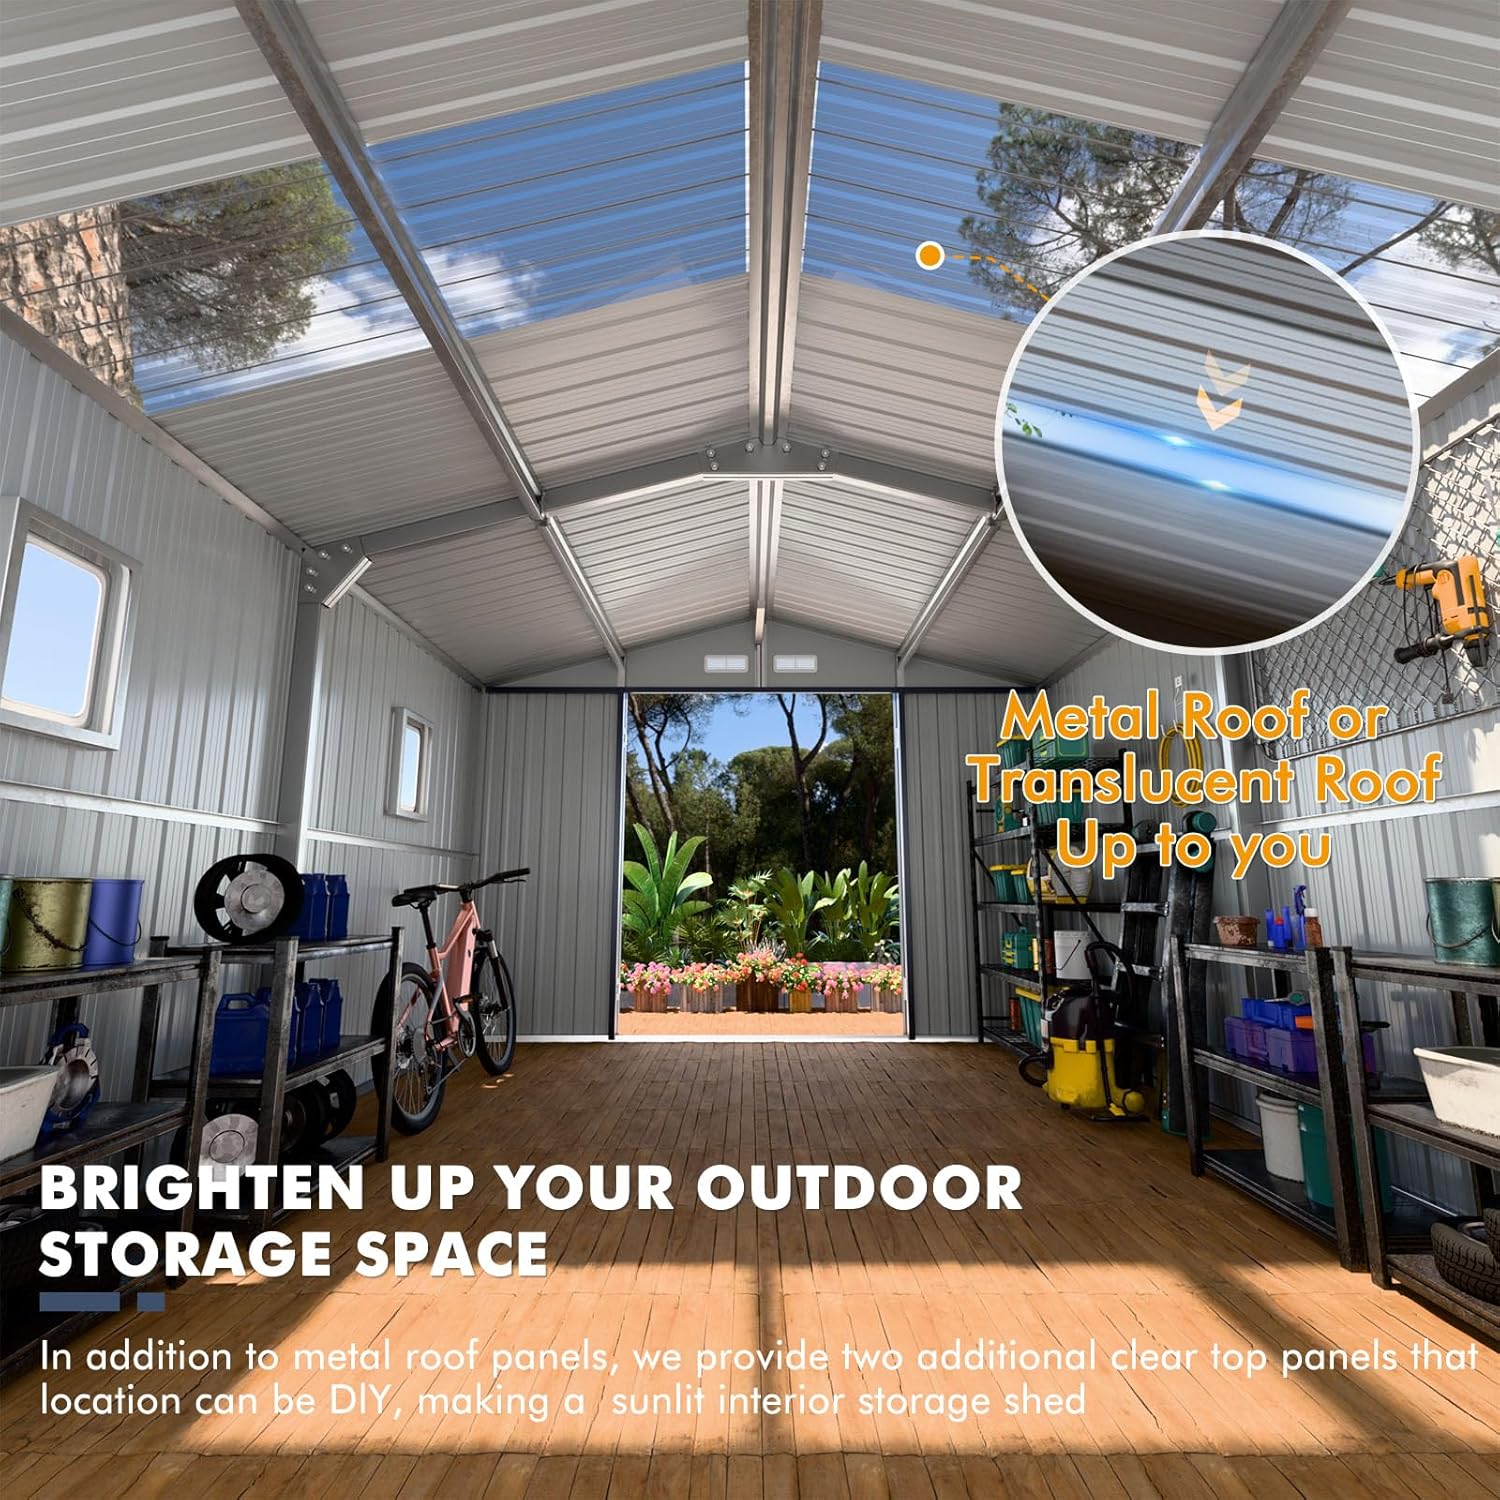
- Roof Panels: Corrugated steel panels for the main roof, including transparent polycarbonate skylight panels.
- Doors: Double swinging doors with pre-drilled holes for hinges and latch.
- Windows: Shatter-proof acrylic windows with frames for installation.
- Vents: Built-in vents for optimal airflow.
- Fasteners: Screws (F1, F4, F5), nuts (F2, F3), and washers (S3) for assembly.
- Accessories: Door latch, handles, and other small parts.

Assembly Instructions
Assembly is a detailed DIY project that typically requires two people and can take approximately 6-8 hours. Follow these steps carefully, referring to the assembly video for visual guidance.
Assembly Video Guide:
Video: Assembly Method for 10x12FT Metal Shed. This video provides a step-by-step visual guide for assembling the K Knowbody 10x12 FT Outdoor Storage Shed.
Step-by-Step Assembly:
- Unboxing and Part Identification:
Unpack all boxes (A, B, C) and lay out components. Refer to the parts list in your manual to identify each piece. The assembly video (0:00-0:05) shows an overview of the boxes and parts. - Bottom Frame Assembly:
Assemble the bottom frame using the designated frame components and F1 screws. Ensure all connectors are aligned correctly, with the upward direction indicating the roof side. The video demonstrates this from 0:05 to 0:59. - Wall System Integration (Corners):
Install the 8 metal wall panels at the four corners (2 panels per corner). Secure them using F1 screws and S3 washers. The video illustrates this process from 1:00 to 2:59. - Roof Panel and Eaves - Part 1 (Roof Frame):
Begin assembling the roof frame using components A1, A3, A7, A8, and A9. Use F7 bolts and nuts for these connections. Ensure parallel orientation of connector bases. This is shown in the video from 3:00 to 3:59. - Wall System Integration (Horizontal Bars):
Attach the horizontal support bars to the wall panels. For bars 1-2, ensure small bore alignment. For bars 3-4, ensure large bore alignment. Use F1 screws and S3 washers. Refer to the video from 4:00 to 5:00. - Wall System Integration (Additional Horizontal Bars):
Install additional horizontal bars (4L, 4R) as shown in the video from 5:00 to 5:50, securing them with F1 screws and S3 washers. - Windowed Panel Assembly:
Assemble the window frames and acrylic panes. This involves peeling off protective films and securing the window components to the metal panels using F1 screws, F2 nuts, and S3 washers. The video demonstrates this from 5:50 to 6:40. - Windowed Panel Installation:
Install the assembled windowed panels into the shed structure. The position of these panels is adjustable per user preference. Secure them with F1 screws and S3 washers. See the video from 6:40 to 7:50. - Roof Panel and Eaves - Part 2 (Ventilation):
Install the ventilation grates into the designated roof panels. Use F2 nuts and bolts for secure attachment. This step is shown in the video from 7:50 to 8:30. - Roof Panel and Eaves - Part 3 (Roof Frame Completion):
Complete the roof frame assembly, ensuring all connections are tight and secure using F1 screws and S3 washers. The video covers this from 8:30 to 9:30. - Roof Panel Installation:
Carefully install the roof panels, ensuring that panel joints overlap precisely as shown in the video (9:30-10:20) to prevent leakage. Use F1 screws and S3 washers. - Eaves Installation:
Attach the eaves to the roof structure, securing them with F1 screws and S3 washers. This is demonstrated in the video from 10:20 to 10:50. - Door Assembly:
Assemble the door panels, including the latch mechanism. Use F1 screws and F5 nuts for the latch. The video shows this from 10:50 to 11:20. - Door Installation:
Install the assembled doors onto the shed frame using hinges and F3/F4 fasteners. Ensure smooth operation and proper alignment. Refer to the video from 11:20 to 12:13.

Operating Instructions
Doors:
The shed features heavy-duty double doors. To open, disengage the latch and pull the doors outward. To close, push the doors inward until they meet, then engage the latch. A padlock (not included) can be added for enhanced security.
Ventilation:
The two built-in vents ensure optimal airflow and help prevent internal moisture buildup. No specific operation is required for the vents as they are passive. Ensure they remain unobstructed for effective air circulation.
Natural Lighting:
The shed is equipped with two polycarbonate roof skylights and two shatter-proof acrylic windows to provide natural light. No operation is required for these features.
Maintenance
- Cleaning: Regularly clean the exterior and interior of the shed with mild soap and water. Avoid abrasive cleaners that could damage the finish.
- Rust Protection: The shed is coated with an industrial-grade finish for 10-15 years of rust protection. Inspect the shed periodically for any signs of damage to the coating and touch up as needed to maintain protection.
- Fasteners: Periodically check all screws and bolts to ensure they remain tight. Tighten any loose fasteners to maintain structural integrity.
- Ventilation: Keep the built-in vents clear of debris (leaves, dirt, etc.) to ensure proper airflow and prevent moisture accumulation.
- Snow Load: While the shed features a super-reinforced top frame, it is advisable to remove excessive snow accumulation from the roof during heavy snowfall to prevent potential damage.
Troubleshooting
- Doors Not Closing Properly: Ensure the shed is assembled on a perfectly level surface. Uneven ground can cause door misalignment. Check hinges and the latch for any obstructions or loose fasteners.
- Water Leakage: Verify that all roof panels are overlapped precisely as instructed during assembly. Check all screw points for proper sealing with washers. Apply silicone sealant to any persistent leak points if necessary.
- Bent Parts During Delivery: If parts arrive bent, gently attempt to straighten them. If damage is significant and affects assembly or structural integrity, contact customer support for replacement parts.
- Missing Parts: Refer to the parts list in your manual. If any parts are missing, contact customer support immediately.
Specifications
| Feature | Detail |
|---|---|
| Brand | K Knowbody |
| Model Number | Y8L042-1012 |
| Product Dimensions (D x W x H) | 125.03"D x 100"W x 85.02"H |
| Material | Aluminum, Metal (Alloy Steel Frame) |
| Color | Dark Blue |
| Item Weight | 299 Pounds |
| Floor Area | 120 Square Feet |
| Door Width | 27 Inches |
| Door Height | 55 Inches |
| Door Style | Double swinging |
| Water Resistance Level | Water Resistant |
| Weight Capacity Maximum | 500 Pounds |
| Required Assembly | Yes |
Warranty & Support
K Knowbody is committed to providing quality products and excellent customer service. While specific warranty details are not provided in this manual, please refer to your purchase documentation or contact K Knowbody directly for warranty information.
Customer Support:
If you have any questions, concerns, or require assistance with your K Knowbody storage shed, please contact our customer support team. We are dedicated to ensuring your satisfaction.
- Email: yueyi@unionservice.com.cn
- Online Store: Visit the K Knowbody Store on Amazon for more information and products.