1. Important Safety Instructions
Read all safety warnings and instructions before using this product. Failure to follow these instructions may result in electric shock, fire, or serious injury.
- Always wear appropriate personal protective equipment, including safety glasses, gloves, and protective clothing.
- Ensure the work area is well-ventilated and free from flammable materials.
- Do not operate the spot welder in damp or wet conditions.
- Keep children and unauthorized persons away from the operating area.
- Do not touch the welding electrodes or work piece immediately after welding, as they will be hot.
- Use only the provided or recommended accessories.
- Disconnect the power supply before performing any maintenance or cleaning.
- Do not attempt to repair or modify the device yourself. Contact qualified service personnel.
- This device contains a lithium battery. Do not expose to high temperatures or direct sunlight.
2. Product Overview
The TOOLTOP Awithz UK3 is a portable, high-power spot welder designed for DIY nickel sheet welding, particularly for 18650 lithium battery packs. It features a compact design, Type-C charging, and multiple welding modes for precise and efficient operation.
Key Features:
- Compact Design: Small body with Type-C charging for portability.
- Multiple Welding Modes: Knob control for preheating, intermittent welding, gear position, and trigger time adjustments.
- High Power Output: 13860W for fast, precise welding.
- Three Welding Modes: Manual, automatic, and foot pedal welding options.
- Ultra-Low Power Consumption: Energy-efficient operation.
- Detachable Soldering Pen: Allows for easy replacement of welding needles without changing the entire rod.
- High Conductivity Copper Bar: Ensures stable current and strong welds.

Figure 2.1: Awithz UK3 Portable Spot Welder with its main components and highlighted features.
This image displays the Awithz UK3 spot welder unit, two welding pens, a foot pedal, and several 18650 battery cells. Key features such as "Detachable and replaceable needle soldering pen" and "Intelligent Handheld Pen" are highlighted, along with the device's ability to "Weld firmly with 0.25 pure nickel and 0.4 nickel plating."

Figure 2.2: UK3 Knob style spot welder with icons representing its core functionalities.
This image showcases the UK3 spot welder and lists its innovative features through icons: "Brand new A-grade battery cells," "Weldable 0.4mm/0.0157inch," "Intelligent Handheld Pen," "Ten thousand precise adjustments," "Powerful dual pulse," "Science has a positive impact," "Automatic/manual/foot pedal," and "Multiple protection."
3. Package Contents
Verify that all items listed below are present in your package:
- 1 x TT-Awithz-UK3-10000mAh Spot Welder Unit
- 1 x Pedal board (Foot Pedal)
- 1 x Nickel coil
- 1 x Charging cable (Type-C)
- 1 pair of spare soldering pins
- 1 x Sandpaper
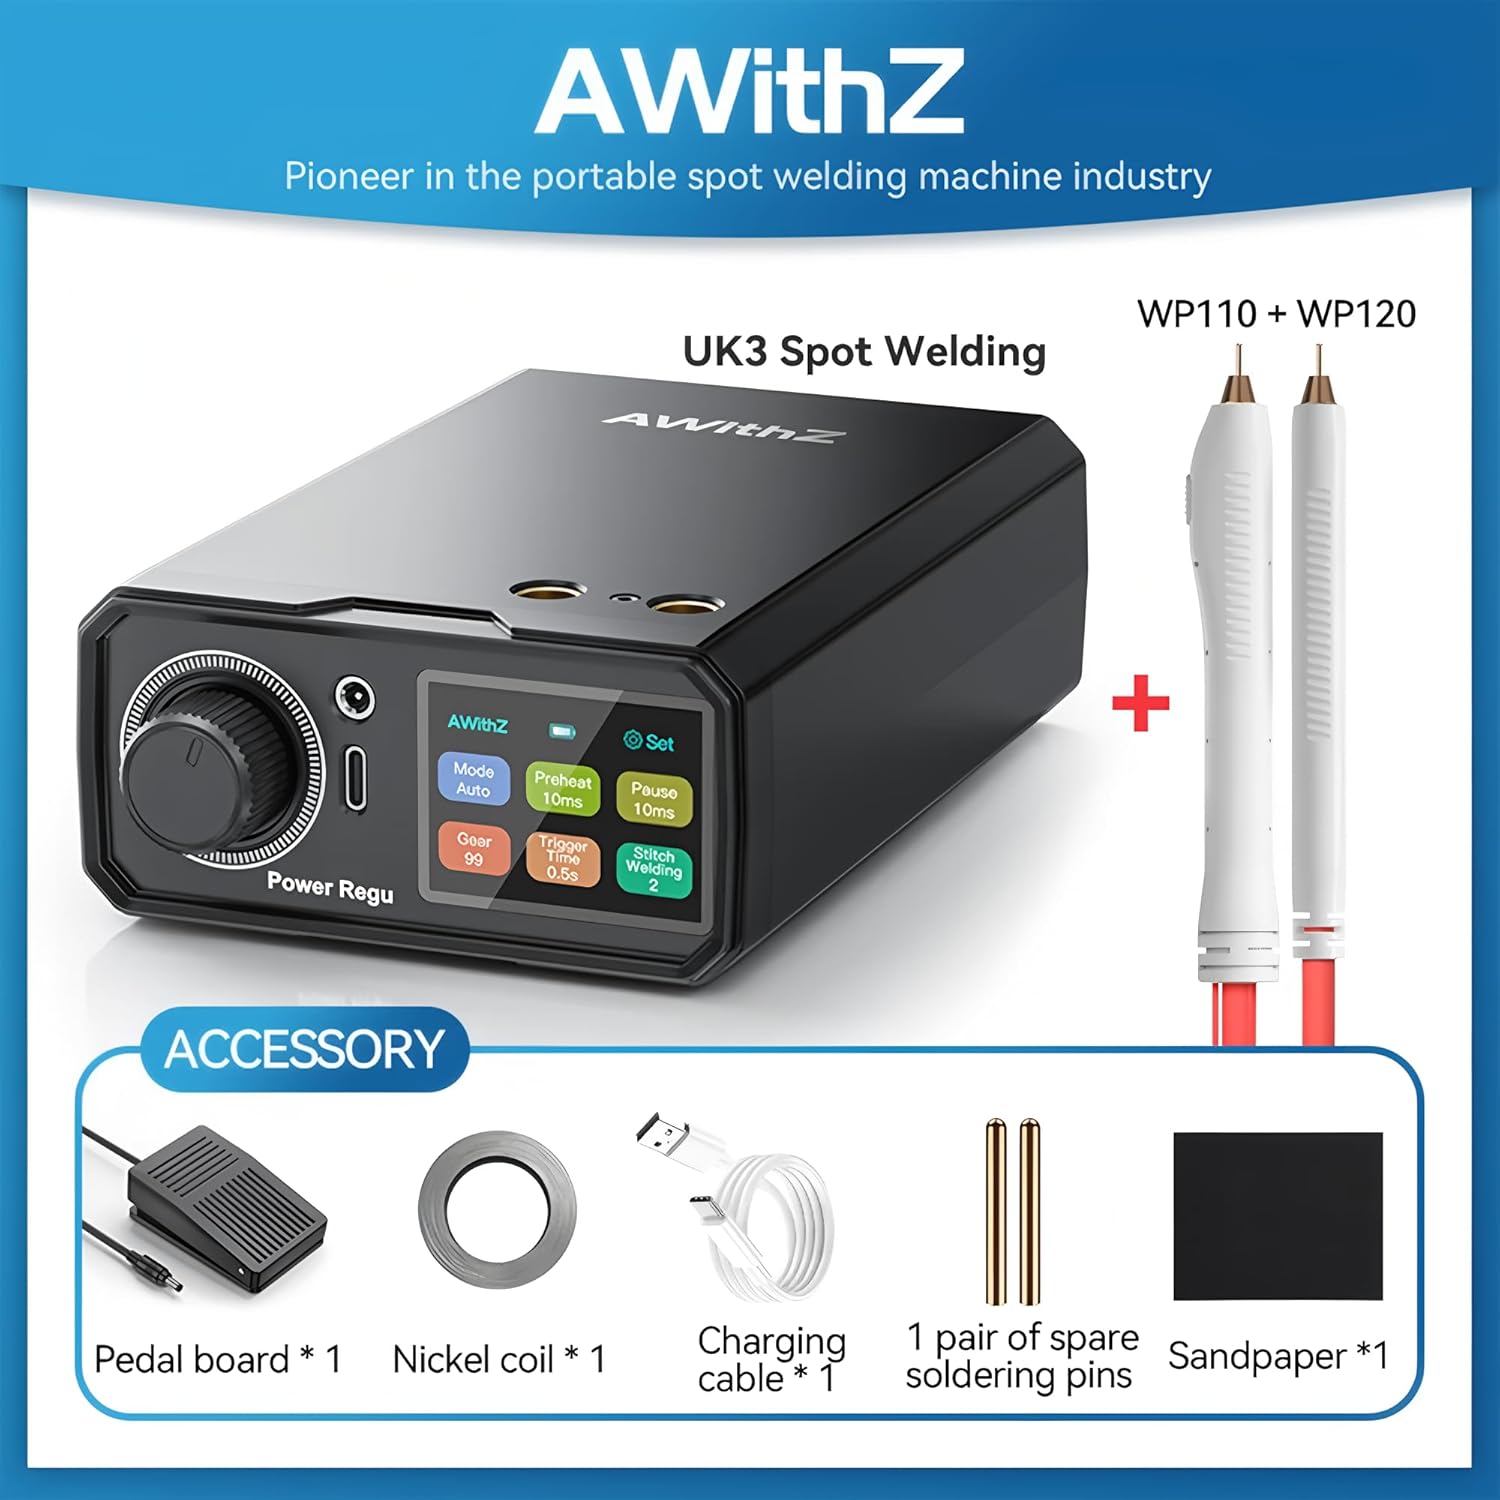
Figure 3.1: All accessories included with the Awithz UK3 Spot Welder.
This image clearly displays the main spot welding unit along with its accessories: a foot pedal, a roll of nickel strip, a Type-C charging cable, a pair of spare welding pins, and a piece of sandpaper.
4. Setup Instructions
- Charge the Device: Connect the spot welder to a Type-C charger using the provided charging cable. Ensure the device is fully charged before first use.
- Connect Welding Pens: Insert the welding pens securely into the designated ports on the front of the spot welder. Ensure a firm connection.
- Connect Foot Pedal (Optional): If using the foot pedal welding mode, connect the foot pedal to its dedicated port.
- Prepare Nickel Strip: Cut the nickel strip to the required length for your welding application.
- Prepare Workpiece: Ensure the surfaces to be welded (e.g., battery terminals, nickel strip) are clean and free from oxidation. Use the included sandpaper if necessary.
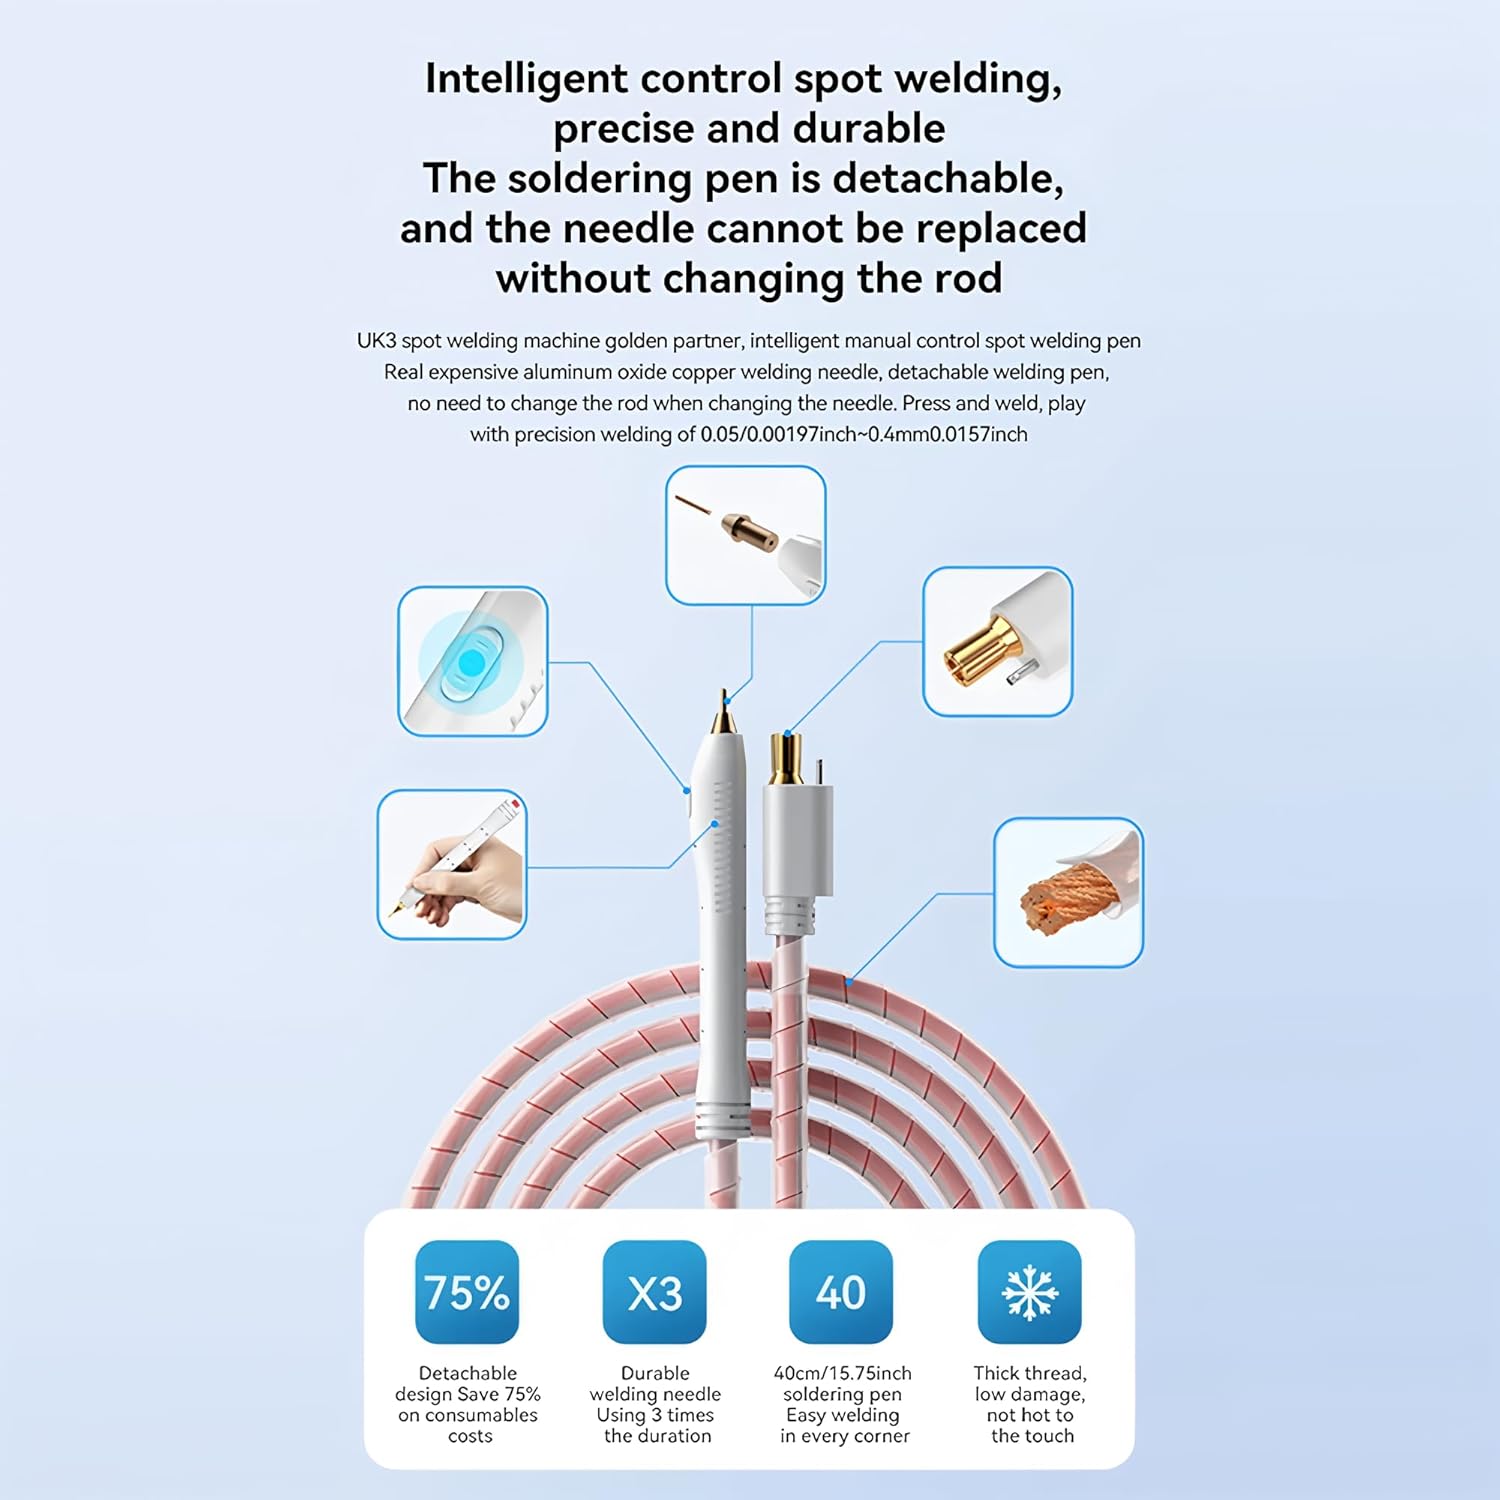
Figure 4.1: Illustration of the intelligent control spot welding pen with detachable needle.
This image highlights the intelligent control spot welding pen, emphasizing its detachable and replaceable needle design. It shows how the needle can be easily changed without replacing the entire pen rod, contributing to cost savings and durability. The image also illustrates the internal high conductivity copper bar for stable current.
5. Operating Instructions
The Awithz UK3 offers multiple welding modes and adjustable settings for optimal performance.
5.1 Powering On/Off
- To power on, press and hold the power button until the display illuminates.
- To power off, press and hold the power button until the display turns off.
5.2 Mode Selection and Adjustments
Use the knob and buttons on the device's control panel to navigate and adjust settings.

Figure 5.1: Close-up of the Awithz UK3 control panel and Type-C charging port.
This image provides a detailed view of the spot welder's control panel, showing the adjustment knob, display screen, and buttons for settings like "Mode," "Preheat," "Pause," "Gear," "Trigger Time," and "Switch Welding." It also highlights the Type-C fast charging port and the device's minimalist design.
- Mode (Manual/Automatic/Foot Pedal): Select the desired welding trigger mode.
- Manual: Trigger welding by pressing a button on the welding pen.
- Automatic: Welding triggers automatically when both pen tips make contact with the workpiece.
- Foot Pedal: Welding triggers when the foot pedal is pressed.
- Preheat: Adjust the preheating time for better weld quality, especially on thicker materials.
- Intermittent/Pause: Set the pause time between welding pulses for controlled heat distribution.
- Gear Position: Adjust the welding power level (e.g., 1-99) to suit the thickness of the nickel strip and battery type. Start with lower settings and increase gradually.
- Trigger Time: Fine-tune the duration of the welding pulse.
5.3 Welding Procedure
- Place the nickel strip firmly onto the battery terminal or workpiece.
- Position the tips of the welding pens onto the nickel strip, ensuring good contact and even pressure.
- Initiate the weld according to your selected mode (manual button, automatic contact, or foot pedal).
- Observe the weld quality. Adjust "Gear Position," "Preheat," and "Trigger Time" as needed to achieve a strong, clean weld.
- Allow the welded area to cool before handling.
6. Maintenance
- Cleaning: Regularly clean the welding pen tips and the device casing with a dry, soft cloth. Ensure no metal dust or debris accumulates.
- Electrode Replacement: If the welding pen tips become worn or damaged, replace them with new ones. The detachable design allows for easy replacement.
- Storage: Store the spot welder in a cool, dry place away from direct sunlight and moisture.
- Battery Care: For optimal battery life, avoid fully discharging the device frequently. Charge it periodically if not used for extended periods.
7. Troubleshooting
| Problem | Possible Cause | Solution |
|---|---|---|
| No power/Device won't turn on | Low battery; Power button not pressed long enough; Device fault. | Charge the device; Press and hold the power button for 3-5 seconds; Contact support. |
| Weak or inconsistent welds | Low power setting (Gear); Dirty or worn welding tips; Poor contact with workpiece; Insufficient preheat/trigger time. | Increase Gear setting; Clean/replace welding tips; Ensure firm contact and pressure; Adjust Preheat/Trigger Time. |
| Excessive sparks or burning | Too high power setting (Gear); Overlapping welds; Incorrect material. | Decrease Gear setting; Avoid overlapping welds; Ensure correct nickel strip thickness. |
| Welding pens get hot quickly | Continuous use; High power setting; Poor contact. | Allow device to cool; Reduce power setting; Ensure good contact. |
8. Specifications
| Feature | Detail |
|---|---|
| Model Number | TT-Awithz-UK3-10000mAh |
| Brand | TOOLTOP |
| Battery Capacity | 10000mAh (Integrated Lithium Battery) |
| Charging Port | Type-C |
| Max Welding Power | 13860W |
| Weldable Nickel Thickness | Up to 0.4mm (0.0157 inch) nickel plating, 0.25mm pure nickel |
| Welding Modes | Manual, Automatic, Foot Pedal |
| Dimensions | Approx. 10.05 x 15.8 x 4.8 cm (3.96 x 6.22 x 1.89 inches) |
| Weight | Approx. 300g (0.66 lbs) |
| Certifications | CE, RoHS |

Figure 8.1: Detailed dimensions of the Awithz UK3 Spot Welder in centimeters and inches.
This image provides precise measurements of the Awithz UK3 spot welder, showing its length, width, and height in both centimeters and inches, illustrating its compact and portable form factor.
9. Warranty and Support
This product comes with a 1-year EU Spare Part Availability Duration as per manufacturer specifications. For technical support, warranty claims, or service inquiries, please contact your retailer or the manufacturer directly. Please have your model number (TT-Awithz-UK3-10000mAh) and purchase information ready.
Manufacturer: TOOLTOP


