
FOIFKIN F100
FOIFKIN F100 Micro-ATX Gaming PC Case Instruction Manual
Model: F100
1. Introduction
Thank you for choosing the FOIFKIN F100 Micro-ATX Gaming PC Case. This manual provides detailed instructions for the proper installation, operation, and maintenance of your new PC case. Please read this manual thoroughly before beginning assembly to ensure optimal performance and longevity of your system.
2. Product Overview
The FOIFKIN F100 is a Micro-ATX gaming PC case designed for efficient cooling and aesthetic appeal. It features a dual-chamber design, panoramic tempered glass, and pre-installed ARGB fans.
2.1 Key Features
- Dual-Chamber Design: Separates hardware from the power supply and storage drives, improving thermal performance and cable management.
- 270° Panoramic Tempered Glass: Fully transparent, high-hardness tempered glass panels showcase internal components.
- Pre-installed ARGB Fans: Includes three 120mm ARGB fans (two reverse, one forward) for immediate cooling and customizable lighting.
- Super Cooling System Support: Capable of accommodating two 240mm radiators simultaneously for advanced liquid cooling setups.
- Component Compatibility: Supports M-ATX/ITX motherboards, GPUs up to 320mm, and PSUs up to 170mm.
- Storage Support: Accommodates one 3.5" HDD and two 2.5" SSDs.
2.2 Case Components
Familiarize yourself with the various parts of your FOIFKIN F100 PC case.

Image 2.2.1: Front view of the FOIFKIN F100 PC Case, showcasing the panoramic tempered glass and pre-installed ARGB fans with internal components like motherboard, GPU, and liquid cooler installed.

Image 2.2.2: Illustration of the tool-free quick release mechanism for the tempered glass panel, allowing easy access to the internal components of the FOIFKIN F100 PC Case.

Image 2.2.3: Close-up view of the pre-installed 120mm ARGB fans within the FOIFKIN F100 PC Case, highlighting their placement and the airflow direction for intake.

Image 2.2.4: Diagram illustrating the front I/O panel of the FOIFKIN F100 PC Case, detailing the locations of the USB 3.0 port, Headphone/Mic Combo Jack, USB 2.0 port, Reset button, and Power button.
3. Specifications
Below are the technical specifications for the FOIFKIN F100 PC Case:
| Feature | Specification |
|---|---|
| Model | F100 |
| Case Type | Mini-Tower (Micro-ATX) |
| Dimensions (L x W x H) | 340mm x 275mm x 330mm (13.4" x 10.8" x 13") |
| Material | Metal, Plastic, Tempered Glass |
| Motherboard Support | M-ATX, ITX |
| GPU Length Clearance | Up to 320mm (12.59") |
| PSU Length Clearance | Up to 170mm (6.7") |
| CPU Cooler Height Clearance | Up to 170mm (6.7") |
| Drive Bays | 1 x 3.5" HDD, 2 x 2.5" SSD |
| Pre-installed Fans | 3 x 120mm ARGB (2 reverse, 1 forward) |
| Fan Support | Up to 7 x 120mm fans (various configurations) |
| Radiator Support | 2 x 240mm / 120mm (top, side) |
| Front I/O Ports | 1 x USB 3.0, 1 x USB 2.0, 1 x Headphone/Mic Combo Jack, Power Button, Reset Button |
| Color | Black |
| Item Weight | 10.48 pounds |

Image 3.1: Detailed diagram illustrating the internal dimensions and component compatibility for the FOIFKIN F100 PC Case, including CPU cooler height, PSU length, GPU length, and fan/radiator placements.
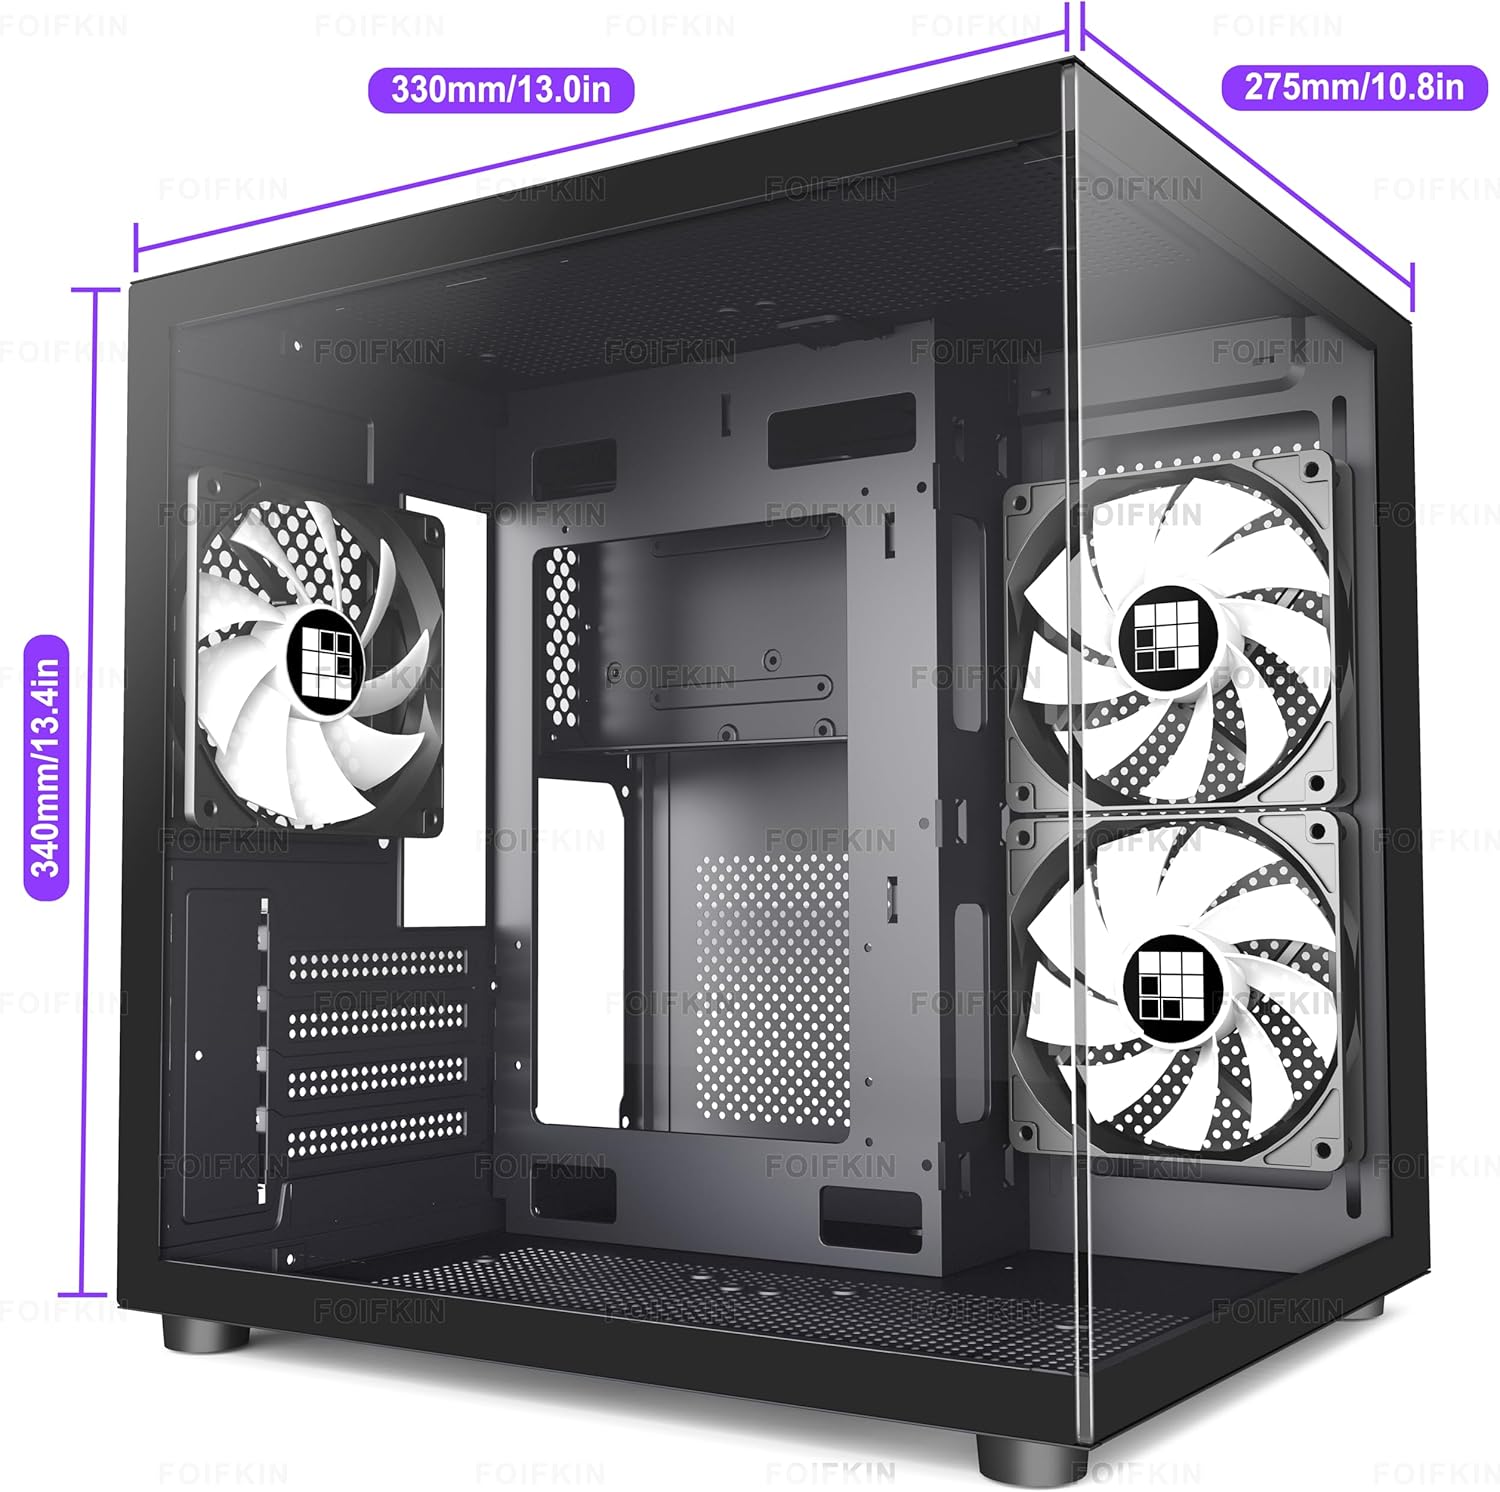
Image 3.2: External dimensions of the FOIFKIN F100 PC Case, showing length (330mm/13.0in), width (275mm/10.8in), and height (340mm/13.4in).
4. Setup and Installation Guide
Follow these steps to install your PC components into the FOIFKIN F100 case.
4.1 Preparation
- Unpack the PC case and remove all packaging materials.
- Place the case on a stable, flat surface.
- Carefully remove the tempered glass side panels. Refer to Image 2.2.2 for the quick release mechanism.
4.2 Motherboard Installation
- Install the I/O shield (if applicable) into the rear opening of the case.
- Align your M-ATX or ITX motherboard with the standoffs inside the case. Ensure all standoffs match the motherboard's mounting holes.
- Secure the motherboard with the provided screws. Do not overtighten.
4.3 Power Supply Unit (PSU) Installation
- Locate the PSU mounting area in the rear chamber of the case.
- Slide the PSU into position from the rear of the case.
- Secure the PSU with screws from the outside of the case.
4.4 Storage Drive Installation
- 3.5" HDD: Locate the HDD cage (if present) or mounting points in the rear chamber. Secure the HDD using screws.
- 2.5" SSDs: Mount SSDs to the designated 2.5" drive trays or mounting points, typically found in the rear chamber or on the motherboard tray. Secure with screws.
4.5 Graphics Card (GPU) Installation
- Remove the necessary PCIe slot covers from the rear of the case.
- Insert your GPU into the appropriate PCIe slot on the motherboard.
- Secure the GPU to the case with screws.
4.6 Cable Management and Front Panel Connections
- Connect all necessary power cables from the PSU to the motherboard, GPU, and storage drives.
- Connect the front panel I/O cables (USB 3.0, USB 2.0, HD Audio, Power SW, Reset SW, Power LED, HDD LED) to their respective headers on the motherboard. Refer to your motherboard manual for exact pin layouts.
- Route cables through the designated cutouts and tie-down points in the rear chamber to maintain a clean build and optimize airflow.
- Connect the pre-installed ARGB fans to your motherboard's ARGB header or a compatible ARGB controller for lighting control.
5. Operating Instructions
5.1 Powering On Your System
- Ensure all components are securely installed and all cables are properly connected.
- Connect your monitor, keyboard, mouse, and other peripherals.
- Plug the power cable into the PSU and a wall outlet.
- Flip the power switch on the back of the PSU to the "ON" position.
- Press the Power button on the front I/O panel of the case (refer to Image 2.2.4).
5.2 Front Panel I/O Usage
- USB 3.0 Port: For high-speed data transfer with compatible devices.
- USB 2.0 Port: For standard data transfer and peripheral connections.
- Headphone/Mic Combo Jack: Connects a headset with a single 3.5mm TRRS plug for audio input and output.
- Reset Button: Initiates a system restart. Use with caution.
- Power Button: Turns the system on or off.
5.3 ARGB Fan Control
The pre-installed ARGB fans can be controlled via your motherboard's ARGB software (e.g., ASUS Aura Sync, MSI Mystic Light Sync, Gigabyte RGB Fusion, ASRock Polychrome Sync) if connected to a compatible 3-pin 5V ARGB header. Consult your motherboard manual for software installation and usage instructions.

Image 5.3.1: Diagram illustrating the high-performance airflow optimization within the FOIFKIN F100 PC Case. Cold air enters from the front and bottom, while hot air is exhausted through the top and rear, ensuring efficient cooling.
6. Maintenance
Regular maintenance helps ensure optimal performance and extends the lifespan of your PC components.
- Dust Cleaning: Periodically clean dust filters and internal components. Dust accumulation can impede airflow and lead to overheating. Use compressed air to remove dust from fans, radiators, and other components.
- Exterior Cleaning: Wipe the exterior surfaces, including the tempered glass panels, with a soft, damp cloth. Avoid abrasive cleaners.
- Cable Management Check: Occasionally check cable routing to ensure no cables are obstructing airflow or fan operation.
7. Troubleshooting
If you encounter issues with your PC case, refer to the following common troubleshooting steps:
- System Not Powering On:
- Ensure the PSU is switched "ON" at the back.
- Verify all power cables (24-pin ATX, 8-pin CPU, PCIe) are securely connected to the motherboard and GPU.
- Check that the front panel Power SW cable is correctly connected to the motherboard header.
- Fans Not Spinning / ARGB Not Lighting Up:
- Ensure fan power cables are connected to appropriate fan headers on the motherboard or fan controller.
- Verify ARGB cables are connected to a 3-pin 5V ARGB header on the motherboard or a compatible controller.
- Check motherboard software for fan speed and ARGB lighting control settings.
- USB Ports Not Working:
- Ensure the front panel USB 3.0 and USB 2.0 cables are correctly connected to their respective headers on the motherboard.
- Check device drivers in your operating system.
- Audio Jack Not Working:
- Verify the HD Audio cable from the front panel is correctly connected to the motherboard's audio header.
- Check audio settings and drivers in your operating system.
For further assistance, please contact FOIFKIN customer support.
8. Warranty and Support
FOIFKIN products are manufactured to high quality standards. For warranty information and technical support, please refer to the warranty card included with your product or visit the official FOIFKIN website. Please retain your proof of purchase for warranty claims.
FOIFKIN Support: Visit the FOIFKIN Store on Amazon
Ask a question about this manual
Ask about setup, troubleshooting, compatibility, parts, safety, or missing instructions. Manuals+ will review the question and use this page’s manual context to help answer it.