
1. Introduction
Thank you for choosing the DreamQuest Mini PC Intel N95. This compact and powerful mini computer is designed for various applications, from office tasks to home entertainment, offering a complete Windows/Linux desktop experience in a small form factor. This manual provides essential information for setting up, operating, and maintaining your device.
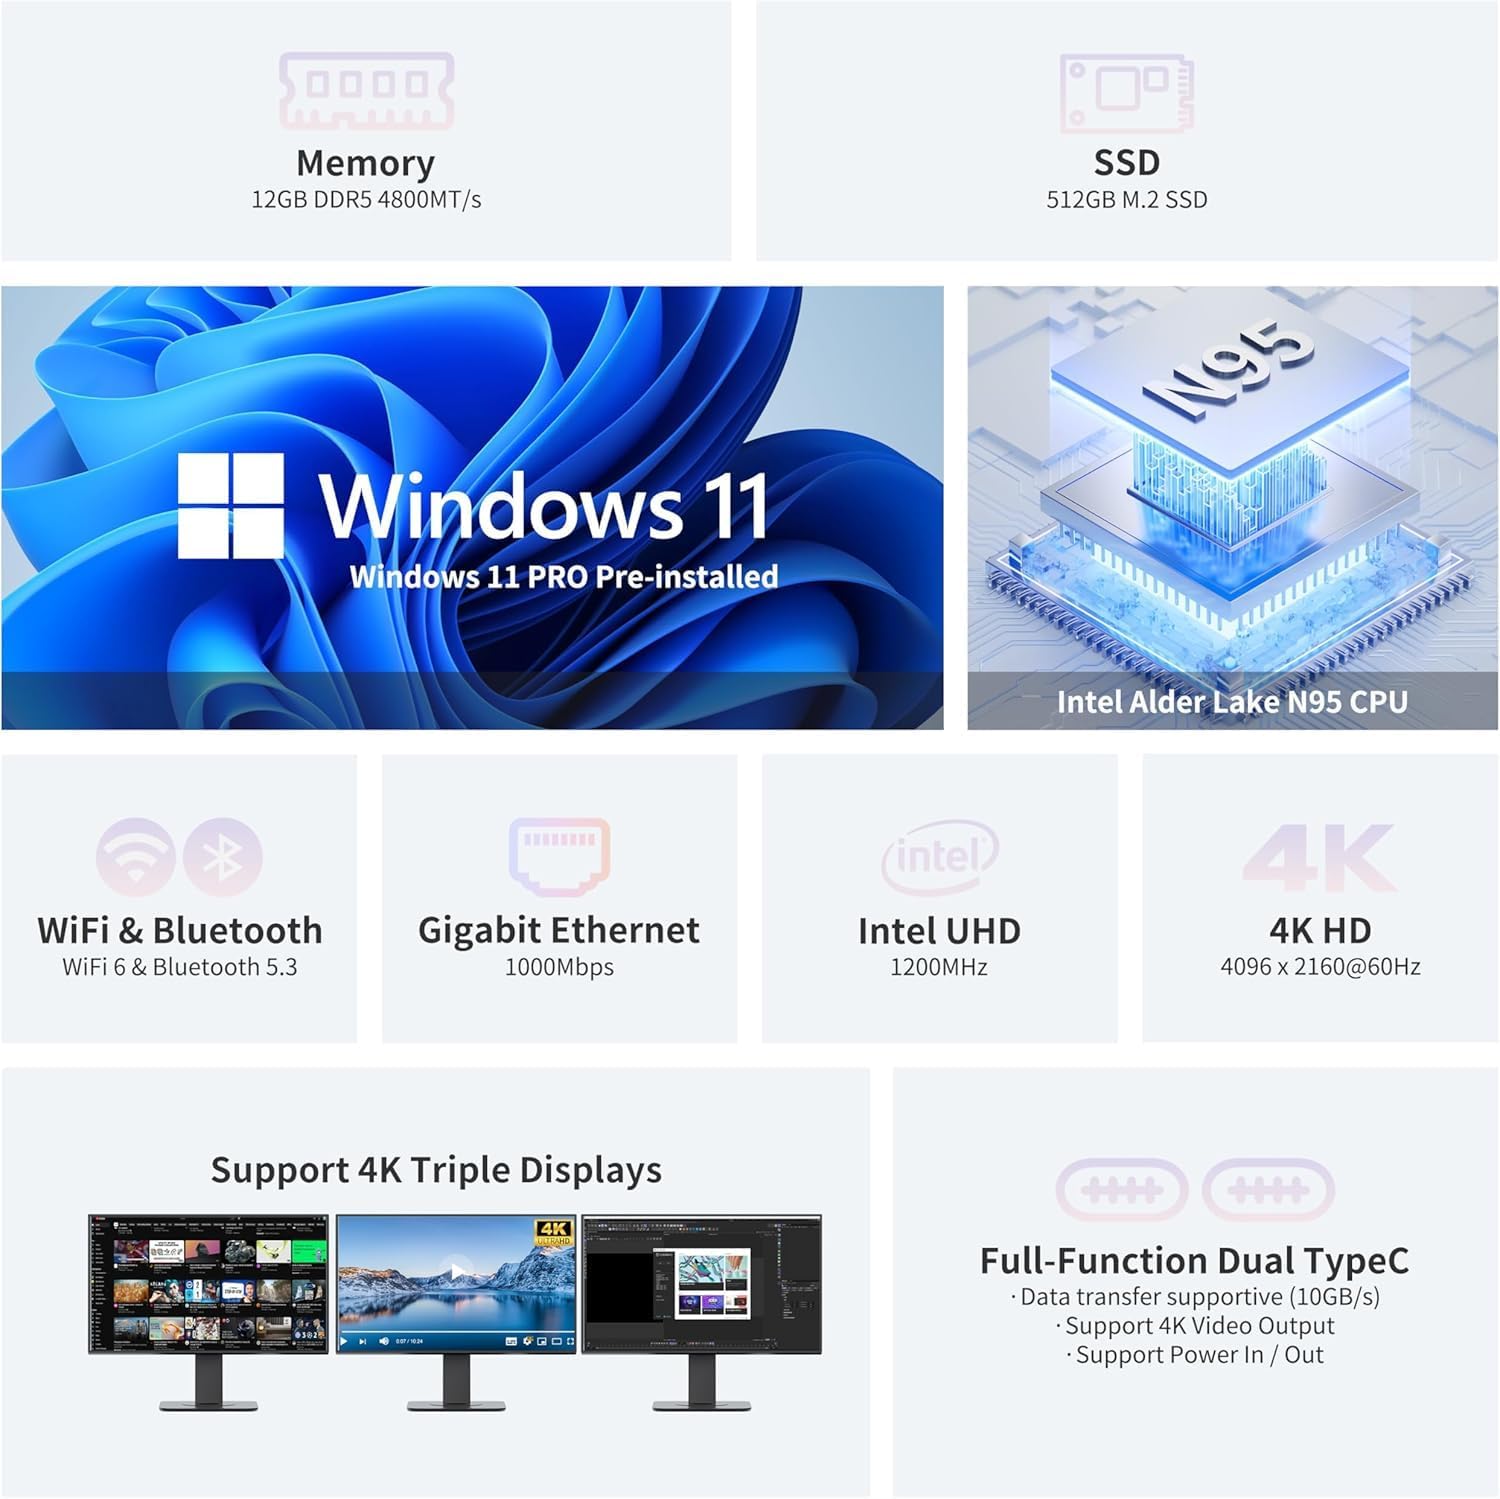
Image 1.1: Overview of DreamQuest Mini PC key features.
Key features include:
- Processor: Intel N95 (up to 3.4GHz) with Intel UHD Graphics 1.20GHz.
- Memory: 12GB DDR5 RAM (4800MHz).
- Storage: 512GB M.2 2280 SSD, expandable up to 2TB.
- Operating System: Pre-installed Windows 11 Pro, compatible with Linux and Ubuntu.
- Connectivity: WiFi 6, Bluetooth 5.3, Gigabit Ethernet.
- Display Output: Dual Type-C and Dual HDMI 2.0 ports supporting triple 4K@60Hz displays.
- Ports: 4x USB 3.2 Gen 2 (10Gbps), 2x Type-C (10Gbps, PD IN 12V@3A, PD OUT 5V@3A, Video Out), Audio Output.
- Cooling: Built-in active cooling fan.
2. What's Included
Upon unboxing your DreamQuest Mini PC, please verify that all the following items are present:

Image 2.1: Items included in the package.
- DreamQuest Mini PC Unit
- User Manual
- HD Cables (HDMI)
- Power Adapter (US Plug Charger)
3. Setup Instructions
Follow these steps to set up your DreamQuest Mini PC:
- Connect to a Display: Use an HDMI cable to connect the Mini PC to your monitor, TV, or projector. The device supports up to three 4K@60Hz displays via its two HDMI 2.0 ports and two full-featured Type-C ports.
- Connect Peripherals: Plug in your keyboard and mouse to the available USB 3.2 ports.
- Network Connection: For a wired connection, connect an Ethernet cable to the Gigabit Ethernet port. For wireless, ensure your WiFi network is available after initial boot.
- Power On: Connect the power adapter to the Mini PC's power input and then plug it into a wall outlet. The device will automatically power on or can be powered on using the power button.
- Initial Boot: The Mini PC comes with Windows 11 Pro pre-installed. Follow the on-screen instructions to complete the initial Windows setup.
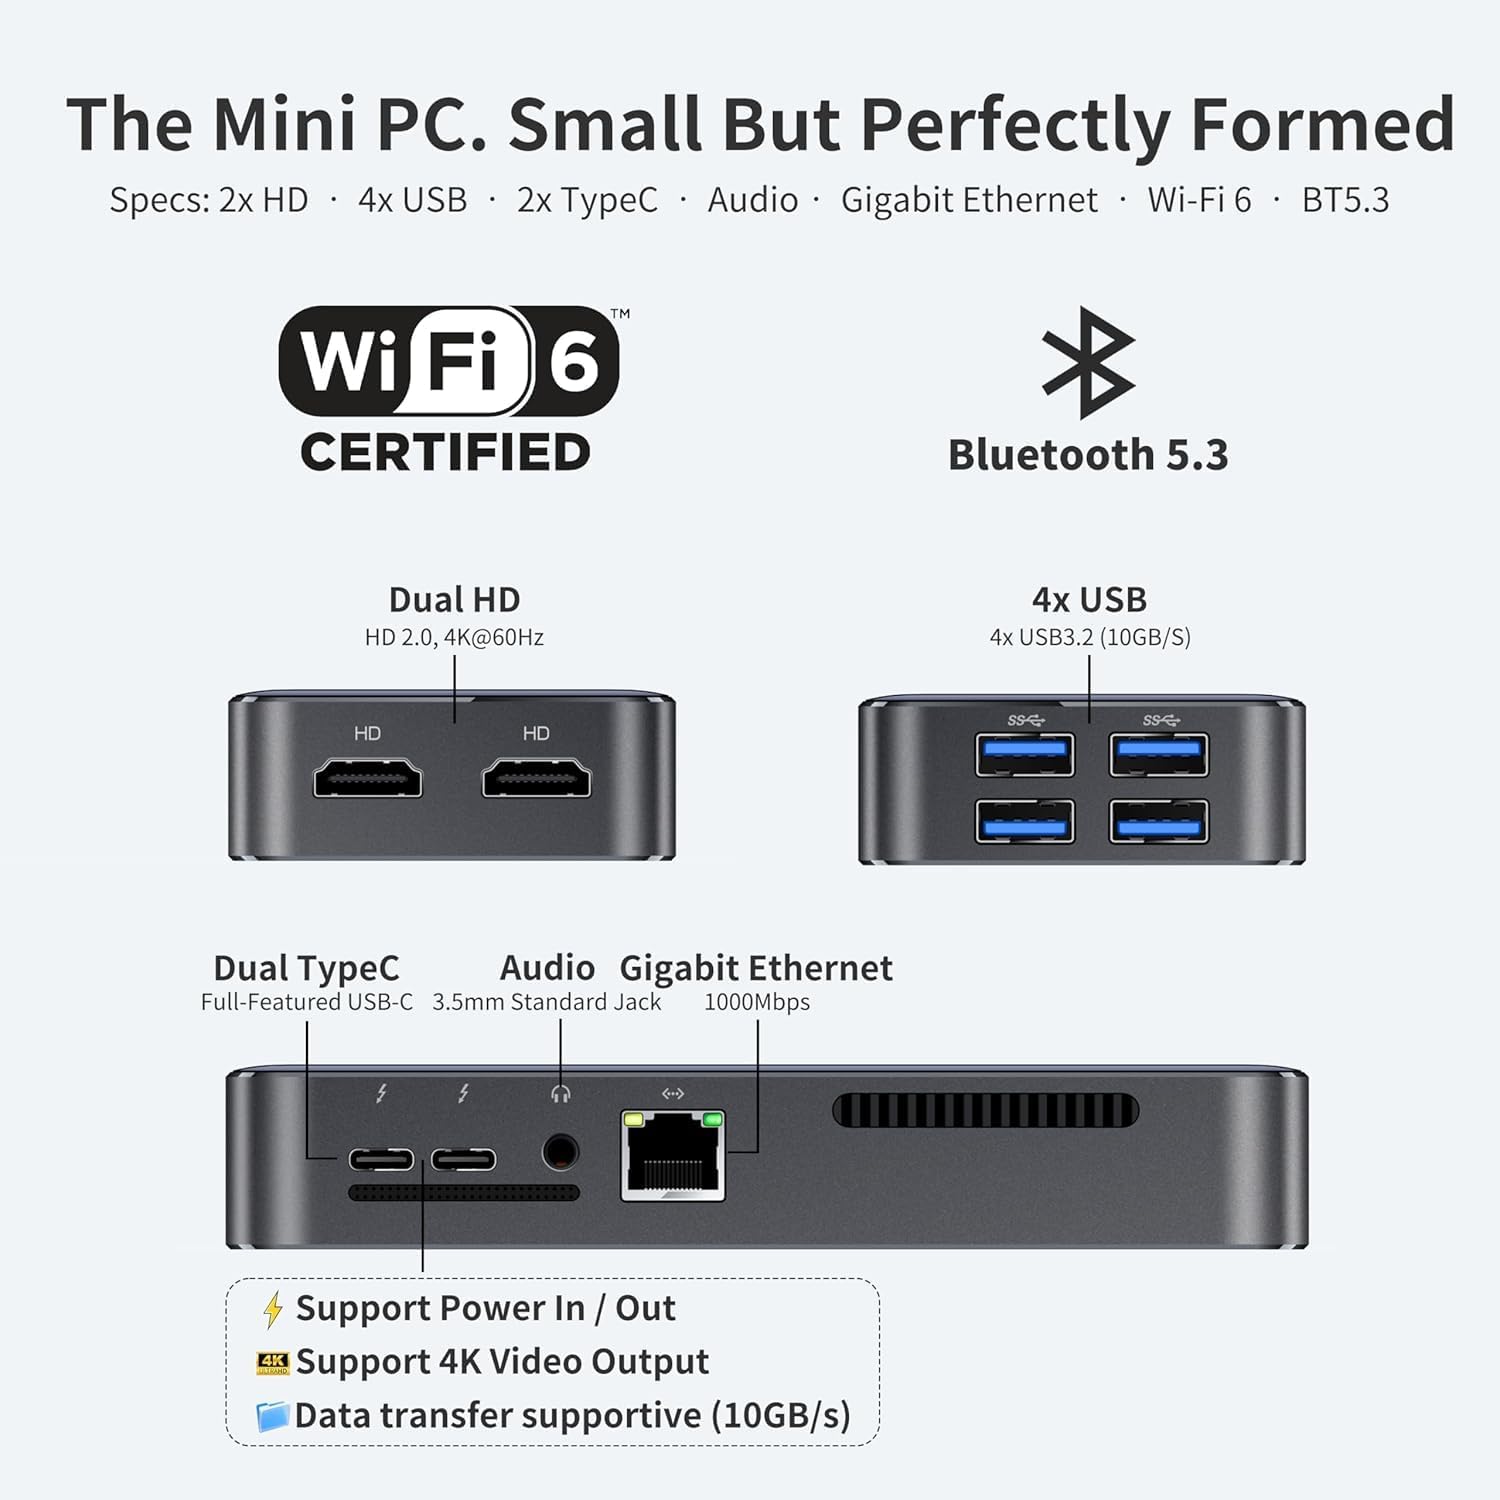
Image 3.1: Port layout for connecting peripherals and displays.
Important Note:
Only Type-C chargers that meet 12V/3A (36W) are supported for stable operation when using Type-C for power input.
4. Operating Instructions
4.1. Display Configuration
The DreamQuest Mini PC supports up to three independent 4K@60Hz displays. Connect your displays using the available HDMI and Type-C ports. Once connected, Windows will automatically detect the displays. You can configure display settings (resolution, orientation, extended/duplicate mode) via Windows Display Settings.

Image 4.1: Triple-screen display capability.
4.2. LED Light Control
The Mini PC features an LED lighting indicator. To control the LED light (ON/OFF), follow these steps:
- Restart the Mini PC.
- During startup, repeatedly press the Delete key to enter the BIOS setup.
- Navigate through the BIOS menu to find the LED Light setting.
- Set the LED Light option to Enabled or Disabled as desired.
- Save changes and exit the BIOS.
4.3. Operating System Compatibility
While Windows 11 Pro is pre-installed, the DreamQuest Mini PC is fully compatible with other operating systems such as Linux and Ubuntu. Users can install their preferred system for various uses.

Image 4.2: Supported operating systems and external devices.
5. Specifications
Detailed technical specifications for the DreamQuest Mini PC Intel N95:
| Feature | Specification |
|---|---|
| Model Number | N95 |
| CPU Model | Intel N95 |
| CPU Speed | Up to 3.4 GHz |
| RAM Memory Installed Size | 12 GB DDR5 |
| Memory Speed | 4800 MHz |
| Memory Storage Capacity | 512 GB M.2 SSD (Expandable up to 2TB) |
| Operating System | Windows 11 Pro |
| Graphics Card Description | Integrated Intel UHD Graphics |
| Display Resolution Maximum | 3840x2160 (4K@60Hz) |
| Video Output Interface | 2x HDMI, 2x USB-C (Video Out) |
| Total USB Ports | 4x USB 3.2 Gen 2 (10Gbps) |
| Type-C Ports | 2x Full-featured Type-C (10Gbps, PD IN/OUT, Video Out) |
| Network Connectivity | WiFi 6, Bluetooth 5.3, Gigabit Ethernet |
| Cooling Method | Smart Fan (Active Cooling) |
| Parcel Dimensions | 16.8 x 14.4 x 6.6 cm |
| Item Weight | 550 g |
6. Maintenance
To ensure the longevity and optimal performance of your DreamQuest Mini PC, consider the following maintenance tips:
- Keep it Clean: Regularly clean the exterior of the Mini PC with a soft, dry cloth. Ensure ventilation openings are free from dust and debris to prevent overheating.
- Optimal Airflow: Place the Mini PC in a well-ventilated area. Avoid obstructing the cooling fan vents. The built-in smart fan adjusts based on CPU temperature to maintain performance and prevent overheating.
- Software Updates: Keep your operating system and drivers updated. Regular updates improve security, performance, and compatibility.
- Data Backup: Periodically back up important data to an external drive or cloud storage to prevent data loss.
- Power Management: Use the provided power adapter. Avoid frequent abrupt power cuts; always shut down the system properly.
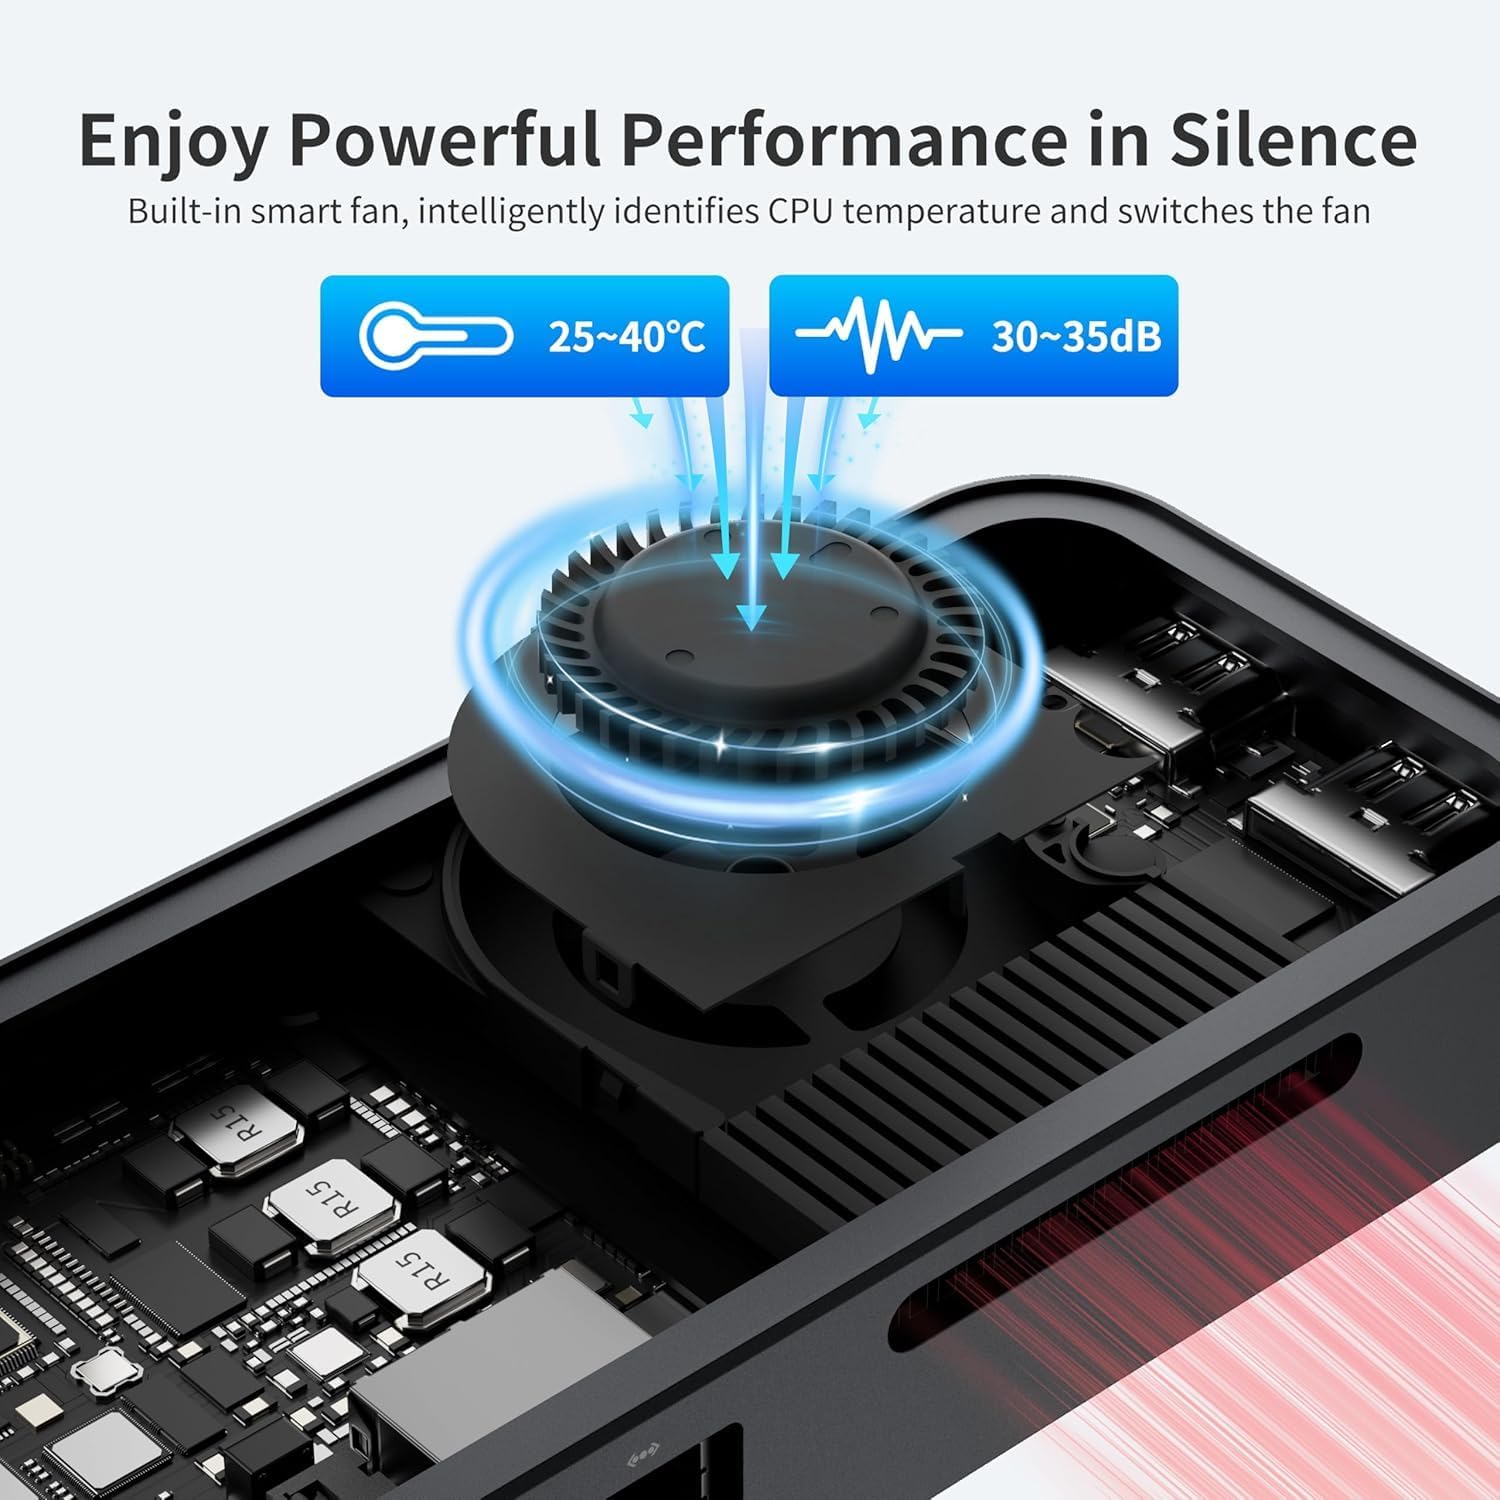
Image 6.1: Internal cooling fan for powerful performance in silence.
7. Troubleshooting
If you encounter issues with your DreamQuest Mini PC, refer to the following common solutions:
- No Display Output:
- Ensure all display cables (HDMI, Type-C) are securely connected to both the Mini PC and the monitor.
- Verify the monitor is set to the correct input source.
- Test with a different cable or monitor if possible.
- Windows Not Activated:
- While Windows 11 Pro is pre-installed, it may require online activation. Ensure your Mini PC is connected to the internet.
- If activation issues persist, contact Microsoft support or the seller for assistance.
- Wi-Fi or Bluetooth Connectivity Issues:
- Go to Windows Settings > Network & Internet (for Wi-Fi) or Bluetooth & devices (for Bluetooth).
- Toggle Wi-Fi or Bluetooth off and then back on.
- Ensure drivers are up to date. You can check Device Manager for any exclamation marks next to network or Bluetooth adapters.
- Restart the Mini PC.
- Excessive Fan Noise:
- Ensure the Mini PC is placed on a flat, hard surface with adequate ventilation.
- Check for dust accumulation in the vents and clean them if necessary.
- High CPU usage can cause the fan to spin faster. Close unnecessary applications to reduce load.
- System Crashes or Blue Screens:
- Ensure all Windows updates are installed.
- Update graphics drivers directly from the Intel website if Windows Update drivers cause instability.
- If issues persist, consider performing a system restore or reinstalling Windows.
8. Warranty and Support
Your DreamQuest Mini PC is backed by a 1-year warranty from the date of purchase.
To claim warranty support or for any questions or concerns, please follow these steps:
- Log in to your Amazon account.
- Go to "Your Orders."
- Find the order for your DreamQuest Mini PC.
- Click on "Contact Seller."
Our support team is ready to assist you with any product-related inquiries.

