
Introduction
Thank you for choosing the Greteefor 3-Stage High Pressure PCP Hand Pump. This manual provides essential information for the safe and effective assembly, operation, and maintenance of your pump. Please read these instructions carefully before use and retain them for future reference.
This pump is designed to deliver up to 4,500 PSI (310 BAR) of pressure, suitable for PCP air rifles, airguns, HPA tanks, and paintball tanks. Its 3-stage compression system ensures efficient and smooth operation.

Image: Greteefor PCP Hand Pump, highlighting its 4500 PSI capability and 3-stage design.
Safety Information
Always prioritize safety when operating high-pressure equipment. Failure to follow these safety guidelines may result in serious injury or damage to the equipment.
- Read the Manual: Understand all instructions and warnings before operating the pump.
- Eye Protection: Always wear appropriate eye protection when operating the pump.
- Pressure Limits: Never exceed the maximum pressure rating of the pump (4,500 PSI / 310 BAR) or the pressure rating of the device being filled.
- Stable Surface: Operate the pump on a stable, flat, and non-slip surface.
- Proper Connection: Ensure all connections are secure and leak-free before pressurizing.
- Moisture Filter: The integrated oil-moisture filter helps protect your equipment. Regularly check and maintain it.
- Depressurize After Use: Always release all pressure from the pump after each use and before storage.
- Children and Pets: Keep the pump out of reach of children and pets.
Setup and Assembly
Your Greteefor PCP Hand Pump is designed for quick and easy setup, with critical high-pressure components pre-installed to minimize assembly and reduce the risk of leaks.
- Attach the Handle: Securely attach the handle to the top of the pump shaft. Ensure it is firmly seated and tightened. The TPR anti-slip grip provides comfort and stability during operation.
- Unfold the Footplate: Unfold the 90-degree footplate to provide a stable base for pumping. Ensure it is fully extended and locked into position.
- Inspect Connections: Verify that the quick-connect fitting and pressure gauge are securely attached and free from damage. These key parts are pre-installed to ensure a reliable seal.

Image: Close-up view of the pre-installed quick-connect interface, emphasizing ease of setup and reduced leak risk.

Image: The pump with its wide, stable, 90-degree foldable foot pedal and TPR anti-slip grip handle, ready for use.
The pump comes with an accessory kit, organized into two bags (frequent-use and occasional-use), containing spare O-rings and other components for maintenance.

Image: The PCP hand pump displayed with its organized accessory kits, including spare parts for maintenance.
Operating Instructions
Follow these steps for safe and efficient operation of your PCP hand pump:
- Connect to Device: Connect the 8mm quick-connect fitting to your PCP air rifle, airgun, or HPA tank. Ensure the connection is secure.
- Tighten Release Valve: Locate the pressure release valve (usually at the base of the pump or on the hose) and ensure it is fully tightened before beginning to pump.
- Begin Pumping: Place your feet firmly on the footplate. Grip the handle with both hands. For smoother and easier pumping, pull the handle up approximately 90% of its full stroke, then press down fully. Maintain a steady rhythm.
- Monitor Pressure: Observe the fluorescent 0–6000 PSI gauge (with dual PSI & BAR scales) to monitor the pressure as you pump. Do not exceed the maximum pressure rating of your device or the pump (4,500 PSI).
- Release Pressure: Once the desired pressure is reached, stop pumping. Slowly loosen the pressure release valve to depressurize the hose and pump. You will hear air escaping.
- Disconnect: Once all pressure is released, disconnect the quick-connect fitting from your device.
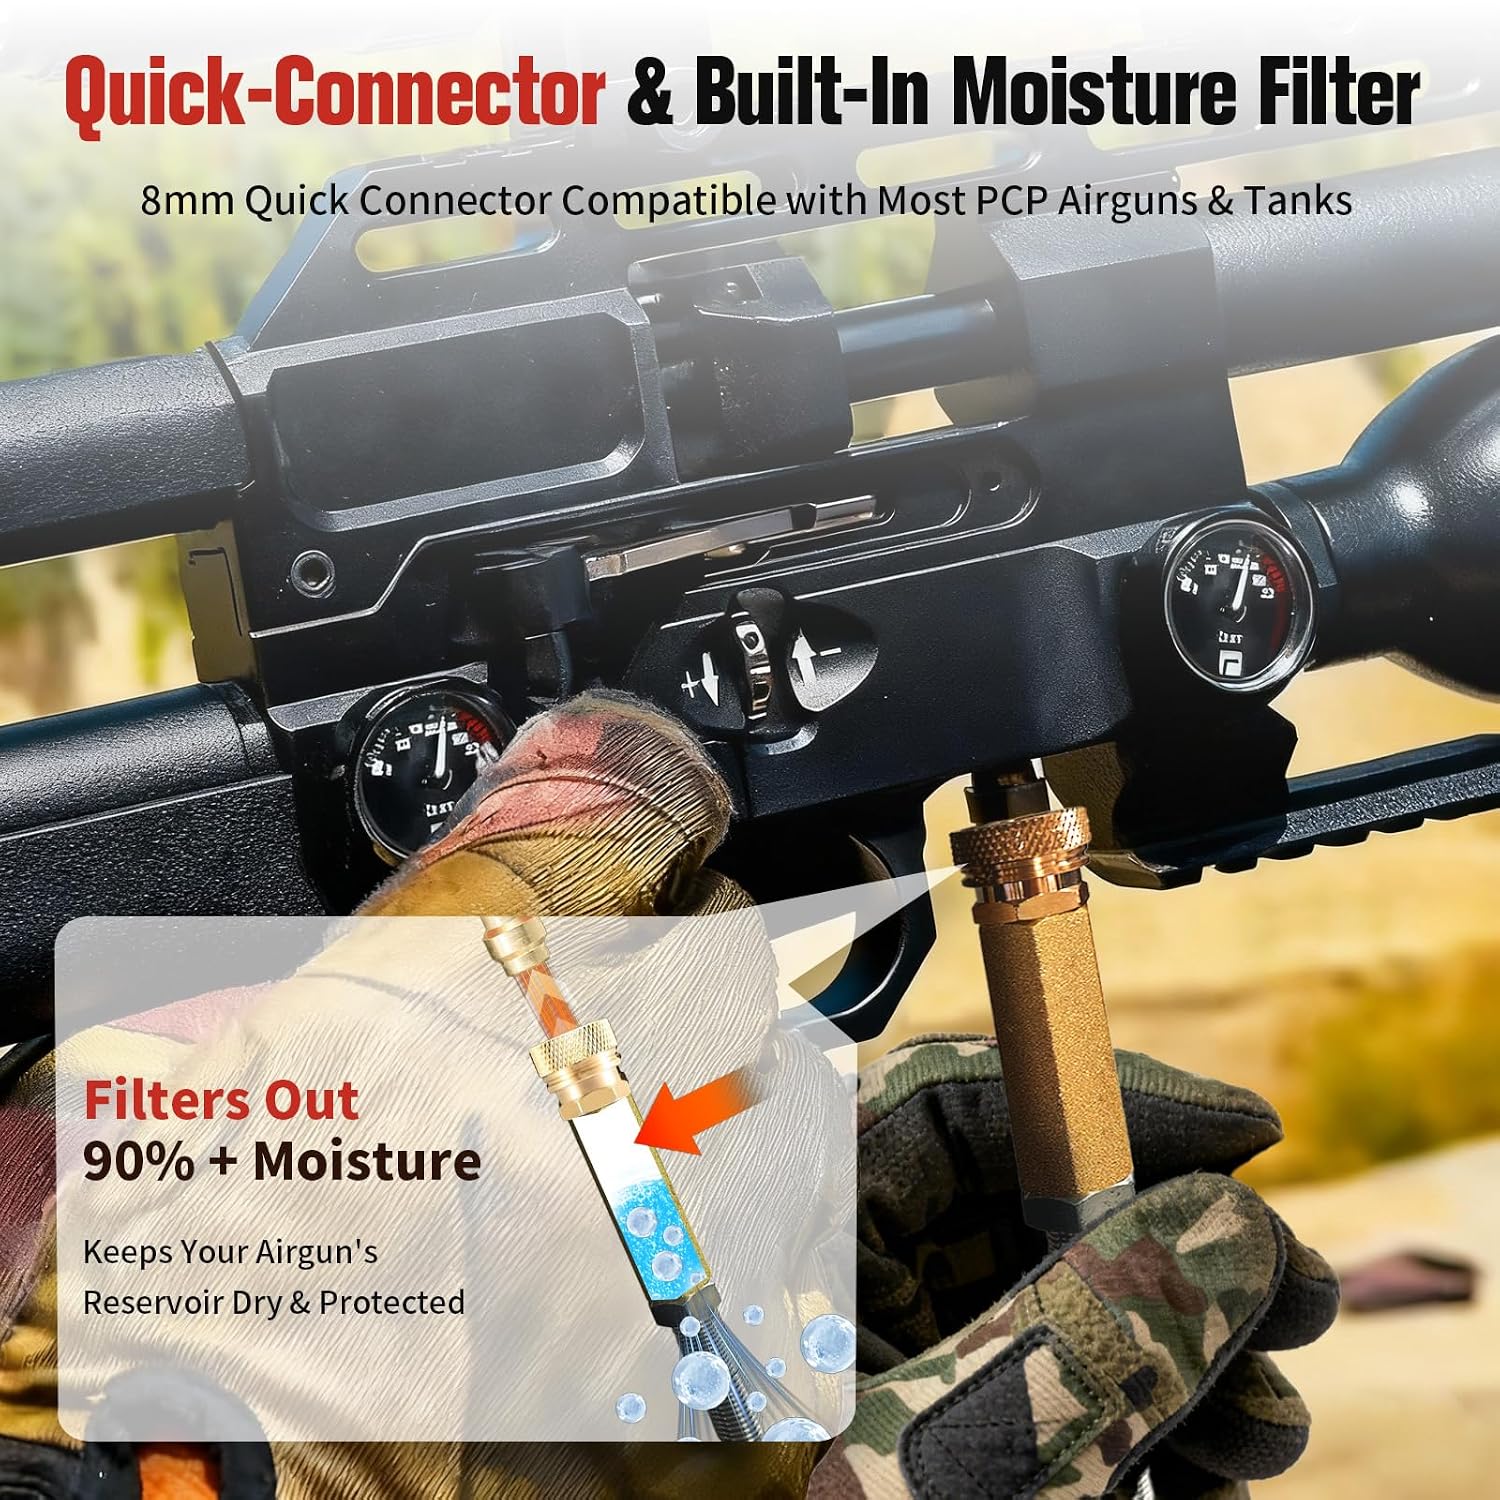
Image: The quick-connector and built-in moisture filter connected to an airgun, demonstrating the connection point and filtration system.
Maintenance
Regular maintenance ensures the longevity and reliable performance of your Greteefor PCP Hand Pump.
- Oil-Moisture Filter: The pump features an integrated oil-moisture filter designed to deliver clean, dry air, protecting your PCP airgun or rifle from moisture damage. Periodically check and replace the filter elements as needed. Refer to the accessory kit for spare filter components.
- O-Ring Inspection: Regularly inspect all O-rings for wear, cracks, or damage. Replace worn O-rings using the provided accessory kit to prevent air leaks.
- Lubrication: Apply a small amount of silicone grease to moving parts and O-rings as recommended in the accessory kit instructions to ensure smooth operation and prevent wear.
- Cleaning: Keep the exterior of the pump clean and free from dirt and debris. Wipe down with a damp cloth as needed.
- Storage: When not in use, always store the PCP hand pump in a depressurized state. Fold the footplate and store accessories neatly in their designated bags to reduce clutter and protect components. Store in a dry, cool place.
Troubleshooting
This section addresses common issues you might encounter with your PCP hand pump.
- Difficulty Pumping / Low Pressure:
- Ensure the pressure release valve is fully tightened.
- Check all connections for leaks. Tighten any loose fittings.
- Inspect O-rings for damage and replace if necessary.
- Verify that the device being filled is not already at maximum pressure.
- Air Leaks:
- Listen for hissing sounds. Apply a small amount of soapy water to connections to identify bubbles indicating a leak.
- Tighten all quick-connect fittings and hose connections.
- Replace any damaged O-rings.
- Moisture in Air:
- The integrated oil-moisture filter is designed to prevent this. Ensure the filter elements are clean and replaced regularly.
- Avoid pumping in high humidity environments if possible.
If you encounter issues not covered here or require further assistance, please contact Greteefor customer support.
Specifications
| Feature | Detail |
|---|---|
| Model Number | NS-PCPAP-3S-B |
| Brand | Greteefor |
| Pressure Rating | Up to 4,500 PSI (310 BAR) |
| Compression Stages | 3-Stage |
| Material | Black Anodized Aluminium |
| Item Weight | 1.81 kg (approximately 4 lbs) |
| Product Dimensions | 62L x 5.1W x 25.9H Centimeters |
| Connector Type | 8mm Quick-Connect |
| Gauge | Fluorescent 0–6000 PSI (0–4500 PSI working range) with dual PSI & BAR scales |
| Filter | Integrated Oil-Moisture Filter |
| Included Components | PCP Hand Pump, Accessory Kit (main-use & spare bags) |
Warranty and Support
Specific warranty details are not provided in the product information. For warranty claims, technical support, or replacement parts, please contact Greteefor customer service directly through their official channels or the retailer where the product was purchased.
Always refer to the manufacturer's website or product packaging for the most up-to-date warranty information and support contacts.