
1. Introduction
Thank you for choosing the AQUASTRONG 16in Sand Filter Pump. This manual provides essential information for the safe and efficient operation, installation, and maintenance of your sand filter pump. Please read these instructions thoroughly before installation and use, and retain them for future reference. This pump is designed for above-ground pools up to 16,000 gallons, ensuring improved circulation and filtration for crystal-clear water.
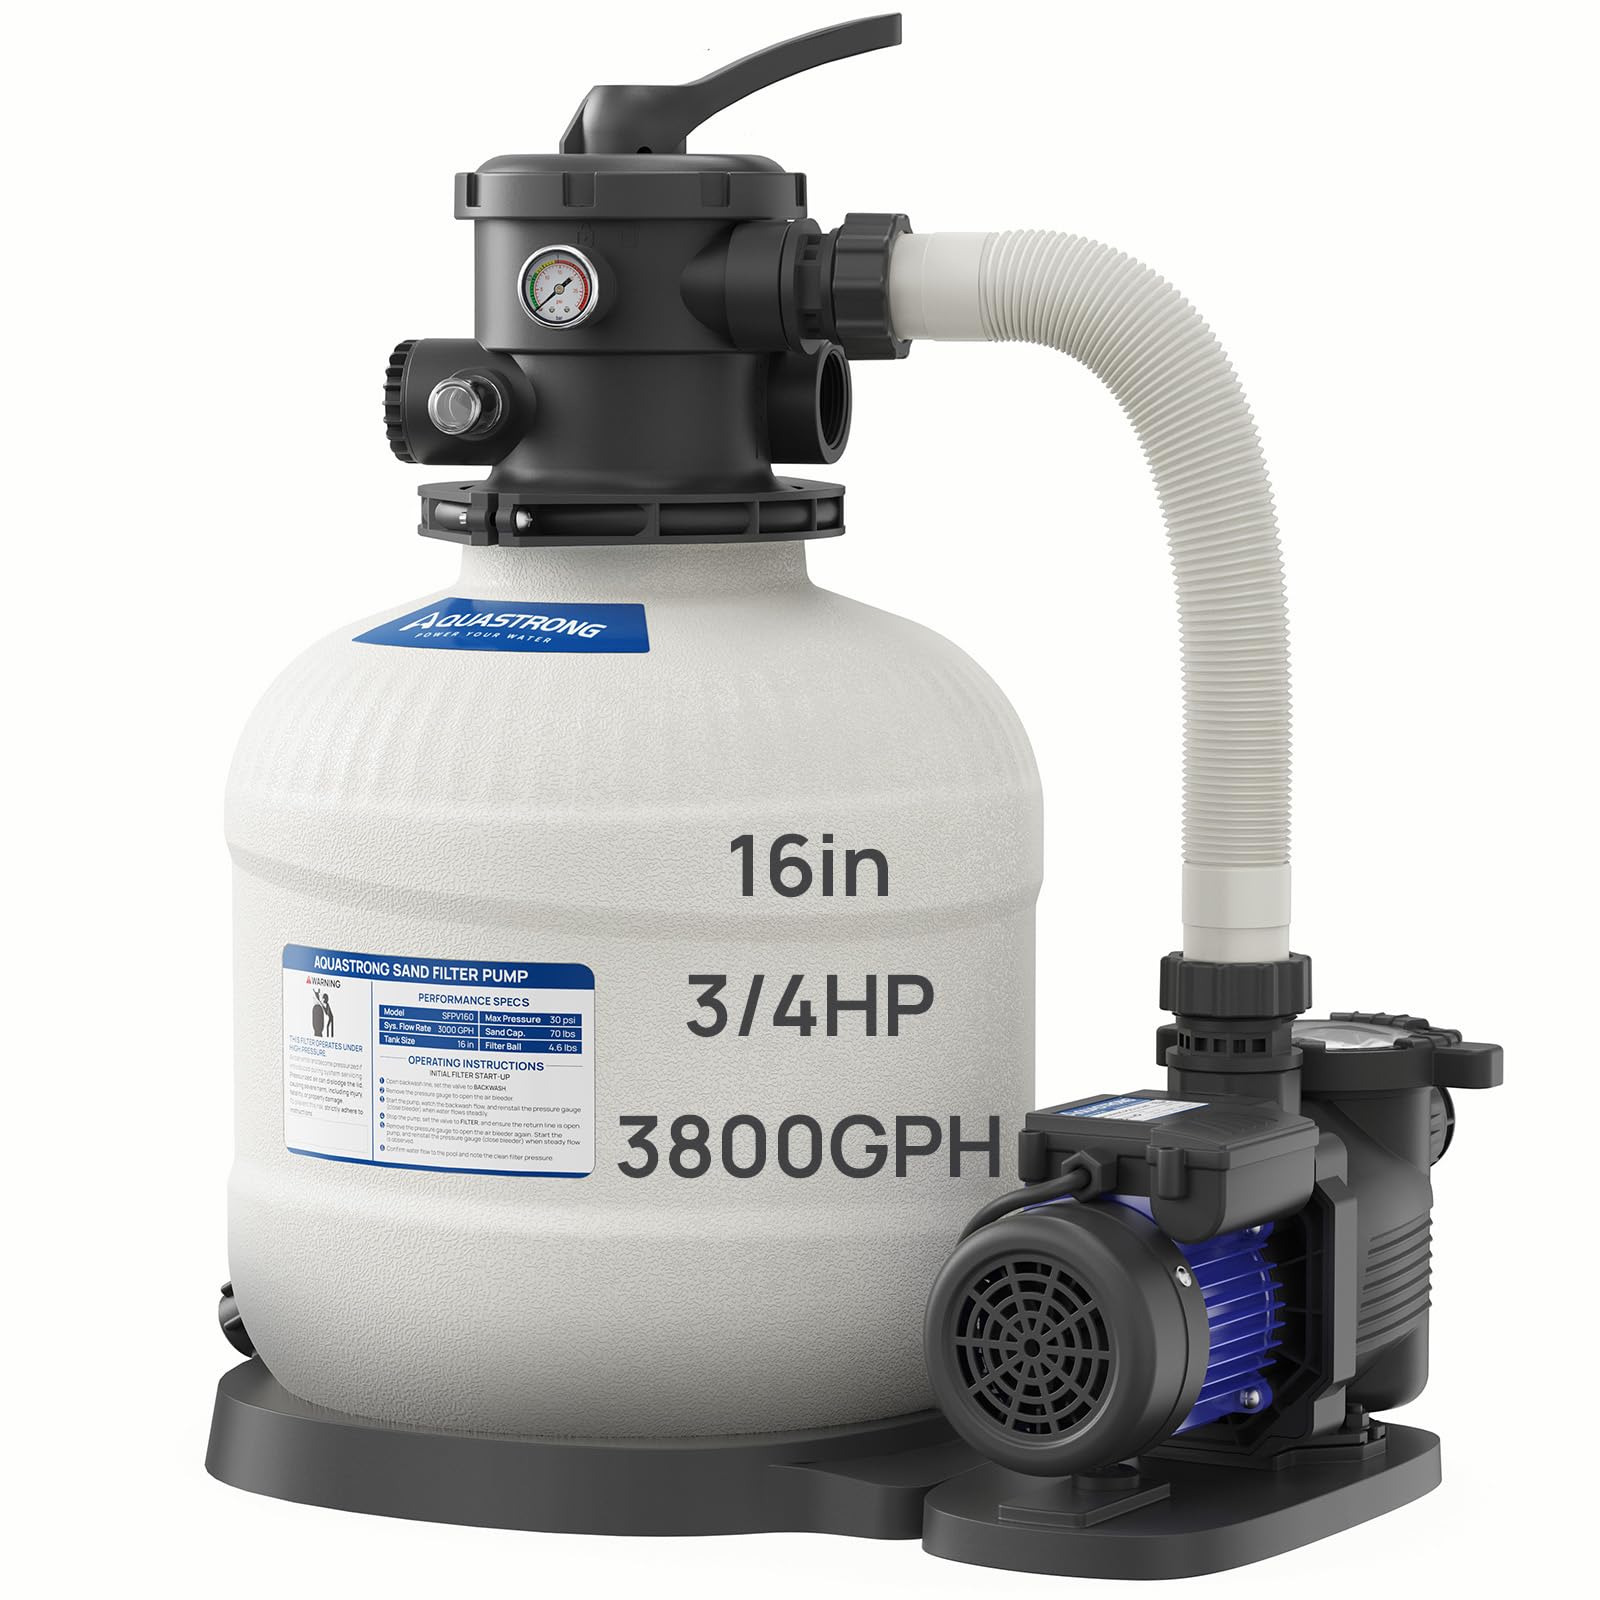
Image: The AQUASTRONG 16in Sand Filter Pump, showcasing the filter tank, 6-way valve, and pump motor unit.
2. Safety Information
WARNING: Failure to follow these instructions can result in serious injury or death.
- Always disconnect power to the pump before performing any service or maintenance.
- Ensure the pump is installed on a solid, level surface, away from the pool edge.
- Do not operate the pump if the power cord or plug is damaged.
- Keep children and pets away from the pump during operation.
- Never switch the 6-way valve position while the pump is running. Always turn off the pump first.
- Ensure proper grounding and electrical connections according to local codes.
- Use only recommended filter media (pool sand or filter balls) and quantities.
3. Package Contents
Verify that all components are present and undamaged before beginning installation:
- Sand Filter Tank (16-inch)
- Pump Motor (3/4 HP)
- 6-Way Multi-Port Valve
- Pressure Gauge
- Hose Adapters (three 1.5-inch and 1.25-inch with clamps)
- 1.5-inch Adapter Conversion Kit (five pieces)
- Base Platform
- Interconnecting Hose
- User Manual
4. Setup and Installation
Follow these steps for proper installation of your AQUASTRONG sand filter pump. Refer to the installation video for visual guidance.
Video: AQUASTRONG Sand Filter Pump Installation Quick Guide. This video provides a step-by-step visual walkthrough of the sand filter pump assembly and connection process.
- Position the Pump: Place the pump and filter tank on a firm, level surface near your pool, ensuring it is below the pool's water level for optimal priming.
- Secure Pump to Base: Attach the pump motor unit to the base platform.
- Add Filter Media: Remove the top cover of the filter tank. Carefully add the recommended amount of filter sand (100 lbs) or filter balls (3.1 lbs). Ensure the standpipe is centered during this process.
- Install 6-Way Valve: Place the 6-way valve onto the top of the filter tank, aligning it with the standpipe. Secure it firmly with the provided clamp or bolts.
- Connect Hoses:
- Connect the pool's skimmer line (suction) to the pump inlet.
- Connect the pump outlet to the 'PUMP' port on the 6-way valve.
- Connect the 'RETURN' port on the 6-way valve to the pool's return line.
- Connect a backwash hose to the 'WASTE' port on the 6-way valve, directing it to an appropriate drainage area.

Image: Close-up view of the 1.25-inch and 1.5-inch hose adapters and conversion kit, demonstrating how to connect hoses to the filter pump system.
- Install Pressure Gauge: Screw the pressure gauge into the designated port on the 6-way valve.
- Prime the Pump: Fill the pump's strainer basket with water until it overflows. Replace the lid.
- Electrical Connection: Connect the pump to a properly grounded electrical outlet.

Image: Visual representation of the four main installation steps: securing the pump, adding filter media, installing the valve, and starting the system.
5. Operating Instructions
The 6-way multi-port valve allows for various operational modes. Always turn off the pump before changing the valve position.

Image: Diagram illustrating the six functions of the multi-port valve: Filter, Backwash, Rinse, Waste, Recirculate, and Closed.
- FILTER: (Normal filtration) Water is pumped through the sand bed, filtered, and returned to the pool. This is the primary operating mode.
- BACKWASH: (Cleaning filter) Reverses the flow of water through the sand bed to flush out trapped debris to the waste port. Perform when pressure gauge reads 8-10 PSI above starting pressure.
- RINSE: (After backwash) Used after backwashing to flush out any remaining dirty water from the valve and sand bed to the waste port, preventing it from returning to the pool.
- WASTE: (Bypasses filter) Drains water directly from the pool to the waste port without passing through the filter. Useful for vacuuming heavy debris or lowering pool water level.
- RECIRCULATE: (Bypasses filter) Circulates pool water without filtering it through the sand bed. Useful for mixing chemicals.
- CLOSED: (Shuts off flow) Closes all flow to the filter and pump. Use this setting only when the pump is off and for servicing the pump or filter.
Monitor the pressure gauge regularly. An increase in pressure indicates that the filter needs backwashing.

Image: Close-up of the pressure gauge, indicating the system pressure during operation.
6. Maintenance
Regular maintenance ensures optimal performance and longevity of your sand filter pump.
- Backwashing: When the pressure gauge reads 8-10 PSI above its clean starting pressure, it's time to backwash. Turn off the pump, set the valve to 'BACKWASH', turn on the pump, and run until the water in the sight glass is clear (approx. 2-3 minutes). Turn off the pump.
- Rinsing: After backwashing, turn off the pump, set the valve to 'RINSE', turn on the pump, and run for 30-60 seconds. Turn off the pump.
- Return to Filter: Turn off the pump, set the valve to 'FILTER', and turn on the pump for normal operation.
- Clean Strainer Basket: Periodically check and clean the pump's detachable strainer basket to remove large debris like leaves and hair. Turn off the pump, close necessary valves, remove the basket lid, empty debris, and replace.

Image: Illustration of the detachable basket design, showing how to access and clean the basket to remove debris.
7. Troubleshooting
| Problem | Possible Cause | Solution |
|---|---|---|
| Low water flow / Poor filtration | Clogged filter sand; Clogged strainer basket; Air leak in suction line; Low water level in pool. | Backwash and rinse filter; Clean strainer basket; Check all connections for leaks; Ensure adequate pool water level. |
| Pump not priming | Strainer basket not full of water; Air leak in suction line; Clogged impeller. | Fill strainer basket with water; Check and tighten all connections; Inspect and clean impeller. |
| Water returning to pool is cloudy | Filter sand needs backwashing; Incorrect filter media; Damaged internal filter components. | Backwash and rinse thoroughly; Verify correct type and amount of filter sand; Contact support if internal damage is suspected. |
| Pump not starting | No power; Thermal overload tripped; Motor issue. | Check power supply and circuit breaker; Allow motor to cool and reset; Contact qualified electrician or support. |
8. Specifications

Image: Overview of the AQUASTRONG 16in Sand Filter Pump, highlighting its dimensions and key performance specifications.
| Feature | Detail |
|---|---|
| Brand | AQUASTRONG |
| Model Number | SFPV160 |
| Tank Size | 16 inches |
| Horsepower | 0.75 HP |
| Pump Flow Rate | 3800 GPH |
| System Flow Rate | 3000 GPH |
| Max Pool Capacity | Up to 16,000 Gallons |
| Sand Capacity | 100 lbs |
| Filter Ball Capacity | 3.1 lbs |
| Valve Type | 6-Way Multi-Port Valve |
| Material | Plastic (UV-resistant, anti-corrosion) |
| Power Source | AC |
| Item Weight | 16.18 Kilograms |
| Manufacturer | Shandong Penghui Environmental Technology Co., Ltd |
9. Warranty and Support
The AQUASTRONG 16in Sand Filter Pump comes with a Two-Year Warranty from the date of purchase. This warranty covers manufacturing defects and ensures peace of mind regarding the product's quality and performance.
For technical assistance, troubleshooting not covered in this manual, or warranty claims, please contact AQUASTRONG customer service. Refer to your purchase documentation or the AQUASTRONG official website for contact details.


