
Introduction
This manual provides detailed instructions for the setup, operation, maintenance, and troubleshooting of your Pisichen 24-inch Touchscreen Monitor with Built-in Webcam (Model 238TS-CMR). This monitor features a 2K QHD (2560x1440) resolution display with a 100Hz refresh rate, 10-point multi-touch functionality, and an integrated pop-up webcam, designed to enhance your productivity and interactive experience.
Safety Information
- Always place the monitor on a stable, flat surface to prevent accidental falls.
- Do not expose the monitor to rain, moisture, or extreme temperatures.
- Avoid blocking ventilation openings to prevent overheating.
- Use only the power adapter supplied with the monitor.
- Disconnect the power cable from the outlet before cleaning or if the monitor will be unused for an extended period.
- Do not attempt to disassemble or repair the monitor yourself. Refer all servicing to qualified personnel.
Package Contents
Please check that all items are present in your package:
- Pisichen 24-inch Touchscreen Monitor (Model 238TS-CMR)
- Monitor Stand (Base and Arm)
- Power Adapter and Cable
- HDMI Cable
- USB-C to USB-C Cable
- USB-A to USB-B Cable (for touch functionality with non-USB-C devices)
- User Manual (this document)
Setup
1. Stand Assembly
- Carefully remove the monitor from its packaging and place it face down on a soft, clean surface to prevent scratches.
- Attach the stand arm to the back of the monitor using the provided screws.
- Connect the stand base to the stand arm and secure it with the designated screw.
- Once assembled, carefully lift the monitor and place it upright on your desk.

Figure 1: Monitor stand assembly and adjustment capabilities.
2. Connecting to Your Device
The monitor supports multiple connection types. Choose the appropriate cable for your device.
- Power Connection: Connect the power adapter to the monitor's DC power port and then plug it into a power outlet.
- USB-C Connection (Recommended for full functionality): If your device has a USB-C port that supports DisplayPort Alternate Mode, connect the monitor using the provided USB-C to USB-C cable. This single cable can transmit video, audio, and touch signals, and may also provide power delivery to your laptop.
- HDMI or DisplayPort Connection: Connect an HDMI or DisplayPort cable from your device to the corresponding port on the monitor for video and audio. For touch functionality, you must also connect the USB-A to USB-B cable from your device's USB port to the monitor's USB-B upstream port.
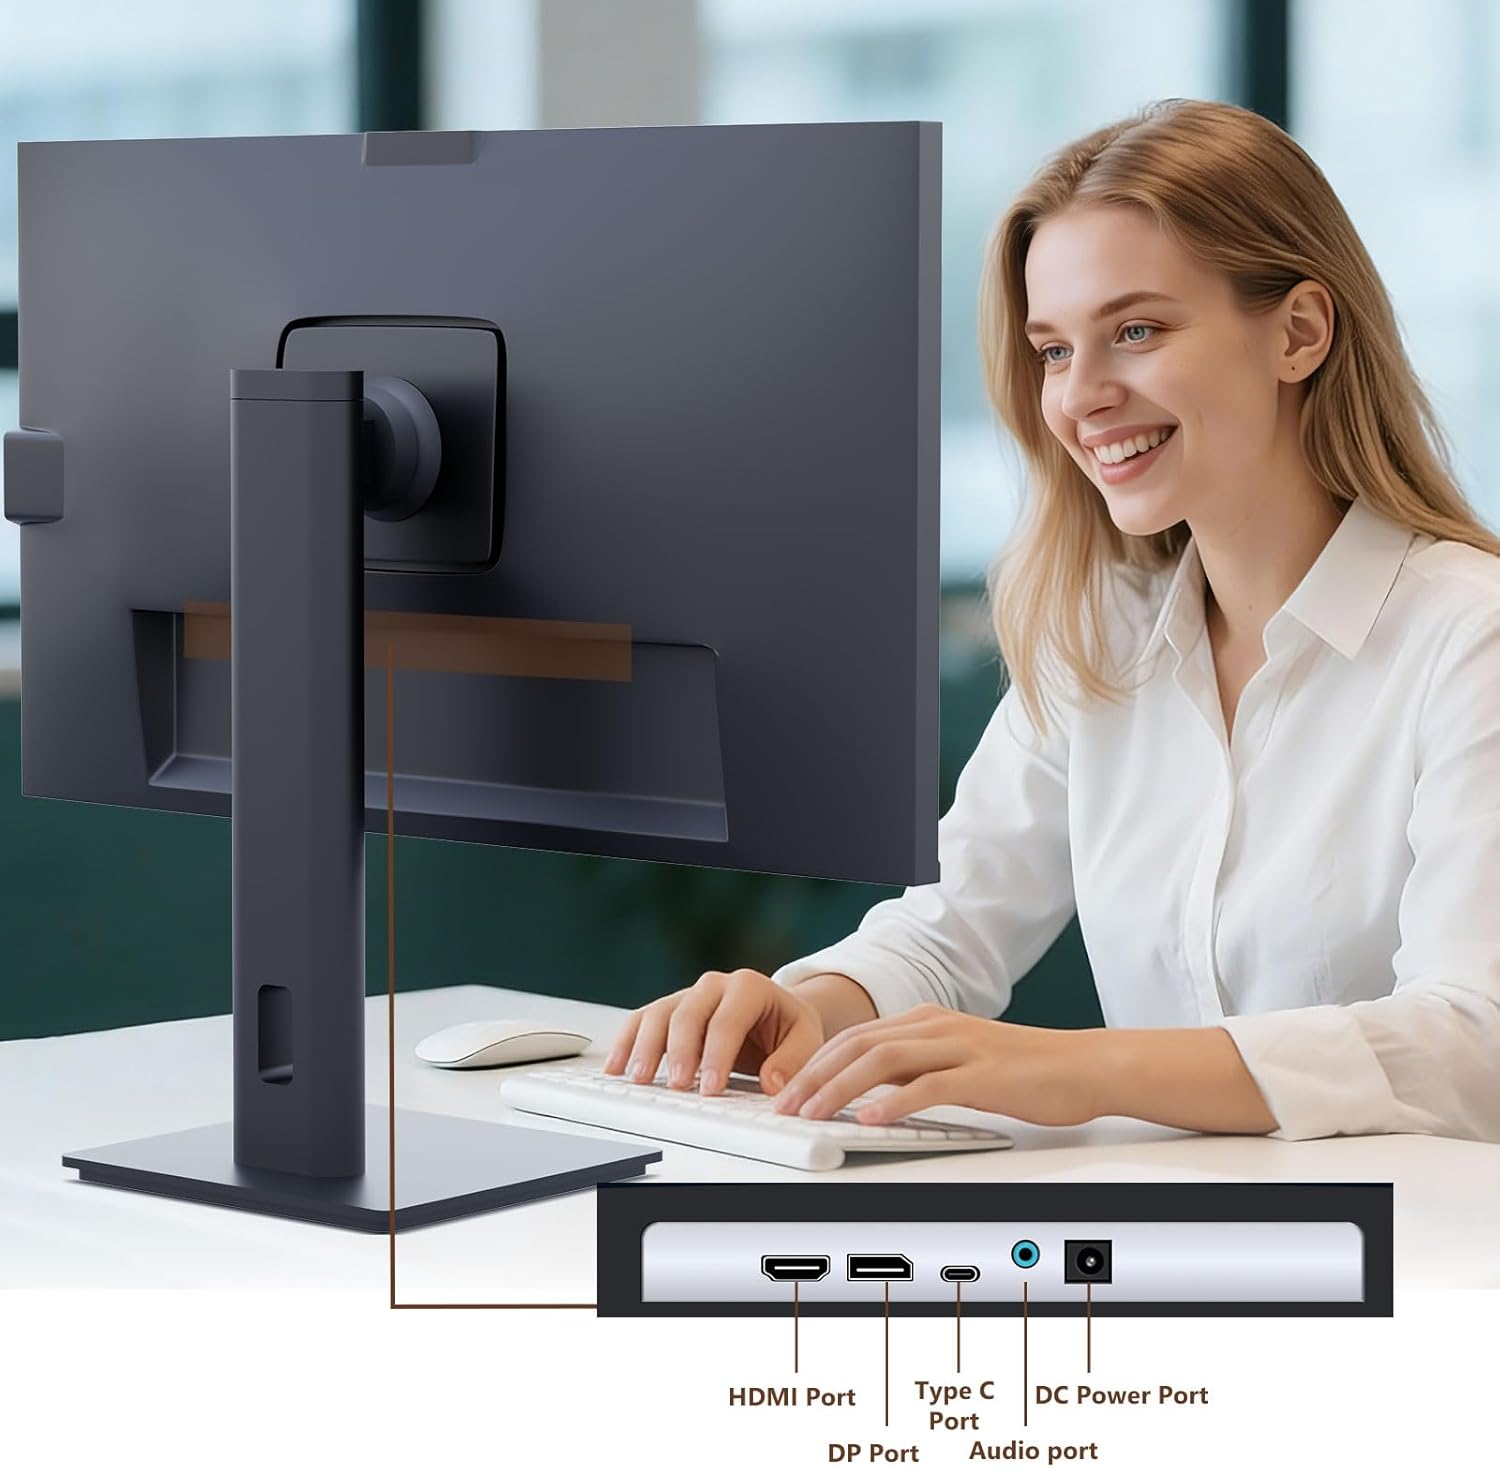
Figure 2: Available ports on the Pisichen monitor.

Figure 3: USB-C one-cable connection for simplified setup.

Figure 4: Connection options for desktop and laptop devices.
3. Initial Power On
Press the power button located on the monitor to turn it on. The monitor will automatically detect the active input source. If multiple sources are connected, you may need to select the correct input via the On-Screen Display (OSD) menu.
Operating Instructions
1. Touchscreen Functionality
The monitor supports 10-point multi-touch. Ensure the USB-C cable is connected (for full functionality) or the USB-A to USB-B cable is connected in addition to your video cable for touch input to work. Touch gestures are similar to those used on tablets or smartphones.
- Tap: Single touch for selection or activation.
- Drag: Touch and hold, then move your finger to move items.
- Pinch/Spread: Use two fingers to zoom in or out.
- Swipe: Move your finger across the screen to scroll or navigate.

Figure 5: Demonstrating intuitive touch interaction.

Figure 6: Collaborative use of the multi-touch display.
2. Built-in Webcam Usage
The monitor features a pop-up webcam for privacy and convenience. To use the webcam, gently press the top center of the monitor frame where the webcam is located. It will pop up. To retract it, gently press it down until it clicks into place.
Ensure your operating system and video conferencing software recognize the webcam. No additional drivers are typically required for basic functionality.

Figure 7: The monitor with its built-in pop-up webcam in use during a video conference.

Figure 8: High-definition video calls using the integrated webcam.
3. On-Screen Display (OSD) Menu
The OSD menu allows you to adjust various monitor settings. Use the buttons on the back or bottom of the monitor to navigate and select options.
- Brightness/Contrast: Adjust the display's luminance and contrast levels.
- Color Settings: Modify color temperature, gamma, and other color-related parameters.
- Input Source: Manually select between HDMI, DisplayPort, or USB-C inputs.
- Audio: Adjust volume for built-in speakers or connected headphones.
- Picture Mode: Select preset display modes (e.g., Standard, Game, Movie).
- HDR: Enable or disable High Dynamic Range settings for improved dark detail optimization.

Figure 9: HDR feature for enhanced visual detail.
4. Ergonomic Adjustments
The monitor stand allows for various adjustments to optimize your viewing comfort:
- Height Adjustment: Gently push or pull the monitor up or down.
- Tilt: Tilt the screen forward or backward to find the ideal angle.
- Swivel: Rotate the monitor left or right on its base.
- Pivot: Rotate the screen 90 degrees for portrait mode viewing.
Figure 10: Ergonomic adjustments for optimal viewing.
Maintenance
- Cleaning the Screen: Gently wipe the screen with a soft, lint-free cloth. For stubborn marks, dampen the cloth slightly with water or a non-abrasive screen cleaner. Do not spray liquid directly onto the screen.
- Cleaning the Body: Use a soft, dry cloth to wipe the monitor's casing. Avoid using strong detergents or abrasive cleaners.
- Storage: If storing the monitor for an extended period, disconnect all cables and store it in a cool, dry place, preferably in its original packaging.
Troubleshooting
No Power
- Ensure the power cable is securely connected to both the monitor and the power outlet.
- Verify the power outlet is functioning by plugging in another device.
- Check if the power adapter is correctly connected to the monitor.
No Signal / Blank Screen
- Confirm the video cable (HDMI, DP, or USB-C) is securely connected to both the monitor and your device.
- Ensure the correct input source is selected in the monitor's OSD menu.
- Check your computer's display settings to ensure the monitor is detected and enabled.
- Try a different video cable or port if available.
Touch Functionality Not Working
- If using HDMI or DisplayPort, ensure the USB-A to USB-B cable is connected from your device to the monitor.
- If using USB-C, ensure your device's USB-C port supports DisplayPort Alternate Mode and touch data transmission.
- Check your operating system's touch settings.
- Note that some devices, such as game consoles (PS3/4/5, Xbox, Steam Deck, Fire TV Cube) and certain Apple products (iPhone, iPad, Switch), do not support touch functionality with this monitor.

Figure 11: Touch compatibility chart for various devices.
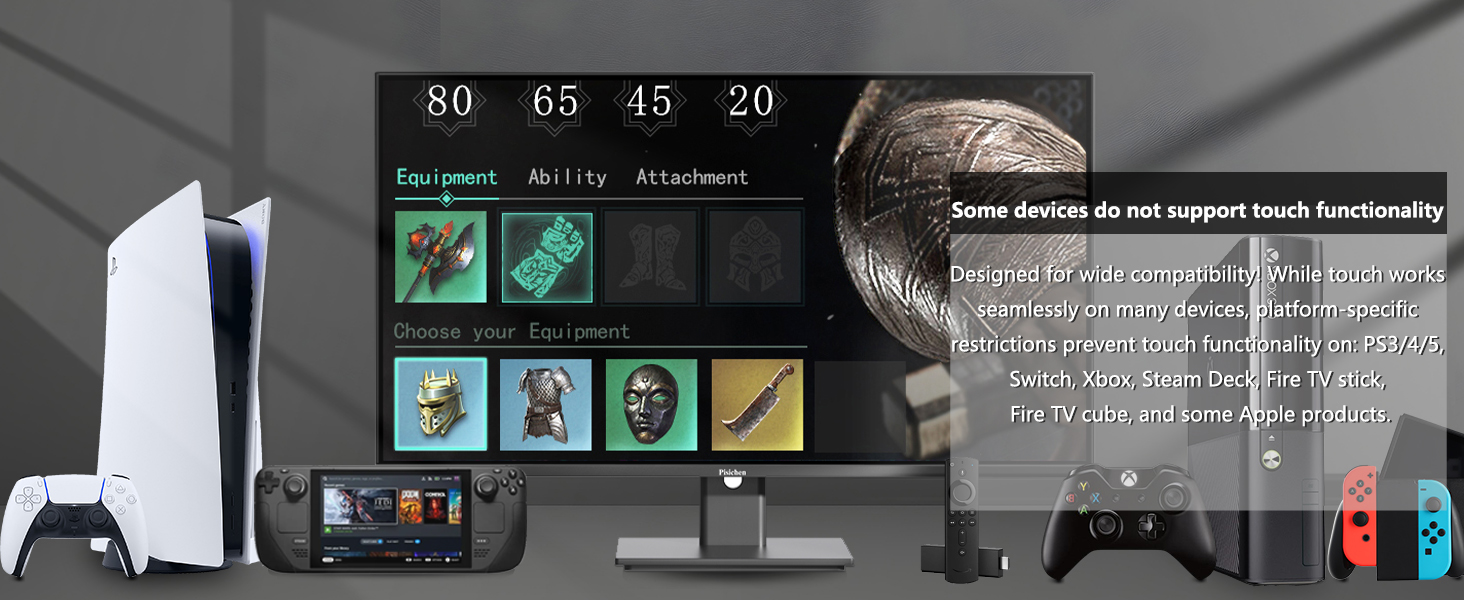
Figure 12: Devices that do not support touch functionality.
Webcam Not Detected
- Ensure the webcam is fully popped up.
- Verify that the USB connection (either USB-C or USB-A to USB-B) is properly established.
- Check your operating system's privacy settings to ensure camera access is granted to applications.
- Restart your computer.
Specifications
| Feature | Description |
|---|---|
| Model Number | 238TS-CMR |
| Screen Size | 23.8 Inches |
| Resolution | 2560 x 1440 (QHD Wide 1440p) |
| Refresh Rate | 100Hz |
| Brightness | 400 Candela (nits) |
| Contrast Ratio | 3000:1 |
| Touch Technology | 10-Point Multi-Touch |
| Webcam | Built-in Pop-up Camera |
| Connectivity | HDMI, DisplayPort (DP), USB Type-C, USB-B (upstream), Audio Out, DC Power |
| Aspect Ratio | 16:9 |
| Screen Surface | Glossy |
| Product Dimensions | 1.97 x 21.26 x 12.6 inches |
| Item Weight | 11.53 pounds |
| Manufacturer | Shenzhen Konowa Electronics Co., LTD |
Warranty and Support
Your Pisichen monitor is covered by a limited warranty. Please refer to the warranty card included in your package for specific terms and conditions, including the warranty period and coverage details.
For technical support, troubleshooting assistance, or warranty claims, please contact Pisichen customer service. Contact information can typically be found on the manufacturer's website or on the warranty card.
When contacting support, please have your monitor's model number (238TS-CMR) and purchase information readily available.


