VEVOR Commercial Ice Maker Machine (Model B0FWJHSTD9) - User Manual
Model: B0FWJHSTD9 | Brand: VEVOR
1. Safety Instructions
Please read all safety instructions carefully before operating the VEVOR Commercial Ice Maker Machine to ensure safe and efficient use. Keep this manual for future reference.
- Electrical Safety: Ensure the appliance is connected to a properly grounded power outlet with the correct voltage (110 Volts). Do not operate with a damaged power cord or plug.
- Water Connection: Use only potable water. Ensure all water connections are secure to prevent leaks.
- Ventilation: Maintain adequate clearance around the unit for proper ventilation. Do not block air vents.
- Placement: Place the ice maker on a stable, level surface. Avoid direct sunlight or heat sources.
- Refrigerant: This appliance uses R290a refrigerant. Servicing should only be performed by qualified personnel.
- Cleaning: Always unplug the unit before cleaning or maintenance.
2. Product Overview
The VEVOR Commercial Ice Maker Machine is designed for efficient ice production, capable of producing up to 90 lbs of ice per day with a 12 lbs storage capacity. It features a stainless steel construction, LED digital display, and a self-cleaning function, making it suitable for home, bar, or light commercial use.
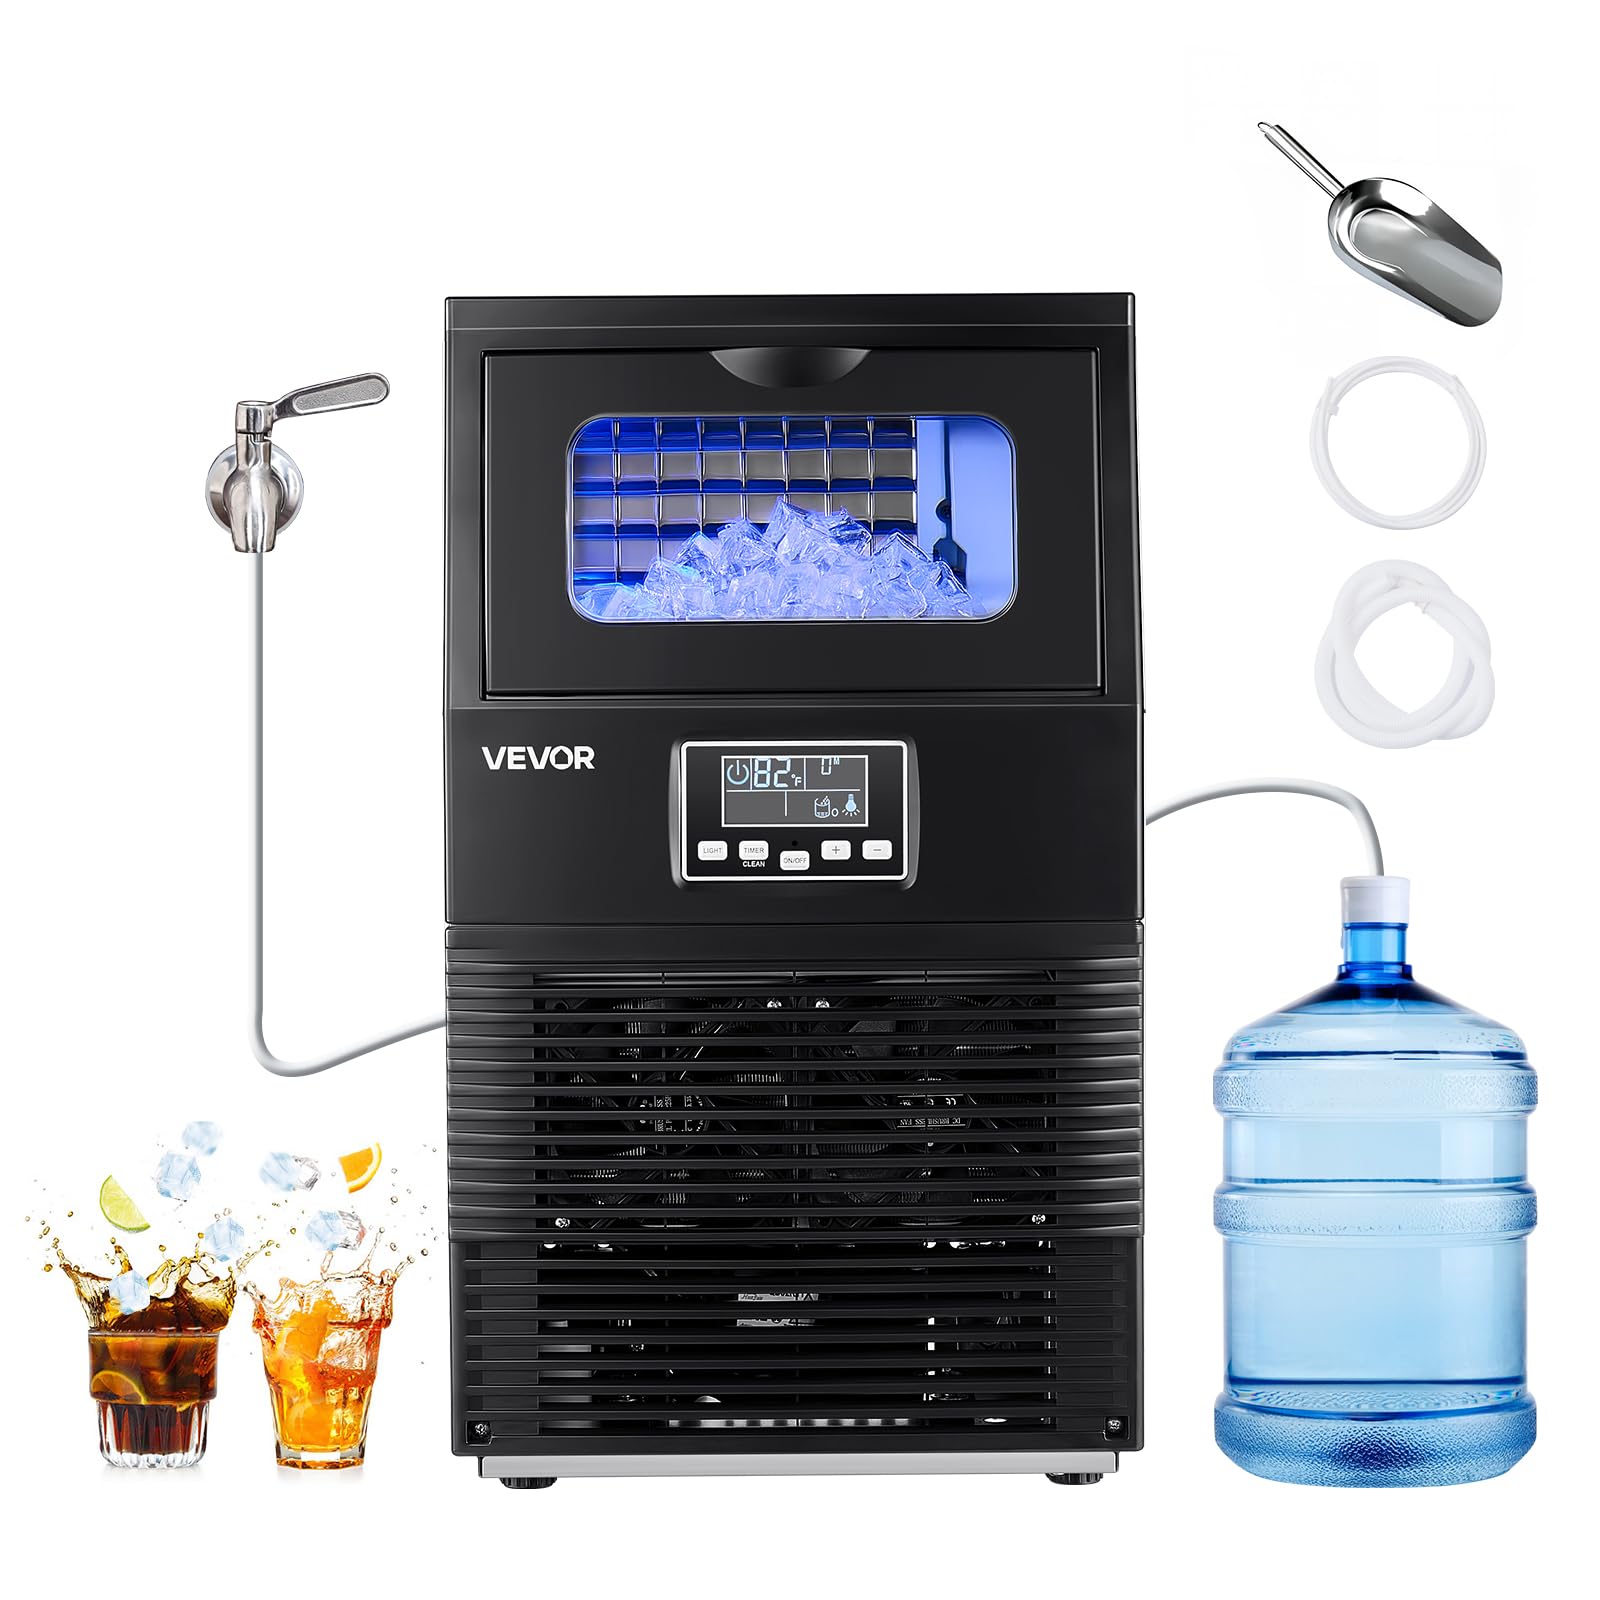
3. Included Components
Upon unpacking, ensure all the following components are present:
- 1 x VEVOR Commercial Ice Maker Machine
- 1 x Water Inlet Hose (for direct tap water connection)
- 1 x Water Outlet Hose (drainage)
- 1 x Medium Stainless Steel Ice Scoop
- 1 x User Manual

4. Setup
4.1 Unpacking and Placement
Carefully remove the ice maker from its packaging. Place the unit in a location with sufficient ventilation, ensuring the rear vents are not obstructed. The unit can be used freestanding or as a countertop appliance.
4.2 Water Connection
This ice maker supports two water inlet modes:
- Direct Tap Water Connection: Connect the provided water inlet hose to a potable water supply with appropriate pressure.
- Bottled Water Pump: For areas without direct water access, use the internal pump to draw water from an external bottled water source. Activate this mode via the control panel.

4.3 Drainage Connection
Connect the water outlet hose to a suitable drain. Ensure the drain pipe is positioned completely below the ice maker's drainage outlet for optimal performance and to prevent water backup.
4.4 Initial Cleaning
Before first use, it is recommended to run a cleaning cycle. Refer to the 'Maintenance' section for instructions on activating the self-cleaning function.
5. Operating Instructions
5.1 Control Panel
The ice maker features an intuitive LED digital display and control buttons:
- ON/OFF: Powers the unit on or off.
- LIGHT: Activates or deactivates the blue interior lighting.
- TIMER/CLEAN: Initiates the self-cleaning cycle (long press) or sets a timer for operation.
- +/- Buttons: Adjusts ice cube thickness or timer settings.

5.2 Ice Making Process
Once powered on and water is supplied, the machine will begin the ice-making process. It produces 32 cubes per cycle. You can adjust the ice cube thickness using the +/- buttons on the control panel.
- Thin Ice: Ideal for quick chilling of beverages.
- Thick Ice: Suitable for longer-lasting cooling or specific drink preparations.

5.3 Blue Interior Lighting
The ice maker features a blue interior light that can be turned on or off using the 'LIGHT' button. This allows you to monitor the ice-making process and ice levels without opening the lid.
6. Maintenance
6.1 Self-Cleaning Function
The ice maker is equipped with a one-touch self-cleaning function:
- Ensure the unit is connected to a water supply and the drain hose is properly installed.
- Press and hold the 'TIMER/CLEAN' button for 3 seconds to activate the 20-minute automatic rinse cycle.
- The display will indicate the cleaning process. Once complete, the unit will return to standby mode.

6.2 Regular Cleaning
Regular cleaning is recommended based on usage to maintain hygiene and performance. This includes wiping down interior surfaces and ensuring the water filter in the inlet pipe is clean.
6.3 Draining the Water
To completely drain the water reservoir, unplug the unit and remove the drain plug located at the bottom rear of the machine. Ensure a container is placed to collect the water.
7. Troubleshooting
If you encounter issues with your VEVOR Commercial Ice Maker Machine, refer to the following common troubleshooting tips:
- No Ice Production: Check water supply connection, ensure the unit is powered on, and verify no error codes are displayed on the LED panel. Ensure proper ventilation.
- Water Leakage: Inspect all water inlet and outlet hose connections for tightness. Ensure the drain hose is correctly positioned and not blocked.
- Unusual Noise: Verify the unit is on a level surface. Check for any obstructions in the fan or ice-making components.
- Ice Not Forming Properly: Ensure the ambient temperature is within the recommended operating range (50°F to 100.4°F / 10°C to 38°C). Check water quality and consider running a cleaning cycle.
For persistent issues, please contact VEVOR customer support.
8. Specifications
| Specification | Value |
|---|---|
| Brand | VEVOR |
| Model Name | Ice Maker |
| Product Dimensions (D x W x H) | 13.58"D x 13.35"W x 23.7"H |
| Ice Storage Capacity | 12 Pounds |
| Max. Ice Production | 90 lbs/24h |
| Cubes per Cycle | 32 |
| Wattage | 160 watts |
| Voltage | 110 Volts |
| Refrigerant | R290a |
| Material Type | Stainless Steel |
| Item Weight | 33.3 Pounds |
| UPC | 197988714781 |
9. Warranty and Support
For technical support, warranty information, or any inquiries regarding your VEVOR Commercial Ice Maker Machine, please visit the official VEVOR Support Center at www.vevor.com/support.


