
Introduction
This manual provides essential instructions for the safe and effective use of your Hi-Spec 8V USB LED Cordless Drill Driver and accompanying 130-piece tool kit. Please read this manual thoroughly before operating the tool kit and retain it for future reference. This kit is designed for general household repairs, furniture assembly, and various DIY tasks involving wood, plastics, thin metals, and plasterboard. It is not suitable for drilling into brick, concrete, hardened metals, or tiles.
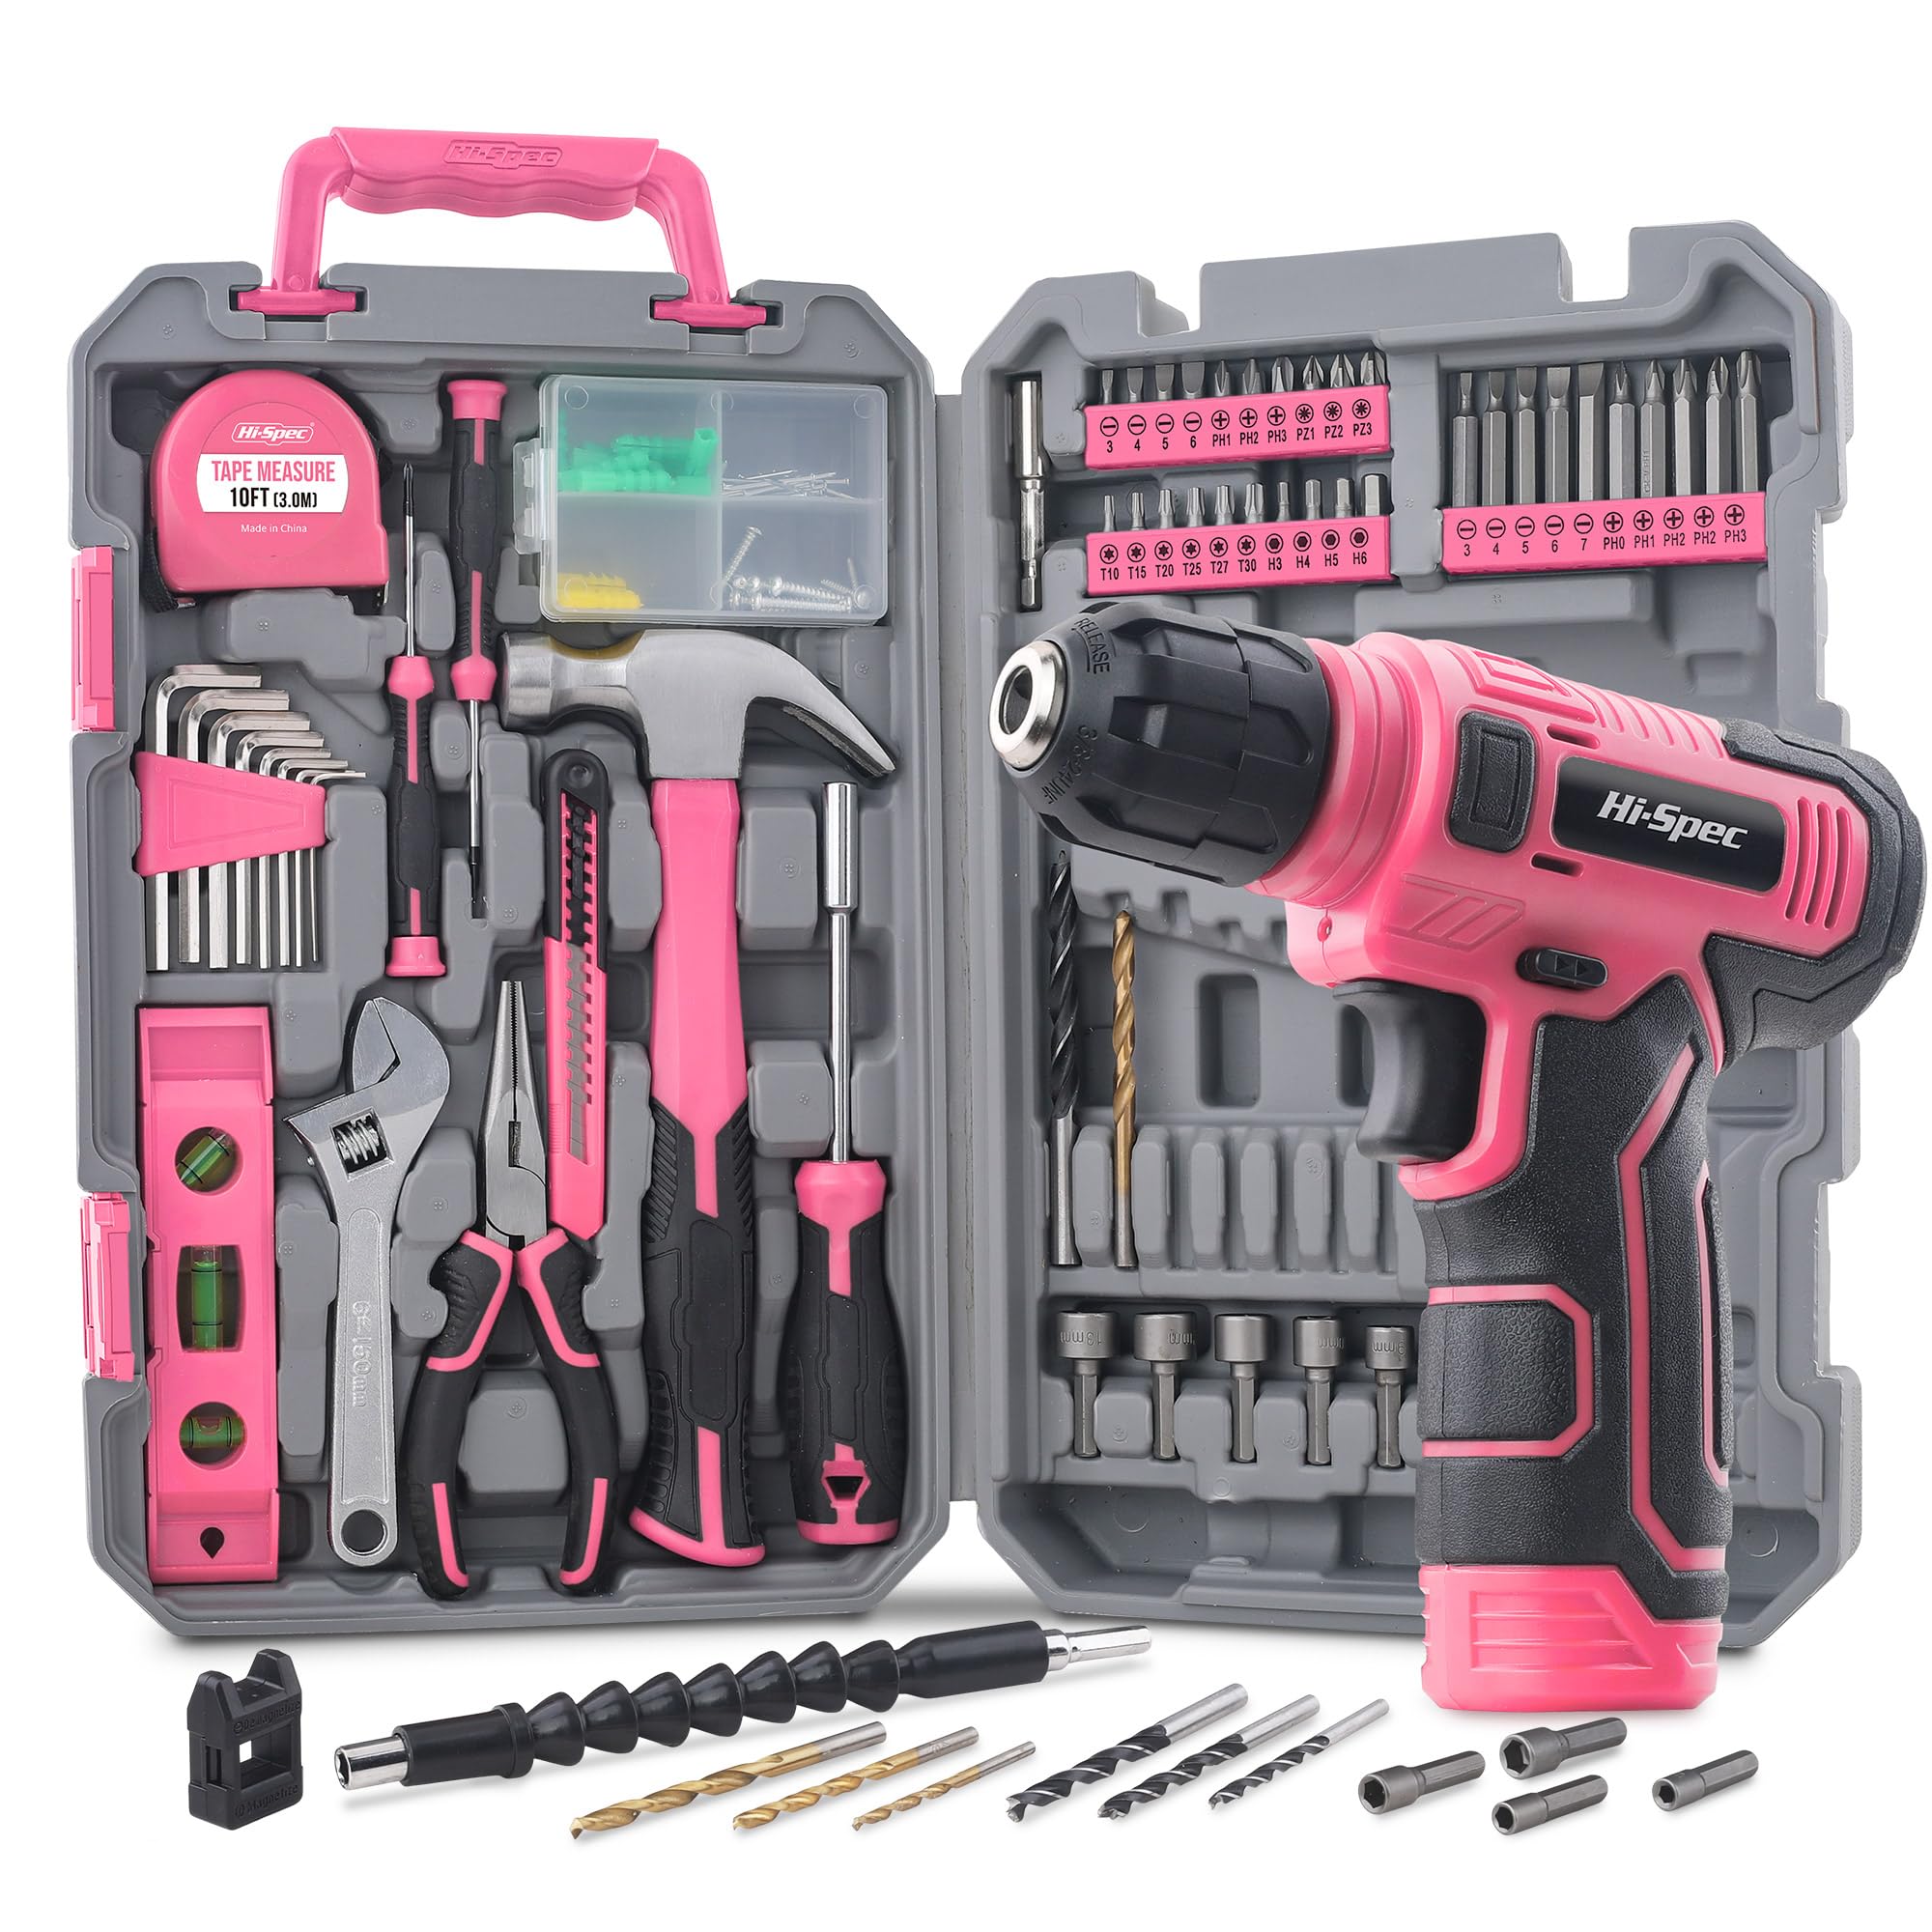
Image: The Hi-Spec 8V USB LED Cordless Drill Driver and the comprehensive 130-piece tool kit, neatly arranged in its storage case.
General Safety Information
Always observe basic safety precautions when using power tools to reduce the risk of fire, electric shock, and personal injury. Keep your work area clean and well-lit. Do not operate power tools in explosive atmospheres, such as in the presence of flammable liquids, gases, or dust. Keep children and bystanders away while operating a power tool. Wear appropriate personal protective equipment, including safety glasses, hearing protection, and gloves, as needed.
Setup
1. Unpacking
Carefully remove all components from the packaging. Verify that all items listed in the product contents are present and undamaged. Familiarize yourself with the drill driver and all included accessories.

Image: An overhead view of the Hi-Spec 130-piece tool kit, with all tools and accessories neatly organized within the gray and pink carrying case.
2. Charging the Drill Driver
The drill driver is powered by an integrated 1500 mAh Lithium-ion battery. Before first use, fully charge the battery. Use the provided USB-C cable to connect the drill driver to a compatible USB power source (e.g., computer, power bank, USB wall adapter). The LED indicator lights on the drill will show the charging status. A full charge typically takes approximately 3-5 hours.

Image: The Hi-Spec drill driver connected via a USB-C cable to a wall adapter for charging. The battery indicator lights are visible on the back of the drill.
3. Installing/Changing Bits
To install a drill bit or screwdriver bit:
- Ensure the drill driver is switched off and the forward/reverse switch is in the neutral (locked) position.
- Twist the chuck counter-clockwise to open the jaws.
- Insert the desired bit into the chuck, ensuring it is seated firmly.
- Twist the chuck clockwise to tighten the jaws securely around the bit. Pull on the bit to confirm it is locked in place.
To remove a bit, reverse the tightening process.

Image: Close-up of the Hi-Spec drill driver's chuck, demonstrating how different types of bits (wood drill bit, metal drill bit, screwdriver bit, nut driver) are inserted and secured.
Operation
1. Powering On/Off and Variable Speed Control
The drill driver is activated by pressing the trigger switch. The speed of rotation is variable and controlled by the amount of pressure applied to the trigger:
- Pressing the trigger lightly results in a slower speed, ideal for starting screws or delicate tasks.
- Pressing the trigger fully results in maximum speed (up to 800 RPM), suitable for drilling or driving screws quickly.
- Releasing the trigger will stop the tool automatically.
2. Forward/Reverse Rotation
A slide switch located above the trigger controls the direction of rotation. Push the switch to the left for forward rotation (for drilling and driving screws) and to the right for reverse rotation (for removing screws or backing out drill bits). When the switch is in the center position, the trigger is locked, preventing accidental activation.
3. Integrated LED Work Light
The drill driver features an integrated LED work light that illuminates the work area when the trigger is pressed, improving visibility in dimly lit spaces.

Image: A close-up of the Hi-Spec drill driver highlighting its features: 10 Nm torque, 1500 mAh battery, 800 RPM, integrated LED light, and the forward/reverse rotation switch.
4. Using the Hand Tools
The 130-piece kit includes a variety of hand tools such as pliers, an adjustable wrench, a hammer, and screwdrivers. Select the appropriate tool for your task. Ensure tools are used correctly and safely for their intended purpose.

Image: A collage showing various household tasks being performed with tools from the Hi-Spec kit, including drilling, using a wrench, tightening a bolt, cutting wires, hammering, and assembling furniture.
Maintenance
1. Cleaning
After each use, clean the drill driver and all tools. Wipe down surfaces with a dry or slightly damp cloth. Do not use harsh chemicals or abrasive cleaners. Ensure no dust or debris accumulates in the ventilation openings of the drill driver.
2. Battery Care
To prolong battery life, avoid completely discharging the battery before recharging. Store the drill driver with a partial charge (around 50%) if it will not be used for an extended period. Do not expose the battery to extreme temperatures.
3. Storage
Store the drill driver and tool kit in its original compact case in a dry, secure location, away from direct sunlight and extreme temperatures. Keep out of reach of children.

Image: The Hi-Spec 130-piece tool kit neatly organized within its gray and pink carrying case, demonstrating its compact and portable storage solution.
Troubleshooting
| Problem | Possible Cause | Solution |
|---|---|---|
| Drill driver does not turn on. | Battery is discharged. Forward/reverse switch is in the locked (center) position. | Charge the battery. Move the forward/reverse switch to the forward or reverse position. |
| Battery not charging. | USB cable or power source is faulty. | Try a different USB cable or power source. Ensure connections are secure. |
| Bit slips in the chuck. | Chuck not tightened sufficiently. Bit shank is dirty or damaged. | Tighten the chuck firmly. Clean the bit shank or replace the bit if damaged. |
| Reduced power or speed. | Battery is low. Overload protection activated. | Recharge the battery. Reduce pressure on the tool or use a more appropriate bit for the material. |
Specifications
- Model Number: DT30558P-DE
- Voltage: 8 Volts
- Battery Capacity: 1500 mAh Lithium-ion
- Maximum Torque: 10 Newton Meters (Nm)
- Maximum Speed: 800 RPM (revolutions per minute)
- Power Source: Battery Powered (USB-C rechargeable)
- Weight: 3.2 Kilograms (including kit)
- Dimensions (L x W x H): 35.5 x 23 x 8.5 cm
- Material: Metal (tool components)
- Special Features: Compact, Integrated LED Work Light, Adjustable Mode (variable speed), Portable
Warranty Information
This product comes with a standard manufacturer's warranty. For specific details regarding warranty coverage, duration, and claims, please refer to the warranty card included with your purchase or visit the official Hi-Spec website. Please retain your proof of purchase for any warranty claims.
Customer Support
Should you encounter any issues not covered in this manual or require further assistance, please contact Hi-Spec customer service. Contact information can typically be found on the product packaging, the official Hi-Spec website, or through your retailer.


