1. Introduction
This manual provides essential information for the safe and effective operation of your Punieayi ZY90 PRO GPS Drone. Please read it thoroughly before your first flight and retain it for future reference. The ZY90 PRO is a feature-rich GPS drone equipped with a 4K camera, 5.7-inch FPV screen remote controller, and intelligent flight modes designed for both beginners and experienced pilots.
2. What's in the Box
- Punieayi ZY90 PRO GPS Drone
- Remote Control with 5.7-inch LCD Display
- 2 x 7.6V 3800mAh Intelligent Flight Batteries
- Carrying Case
- USB Type-C Charging Cable
- Memory Card (8GB SD Card)
- Spare Propellers
- Screwdriver
- User Manual
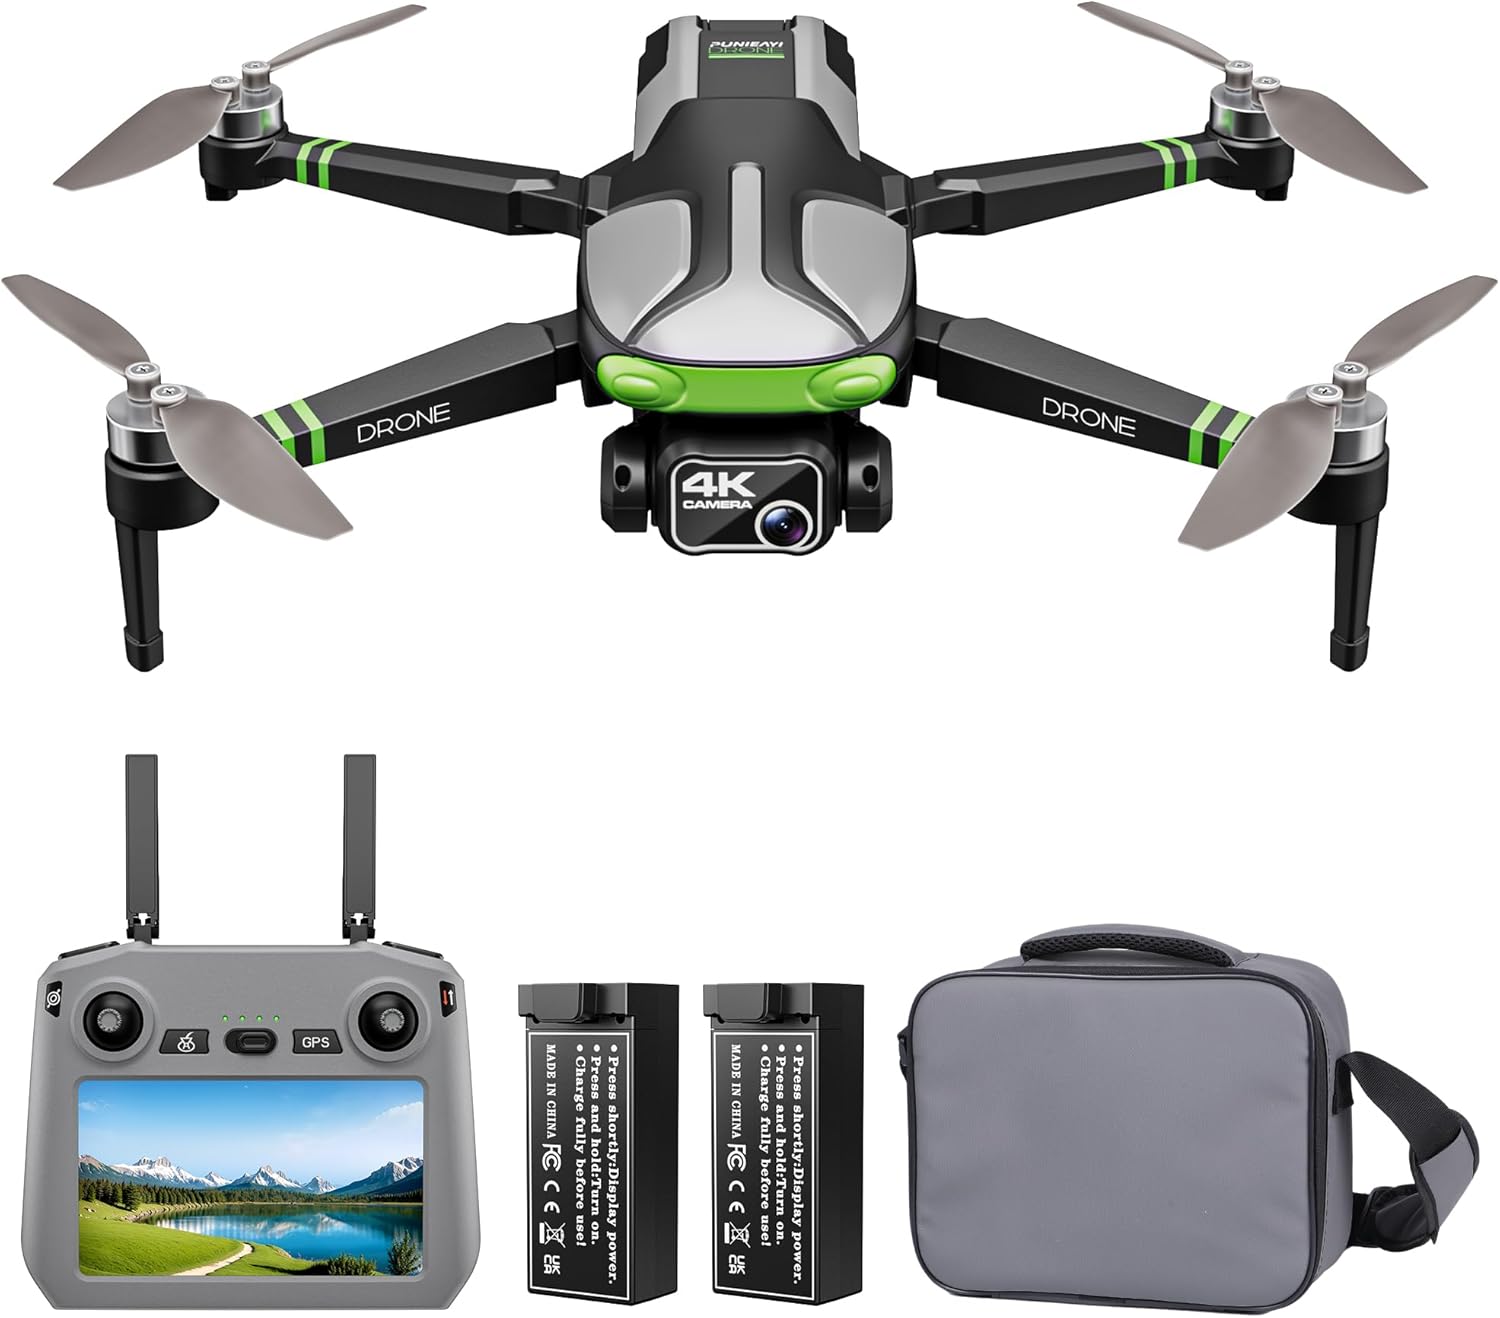
Figure 2.1: All components included in the Punieayi ZY90 PRO package.
3. Setup
3.1 Battery Installation and Charging
- Ensure both drone and remote control batteries are fully charged before each flight.
- To charge the drone battery, connect the USB-C cable to the battery and a power source. The visible power display will show charging status. A flashing green icon indicates charging, and a solid green icon indicates full charge.
- To charge the remote control battery, connect the USB-C cable to the remote control and a power source. A solid red light indicates charging, and the light turning off indicates full charge.
- Insert the charged battery into the drone's battery compartment, ensuring it clicks securely into place.

Figure 3.1: Drone battery with visible power display.
3.2 Drone Preparation
- Unfold the drone arms one by one, starting with the top layer and then the lower layer, until they are fully extended.
- Remove the gimbal protector from the camera before flight.
- Insert the provided Micro SD card into the drone's designated slot for 4K video and photo recording.
- For optimal transmission performance, always unfold the remote control antennas to a 90-degree vertical position.

Figure 3.2: ZY90 PRO drone in its folded configuration.
3.3 Pre-Flight Preparations Video
Video 3.1: Detailed guide on pre-flight preparations for the ZY90 PRO drone.
4. Calibration
4.1 Compass Calibration
Compass calibration is crucial for stable flight and accurate GPS functions. Perform this outdoors in an open area, away from magnetic interference.
- Place the drone on a horizontal surface and power it on.
- Power on the remote control. The drone will automatically match frequency.
- Short press the magnetic calibration button on the remote control. The drone's front arm lights will flash rapidly, and the rear arm lights will flash slowly.
- Pick up the drone and turn it horizontally until the remote control emits a beep.
- Then, turn the drone vertically until the remote control emits another beep.
- The front arm lights will turn solid, and the rear arm lights will flash slowly, indicating successful compass calibration.
4.2 Gyroscope Calibration
Gyroscope calibration ensures the drone's stability. Perform this on a flat, level surface.
- Place the drone on a horizontal surface.
- Press the gyroscope calibration button on the remote control. The drone's front and rear arm lights will flash alternately.
- Once the front arm lights turn solid and the rear arm lights flash slowly, the gyroscope calibration is successful.
4.3 Calibration Tutorial Video
Video 4.1: Step-by-step guide for drone calibration (Compass and Gyroscope).
5. Operating Instructions
5.1 Basic Flight Controls
- Unlock Motors: After successful calibration and GPS signal acquisition (more than 12 stars), press the unlock button on the remote control.
- One-Key Takeoff: Push the left rocker stick up, or press the One-Key Takeoff/Landing button. The drone will automatically take off and hover.
- Ascend/Descend: Use the left control stick (up/down) to adjust altitude.
- Rotate Left/Right: Use the left control stick (left/right) to rotate the drone.
- Forward/Backward/Left/Right: Use the right control stick to move the drone in desired directions.
- One-Key Landing: Press the One-Key Takeoff/Landing button again. The drone will automatically land.

Figure 5.1: Easy control features of the ZY90 PRO drone.
5.2 Speed Adjustment
The drone defaults to low speed. Use the rolling speed roller on the remote control to adjust flight speed:
- First click: Low Speed
- Second click: Medium Speed
- Third click: High Speed
5.3 Obstacle Avoidance
The ZY90 PRO features automatic obstacle avoidance. Short press the obstacle avoidance button on the remote control to activate this mode. The drone will automatically detect and avoid obstacles.
5.4 GPS Functions (Outdoor Flight)
Ensure GPS mode is active (indicated on the remote control screen) for these functions. Long press the GPS button to switch between Indoor Optical Flow Mode and Outdoor GPS Mode.
- Rocket Mode: Drone ascends rapidly while recording.
- Far Away Mode: Drone flies away and zooms out, capturing a wide landscape.
- Helix Mode: Drone flies in a spiral pattern, gradually expanding.
- Circle Fly Mode: Drone circles a point of interest.
- GPS Follow Mode: Drone follows the remote controller's movement.
- One Key Return: Press the Return button. The drone will automatically return to its takeoff point. This also activates in low power or lost signal situations.

Figure 5.2: Advanced GPS flight modes.
5.5 Enable GPS Function Video
Video 5.1: Instructions on how to enable and utilize the GPS functions.
5.6 Indoor Flight Video
Video 5.2: Guide for operating the ZY90 PRO drone in indoor environments.
6. Camera Operation
The ZY90 PRO is equipped with a 4K camera and a 90° adjustable lens for capturing high-quality photos and 2K@30fps videos.
- Adjust Camera Angle: Use the dial on the upper right corner of the remote control to adjust the camera's vertical angle.
- Take Photos: Short press the photo button on the remote control to capture a still image.
- Record Videos: Long press the video button to start recording. Long press again to stop.
- View Media: Press the switch button on the remote control to enter the gallery. Use the navigation buttons to view photos and videos.

Figure 6.1: ZY90 PRO 4K camera with adjustable lens.
6.1 Built-in Composition Guides
Utilize the on-screen visual guides on your remote controller to enhance your photography and videography:
- Diagonal Lines: Displays two intersecting lines for dynamic compositions.
- Center Dot: Provides a central point for precise symmetry.
- 3x3 Grid: Helps align elements and apply the rule of thirds.
7. Maintenance
- Regularly inspect propellers for damage. Replace any damaged propellers immediately using the provided spares and screwdriver.
- Keep the drone and remote control clean and free from dust and debris. Use a soft, dry cloth.
- Store the drone and batteries in a cool, dry place, away from direct sunlight and extreme temperatures.
- Ensure batteries are charged to approximately 50-60% for long-term storage to prolong their lifespan.
8. Troubleshooting
- Drone not powering on: Ensure the battery is fully charged and correctly inserted.
- Remote control not connecting: Ensure both drone and remote control are powered on and within range. Re-attempt pairing if necessary.
- Unstable flight: Perform Compass and Gyroscope calibration in an open, interference-free area.
- No GPS signal: Ensure you are flying outdoors in an open area with clear sky. Wait for the remote control to indicate sufficient GPS satellites (more than 12).
- Poor video/photo quality: Ensure the Micro SD card is properly inserted and has sufficient space. Clean the camera lens.
9. Specifications
| Feature | Specification |
|---|---|
| Brand | Punieayi |
| Model Name | ZY90 PRO |
| Dimensions | 13"L x 12.2"W x 2.6"H |
| Item Weight | 312 Grams (11 ounces) |
| Video Capture Resolution | 2160P (4K) |
| Effective Still Resolution | 8 MP |
| Connectivity Technology | Wi-Fi |
| Control Type | Remote Control |
| Maximum Range | 6500 Feet |
| Battery Capacity | 3800 Milliamp Hours |
| Flight Time | Up to 50 minutes per battery (100 minutes total with 2 batteries) |
| Special Features | Extended Flight Time, FPV, Integrated GPS, One Button Return, Speed Adjustment, Obstacle Avoidance |
10. Warranty and Support
Punieayi is committed to providing quality products and excellent customer service. For any inquiries, technical support, or warranty claims, please contact our dedicated customer support team. Refer to your purchase documentation for specific warranty details and contact information.
10.1 Customer Support Video
Video 10.1: Information regarding convenient after-sale customer support.


